· Todd Martin · Home Cleaning · 15 min read
How To Clean Gas Oven With Easy Off

How To Clean Gas Oven With Easy Off: A Simple Guide
Cleaning a gas oven might seem like a daunting task, especially when faced with layers of baked-on food and grease. You might wonder if it is truly possible to restore that shiny, almost-new look without excessive scrubbing. Many people delay oven cleaning, allowing spills to harden and accumulate over time. This makes the job even harder later on.
But what if I told you there’s a widely available product that can cut through that grime with minimal effort? Easy Off oven cleaner is a popular choice for tackling tough oven messes. It effectively dissolves grease and baked-on food, making cleanup much simpler. This guide will walk you through the entire process, ensuring your gas oven looks spotless and functions efficiently. You will learn the correct preparation, application techniques, and crucial safety steps for a successful cleaning experience.
Takeaway
- Always prioritize safety by wearing gloves, ensuring ventilation, and understanding your gas oven.
- Prepare your oven by removing racks and loose debris before applying Easy Off.
- Apply Easy Off evenly, allowing sufficient dwell time for the formula to work.
- Wipe away dissolved grime thoroughly, rinsing surfaces to remove all chemical residue.
- Maintain your clean oven with regular spot treatments and proper ventilation.
Answer to the Main Query
To clean a gas oven with Easy Off, ensure proper ventilation and wear protective gear. Remove all racks and loose debris. Apply Easy Off oven cleaner according to product directions, letting it sit for the recommended time to dissolve baked-on food and grease. Wipe away residue with damp cloths and thoroughly rinse surfaces until clean.
Why Choose Easy Off for Your Gas Oven?
Dealing with a dirty gas oven can be a real headache. Baked-on food and stubborn grease seem to bond with the oven’s surfaces, making them incredibly difficult to remove. This is where a powerful cleaner like Easy Off comes into play. It stands out because its chemical formula is specifically designed to break down tough, carbonized food residues and grease.
Easy Off offers various formulations, including heavy-duty, fume-free, and even specific types for self-cleaning ovens (though this article focuses on non-self-cleaning gas ovens). The heavy-duty formula is often preferred for deeply soiled ovens, while the fume-free option offers a less irritating experience for users. Both versions aim to simplify the tedious task of oven cleaning. They effectively loosen the grime, turning it into a much easier-to-wipe-away substance. Using Easy Off helps restore your oven’s efficiency and appearance. A clean oven also cooks food more evenly and can prevent smoke from burning old food particles.
Safety First: Essential Precautions for Gas Oven Cleaning
Cleaning your gas oven, especially with chemical cleaners like Easy Off, requires careful attention to safety. Your well-being and the integrity of your appliance depend on it. Skipping safety steps can lead to skin irritation, respiratory issues, or even damage to your oven. Always make safety your top priority.
Before You Begin:
- Ventilation is Key: Open windows and doors to create a cross-breeze. Turn on your kitchen fan if you have one. This helps disperse fumes from the oven cleaner. Proper ventilation is critical to avoid inhaling harsh chemicals.
- Protect Yourself: Wear long rubber gloves to protect your hands from direct contact with the cleaner. Consider wearing old clothes or an apron to prevent splashes from ruining your good clothes. Safety glasses are also a wise choice to protect your eyes from accidental spray or splashes.
- Gas Safety Check: Before starting, ensure your gas oven is completely off and cool. Double-check that all burner knobs are in the “off” position. If you have any concerns about a gas leak, address those immediately before cleaning; never clean a gas oven if you suspect a leak. You can learn more about oven safety and how to address concerns at Why does my gas oven turn off by itself.
- Keep Pets and Children Away: The fumes and chemicals are harmful. Ensure no pets or children are in the kitchen area during the cleaning process. This keeps them safe from accidental exposure.
Taking these precautions ensures a safer and more effective cleaning session. Your health matters most when handling cleaning agents.
Preparing Your Gas Oven for Easy Off Application
Proper preparation is crucial for an effective and mess-free cleaning experience when using Easy Off on your gas oven. Rushing this stage can lead to uneven cleaning or unnecessary complications. Taking a few moments to prepare ensures the cleaner can work most efficiently. This step also protects other parts of your kitchen.
Step-by-Step Preparation:
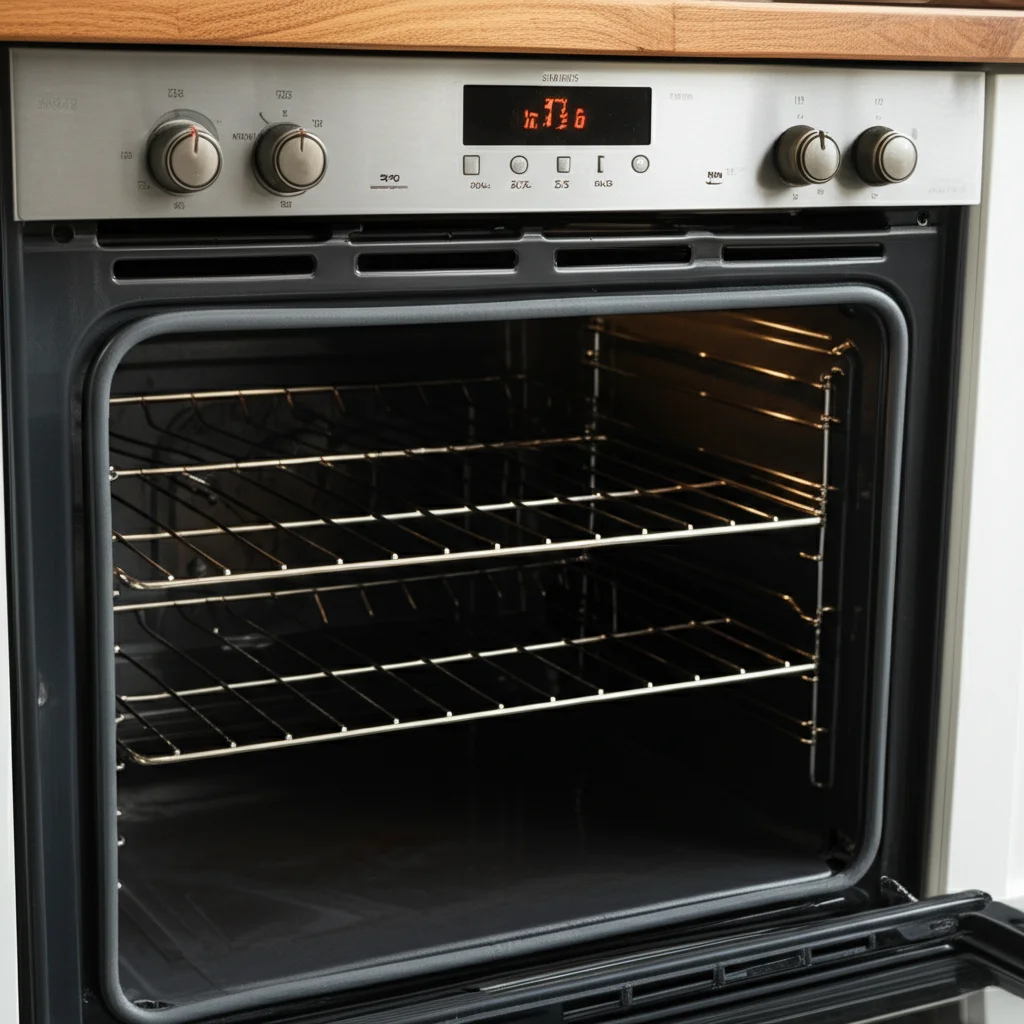
- Remove Oven Racks and Other Items: Take out all oven racks, baking sheets, and any other removable items from inside your gas oven. These items often need separate cleaning and would hinder the application of the cleaner. You can set them aside on a protective surface like old newspapers or a drop cloth. This ensures full access to the oven interior.
- Scrape Off Loose Debris: Use a plastic scraper, spatula, or even a damp cloth to remove any large, loose food particles, crumbs, or charred bits. This initial scrape makes a big difference. Easy Off works best on baked-on grease and grime, not large pieces of food. Removing debris prevents chunks from sticking to your cleaning cloth later.
- Protect Surrounding Surfaces: Lay down old newspapers, cardboard, or a large plastic tarp on the floor directly in front of the oven. This protects your kitchen floor from any drips or overspray of the oven cleaner. Easy Off can damage certain floor finishes, so this protective layer is important. Also, consider placing a small towel over the gas burners to prevent accidental contact with the cleaner.
- Ensure Oven is Cool: Make sure your gas oven is completely cool before applying any cleaner. Applying cleaner to a hot oven can cause dangerous fumes and might even damage the oven’s surface. Always let the oven cool down completely after use.
By following these preparatory steps, you set the stage for a thorough and safe cleaning of your gas oven. This attention to detail will save you time and effort in the long run. For more general tips on cleaning oven interiors, you can check out How to clean a gas oven inside.
Applying Easy Off Oven Cleaner Correctly
Now that your gas oven is prepared and you have your safety gear on, it’s time to apply the Easy Off cleaner. Proper application is key to ensuring the product works effectively on all the grime. Different types of Easy Off might have slightly varied instructions, so always read the specific label on your product. However, the general principles remain the same.
Directions for Application:
- Shake the Can: Vigorously shake the Easy Off can for at least 30 seconds before use. This mixes the powerful ingredients, ensuring an even spray and optimal performance. An un-shaken can might release mostly propellants first, leading to poor coverage.
- Hold Can Upright and Spray Evenly: Hold the can upright, about 9-12 inches away from the surface you are cleaning. Begin spraying a light, even layer over the interior surfaces of your gas oven. Start from the top and work your way down. Make sure to cover the back wall, side walls, and the bottom of the oven. Do not forget the inside of the oven door. Avoid spraying on pilot lights, heating elements, or electrical connections. If you want to know more about keeping your oven clean overall, visit How to clean gas oven.
- Address Stubborn Spots: For areas with heavy, baked-on grease or stubborn stains, you might apply a slightly thicker layer of the cleaner. Do not over-saturate, but ensure good coverage. The cleaner needs to fully coat the grime to break it down effectively.
- Close the Oven Door: Once you have thoroughly sprayed the interior of your gas oven, close the oven door. This traps the fumes inside, allowing the chemical reaction to work more efficiently on the grime. It also keeps fumes contained while the cleaner does its job.
Remember, patience is a virtue here. The cleaner needs time to penetrate and dissolve the tough grease. For tips on cleaning the bottom of your oven specifically, you can refer to How to clean bottom of oven.
The Waiting Game and Wiping Away Grime
After applying the Easy Off, the most crucial part is letting the cleaner do its job. This “waiting game” allows the powerful chemicals to penetrate and break down the stubborn baked-on food and grease. Rushing this step will result in a less effective clean and more scrubbing for you. The recommended dwell time varies based on the product type and the level of grime.
Dwell Time and Removal:
- Observe Dwell Time: Check the Easy Off product label for the recommended waiting time. For heavy-duty formulas, this can range from 30 minutes to several hours, or even overnight for extremely soiled ovens. Fume-free options often require a longer soak time. Be patient and do not open the oven door prematurely. The cleaner needs uninterrupted time to work.
- Prepare for Wipe Down: Once the recommended time has passed, put your gloves and safety glasses back on if you removed them. Gather a stack of clean, damp cloths or sponges. Avoid using abrasive scrubbers, as they can scratch your oven’s surface. Old towels or microfiber cloths work well.
- Wipe Away Dissolved Grime: Open the oven door. Begin wiping away the dissolved grime from the top surfaces down to the bottom. You will notice that the grease and baked-on food have turned into a soft, brownish sludge. This is the Easy Off working its magic. Rinse your cloths frequently in a bucket of clean water or use fresh cloths as needed to avoid spreading dirt. You should see a significant difference with each wipe.
- Target Stubborn Spots: If you encounter any particularly stubborn spots that did not come off easily, you can apply a small amount of fresh Easy Off directly to that area. Let it sit for another 5-10 minutes, then wipe again. This targeted approach can handle resilient grime without re-applying to the entire oven. For general easy cleaning tips that might apply here, see How to clean the oven easy.
This part of the process requires some elbow grease, but it will be much less than if you tried to scrub without a strong cleaner. Keep wiping until all visible grime is gone.
Cleaning Gas Oven Racks and Components Separately
While the Easy Off is working its magic inside your gas oven, do not forget about the oven racks and other removable components. These parts often accumulate just as much, if not more, baked-on grease and food residue. Cleaning them separately ensures they get the attention they need for a complete oven overhaul. This parallel cleaning approach makes the entire process more efficient.
Methods for Cleaning Racks:
- Soaking in a Bathtub or Large Basin: This is often the most effective method for oven racks. Line a bathtub or a large laundry basin with old towels to protect the surface. Place the oven racks inside. Fill the tub or basin with very hot water, just enough to submerge the racks. Add a generous amount of dish soap, or even a cup of powdered laundry detergent or dishwasher detergent. Let the racks soak for several hours, or even overnight. The hot water and soap will help loosen the baked-on grime.
- Using Easy Off on Racks: For extremely greasy racks, you can also apply Easy Off directly to them. Place the racks on old newspapers or a drop cloth outside or in a well-ventilated area. Spray them thoroughly with Easy Off, following the product’s instructions for application and dwell time. Then, wipe them clean as described earlier. This is particularly effective for very heavy buildup. For detailed advice on cleaning grates, refer to How to clean gas oven grates.
- Scrubbing and Rinsing: After soaking or applying Easy Off, use a stiff brush (not metal, as it can scratch) or a heavy-duty sponge to scrub away the loosened grime. You will be surprised how easily the residue comes off after a good soak. Once clean, rinse the racks thoroughly under running water. Ensure all soap or cleaner residue is removed. This step is critical to prevent smoking when you next use the oven.
Allow the racks to air dry completely before placing them back into your freshly cleaned gas oven. A thorough cleaning of all components ensures your entire oven is pristine.
Final Touches and Post-Cleaning Care
You have put in the effort, and your gas oven is looking much better. But the job is not quite done. The final touches are crucial for ensuring your oven is truly clean, safe to use, and ready for your next culinary adventure. This stage involves removing any lingering chemical residue and preparing your oven for operation. It also includes steps for maintaining that newfound cleanliness.
Post-Cleaning Steps:
- Thorough Rinsing/Wiping: After wiping away the main grime, you must thoroughly rinse the oven interior. Dampen a clean cloth with plain water and wipe down all the internal surfaces again. Repeat this step multiple times, rinsing the cloth frequently, until you are confident that all chemical residue is gone. Any cleaner left behind can produce fumes and an unpleasant odor when the oven is heated. This is a critical step for both safety and usability.
- Air Out the Oven: Leave the oven door ajar (or wide open if possible) for several hours after cleaning, or even overnight. Keep your kitchen well-ventilated during this period. This allows any residual fumes to dissipate completely. You might still detect a faint chemical smell even after thorough rinsing. Airing it out ensures a fresh start for your next meal.
- First Use Post-Cleaning: When you use your gas oven for the first time after cleaning, set it to a low temperature (around 200-250°F or 100-120°C) for 15-30 minutes. You might notice a slight burning smell or some smoke. This is normal and usually due to any tiny residual cleaner burning off. Ensure your kitchen is well-ventilated during this initial “burn-off” period. Do not cook food during this time.
- Maintaining Cleanliness: To keep your gas oven looking good and make future cleanings easier, wipe up spills as they happen, once the oven is cool. For minor messes, you can use a damp cloth or a mild cleaner. Regular spot cleaning prevents the buildup of tough grime. Consider placing an oven liner on the bottom if your oven allows it; this catches spills. Proactive maintenance truly makes a difference.
A clean oven is a happy oven, and with these steps, you can keep it that way for longer.
FAQ Section
Q1: Is Easy Off safe to use in all gas ovens? Easy Off is generally safe for most gas ovens. However, always check your oven’s manual first for specific cleaning recommendations. Avoid using it on self-cleaning oven cycles or on areas like pilot lights, heating elements, or fan openings. Always follow the product instructions carefully to ensure safety and prevent damage.
Q2: How long should I leave Easy Off in my gas oven? The dwell time for Easy Off depends on the specific product type and the level of grime. For heavy-duty formulas, it can range from 30 minutes to several hours. Fume-free versions often require 2-4 hours, or even overnight for very stubborn messes. Always consult the instructions on your Easy Off can for the precise recommended time.
Q3: Can I use Easy Off on my gas oven racks? Yes, you can use Easy Off on gas oven racks. It is often effective for removing baked-on grease from them. Place the racks on old newspapers or a drop cloth in a well-ventilated area, spray them with Easy Off, and let them sit for the recommended time. Then, scrub and rinse them thoroughly to remove all residue.
Q4: What should I do if I get Easy Off on my skin? If Easy Off cleaner comes into contact with your skin, immediately rinse the affected area with plenty of cool water for at least 15-20 minutes. If irritation persists, seek medical attention. Always wear long rubber gloves and safety glasses when using the product to prevent skin and eye contact.
Q5: Why is my gas oven smoking after cleaning with Easy Off? A slight burning smell or smoke after cleaning is common. This usually occurs because tiny amounts of cleaner residue or very fine food particles were left behind and are burning off when the oven heats up. Ensure thorough rinsing and air out the oven completely. Run the oven empty at a low temperature for 15-30 minutes with good ventilation before cooking.
Q6: How often should I clean my gas oven with Easy Off? The frequency depends on your cooking habits. For regular use, a deep clean with Easy Off every 3-6 months is usually sufficient. For light use or if you clean up spills promptly, you might only need it once or twice a year. Regular spot cleaning and wiping up spills as they happen can extend the time between deep cleans.
Conclusion
Cleaning your gas oven with Easy Off might seem like a big job, but with the right approach, it is entirely manageable. We have covered every step, from crucial safety measures to the final touches, to help you achieve a sparkling clean appliance. By following these detailed instructions, you can effectively tackle even the toughest baked-on grease and grime. Your gas oven will not only look better but will also function more efficiently, cooking your meals more evenly without the odors of old, burnt food.
Remember, consistent cleaning and proper ventilation are key to maintaining a healthy cooking environment. Do not put off cleaning your oven any longer. Take control of your kitchen’s cleanliness today. Grab your Easy Off, put on your gloves, and get ready to transform your gas oven. A clean oven makes cooking more enjoyable and your kitchen a happier place. Get started on your path to a cleaner kitchen; your oven will thank you!
- Easy Off
- gas oven cleaning
- oven cleaner
- deep cleaning
- kitchen maintenance

Todd Martin
Senior Writer
With over 15 years of experience in home renovation and design, I started HEG to share what I’ve learned with homeowners who want to create spaces that are both beautiful and functional. I’ve always believed in a hands-on approach, and over the years, I’ve picked up practical solutions that actually work. Through HEG, I aim to make home improvement more approachable, sharing real tips that help you create a home you truly love.