· Kianna Connelly · Home Cleaning · 21 min read
How To Clean Grease Out Of Oven
How To Clean Grease Out Of Oven: Your Ultimate Guide
Imagine opening your oven door, ready to bake, only to face a landscape of baked-on grease and stubborn grime. It is a common sight in many kitchens. Dealing with a greasy oven feels like a daunting task for many homeowners. However, a clean oven improves cooking efficiency and keeps your kitchen safe.
This article gives you step-by-step instructions. We explore effective methods to clean grease out of your oven. You will learn about natural solutions and powerful commercial cleaners. We cover cleaning different oven parts, too. Get ready to transform your dirty oven into a sparkling clean appliance. You can tackle this task with confidence.
Takeaway
- Gather essential tools and choose your cleaning method.
- Use baking soda and vinegar for a natural, effective clean.
- Apply commercial cleaners for tough, baked-on grease.
- Clean all oven parts, including racks and glass doors.
- Implement regular maintenance to prevent future grease buildup.
To effectively clean grease out of an oven, first remove racks and loose debris. Then, apply a thick paste of baking soda and water or a commercial oven cleaner. Allow it to sit for several hours or overnight. Finally, wipe away the softened grease with a damp cloth and rinse thoroughly.
Why Cleaning Oven Grease Matters for Your Home
A clean oven is more than just about appearances. It plays a significant role in your home’s safety and cooking performance. Built-up grease can lead to several problems. It is important to address them promptly.
First, accumulated grease creates a fire hazard. Drippings and food particles left inside the oven can ignite at high temperatures. This risk increases with heavy buildup. A clean oven lowers this danger significantly. You protect your home and family.
Second, old grease produces unpleasant smells. When you heat the oven, these odors can transfer to your food. This affects the taste and aroma of your dishes. Imagine your cookies smelling like last week’s burnt casserole. Nobody wants that.
Third, grease buildup reduces oven efficiency. Dirty ovens need more energy to reach and maintain temperature. The grime acts as an insulator, making your oven work harder. Cleaning your oven helps it run more efficiently. This saves you money on utility bills. A clean oven also cooks food more evenly. You get better results from your recipes. Regular cleaning makes sure your oven lasts longer too. It protects the appliance’s internal components from corrosive buildup. Prioritizing oven cleanliness saves you time, money, and ensures safer cooking experiences.
Preparing Your Oven and Gathering Supplies
Before you begin to clean grease out of your oven, proper preparation is key. This step ensures a safer and more effective cleaning process. Take the time to gather all necessary supplies. Being prepared makes the job much smoother.
First, unplug your oven from the power outlet. For gas ovens, turn off the gas supply. This prevents accidental starts and protects you from electrical shock. Safety always comes first when working with appliances.
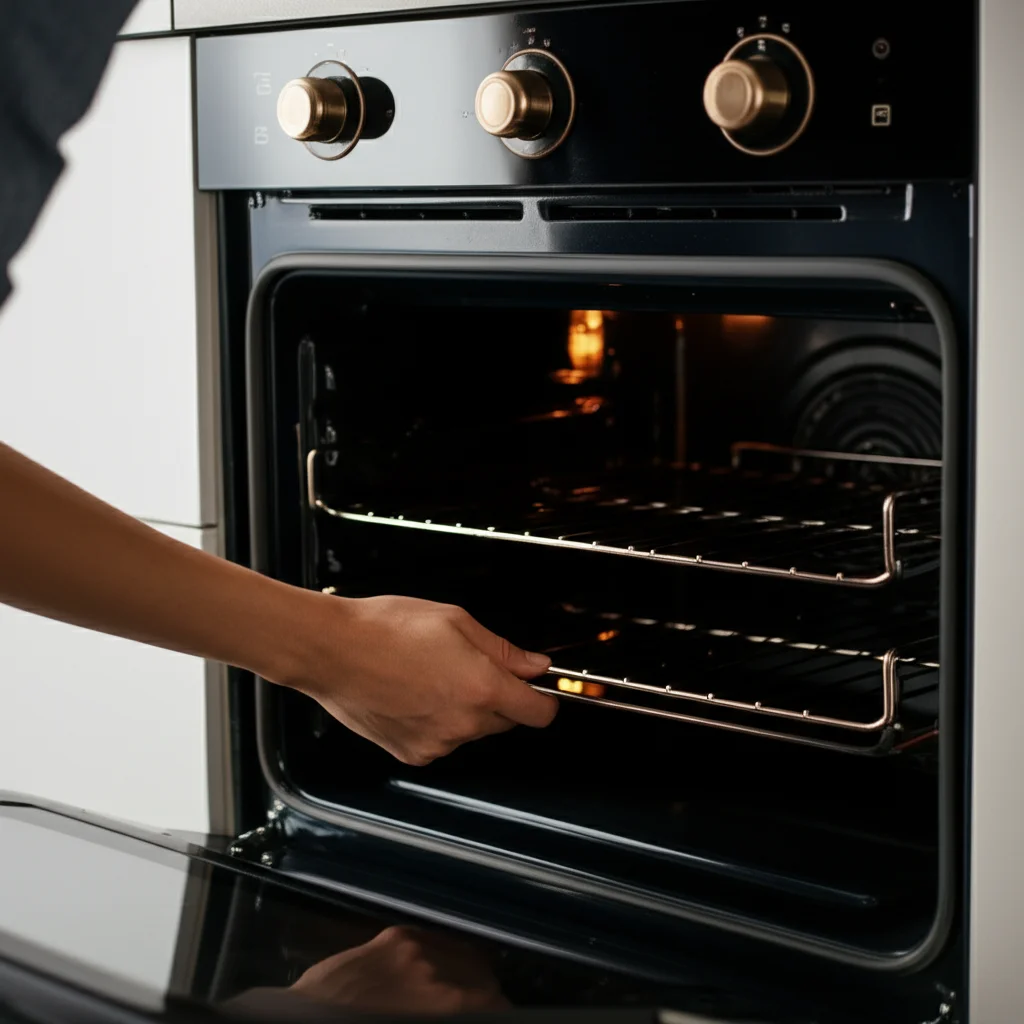
Next, remove everything from inside the oven. This includes oven racks, baking sheets, and any other removable items. These items often have grease buildup themselves. You will clean them separately later. Clear the oven interior completely.
Then, use a dry cloth or paper towels to wipe away any loose crumbs or food debris. A vacuum cleaner with a hose attachment can also help here. Removing loose particles prevents them from turning into muddy messes during cleaning. This simple step makes the deep cleaning process much easier.
Finally, protect your floor around the oven. Lay down old newspapers, cardboard, or a large towel. This catches any drips or spills. It protects your kitchen floor from cleaners and grime. Now, you are ready to gather your cleaning arsenal. You will need certain items whether you choose a natural or commercial approach.
Essential Cleaning Supplies
- Rubber gloves: Protect your hands from harsh chemicals or abrasive solutions.
- Safety goggles: Shield your eyes from splashes, especially with commercial cleaners.
- Baking soda: A natural abrasive and deodorizer.
- White vinegar: Cuts through grease and helps with rinsing.
- Spray bottle: For applying vinegar or water.
- Dish soap: Good for pre-cleaning and washing racks.
- Scrub brush or non-abrasive sponge: For scrubbing surfaces.
- Plastic scraper or old credit card: For gently scraping off baked-on gunk.
- Microfiber cloths or old rags: For wiping and rinsing.
- Large trash bags: For soaking oven racks.
- Bowl or small bucket: For mixing solutions.
Having these items ready saves time. You will not need to stop cleaning midway to search for a tool. Proper preparation sets the stage for a successful oven cleaning project.
Natural Cleaning: How To Clean Grease Out Of Oven With Baking Soda and Vinegar
Using baking soda and vinegar offers a powerful and non-toxic way to clean grease out of your oven. This method avoids harsh chemicals. It is safe for families and pets. It effectively breaks down stubborn baked-on grease. Many people prefer this natural approach for their home.
First, mix about ½ cup of baking soda with a few tablespoons of water. You want to create a thick paste. The consistency should be spreadable, like frosting. Adjust water slowly to reach the right thickness. This paste is your main cleaning agent. It pulls grease from surfaces.
Next, spread the baking soda paste all over the inside surfaces of your oven. Pay special attention to areas with heavy grease. Avoid covering the heating elements. They do not need this treatment. Ensure the paste covers all greasy spots. For really tough grease, you can apply a thicker layer. This maximizes the paste’s effectiveness.
Allow the paste to sit for at least 12 hours, or even overnight. The longer it sits, the more time it has to break down the hardened grease. During this time, the baking soda works to absorb and loosen the grime. This waiting period is crucial for good results.
After the waiting period, put on your rubber gloves. Use a damp cloth or sponge to start wiping away the dried baking soda paste. You will see the softened grease come off with it. For stubborn spots, use a plastic scraper or a non-abrasive scrub brush. Gently scrape away any remaining residue. You may need to apply a little pressure. You can also re-spray a little water to help re-moisten the paste. This helps remove the most difficult grime. If some spots remain, repeat the paste application on those areas. This ensures a thorough clean. You can find more details on using this method here: How to clean oven with baking soda.
Finally, put white vinegar in a spray bottle. Lightly spray the inside of your oven. The vinegar reacts with any leftover baking soda residue. It creates a slight fizz. This fizz helps lift away any remaining film. Wipe down the entire interior with a clean, damp cloth. Continue wiping and rinsing until all residue is gone and your oven shines. Your oven will look and smell fresh. This natural method tackles even tough baked-on messes effectively. You now have a very clean oven interior.
Tackling Tough Grease: Commercial Oven Cleaners and Steam Cleaning
When natural methods fall short, commercial oven cleaners offer a powerful alternative. These products contain strong chemicals designed to dissolve even the most stubborn, baked-on grease. Always use them with extreme caution. Read the product instructions carefully before you begin.
Before applying any commercial cleaner, ensure proper ventilation. Open windows and turn on your kitchen exhaust fan. This helps dissipate strong fumes. Wear rubber gloves and safety goggles. These cleaners can irritate skin and eyes. Take all necessary safety precautions.
Apply the commercial oven cleaner according to the product’s directions. Many cleaners come in a spray can. Spray an even layer over all greasy surfaces inside your oven. Avoid spraying directly on the heating elements or fan openings. For specific tips on cleaning the overall inside of your oven, check out this guide: How to clean inside oven. Allow the cleaner to sit for the recommended time. This can range from 30 minutes to several hours, depending on the product and the grease buildup. The chemicals work to break down the grease during this period.
After the waiting time, use a damp cloth or sponge to wipe away the cleaner and dissolved grease. Be prepared for a thick, gooey residue. Rinse your cloth frequently in clean water. You may need to make several passes to remove everything. For very tough spots, a plastic scraper can help. Gently scrape away any remaining hardened grime. Once most of the cleaner is gone, wipe the oven interior several times with clean, damp cloths. This removes any chemical residue. You want to ensure no cleaner remains before you use the oven. For a more comprehensive approach to deep cleaning, consider this resource: How to deep clean your oven.
Steam Cleaning for Less Grime
Steam cleaning is another option, especially for lighter grease buildup or as a maintenance step. Many modern ovens have a steam clean function. If yours does not, you can create a DIY steam method. This method is less aggressive than chemicals but can loosen grime.
To steam clean, remove all racks and debris. Place an oven-safe bowl or pan filled with 1-2 cups of water inside the oven. You can add a tablespoon of lemon juice for a fresh scent. Turn your oven to a high temperature, around 450°F (232°C), for 20-30 minutes. The water will boil and create steam. This steam helps loosen the grease.
After the time is up, turn off the oven and let it cool down completely. Once cool, wipe down the interior with a damp cloth. The softened grease should come off much more easily. This method is good for routine cleaning or light spills. For a dedicated guide on this method, read: How to steam clean oven. It avoids harsh chemicals and is a great option for maintenance.
Cleaning Specific Oven Parts: Racks, Glass Door, and Bottom
When you clean grease out of your oven, remember to address specific parts. The racks, glass door, and oven bottom often accumulate the most grime. Each area requires a slightly different approach for effective cleaning. Focusing on these parts ensures a truly clean appliance.
Oven Racks: Soak Away the Grime
Oven racks can become covered in baked-on grease and food bits. Cleaning them inside the oven is difficult. The best way to clean them is to remove them completely. You have a few effective methods for tackling this task.
One popular method involves soaking. Place your oven racks in a large tub, a bathtub, or even a large trash bag. Fill the container with hot water and add a generous amount of dish soap. You can also add half a cup of baking soda for extra cleaning power. Let the racks soak overnight. This softens the baked-on grease significantly. The next morning, the grime should wipe away easily with a sponge or brush. For more detailed instructions on cleaning racks, explore options like: How to clean oven racks without bathtub or How to clean oven racks with ammonia.
Another option for stubborn racks is using a commercial oven cleaner. Spray the cleaner on the racks outdoors or in a well-ventilated area. Place them on old newspapers or cardboard. Follow the product’s instructions for sitting time. Then, rinse them thoroughly with a hose. Always wear gloves and eye protection when using these strong cleaners. Make sure you rinse completely before putting them back in the oven.
Oven Glass Door: See-Through Clean
A dirty oven door glass obscures your view of food cooking. It also makes the oven look neglected. Cleaning the glass often requires a bit more elbow grease. Grease can get stuck on the inner layers of glass.
For light grease, a baking soda paste works well. Apply the paste directly to the glass. Let it sit for 20-30 minutes. Then, scrub with a non-abrasive sponge or a plastic scraper. Wipe clean with a damp cloth. This often reveals a much clearer view.
For heavier buildup, you might need a commercial glass cleaner specifically for ovens or a stronger baking soda application. You can also create a powerful cleaning paste with baking soda and a few drops of dish soap. Apply it to the glass and let it sit for a few hours. Then scrub and wipe clean. For extensive instructions on this specific area, see: How to clean inside oven glass or How to clean the glass on oven door. Sometimes, grease gets between the glass panes. This requires disassembling the oven door. Consult your oven’s manual or a professional if you face this issue.
Oven Bottom: Targeting Spills and Stains
The bottom of the oven catches most spills and drips. This area often has the most concentrated baked-on grease. Cleaning the bottom is similar to cleaning the main interior. However, it may require more focused effort.
For everyday spills, wipe them immediately after the oven cools. This prevents them from baking on. For existing grime, use the baking soda paste method. Apply a thick layer to the oven bottom. Let it sit overnight. The baking soda will draw out and soften the stubborn grease.
Scrape away the softened grime with a plastic scraper. Avoid metal tools, as they can scratch the enamel finish. Wipe thoroughly with a damp cloth. You may need multiple passes to remove all residue. For more detailed methods on cleaning the oven floor, check out: How to clean bottom of oven. Remember, consistent cleaning of these specific areas keeps your oven looking its best.
Advanced Cleaning Tips for Specific Oven Types and Stubborn Stains
Different oven types and specific types of stains require tailored cleaning strategies. Whether you own a gas, electric, or self-cleaning oven, understanding its nuances helps you clean grease out effectively. Some stains also need a little extra effort.
Cleaning Gas and Electric Ovens
Gas ovens and electric ovens share many cleaning principles. However, specific components need attention. For gas ovens, you have grates and burner elements. For electric ovens, you have exposed heating coils.
When cleaning a gas oven, remove the grates and burner caps. These can be cleaned in a sink with hot, soapy water and a scrub brush. For baked-on grease on grates, a baking soda paste or a commercial degreaser works well. The interior of a gas oven can be cleaned using the same methods as other ovens—baking soda paste or commercial cleaners. Be careful around the igniter. Always ensure the gas supply is off before cleaning. You can find more targeted advice on gas ovens here: How to clean gas oven.
Electric ovens often have heating elements at the bottom or top. Never submerge these elements in water. You can wipe them gently with a damp cloth. For spills underneath the bottom element, you might need to carefully lift or remove it if your oven design allows. Consult your manual before attempting this. The main cavity of an electric oven cleans the same way as other types. Remember to unplug the oven first. For specific instructions on electric models, see: How to clean electric oven.
Dealing with Burnt-On and Baked-On Grease
Baked-on grease is notoriously difficult to remove. It forms a hard, dark crust. For these extremely stubborn areas, longer soaking times are essential. If you are using the baking soda paste, let it sit for a full 24 hours. For commercial cleaners, extend the dwell time to several hours if the product allows.
Another trick for tough spots is to reapply the cleaner. After the initial application and wiping, if a spot remains, apply a small amount of fresh cleaner directly to that area. Let it sit again for an hour or two. This second application often softens what the first missed. A plastic scraper is your best friend here. Gently but firmly scrape the softened residue. Avoid scratching the oven’s surface. Sometimes, a fine steel wool pad (like grade 0000) can be used on extremely tough, localized spots on metal surfaces, but test it first in an inconspicuous area to ensure it doesn’t scratch. Be very careful with any abrasive materials. You can also explore options for dealing with similar types of baked-on grime on other surfaces: How to clean baked on grease from pans.
Understanding Self-Cleaning Oven Cycles
Many modern ovens feature a self-cleaning cycle. This function uses extremely high temperatures (up to 900°F or 482°C) to incinerate food residue and grease. The grime turns into a fine ash. While convenient, some precautions are necessary.
Before starting a self-clean cycle, remove all oven racks. The high heat can discolor or damage them. Wipe out any large food debris or heavy grease pools. Too much buildup can create excessive smoke. Ensure your kitchen is well-ventilated during the cycle. Open windows. You might want to leave your home during the cycle due to strong odors or smoke.
After the cycle completes, let the oven cool down completely. Then, simply wipe away the ash with a damp cloth. Do not use commercial oven cleaners in a self-cleaning oven. The chemicals can damage the oven’s special enamel coating. For specific after-care, refer to: How to clean oven after self clean. While self-cleaning ovens do most of the work, some manual effort is still needed for a truly spotless finish, especially around the door seal and edges where the self-clean function doesn’t reach.
Maintaining a Clean Oven: Prevention and Routine Care
Cleaning grease out of your oven is hard work. Keeping it clean afterwards is easier. Regular maintenance prevents heavy buildup. Prevention saves you time and effort in the long run. Incorporate these habits into your kitchen routine.
First, wipe spills immediately. As soon as a spill happens, wait for the oven to cool down. Then, wipe it away with a damp cloth. Fresh spills are much easier to clean than baked-on ones. A quick wipe prevents future headaches. This simple step can make a big difference.
Second, use oven liners or aluminum foil on the bottom rack. These catch drips and spills before they reach the oven floor. They are easy to remove and replace. This protects the oven bottom from direct contact with food. Always ensure the liner does not block any vents or heating elements. This can affect oven performance. Remember to replace liners regularly.
Third, clean your oven regularly, even if it looks okay. A light cleaning every 1-3 months prevents major grease accumulation. You do not need a deep clean every time. A quick wipe-down with a degreasing spray or a vinegar-water solution can work wonders. This routine effort stops grime from becoming permanent. Consistency is key.
Fourth, cover your food when cooking. Using oven-safe lids, foil, or roasting bags minimizes splatters. This keeps grease and food particles contained. It reduces the amount of residue that ends up on your oven walls and racks. This simple habit saves you a lot of cleaning time later.
Fifth, consider cleaning your oven after heavy use. If you bake a greasy roast or a bubbling casserole, plan a quick clean soon after. Do not wait for the grease to harden. This proactive approach helps manage buildup effectively. For example, if you just cleaned a really greasy oven, a quick wipe down next time will save you time. This is especially true after tackling something like a very greasy oven.
Lastly, address lingering odors. Even after cleaning, sometimes a faint smell persists. Place an oven-safe bowl with activated charcoal or citrus peels inside the cooled oven overnight. This absorbs any remaining odors. You can also bake lemon or orange peels in a low oven for a fresh scent. Maintaining a clean oven is an ongoing effort. It is an investment in your kitchen’s longevity and your cooking enjoyment. A clean oven is ready for your next culinary adventure.
Troubleshooting Common Oven Grease Issues
Even with the best cleaning efforts, you might encounter specific challenges. Baked-on grease can be stubborn. Addressing common issues helps you achieve a truly spotless oven. Do not get discouraged by persistent problems.
What if the Grease Doesn’t Come Off?
Sometimes, despite soaking or scrubbing, some baked-on grease stubbornly remains. This often happens with very old or extremely thick deposits. Do not give up. Instead, reapply your chosen cleaning agent.
If using baking soda paste, apply a fresh, thick layer directly to the problem spot. Mist it lightly with water if it dries out. Let it sit for an even longer period, such as 24 hours. The prolonged contact time helps break down the toughest bonds. For commercial cleaners, apply a concentrated amount to the stubborn area. Allow it to work for an extended duration, following the product’s maximum recommended time. You might also try a combination approach. For instance, after using a natural method, if spots remain, consider a small, targeted application of a commercial degreaser on those specific areas. Always wipe thoroughly afterward. This can be particularly true if you are dealing with very old grease, similar to how one might approach cleaning grease from oven that has been neglected for a long time.
Dealing with Lingering Odors After Cleaning
After a deep clean, sometimes a chemical smell or a faint odor of old food remains. This is common. Proper ventilation is key.
First, keep your kitchen windows open for several hours after cleaning. Turn on your kitchen exhaust fan. Good airflow helps air out the oven interior. Second, if you used a commercial cleaner, run the oven at a low temperature (around 250°F or 120°C) for 15-30 minutes. Make sure the kitchen is well-ventilated during this process. This helps burn off any remaining chemical residue. Do not put food in the oven during this burn-off.
For persistent food odors, place an oven-safe bowl filled with activated charcoal, coffee grounds, or vanilla extract inside the cool oven overnight. These absorb unwanted smells. You can also bake lemon or orange peels at a low temperature for 15-20 minutes. This naturally freshens the oven’s interior. This is a great way to ensure your oven smells clean.
Avoiding Scratches on Oven Surfaces
Oven surfaces, especially enamel, can scratch easily. Avoiding abrasive tools is vital. Never use steel wool pads or metal scrapers directly on the oven’s interior or door glass. These will cause permanent damage.
Instead, opt for non-abrasive scrub brushes, plastic scrapers, or old credit cards. Even a wooden spatula can work for gently nudging off softened grime. For the glass, use a razor blade only if absolutely necessary and hold it at a very shallow angle. Test it on an inconspicuous corner first. Always apply cleaning agents generously to soften the grease before attempting to scrape. Lubricating the surface with cleaner reduces friction and protects the finish. Proper tools protect your oven’s appearance and functionality.
Preventing Future Build-up Effectively
The best way to troubleshoot future issues is to prevent them. Consistent maintenance is easier than deep cleaning.
Make a habit of wiping down your oven after every few uses. Small spills cleaned immediately do not become baked-on problems. Use oven liners for messy dishes. These simple actions drastically reduce the amount of grease that accumulates. Regular, light cleanings mean you will rarely face overwhelming grease issues again. A little effort often prevents big cleaning tasks. Consistent care makes all the difference for a pristine oven.
Frequently Asked Questions (FAQ)
How often should I clean my oven to prevent grease buildup?
The frequency depends on how often you use your oven and what you cook. For regular use, aim for a light wipe-down every 1-2 weeks. A deep clean should happen every 3-6 months. If you cook greasy foods frequently, clean more often to prevent significant buildup. Consistent, small efforts make a big difference.
Can I use steel wool or abrasive scrubbers inside my oven?
No, you should avoid using steel wool or highly abrasive scrubbers on your oven’s interior, especially on enamel surfaces or glass. They can scratch and damage the finish permanently. Always opt for non-abrasive sponges, microfiber cloths, or plastic scrapers. This protects your oven’s integrity and appearance.
Is it safe to use a self-cleaning oven feature?
Yes, self-cleaning oven features are generally safe when used correctly. Always remove all oven racks before starting the cycle. Ensure your kitchen is well-ventilated, as the process can produce smoke and strong odors. Never use chemical cleaners in a self-cleaning oven, as they can damage the special coating.
What is the best natural degreaser for oven grease?
Baking soda and white vinegar make an excellent natural degreaser for oven grease. Baking soda acts as a mild abrasive and odor absorber, while vinegar cuts through grease and helps lift residue. Mix them into a paste or use them in combination for effective, non-toxic cleaning results.
How do I get rid of the chemical smell after using oven cleaner?
After using a chemical oven cleaner, ensure thorough ventilation by opening windows and running the exhaust fan. Wipe the oven interior multiple times with a clean, damp cloth to remove all residue. Then, run the oven at a low temperature (e.g., 250°F) for 15-30 minutes with the door slightly ajar to burn off remaining fumes.
Can I clean the oven racks in the dishwasher?
Most oven racks are not dishwasher safe. The high heat and harsh detergents in a dishwasher can discolor or damage the finish of the racks, especially if they are chrome-plated. So
- oven cleaning
- grease removal
- kitchen maintenance
- deep cleaning
- appliance care

Kianna Connelly
Cleaning Expert
With a background in hospitality management and a passion for professional organizing, I’ve dedicated my career to helping people create cleaner, calmer living spaces. At HEG, I design efficient, eco-friendly cleaning systems that not only save time but also deliver spotless, lasting results. I believe that a well-organized home brings peace of mind—and I’ve had the privilege of transforming thousands of homes with practical strategies that truly work. Whether it’s streamlining routines or tackling the toughest messes, I’m here to make clean living simple and sustainable.