· Todd Martin · Home Cleaning · 18 min read
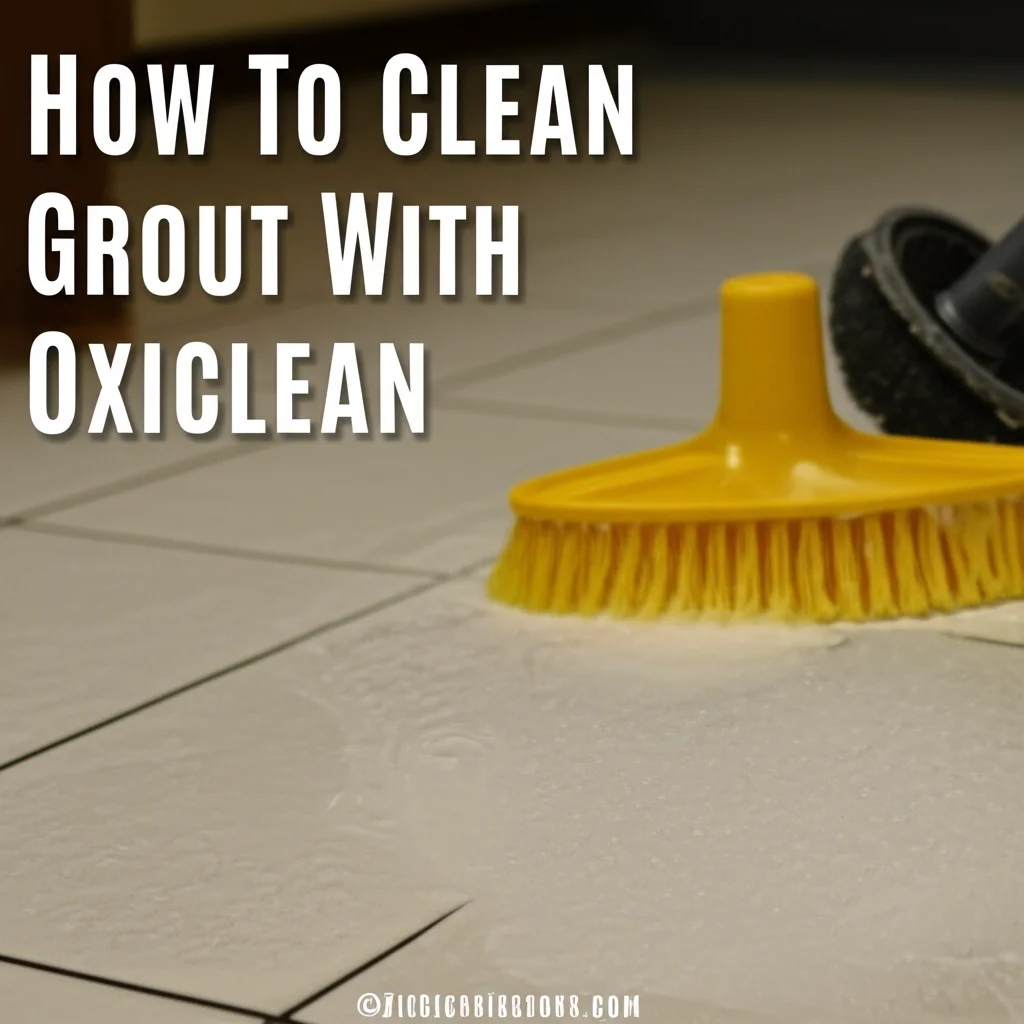
How To Clean Grout With Oxiclean
Clean Grout with OxiClean: A Comprehensive Guide
Dirty grout lines can make even a spotless room feel grimy. They absorb dirt, spills, and grime over time, changing from their original bright color to a dull, discolored mess. Many people struggle to find a cleaning solution that works well and is safe for their home. If you want to clean grout effectively, OxiClean offers a powerful solution.
OxiClean is a popular oxygen-based cleaner. It can lift tough stains from many surfaces. This article explains how to clean grout with OxiClean, from preparing your work area to applying the solution and maintaining your results. We will cover the types of OxiClean suitable for grout, safety measures, and techniques for different types of stains. By the end, you will have the knowledge to make your grout look new again.
Takeaway
- Prepare the Area: Clear items and sweep surfaces before cleaning.
- Mix OxiClean Correctly: Use warm water for activation. Follow specific ratios for light stains or tough grime.
- Apply and Dwell: Let the OxiClean solution sit on grout for sufficient time. This helps it break down dirt.
- Scrub Effectively: Use a stiff brush or old toothbrush for scrubbing. Work on small sections at a time.
- Rinse Thoroughly: Remove all OxiClean residue to prevent streaks.
- Maintain Cleanliness: Regular wiping and sealing prevent future discoloration.
To clean grout with OxiClean, mix a powder like OxiClean Versatile Stain Remover with warm water to create a paste or solution. Apply this mixture directly to the grout lines and let it sit for 15-30 minutes. Then, scrub the grout with a stiff brush and rinse the area thoroughly with clean water.
Understanding OxiClean: Your Grout’s Best Friend
OxiClean stands out as a powerful cleaning agent. It is an oxygen-based cleaner. This means it works by releasing oxygen when mixed with water. This oxygen helps break down dirt, stains, and grime at a molecular level. It makes OxiClean very effective on many surfaces, including discolored grout.
The main active ingredient in OxiClean Versatile Stain Remover is sodium percarbonate. This compound combines hydrogen peroxide with sodium carbonate, or washing soda. When it mixes with water, sodium percarbonate breaks down. It releases oxygen bubbles. These bubbles lift and remove dirt from the grout. This action is similar to how hydrogen peroxide cleans grout. OxiClean does not contain chlorine bleach. This makes it safer for many surfaces and colors. It also produces fewer harsh fumes.
The Science Behind Oxygen Power
Oxygen cleaners work differently from traditional cleaners. Instead of just dissolving dirt, they use an oxidation process. The released oxygen reacts with organic stains. This reaction breaks the bonds of the stain. This makes the stain easier to remove. This process helps lift mildew, soap scum, and everyday dirt from grout. It reaches deep into the porous surface of grout. This action leaves the grout much cleaner.
Is OxiClean Safe for All Grout Types?
OxiClean is generally safe for most ceramic and porcelain tile grout. However, exercise caution with natural stone tiles like marble, granite, or travertine. These materials are porous and can react to alkaline cleaners. Always perform a patch test in a hidden area first. This helps ensure OxiClean does not cause discoloration or damage. For specific advice on cleaning natural stone tile and grout, consult specialized guides. Ensure good ventilation when using OxiClean. Wear gloves to protect your skin. This simple step protects you and your surfaces.
OxiClean uses oxygen power to lift stains. This method is effective on common grout types. Always test OxiClean on an unseen area. This confirms its safety for your specific tile and grout. Proper ventilation protects you from fumes.
Gathering Your Tools: Preparation for Grout Cleaning
Before you begin cleaning, gather all necessary tools and supplies. Having everything ready makes the cleaning process smooth and efficient. Proper preparation also protects your surrounding areas. This step is as important as the cleaning itself.
First, clear the area you plan to clean. Remove any rugs, furniture, or other items that might get in the way. If you are cleaning floor grout, sweep or vacuum the entire floor. This removes loose dirt, dust, and debris. This pre-cleaning step prevents you from turning dirt into mud when you apply the OxiClean solution. It also ensures the OxiClean can work directly on the embedded grime. For cleaning tile grout on floors, this initial sweep is crucial.
Essential Cleaning Supplies
You will need a few basic items to clean grout with OxiClean. These include:
- OxiClean Versatile Stain Remover Powder: This is the standard OxiClean product for cleaning.
- Warm Water: Warm water helps activate the OxiClean effectively.
- Mixing Bucket or Bowl: Use a clean container to mix your solution.
- Stiff-Bristled Brush: A grout brush works best. An old toothbrush can also work for small areas or detailed scrubbing.
- Measuring Spoons/Cups: For accurate mixing ratios.
- Gloves: Protect your hands from the cleaning solution.
- Safety Glasses: Protect your eyes from splashes.
- Sponges or Rags: For wiping and rinsing the grout.
- Clean Water Source: For rinsing the treated areas.
- Towels: To dry the floor or wall after rinsing.
Preparing the Grout Surface
After sweeping, you might want to give the grout a quick wipe down. Use a damp cloth to remove any surface grime. This allows the OxiClean to penetrate deeper into the porous grout. Make sure the area is well-ventilated. Open windows or turn on a fan. This helps air circulation and reduces exposure to any fumes. If you are working in a bathroom, especially when cleaning grout in a shower, ensure proper ventilation. Good ventilation is important for comfort and safety. Prepare the area well for best results.
Gathering tools and preparing the surface are important first steps. Clear the area and remove loose dirt. Have all your cleaning supplies ready. This preparation ensures a smooth and effective cleaning process.
Mixing the OxiClean Solution: Getting the Ratio Right
Correctly mixing your OxiClean solution is important for good results. The right concentration ensures the product works effectively without wasting it. Always use warm water. Warm water helps activate the OxiClean powder faster and more completely. This creates the oxygen bubbles needed for cleaning.
Always read the specific instructions on your OxiClean package. While standard ratios exist, product formulas can vary slightly. Generally, you will mix OxiClean powder with warm water. The consistency of the mixture depends on the level of dirtiness. A thinner solution works for general cleaning. A thicker paste works for stubborn stains.
Standard Strength Mixture
For everyday dirt and general brightening, a standard strength solution works well. I recommend starting with this ratio for most cleaning tasks. Mix about 2 scoops of OxiClean powder with 1 gallon of warm water. Stir the mixture until the powder fully dissolves. The water should become slightly cloudy. This solution is good for overall floor or wall grout cleaning. You can apply it with a sponge or a mop for larger areas.
Heavy-Duty Paste for Stubborn Stains
Some grout lines have deep, set-in stains. For these, a thicker paste gives more concentrated cleaning power. To make a heavy-duty paste, mix about 1 scoop of OxiClean powder with 2-3 tablespoons of warm water. Add water slowly, stirring until you get a thick, spreadable paste. The consistency should be like toothpaste. This paste is ideal for targeted application on dark or black grout. Apply this paste directly onto the stain. Ensure the paste covers the entire discolored area. The higher concentration of OxiClean means more oxygen bubbles will be released. This helps lift the tough grime.
Always wear gloves when mixing OxiClean. The solution can irritate skin. Avoid inhaling the powder directly. Mix the solution in a well-ventilated area. This simple step protects your health.
Correctly mixing OxiClean is crucial. Use warm water for standard solutions or a thick paste. This activates the cleaner for effective stain removal. Always wear gloves and work in a well-ventilated space.
Applying OxiClean to Grout: A Step-by-Step Process
Once your OxiClean solution or paste is ready, it’s time to apply it to the grout. Proper application ensures the cleaner has enough contact time to work its magic. Remember to work in small sections. This prevents the solution from drying out before you can scrub and rinse.
Start by choosing a manageable area. For instance, clean a 3x3 foot section of floor grout. This approach allows you to focus and keep the cleaner wet. Apply the OxiClean mixture evenly over the grout lines. You do not need to cover the entire tile surface, just the grout. For a standard solution, use a sponge, spray bottle, or pour directly onto the grout lines. For the heavy-duty paste, use an old spoon or a small brush to spread the paste directly onto the discolored grout.
Application Techniques
- For Standard Solution:
- Pouring: Gently pour the solution directly onto the grout lines. Be careful not to flood the entire floor.
- Spraying: Transfer the solution to a spray bottle. Spray the grout lines until they are thoroughly wet. This is good for wall grout or shower grout.
- Sponging: Dip a sponge into the solution and wipe it along the grout lines. This method offers good control.
- For Heavy-Duty Paste:
- Spoon/Spatula: Use a plastic spoon or spatula to scoop the paste. Carefully apply it directly onto the stained grout.
- Small Brush: An old paintbrush or a dedicated grout brush can help spread the paste precisely.
After applying, ensure the grout is fully saturated or covered. The OxiClean needs to penetrate the porous material. This step is important for breaking down tough stains. If some areas dry out too quickly, reapply a bit more solution.
Allowing Dwell Time for Maximum Effect
This is where the oxygen power does its work. After applying the OxiClean, you must let it sit. This “dwell time” allows the oxygen bubbles to activate and break down the grime. For light to moderately dirty grout, 15 to 30 minutes is usually enough. For heavily soiled or black grout, you might need to let it sit for up to an hour. Do not let the solution dry completely on the grout. If it starts to dry, mist it with a little warm water to keep it damp. This keeps the oxygen reaction going.
During the dwell time, you might see small bubbles forming. This shows the OxiClean is actively working. Do not scrub during this period. Let the chemical reaction do most of the hard work. This method often helps with cleaning floor grout without scrubbing as much.
Applying OxiClean correctly is important. Use a standard solution or a thick paste. Ensure even coverage on grout lines. Allow proper dwell time for OxiClean to break down grime. Keep the grout damp during this period.
Scrubbing and Rinsing: Unveiling Clean Grout
After allowing the OxiClean to dwell, the real transformation begins with scrubbing and rinsing. This physical action removes the loosened dirt and grime, revealing cleaner grout. Remember, the OxiClean has done most of the heavy lifting. Your scrubbing helps lift and remove the broken-down particles.
Return to the section you treated. Using your chosen scrubbing tool, apply gentle but firm pressure along the grout lines. Scrub in small, back-and-forth motions. Pay close attention to areas that are still discolored. You should see the dirt lifting as you scrub. The goal is to agitate the remaining grime. This makes it easier to rinse away.
Effective Scrubbing Tools
Choosing the right brush matters.
- Grout Brush: This tool has stiff, narrow bristles designed to fit perfectly into grout lines. It provides good leverage and scrubbing power.
- Stiff-Bristled Utility Brush: A general-purpose utility brush with stiff bristles can also work for wider grout lines.
- Old Toothbrush: For very narrow grout lines, corners, or detailed spots, an old toothbrush is excellent. Its small head allows for precise scrubbing.
- Electric Scrubber: For large areas or very stubborn stains, an electric scrubber with a brush attachment can save time and effort. It provides consistent power.
Avoid using abrasive scrub pads or steel wool directly on tiles or grout. These can scratch delicate tile surfaces or damage the grout. Stick to brushes that are firm but not overly harsh. Proper scrubbing helps lift dirt effectively.
The Importance of Thorough Rinsing
After scrubbing, it is time to rinse. This step is crucial to remove all the loosened dirt and OxiClean residue. If you leave residue, it can dry on the grout and attract new dirt quickly. It can also leave a hazy film on your tiles.
For floor grout, you can use a bucket of clean water and a mop or sponge. Rinse the scrubbed section multiple times with fresh, clean water. Change your rinse water often to avoid spreading dirt. For wall or shower grout, use a spray bottle filled with clean water or a damp cloth to wipe down the area. In a shower, you can use the showerhead to rinse thoroughly. Be sure to flush all the dirty water and cleaner away. For cleaning grout after tiling, a thorough rinse is essential to remove all construction residue. If you are cleaning shower tiles and grout, rinse from top to bottom.
After rinsing, use clean, dry towels to absorb any excess water. This helps prevent water spots and speeds up drying. You will notice a big difference in your grout’s appearance.
Scrubbing removes loosened dirt. Use appropriate brushes for effective cleaning. Rinse all OxiClean residue thoroughly with clean water. Dry the area to reveal sparkling grout.
Addressing Stubborn Grout Stains with OxiClean
Sometimes, grout stains are so deeply set that a single application of OxiClean might not fully remove them. These can be areas with heavy foot traffic, persistent mold, or long-neglected grime. Do not worry. OxiClean is still a powerful ally. It just requires a bit more targeted treatment and patience.
When faced with stubborn stains, the key is to re-evaluate and reapply. A second or even third application can often make a significant difference. The goal is to give the OxiClean more time and concentration to break down the most resistant grime. You might also need to adjust your application method or scrubbing intensity for these areas. Identify the specific areas that did not come clean after the first round. These are your target zones.
Targeted Treatment for Discolored Grout
For persistent stains, switch to the heavy-duty OxiClean paste. This thicker consistency delivers a more concentrated dose of oxygen cleaning power directly to the problem area.
- Reapply Paste: Mix a fresh batch of the thick OxiClean paste (1 scoop OxiClean to 2-3 tablespoons warm water).
- Target Application: Apply the paste directly and generously onto the stubborn grout lines. Really cover the discolored sections.
- Extended Dwell Time: Allow the paste to sit for a longer period. For very tough stains, let it dwell for 1 to 2 hours. You can even leave it overnight if the area is undisturbed. Just ensure the paste does not dry out. Mist it with a little warm water if needed.
- Focused Scrubbing: After extended dwell time, use a small, stiff brush, like an old toothbrush, to scrub the specific stained areas. Apply firm pressure. You might need to put a little more “elbow grease” into these spots.
- Rinse Thoroughly: Rinse the area completely with clean water. Ensure no residue remains.
This targeted approach allows the OxiClean to work harder on specific tough spots. For heavily used areas, such as grout in a shower or frequently trafficked floor grout, this method is often necessary.
When to Reapply OxiClean
You can reapply OxiClean as often as needed until the desired cleanliness is achieved. However, always rinse completely between applications. This prevents build-up. Also, ensure the grout is wet before reapplication. If a stain persists after two or three strong OxiClean treatments, the grout might be permanently discolored, or the stain might be something OxiClean cannot remove, such as a deep oil stain. In such cases, consider specialized stain removers or professional cleaning services. For most common household stains, OxiClean works well.
Stubborn stains need targeted treatment. Reapply a thick OxiClean paste to discolored areas. Allow for extended dwell time. Scrub with focused effort. Reapply if needed, always rinsing thoroughly between applications.
Maintaining Clean Grout: Prolonging Your Efforts
Cleaning grout with OxiClean brings impressive results. But the work does not stop there. To keep your grout looking fresh and new for longer, you need to implement a maintenance routine. Preventing dirt and grime from building up is far easier than deep cleaning it again. This helps maintain the cleanliness you just achieved.
Regular cleaning prevents stains from setting in. Grout is porous, meaning it has tiny holes. These holes trap dirt, grease, and soap scum over time. If left unattended, these particles become embedded, leading to discoloration. A simple, consistent cleaning schedule can save you from future intense scrubbing sessions.
Routine Cleaning Habits
Incorporate these habits into your regular cleaning routine:
- Weekly Wiping: For bathroom and kitchen grout, wipe down surfaces weekly. Use a mild all-purpose cleaner or a simple mixture of warm water and a few drops of dish soap. This removes surface dirt before it can set into the grout.
- Prompt Spill Cleanup: If something spills on your tiled floor, clean it up immediately. Do not let it sit. Acidic liquids like juice or coffee can stain grout quickly.
- Shower Maintenance: After showering, use a squeegee on tiled walls and glass doors. This removes excess water and soap scum. Good ventilation in the bathroom also helps prevent mold and mildew growth in grout.
- Ventilation: Ensure good air circulation in tiled areas, especially bathrooms. This helps dry out grout and prevents moisture-related issues like mildew.
These small, consistent actions significantly reduce the need for deep cleaning. They keep your grout looking good day-to-day.
Sealing Grout for Future Protection
After a deep clean with OxiClean, consider sealing your grout. Grout sealer creates a protective barrier over the porous surface. This barrier helps repel liquids and stains. It makes the grout less absorbent. Sealing does not make grout stain-proof, but it makes it much more resistant to future discoloration.
- Ensure Grout is Dry: Wait at least 24-48 hours after cleaning to ensure the grout is completely dry before applying a sealer. Moisture can interfere with the sealer’s effectiveness. This is especially important for cleaning grout before sealing.
- Choose a Quality Sealer: Select a penetrating grout sealer. These soak into the grout, providing long-lasting protection.
- Apply According to Instructions: Follow the product instructions carefully. Apply the sealer evenly to the grout lines. Use a small brush or applicator bottle.
- Reapply Periodically: Grout sealers do not last forever. They typically need reapplication every 1-3 years, depending on the product and traffic. Test water absorption by dropping a few drops of water on the grout. If the water soaks in, it is time to reseal.
Maintaining clean grout requires ongoing effort. Implement routine cleaning habits. Consider sealing your grout after deep cleaning. These steps protect your grout and extend its fresh appearance.
FAQ Section
Q1: Can OxiClean damage grout?
OxiClean is generally safe for most traditional cement-based grout. It does not contain harsh chlorine bleach. However, always test OxiClean in a hidden spot first. This helps ensure it does not cause discoloration or damage, especially on colored grout or natural stone tiles. Proper dilution and rinsing prevent issues.
Q2: How often can I use OxiClean on grout?
You can use OxiClean for deep cleaning grout as needed, perhaps every few months or when dirt buildup becomes noticeable. For regular maintenance, a milder cleaner or simple soap and water is sufficient. Overuse of strong cleaners is not necessary if you maintain regular cleaning habits.
Q3: What if OxiClean does not work on my grout?
If OxiClean does not fully clean your grout after several attempts, the stains might be too old, deep, or permanent. The grout itself might also be degraded. You could try other cleaning methods, like steam cleaning or professional cleaning. In some cases, regrouting might be the only solution.
Q4: Is OxiClean safe for colored grout?
OxiClean is generally safe for most colored grout. It is a non-chlorine bleach product. However, some colored grouts use dyes that might react to oxygen cleaners. Always perform a patch test on an inconspicuous area of your colored grout first. This confirms color fastness before you clean the entire surface.
Q5: Can I mix OxiClean with other cleaners?
No, do not mix OxiClean with other household cleaners, especially those containing bleach or ammonia. Mixing cleaning products can create dangerous fumes or reduce their effectiveness. Use OxiClean on its own as directed. Always rinse surfaces thoroughly before applying a different cleaner.
Q6: Does OxiClean remove mold from grout?
Yes, OxiClean can help remove mold and mildew from grout. Its oxygen-boosting power breaks down organic matter. This helps lift mold spores and stains. For very stubborn mold, you might need to use a stronger paste and allow for longer dwell time. Good ventilation helps prevent mold return.
Conclusion
Cleaning grout with OxiClean is a powerful and effective method to restore the beauty of your tiled surfaces. We covered everything from understanding how OxiClean works to preparing your area, mixing the right solution, and applying it for maximum effect. You learned about the importance of dwell time, proper scrubbing techniques, and the critical step of thorough rinsing. We also discussed how to tackle stubborn stains with targeted treatments and how to maintain your clean grout with routine habits and sealing.
By following these steps, you can achieve sparkling clean grout lines throughout your home. OxiClean offers a safe and potent alternative to harsh chemical cleaners. Remember, consistency in maintenance is key to prolonging your efforts. Regularly wiping down tiled surfaces and considering grout sealing will keep your grout looking fresh for a long time. Take pride in your home’s appearance. A clean grout line makes a big difference. Get started today and transform your home with bright, clean grout.
- grout cleaning
- OxiClean
- tile cleaner
- stain removal
- DIY cleaning
- household tips
- floor cleaning

Todd Martin
Senior Writer
With over 15 years of experience in home renovation and design, I started HEG to share what I’ve learned with homeowners who want to create spaces that are both beautiful and functional. I’ve always believed in a hands-on approach, and over the years, I’ve picked up practical solutions that actually work. Through HEG, I aim to make home improvement more approachable, sharing real tips that help you create a home you truly love.