· Todd Martin · Home Cleaning · 21 min read
How To Clean White Tile Floors
Sparkling White Tile Floors: Your Ultimate Cleaning Guide
White tile floors bring a bright, clean look to any home. They reflect light and create a sense of spaciousness. However, white tiles also show every speck of dirt, every spill, and every scuff mark. Keeping them clean requires regular attention and the right methods. You want your beautiful floors to stay that way, vibrant and spotless.
This comprehensive guide will show you exactly how to clean white tile floors. We will cover daily cleaning routines, deep cleaning techniques, and specific strategies for tackling stubborn stains and discolored grout. You will learn about essential tools, effective cleaning agents, and natural alternatives. Get ready to transform your white tile floors from dull to dazzling.
Takeaway
- Regular sweeping and mopping prevent dirt buildup.
- Use gentle cleaners for daily maintenance.
- Deep clean white tile and grout to remove stubborn dirt.
- Act quickly on spills to prevent stains.
- Protect floors with mats and sealants.
White tile floors become clean by using the correct tools and cleaners for routine care and addressing spills promptly. For deeper dirt, specialized solutions and scrubbing restore their shine. Regular maintenance ensures they stay bright.
Why White Tile Floors Show Dirt More
White tile floors offer a crisp, clean aesthetic. They make rooms feel larger and brighter. Many people choose white tiles for bathrooms, kitchens, and entryways. This choice provides a sleek and modern foundation.
However, the light color means white tiles highlight dirt. Dust, crumbs, and pet hair are easily visible. Scuff marks from shoes or furniture stand out clearly. Even tiny spills become obvious stains on a white surface. This sensitivity means white tile floors require more consistent cleaning than darker tiles. Understanding why they show dirt helps you prepare for effective cleaning.
The Challenge of Grout Lines
Grout lines are porous. They often absorb dirt, grime, and spilled liquids. White grout, commonly paired with white tiles, stains very easily. It can turn from bright white to dingy gray or brown over time. Dirty grout makes the entire floor look unclean, even if the tiles themselves are spotless.
This challenge makes cleaning tile grout on floors an essential part of maintaining white tile floors. You must address both the tiles and the grout. Ignoring the grout will keep your floors from looking truly clean. We will cover specific strategies for grout later in this guide.
Essential Tools and Cleaning Agents
Before you start cleaning, gather the right supplies. Having everything ready makes the cleaning process smoother. You do not want to stop in the middle to find a tool. The right tools also help you clean more effectively without damaging your white tiles.
I always recommend having these basic items on hand. They are common household items, so you likely already own most of them. Prepare your cleaning arsenal for sparkling results.
Must-Have Tools
- Soft-bristle broom or vacuum cleaner: You need this for daily dry cleaning. A soft broom sweeps away loose dirt. A vacuum with a hard floor attachment picks up small particles without scratching.
- Microfiber mop: A microfiber mop is excellent for white tiles. It absorbs dirt and moisture well. It does not leave streaks like traditional cotton mops can. This helps maintain the shine of your white surfaces.
- Two buckets: Use one bucket for cleaning solution and one for rinse water. This prevents you from spreading dirty water back onto your clean floor.
- Soft scrubbing brush or grout brush: A dedicated grout brush helps you clean the lines between tiles. Its firm bristles get into the grooves. You need a separate soft brush for stubborn spots on the tiles themselves.
- Microfiber cloths: These are useful for wiping down small areas. They also work well for buffing tiles dry.
Recommended Cleaning Agents
- Mild pH-neutral floor cleaner: This is ideal for daily or regular cleaning. It cleans effectively without harming the tile or grout. Read product labels to ensure pH neutrality.
- White vinegar: White vinegar is a natural disinfectant and powerful cleaner. Mix it with water for a versatile solution. It helps cut through grease and grime.
- Baking soda: Baking soda is a gentle abrasive. It is excellent for stain removal and brightening grout. Create a paste with water for tough spots.
- Hydrogen peroxide: Use hydrogen peroxide for stubborn stains and brightening white grout. It acts as a mild bleaching agent. Test it in an inconspicuous area first.
- Oxygen bleach (optional): For deep cleaning and severe discoloration, oxygen bleach is effective. It is gentler than chlorine bleach but still powerful. Follow instructions carefully.
You can also consider a steam mop for an chemical-free option. A steam mop uses hot steam to lift dirt and sanitize surfaces. It works very well on tile and grout. However, always check your tile manufacturer’s recommendations for steam cleaning suitability.
Daily Routine: Keeping Your White Tiles Pristine
Maintaining white tile floors starts with a simple daily routine. Consistent, light cleaning prevents dirt from building up. This saves you time and effort in the long run. A quick daily sweep makes a big difference.
I find that a few minutes each day keeps my white tiles looking fresh. It stops surface grime from settling into the grout. This routine is your first line of defense against dull floors.
Sweeping or Vacuuming Daily
The most important step is to remove loose dirt and debris. Use a soft-bristle broom or a vacuum cleaner with a hard floor attachment. Sweep or vacuum your white tile floors every day, especially in high-traffic areas. This prevents dirt from being ground into the tile surface and grout lines.
Think of it as preventing a problem before it starts. Dust and crumbs are much easier to pick up when dry. If you skip this, wet mopping can just turn the dirt into muddy streaks. Make this a quick, habitual task.
Spot Cleaning Spills Immediately
White tiles show spills immediately. Any liquid, from coffee to juice, can quickly stain if left too long. Act fast when spills happen. Blot the spill with a clean cloth or paper towel. Do not wipe, as this can spread the stain.
Once you blot up the liquid, wipe the area with a damp cloth. You can use a tiny amount of mild soap for sticky spills. Rinse the spot with clean water afterwards. Immediate action is key to preventing permanent stains on your beautiful white tiles.
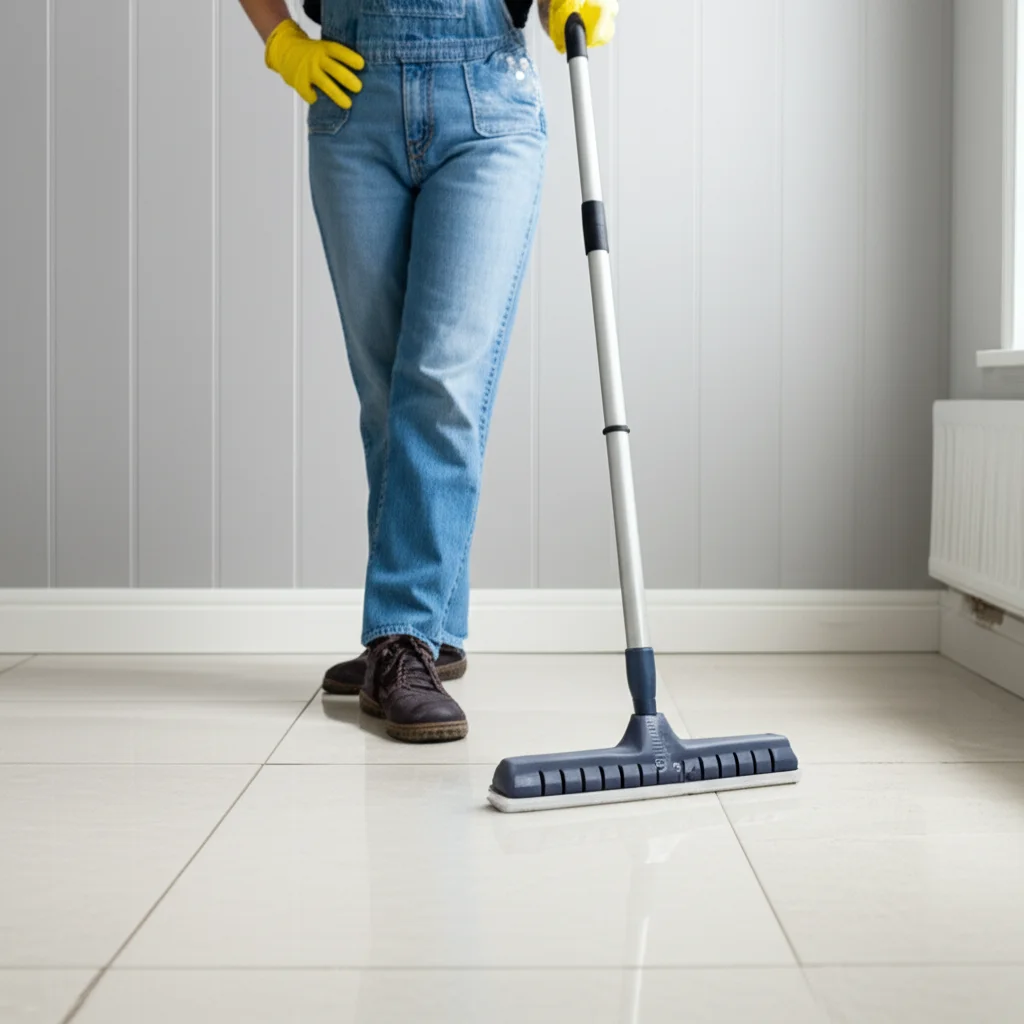
Quick Mop for High-Traffic Areas
Consider a quick mop of your most used areas a few times a week. This is not a full deep clean. Simply mix a capful of pH-neutral floor cleaner with warm water in one bucket. Dip your microfiber mop, wring it out well, and quickly go over the entryway, kitchen, or bathroom.
This light mopping helps remove light grime. It keeps the shine without needing a full-scale cleaning. This method extends the time between major cleaning sessions. This makes your overall floor care easier.
Deep Cleaning White Tile Floors for a Brilliant Shine
Sometimes, daily cleaning is not enough. White tiles and their grout can start to look dull or dingy over time. This happens even with regular maintenance. Deep cleaning brings back their original brilliance. It targets embedded dirt and light stains that daily cleaning misses.
I usually deep clean my white tile floors once a month. This schedule keeps them looking their best. A thorough deep clean tile floors process restores the floor’s sparkle. It ensures all dirt and grime are removed from both tiles and grout.
Step-by-Step Deep Cleaning Process
Prepare the Area: First, clear the entire floor. Move furniture, rugs, and anything else off the tiles. This gives you full access to all areas. Sweep or vacuum thoroughly to remove all loose dirt. This step is critical to avoid making mud when you add water.
Mix Your Cleaning Solution: For a general deep clean, I recommend a solution of warm water and a pH-neutral tile cleaner. Follow the product instructions for the correct ratio. For a natural option, mix one part white vinegar with two parts warm water. Vinegar is great for cutting through soap scum and mineral deposits, common on porcelain tile floors.
Apply and Dwell: Apply the cleaning solution to a small section of the floor. Do not saturate the entire floor at once. Let the solution sit for 5-10 minutes. This dwell time allows the cleaner to break down dirt and grime. It loosens embedded particles.
Scrub the Tiles and Grout: Use your soft scrubbing brush for the tiles. Scrub in small circular motions. For the grout lines, use a dedicated grout brush. Pay extra attention to discolored grout. For tough spots, you might need a bit more cleaner or a paste of baking soda and water. Be gentle but firm.
Rinse Thoroughly: This is a crucial step. Fill your second bucket with clean, plain water. Dip your microfiber mop into the clean water and wring it out completely. Mop the scrubbed section to remove all cleaner residue and lifted dirt. Rinse the mop frequently in the clean water. Change the rinse water often as it gets dirty. Rinsing prevents streaks and sticky residue, especially important for cleaning porcelain tile surfaces.
Dry the Floor: After rinsing each section, dry the tiles with clean, dry microfiber cloths. You can also use a clean, dry mop head. Drying prevents water spots and streaks. It also stops new dirt from sticking to damp surfaces. Ensure the floor is completely dry before walking on it or replacing furniture.
This process ensures your white tile floors are not just clean, but truly sparkling. It removes the grime that dulls their appearance. You will notice a dramatic difference.
Tackling Stubborn Stains on White Tile
Even with regular cleaning, stubborn stains can appear on white tile floors. These might be from spilled coffee, ink, or even rust. Do not despair; most stains can be removed with the right approach. The key is to identify the type of stain and use the appropriate cleaner. Always test any new cleaning solution in an inconspicuous area first. This prevents potential damage to your white tiles.
I have found success with various methods, depending on the stain. It is important to avoid harsh chemicals that could etch the tile or discolor the grout. Gentle yet effective solutions are usually best.
Common Stains and Solutions
Coffee, Tea, Juice, or Wine Stains:
- Blot up as much of the liquid as possible immediately.
- Mix a paste of baking soda and a small amount of hydrogen peroxide. Apply this paste directly to the stain.
- Let it sit for 15-30 minutes.
- Gently scrub with a soft brush.
- Rinse thoroughly with clean water.
- Hydrogen peroxide is effective at breaking down organic stains without harsh bleaching.
Grease and Oil Stains:
- Sprinkle baking soda or cornstarch generously over the stain. These powders absorb grease.
- Let it sit for several hours, or even overnight.
- Sweep up the powder.
- Clean the remaining residue with a solution of warm water and a few drops of dish soap.
- Rinse well.
Scuff Marks:
- For light scuff marks, use a pencil eraser. Gently rub the eraser over the mark.
- For tougher scuffs, apply a small amount of rubbing alcohol to a microfiber cloth. Rub the scuff mark until it disappears.
- Wipe the area with a damp cloth afterward.
Rust Stains:
- Rust stains can be challenging. You need a rust remover designed for tiles. Look for oxalic acid-based products.
- Apply the product according to its instructions.
- Do not leave it on for too long, as it can damage the tile or grout.
- Rinse completely with clean water after use.
- This is a strong chemical, so use gloves and good ventilation.
Ink or Dye Stains:
- For fresh ink, try rubbing alcohol on a cotton ball. Blot the stain, do not rub.
- For older or deeper dye stains, a diluted bleach solution (one part bleach to ten parts water) might be necessary.
- Apply with a cotton swab to the stain only. Leave for a few minutes.
- Rinse immediately and thoroughly. Be very careful with bleach on grout, as it can weaken it over time. Always test bleach in an unseen area first.
Remember to always rinse the area with clean water after treating any stain. This removes cleaning agent residues. It prevents new stains or damage from leftover chemicals. Persistent stains might require repeat applications.
Restoring Grout to Its Original Brilliance
White grout is a common choice for white tile floors. It provides a seamless look. However, white grout also shows dirt, mold, and mildew very easily. Over time, it can turn dark and dingy. This makes the entire floor look unclean, no matter how spotless the tiles are. Restoring grout to its original white color significantly improves the overall appearance of your floor.
I have spent many hours on my hands and knees cleaning grout. It is a tedious but rewarding task. Bright white grout truly makes white tiles pop. This effort makes your floors look new again.
Effective Grout Cleaning Methods
Baking Soda and Hydrogen Peroxide Paste:
- This is my favorite method for general grout brightening.
- Mix baking soda with hydrogen peroxide to form a thick paste. The mixture will fizz slightly.
- Apply a generous layer of the paste directly onto the grout lines.
- Let it sit for 10-15 minutes. This allows the peroxide to break down grime.
- Scrub the grout lines with a stiff grout brush. You will see the dirt lift away.
- Rinse thoroughly with clean water. You might need to wipe with a damp cloth multiple times.
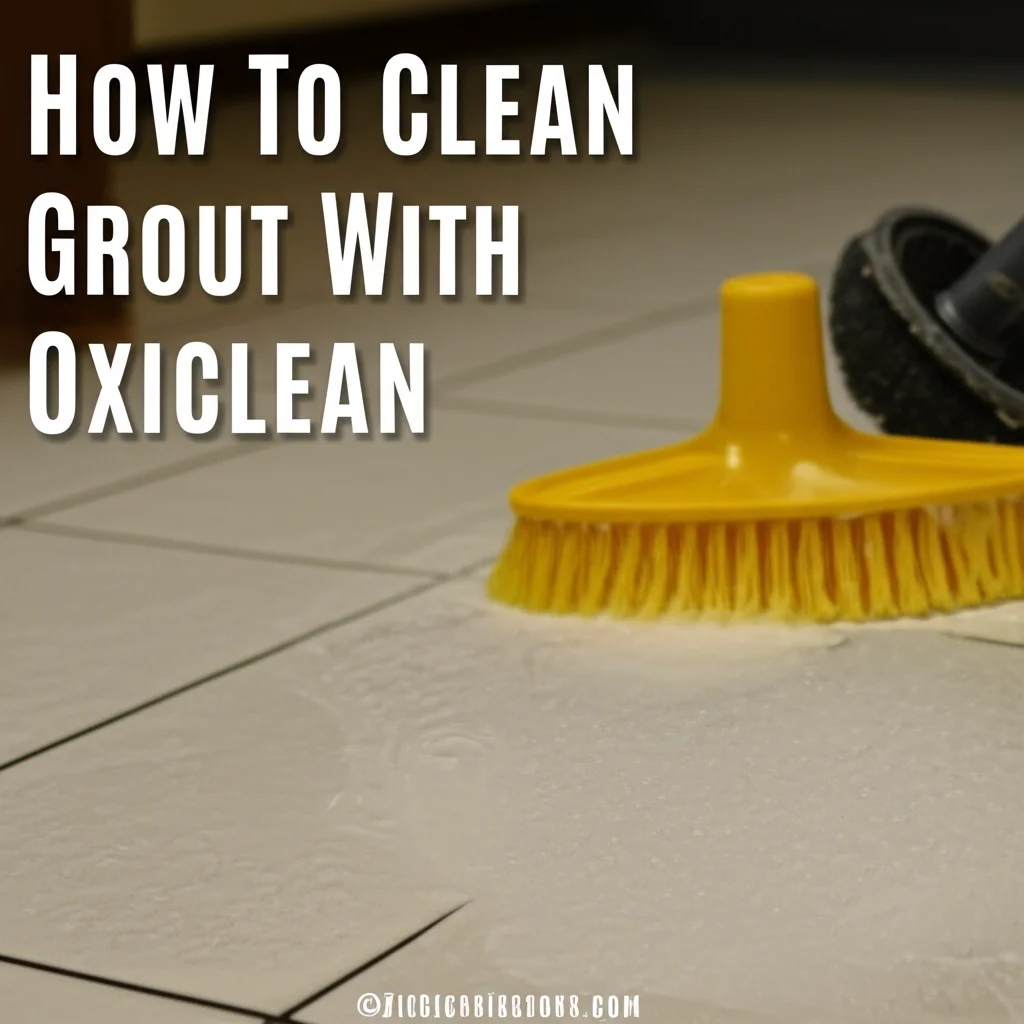
Oxygen Bleach Solution:
- For tougher discoloration or mildew, oxygen bleach is a good choice. It is safe for most grout.
- Mix powdered oxygen bleach with hot water according to package directions.
- Pour or spray the solution directly onto the grout lines.
- Let it sit for 30 minutes to an hour. For very stubborn grime, you can let it sit longer, but do not let it dry.
- Scrub the grout with a brush.
- Rinse very well with clean water.
Steam Cleaner:
- A steam cleaner uses hot vapor to sanitize and loosen dirt. This method is chemical-free.
- Use a nozzle attachment designed for grout.
- Direct the steam along the grout lines.
- Follow immediately with a brush to scrub. The heat and moisture make dirt easy to remove.
- Wipe away any loosened dirt and excess moisture with a clean cloth.
Protecting Your Grout
After cleaning, consider sealing your grout. Grout sealant creates a barrier. This barrier helps repel water, dirt, and stains. It makes future cleaning much easier. Reapply sealant every 1-2 years, especially in high-traffic areas. Sealing is a simple step that preserves your hard work. It keeps your white grout looking pristine for longer.
Natural Cleaning Solutions for White Tile Floors
Many people prefer to use natural cleaning products. They are often safer for pets, children, and the environment. You can achieve fantastic results on white tile floors using common household ingredients. These solutions are effective for daily cleaning and tackling light stains. They offer a gentle yet powerful approach.
I often use these natural methods myself. They avoid harsh chemicals while still delivering a sparkling finish. You might already have these ingredients in your pantry.
White Vinegar and Water
White vinegar is a cleaning powerhouse. It is acidic, which helps cut through grease, soap scum, and hard water stains. For general floor cleaning with vinegar, mix equal parts white vinegar and warm water in a spray bottle or bucket.
- For light daily mopping: Use this diluted solution. Spray a small section of the floor, then mop with a clean microfiber mop. Rinse the mop frequently. Dry the floor to prevent streaks.
- For tough spots: Apply undiluted white vinegar directly to the stain. Let it sit for a few minutes. Scrub with a soft brush and rinse well. Do not use vinegar on unsealed natural stone tiles like marble or travertine, as it can etch them. However, for ceramic or porcelain white tiles, it is generally safe.
Baking Soda Paste
Baking soda is a mild abrasive and a natural deodorizer. It is excellent for scrubbing without scratching. It works wonders on light stains and brightening grout.
- For surface stains: Mix baking soda with a little water to form a paste. Apply the paste to the stain. Gently scrub with a soft cloth or brush. Rinse thoroughly.
- For brightening grout: As mentioned earlier, a baking soda and hydrogen peroxide paste works wonders. The baking soda provides the abrasive action, and the peroxide helps lift stains.
Lemon Juice
Lemon juice is another natural acidic cleaner. It is effective for tackling mineral deposits and soap scum. It also leaves a fresh scent.
- Mix equal parts lemon juice and water. Use this solution for light mopping.
- For concentrated stains, apply pure lemon juice to the area. Let it sit for a few minutes before scrubbing and rinsing.
- Like vinegar, avoid lemon juice on unsealed natural stone tiles. It is generally safe for glazed ceramic or porcelain white tiles.
These natural solutions are a great alternative to commercial cleaners. They are budget-friendly and reduce your exposure to harsh chemicals. Always test them on an inconspicuous area first to ensure they are suitable for your specific white tile type.
Protecting Your White Tile Floors: Prevention is Key
Cleaning white tile floors is important, but preventing dirt and damage saves you effort. A proactive approach keeps your floors looking new for longer. Prevention stops problems before they start. It reduces the frequency of deep cleaning.
I always advise people to focus on prevention. It is much easier to prevent a stain than to remove it. These simple steps protect your investment in white tile.
Use Entry Mats and Rugs
Place mats at all entryways to your home. These mats trap dirt, dust, and moisture from shoes. This prevents these elements from being tracked onto your white tile floors. Choose mats with absorbent materials.
Consider placing rugs in high-traffic areas, like hallways or in front of the kitchen sink. Rugs protect the tile from wear and tear. They also absorb spills and prevent scuff marks. Make sure rugs have non-slip backings to prevent accidents.
Wipe Up Spills Immediately
This cannot be stressed enough. White tiles show every spill. Liquids, food, or chemicals can quickly stain if left to dry. Always have a clean cloth or paper towels handy. Blot spills gently, do not rub. Rubbing can spread the stain or push it deeper into the grout.
Quick action is the best defense against permanent stains. A few seconds of effort can save hours of scrubbing later. This simple habit keeps your floors looking pristine.
Apply Grout Sealer
As discussed, grout is porous and absorbs stains easily. Applying a high-quality grout sealer creates a protective barrier. This barrier repels water and prevents dirt from penetrating the grout lines.
- Clean the grout thoroughly before applying sealer.
- Follow the manufacturer’s instructions for application.
- Reapply the sealer every 1-2 years, especially in high-traffic areas or wet environments like bathrooms.
- Sealed grout resists stains, making routine cleaning much simpler.
Use Furniture Protectors
Heavy furniture legs can scratch or scuff white tiles. Attach felt pads or furniture glides to the bottom of chairs, tables, and other furniture. This protects your floors from scratches. It also makes moving furniture easier without damaging the tile.
Regular Dry Cleaning
Daily sweeping or vacuuming is your first line of defense. This removes loose dirt and grit before it can be ground into the tile or grout. This simple, quick task prevents buildup. It extends the time between wet cleanings. A few minutes each day saves a lot of work over time.
By implementing these preventative measures, you significantly reduce the amount of cleaning your white tile floors need. You also extend their lifespan and maintain their beautiful appearance.
Common Mistakes to Avoid When Cleaning White Tile
Cleaning white tile floors requires care. Using the wrong methods or products can damage your tiles. It can also make your cleaning efforts less effective. Knowing what to avoid is as important as knowing what to do. These mistakes can lead to dull floors or even permanent damage.
I have seen many people make these errors. Avoiding them ensures your white tiles stay beautiful and last longer. Learn from these common pitfalls.
Using Harsh Chemicals
Avoid strong acids or abrasive cleaners on your white tile floors.
- Bleach: While bleach can whiten grout, undiluted bleach or frequent use can weaken grout over time. It can also strip sealants from both tile and grout. Use it sparingly and diluted, or opt for oxygen bleach.
- Ammonia-based cleaners: These can dull the shine of glazed tiles. They can also leave a sticky residue that attracts more dirt.
- Oil-based cleaners or waxes: These can leave a slippery residue. They can also attract dirt, making your white floors look dingy.
Stick to pH-neutral cleaners or natural alternatives like vinegar and baking soda for most tasks.
Not Rinsing Thoroughly
Failing to rinse your floors properly is a common mistake. Leftover cleaning solution dries on the tile surface. This leaves a sticky film. This film attracts new dirt quickly, making your floors appear dull or streaky.
Always use a second bucket of clean water for rinsing. Change the rinse water often. Mop with clean water until no suds or residue remain. This ensures a truly clean, streak-free finish.
Using Abrasive Scrubbers
Avoid steel wool, abrasive pads, or highly abrasive powders on glazed white tiles. These can scratch the tile surface. Scratches dull the finish and make tiles harder to clean. They also create places for dirt to hide.
Use soft-bristle brushes for tiles. Use a dedicated grout brush for grout lines. For stubborn spots, rely on chemical action (like a paste) rather than aggressive scrubbing.
Letting Standing Water Dry
Leaving puddles of water to dry on your white tile can lead to water spots. This is especially true if you have hard water. Hard water contains minerals that leave white residue when dry.
Always dry your floors with a clean, dry mop or microfiber cloths after wet cleaning. This prevents water spots and ensures a sparkling, streak-free shine.
Ignoring Grout Lines
Focusing only on the tiles and ignoring the grout makes your floor look dirty overall. Dirty grout can harbor mold and mildew. It also detracts from the brightness of your white tiles.
Make grout cleaning a regular part of your deep cleaning routine. Use appropriate tools and cleaners for grout. Seal the grout to protect it after cleaning.
By avoiding these common mistakes, you protect your white tile floors. You also ensure your cleaning efforts produce the best results. Your white tiles will stay bright and beautiful for years.
FAQ Section
How often should I clean white tile floors?
You should sweep or vacuum white tile floors daily in high-traffic areas. Spot clean spills immediately. Mop high-traffic areas 2-3 times per week with a mild cleaner. Perform a deep clean of all tiles and grout monthly to maintain their brightness and prevent buildup.
What is the best cleaner for white tile floors?
A pH-neutral floor cleaner is best for regular use on white tile floors. For natural cleaning, a diluted white vinegar solution works well for many types of white tiles, especially ceramic and porcelain. For stubborn stains and grout, baking soda, hydrogen peroxide, or oxygen bleach solutions are effective.
Can I use bleach on white tile floors?
You can use a diluted bleach solution (1 part bleach to 10 parts water) for tough stains or to whiten grout. However, use it sparingly. Frequent or undiluted bleach can weaken grout over time and strip sealants. Always rinse thoroughly after use and test in an inconspicuous area.
How do I remove black scuff marks from white tile?
For light black scuff marks, use a pencil eraser and gently rub the mark away. For more stubborn scuffs, apply a small amount of rubbing alcohol to a clean microfiber cloth. Gently rub the scuff until it disappears. Wipe the area with a damp cloth afterward to remove residue.
Is steam cleaning safe for white tile and grout?
Yes, steam cleaning is generally safe and very effective for most white tile and grout. Steam helps loosen dirt and sanitize surfaces without chemicals. Always check your tile manufacturer’s recommendations first. Ensure you remove excess moisture and dry the floor after steam cleaning to prevent water spots.
How can I prevent my white grout from getting dirty quickly?
To prevent white grout from getting dirty, clean it regularly with appropriate grout cleaners. After cleaning, apply a high-quality grout sealer. This sealant creates a protective barrier, making the grout less porous and more resistant to dirt and stains. Reapply sealer every 1-2 years.
Conclusion
Keeping your white tile floors sparkling truly enhances your home’s appearance. It brings a fresh, clean feeling to any space. While white tiles require consistent care, the methods are straightforward and effective. Regular maintenance, coupled with strategic deep cleaning, ensures your floors remain bright and inviting.
Remember to sweep daily and act fast on spills. Embrace the power of pH-neutral cleaners, or natural options like vinegar and baking soda. Do not forget the grout; it plays a big role in your floor’s overall look. By following this guide on how to clean white tile floors, you will protect your investment. Your white tiles will continue to radiate beauty and cleanliness for years to come. Start your cleaning journey today for dazzling results.
- white tile
- tile cleaning
- floor cleaning
- grout cleaning
- home maintenance
- stain removal

Todd Martin
Senior Writer
With over 15 years of experience in home renovation and design, I started HEG to share what I’ve learned with homeowners who want to create spaces that are both beautiful and functional. I’ve always believed in a hands-on approach, and over the years, I’ve picked up practical solutions that actually work. Through HEG, I aim to make home improvement more approachable, sharing real tips that help you create a home you truly love.