· Kianna Connelly · Home Cleaning · 17 min read
How To Clean Inside Of Keurig

Unlock the Freshness: How to Clean Inside Your Keurig Brewer
A fresh cup of coffee is a wonderful way to start the day. Many of us rely on our Keurig brewers for this daily ritual. However, over time, mineral deposits and coffee residues build up inside the machine. This buildup affects taste and can shorten your Keurig’s life. Learning how to clean inside of Keurig coffee makers is essential for maintaining your brewer. This guide will walk you through the necessary steps. We will cover everything from descaling to cleaning removable parts. We will help you ensure every brew tastes its best.
Takeaway
Regularly cleaning the inside of your Keurig is vital for optimal performance and taste. Focus on these key areas:
- Descale monthly or every 3-6 months: Use vinegar or a descaling solution to remove mineral buildup.
- Clean removable parts weekly: Wash the water reservoir, drip tray, and K-cup holder by hand.
- Wipe down daily: Keep the exterior clean to prevent residue accumulation.
- Address specific issues: Tackle mold or stubborn clogs immediately.
To clean inside your Keurig, you need to descale it regularly with white vinegar or a descaling solution to remove mineral buildup. Additionally, thoroughly clean the water reservoir, K-cup holder, and drip tray. This comprehensive approach ensures clean lines, prevents mold, and maintains optimal coffee flavor.
Why Regular Keurig Cleaning Matters for Taste and Longevity
Your Keurig brewer works hard to deliver delicious coffee every day. But with each use, water leaves behind mineral deposits. Coffee oils and grounds can also accumulate in various parts. This internal buildup is often invisible to the eye. Yet, it greatly impacts the quality of your coffee.
These deposits, mainly from hard water, can clog the internal tubing and heating elements. This slows down brewing time. It also makes your machine work harder. Over time, this stress can lead to premature breakdowns. A clean Keurig lasts longer and runs more efficiently. My own Keurig started making weird noises before I realized it needed a good descaling.
Beyond performance, cleanliness directly affects taste. That fresh, pure coffee flavor comes from clean water passing through clean components. When minerals or old coffee oils line the internal pathways, they impart off-flavors to your brew. Your morning coffee might taste dull, bitter, or even have a strange aftertaste. You want your coffee to taste like coffee, not like hard water.
Regular cleaning prevents the growth of mold and bacteria. The warm, damp environment inside a coffee maker is a perfect breeding ground for these unwanted guests. Mold can hide in the water reservoir or internal lines. This poses a health risk. It also ruins the flavor profile of your coffee. A simple cleaning routine keeps your machine hygienic. This ensures your coffee is safe and delicious. This is why learning how to clean inside of Keurig machines is a necessary task for any coffee lover.
Essential Supplies for Deep Cleaning Your Keurig
Before you start cleaning your Keurig, gather all the necessary supplies. Having everything ready saves time and ensures a smooth cleaning process. Most of these items are common household products. You might already have them in your pantry. Using the right tools makes the job much easier.
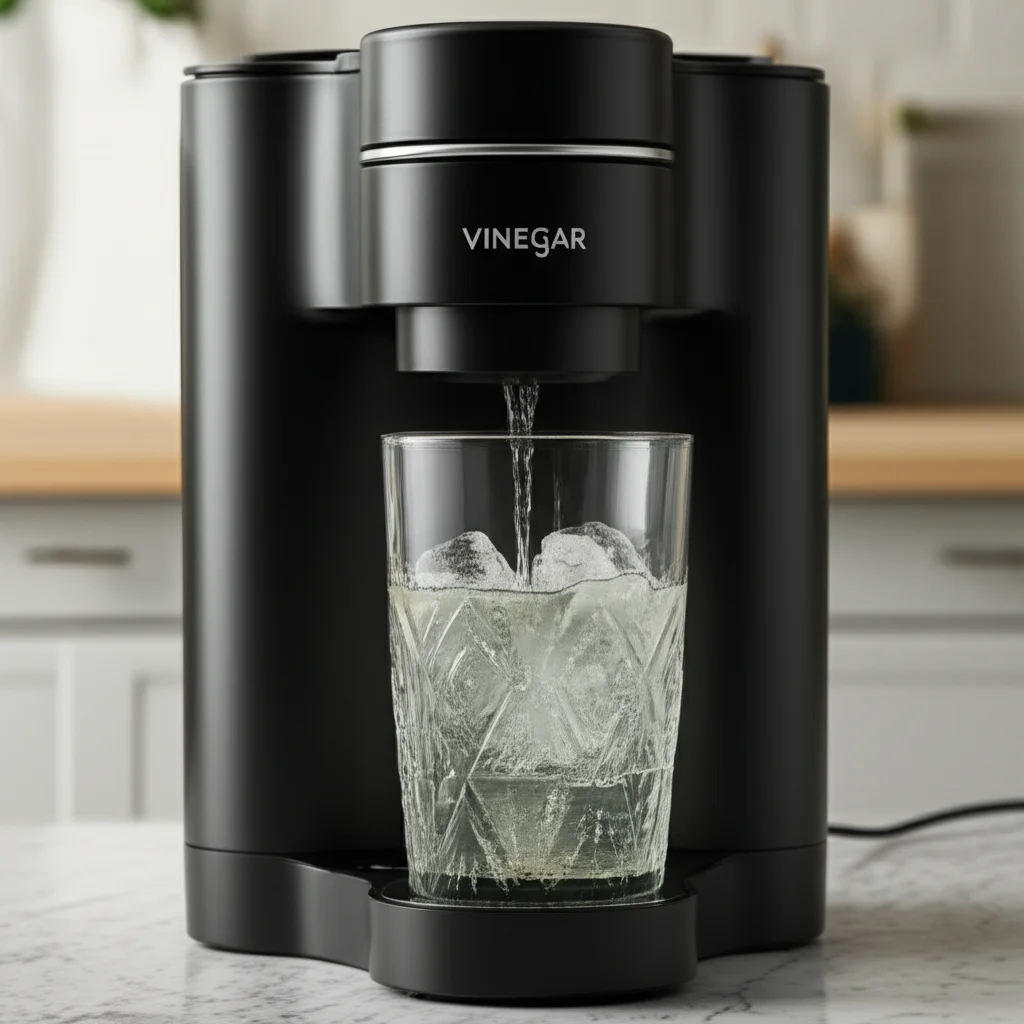
First, you will need white vinegar. This is a powerful, natural descaling agent. It breaks down mineral deposits effectively. White vinegar is also food-safe and readily available. Many people prefer it over harsh chemicals. You can also use a dedicated Keurig descaling solution. These solutions are formulated specifically for coffee makers. They might work faster for heavy buildup. Always follow the product instructions if you choose a commercial descaler.
Next, you will need fresh water. This is for rinsing cycles after descaling. Filtered water is ideal. It helps prevent new mineral buildup immediately. You will also need a large ceramic mug or bowl. This will catch the hot water during cleaning cycles. Make sure it can hold at least 10 ounces. You will also need a soft cloth or sponge. This is for wiping down surfaces. A microfber cloth works well. It cleans without scratching.
Finally, consider a small brush or paperclip. These are useful for clearing stubborn clogs in the K-cup needle. Sometimes, coffee grounds get stuck there. A toothpick can also work. Avoid anything too sharp that could damage the needle. Always unplug the machine before inspecting the needle. These simple tools help you clean inside Keurig brewers thoroughly.
- White Vinegar: An effective, natural descaling agent.
- Keurig Descaling Solution: An alternative, specially formulated for coffee makers.
- Fresh Water: For rinsing cycles after descaling.
- Large Ceramic Mug or Bowl: To catch water during cleaning.
- Soft Cloth or Sponge: For wiping down surfaces.
- Small Brush or Paperclip: To clear K-cup needle clogs.
Step-by-Step Guide to Descaling Your Keurig
Descaling is the most important step for cleaning the internal parts of your Keurig. This process removes the hard water mineral buildup. This buildup causes slow brewing and affects taste. I make sure to do this for my Keurig every month. This keeps it running perfectly.
Prepare for Descaling
- Unplug and Disassemble: First, turn off and unplug your Keurig brewer. Remove the water reservoir, drip tray, and K-cup holder. Wash these parts separately as instructed in the next section.
- Prepare Descaling Solution: If using white vinegar, fill the water reservoir with equal parts white vinegar and fresh water. For instance, if your reservoir holds 48 ounces, use 24 ounces of vinegar and 24 ounces of water. If you are using a Keurig descaling solution, follow the instructions on the package carefully. Typically, you pour the entire bottle into the reservoir, then fill the rest with water. You can find more detailed information on cleaning with vinegar at how to clean keurig with vinegar.
- Place Mug: Place a large ceramic mug on the drip tray. Make sure it can hold at least 10 ounces of liquid.
Run the Descaling Cycle
- Start Brew Cycle: Plug in your Keurig. Press the power button. Once the brewer is on, lift and close the K-cup handle without inserting a K-cup. Select the largest brew size setting.
- Run Multiple Cycles: Begin the brewing process. The vinegar solution will run through the machine. Empty the mug after each cycle. Repeat this process until the “add water” light comes on. This means the reservoir is empty. The vinegar works to break down mineral deposits during these cycles.
- Rest and Repeat (Optional): Some guides suggest letting the brewer sit for 30 minutes after the initial cycles. This allows the vinegar to work longer. After resting, run any remaining solution through the machine.
Rinse Cycles
- Rinse Reservoir: Empty and thoroughly rinse the water reservoir with fresh water. Fill it with fresh, filtered water up to the max fill line.
- Run Fresh Water Cycles: Place a large mug on the drip tray. Run several brew cycles using only fresh water. Repeat this process at least 12 times, or until the water no longer smells like vinegar. You want to flush all traces of the descaling solution. My first rinse tasted like vinegar. So, I ran many more cycles. This ensures your coffee tastes clean.
- Final Wipe Down: Unplug the machine. Wipe down the exterior with a soft, damp cloth. Reassemble all the parts. Your Keurig is now descaled and ready for brewing. You will notice a difference in brew speed and coffee taste.
Cleaning the Removable Parts of Your Keurig
While descaling handles the internal pipes, other parts of your Keurig also need attention. The water reservoir, drip tray, and K-cup holder accumulate residues. These parts are easy to remove and clean. Regular cleaning of these components improves hygiene. It also prevents mold growth and ensures the best coffee taste.
Water Reservoir Cleaning
The water reservoir holds the water for your coffee. It is crucial to keep it clean. Mold or algae can grow in standing water. I clean mine every week. This prevents any issues.
- Empty and Remove: First, empty any remaining water from the reservoir. Detach it from the Keurig brewer.
- Wash with Soap and Water: Use warm, soapy water and a soft cloth or sponge to wash the inside and outside of the reservoir. For hard-to-reach areas, you can use a bottle brush. Do not use abrasive scrubbers. They can scratch the plastic.
- Rinse Thoroughly: Rinse the reservoir completely under running water. Make sure no soap residue remains. Soap residue can affect coffee taste.
- Dry Completely: Allow the reservoir to air dry completely before returning it to the brewer. Or, dry it with a clean, lint-free cloth. This prevents new mold growth.
Drip Tray and K-Cup Holder Cleaning
The drip tray catches spills and overflows. The K-cup holder comes into direct contact with coffee grounds. Both need regular cleaning.
- Remove and Disassemble: Remove the drip tray from its slot. If your K-cup holder is removable, detach it from the brewer. Some K-cup holders separate into two pieces.
- Wash with Soap and Water: Wash the drip tray and K-cup holder with warm, soapy water. Use a sponge or soft brush to clean all surfaces. Pay attention to crevices where coffee grounds might hide.
- Clean the Exit Needle: This is a key area. The exit needle is inside the K-cup holder. It punctures the bottom of the K-cup. Coffee oils and grounds can accumulate here.
- Unplug the Keurig: Always unplug the machine first.
- Lift Handle: Lift the K-cup handle fully.
- Inspect Needle: Look for blockages in the exit needle.
- Clear with Paperclip: Carefully insert a straightened paperclip or a small brush into the needle. Move it around gently to dislodge any debris. Be careful not to damage the needle.
- Rinse and Dry: Rinse all parts thoroughly under clean water. Ensure all soap is gone. Let them air dry or wipe them with a clean cloth before reassembling them on your Keurig.
Cleaning these removable parts regularly complements the descaling process. It keeps your entire system clean. This ensures hygienic and great-tasting coffee.
Tackling Stubborn Mineral Buildup and Mold in Your Keurig
Sometimes, standard cleaning might not be enough. Stubborn mineral buildup can remain after descaling. Mold might also appear in hard-to-reach areas. Addressing these issues ensures a truly clean Keurig. I once found mold in my Keurig’s water lines. It needed extra care.
Dealing with Persistent Mineral Buildup
If your Keurig still brews slowly or displays descaling warnings after one cycle, it likely has significant mineral buildup.
- Repeat Descaling: Run the descaling process again. This time, use a stronger solution. You can use undiluted white vinegar for particularly stubborn cases. Fill the reservoir entirely with white vinegar. Run several large cup cycles. Let the machine sit for 30 minutes after each cycle. This allows the vinegar to dissolve more deposits.
- Use Commercial Descaler: If vinegar does not work, consider a stronger commercial Keurig descaling solution. These are often more potent. They are designed to break down heavy calcium deposits. Always follow the manufacturer’s instructions. They usually involve specific dilution ratios and resting times.
- Check Internal Hoses: While difficult to access, very thick buildup can occur in the internal hoses. If your machine is still struggling, it might be time for professional servicing. Or, consider replacing the unit if it is old. Persistent blockages often indicate a need for deeper internal cleaning or part replacement.
Eliminating Mold and Mildew
Mold thrives in dark, damp environments. A Keurig’s water reservoir and internal lines are perfect places. You might see black specks or notice a musty smell.
- Initial Cleaning: If you spot visible mold in the water reservoir, remove it. Wash it thoroughly with warm, soapy water. Use a soft brush to scrub away all visible mold. Rinse it completely.
- Vinegar Soak for Reservoir: For stubborn mold, fill the reservoir with undiluted white vinegar. Let it sit for at least an hour, or even overnight. The acidity of the vinegar kills mold and prevents its return. Vinegar is a strong tool for cleaning mold in many household items. You can learn more about its uses here: how to clean mold with vinegar.
- Vinegar Flush for Internal Lines: To address mold in internal lines, perform a full descaling cycle using undiluted white vinegar. Run several brew cycles. Then, let the machine sit for 30 minutes. Repeat this process until all vinegar is used up.
- Rinse Thoroughly: After using vinegar, it is crucial to run at least 12 cycles of fresh water through the machine. This flushes out all vinegar and dead mold spores. You do not want mold or vinegar in your coffee.
- Preventive Measures: To prevent future mold growth, always empty the water reservoir when the Keurig is not in use for extended periods. Leave the lid open to allow air circulation. Dry the reservoir completely after each cleaning.
Dealing with persistent issues requires patience. But a thorough cleaning ensures a safe and clean coffee brewing experience. Remember that a clean Keurig means better coffee.
Maintaining Your Keurig: Daily and Weekly Cleaning Habits
Regular maintenance prevents major cleaning headaches. Daily and weekly habits keep your Keurig in top shape. This ensures consistent performance and taste. I’ve found that a little effort each day saves a lot of time later.
Daily Cleaning Habits
These quick steps help prevent buildup and keep your machine fresh.
- Wipe Down the Exterior: After your last brew, quickly wipe down the outside of your Keurig. Use a soft, damp cloth. This removes splashes and dust. This prevents coffee residue from hardening.
- Empty and Rinse Drip Tray: The drip tray collects drips and small spills. Empty it daily. Rinse it under warm water. This prevents coffee and water from sitting there. This stops mold growth.
- Empty Remaining Water (If Not Daily Use): If you do not use your Keurig every day, empty the water reservoir. Stagnant water can lead to mold and a stale taste. Leaving the reservoir empty ensures fresh water for your next brew. This is important for those who only use their Keurig on weekends.
Weekly Cleaning Habits
These steps go a bit deeper and are essential for preventing mineral and mold issues.
- Wash Removable Parts: Once a week, fully remove and wash the water reservoir, lid, and K-cup holder. Use warm, soapy water. Rinse them thoroughly. Let them air dry. This removes coffee oils and potential mold spores. Pay extra attention to the K-cup holder. Grounds can get stuck.
- Clean the Entry and Exit Needles: The needles are critical for brewing. Over time, coffee grounds and oils can clog them.
- Entry Needle (Top): Unplug the Keurig. Lift the K-cup handle. You will see the needle where the K-cup is punctured. Use a straightened paperclip to gently clear any debris.
- Exit Needle (Bottom of K-cup Holder): If your K-cup holder detaches, clean the exit needle on the bottom. Use a paperclip to poke through any blockages. Be gentle. Do not bend or damage the needles.
- Wipe Inside the K-Cup Holder Area: Use a damp cloth to wipe inside the area where the K-cup sits. This removes any stray coffee grounds. This also helps keep the area clean.
Adopting these small habits ensures your Keurig stays clean. This extends its life. It also ensures every cup of coffee is as delicious as the first. This routine is part of how to clean inside of Keurig for long-term health.
Common Keurig Cleaning Mistakes to Avoid
While cleaning your Keurig seems straightforward, some common mistakes can damage your machine or leave it less clean than desired. Avoiding these pitfalls ensures an effective and safe cleaning process. I have learned some of these lessons the hard way.
Using Harsh Chemicals or Abrasives
One of the biggest mistakes is using harsh cleaning chemicals. Bleach, ammonia, or strong detergents can damage plastic components. They can also leave harmful residues. These residues can end up in your coffee. Abrasive scrubbers or steel wool scratch surfaces. These scratches provide places for bacteria to grow.
- Solution: Stick to white vinegar or a Keurig-approved descaling solution for internal cleaning. For external and removable parts, mild dish soap and warm water are sufficient. Use soft cloths or sponges.
Neglecting Rinse Cycles
After descaling with vinegar or a commercial solution, it is easy to cut corners on the rinse cycles. If you do not rinse thoroughly, leftover descaler will affect the taste of your coffee. It might even be harmful. My coffee once tasted strongly of vinegar because I rushed this step.
- Solution: Always run at least 12 full cycles of fresh water through your Keurig after descaling. Continue until no odor or taste of the cleaning solution remains. This ensures all residues are flushed out.
Not Cleaning All Removable Parts
Many people focus only on descaling. They forget about the water reservoir, drip tray, and K-cup holder. These parts accumulate coffee oils, mineral residue, and even mold. Ignoring them means your Keurig is not truly clean.
- Solution: Make weekly cleaning of all removable parts a standard practice. Disassemble them. Wash them with soap and water. Dry them completely. This prevents growth of mold and keeps your machine hygienic.
Ignoring the Needles
The entry and exit needles are vital. They can easily clog with coffee grounds or mineral deposits. A clogged needle prevents proper water flow. It can lead to weak coffee or brewing issues.
- Solution: Regularly inspect the needles. Use a straightened paperclip or a specialized tool to gently clear any blockages. Always unplug the machine before doing this.
Waiting Too Long Between Cleanings
Delaying cleaning allows mineral buildup to harden. It also gives mold a chance to establish itself. A heavily soiled Keurig is much harder to clean. It might even sustain permanent damage.
- Solution: Follow a regular cleaning schedule. Descape your Keurig every 3-6 months. Clean removable parts weekly. Perform daily wipe-downs. This proactive approach saves time and extends the life of your brewer.
Avoiding these common mistakes ensures your how to clean inside of Keurig efforts are effective. This keeps your coffee tasting fresh and your machine working well.
Frequently Asked Questions About Cleaning Your Keurig
How often should I clean my Keurig?
You should descale your Keurig every 3 to 6 months, or more often if you have hard water or use the machine daily. The descaling light on newer models will alert you. For removable parts like the water reservoir and drip tray, weekly cleaning with soap and water is ideal. This prevents coffee oil and mineral buildup.
Can I use bleach to clean my Keurig?
No, you should never use bleach or harsh chemicals to clean the inside of your Keurig. Bleach can damage the internal components. It is also very difficult to rinse out completely. Residues can be harmful if ingested. Stick to white vinegar or a Keurig-approved descaling solution for internal cleaning.
What if my Keurig still tastes bad after cleaning?
If your coffee still tastes off after cleaning, run more plain water rinse cycles. This helps flush out any lingering cleaning solution. Ensure you thoroughly cleaned the K-cup holder and needles. Stubborn mineral buildup might require another descaling cycle or using a commercial descaling solution. Check your water source too; filtered water can improve taste.
Do I need a special descaling solution?
You do not always need a special descaling solution. White vinegar works effectively as a natural descaler. Mix equal parts white vinegar and water for descaling. However, if you have very hard water or significant buildup, a commercial Keurig descaling solution can be more potent. Follow its specific instructions.
How do I clean the needle/K-cup holder?
First, unplug your Keurig. Remove the K-cup holder. If it separates, take it apart. Use warm, soapy water and a small brush to clean the holder. For the entry and exit needles, carefully use a straightened paperclip to gently poke through any visible clogs. Be very careful not to damage the needles. Rinse thoroughly after.
What causes mold in my Keurig?
Mold grows in damp, dark environments with stagnant water. If you leave water in your Keurig’s reservoir for extended periods, or if the machine is not dried properly after cleaning, mold can develop. Using tap water instead of filtered water can also contribute, as tap water may contain more impurities that feed mold. Regular cleaning and drying prevent mold.
Conclusion
Keeping your Keurig brewer clean is not just about hygiene; it is about enjoying the best possible coffee experience. You have learned how to clean inside of Keurig machines effectively. We covered everything from routine descaling to tackling stubborn issues like mineral buildup and mold. Remember, a clean machine operates more efficiently. It lasts longer. Most importantly, it brews coffee that tastes exactly as it should—pure and delicious.
Regular maintenance, like weekly cleaning of removable parts and consistent descaling, prevents major problems. It also ensures that every cup from your Keurig is a perfect brew. Do not let hidden buildup compromise your morning ritual. Take the time to implement these cleaning steps. Your Keurig will thank you with consistently fresh, flavorful coffee. Embrace these simple habits, and savor the difference a clean Keurig makes every single day.
- Keurig cleaning
- coffee maker maintenance
- descaling Keurig
- clean Keurig
- coffee machine care

Kianna Connelly
Cleaning Expert
With a background in hospitality management and a passion for professional organizing, I’ve dedicated my career to helping people create cleaner, calmer living spaces. At HEG, I design efficient, eco-friendly cleaning systems that not only save time but also deliver spotless, lasting results. I believe that a well-organized home brings peace of mind—and I’ve had the privilege of transforming thousands of homes with practical strategies that truly work. Whether it’s streamlining routines or tackling the toughest messes, I’m here to make clean living simple and sustainable.