· Todd Martin · Electronics Maintenance · 21 min read
How To Clean Iphone Charging Port
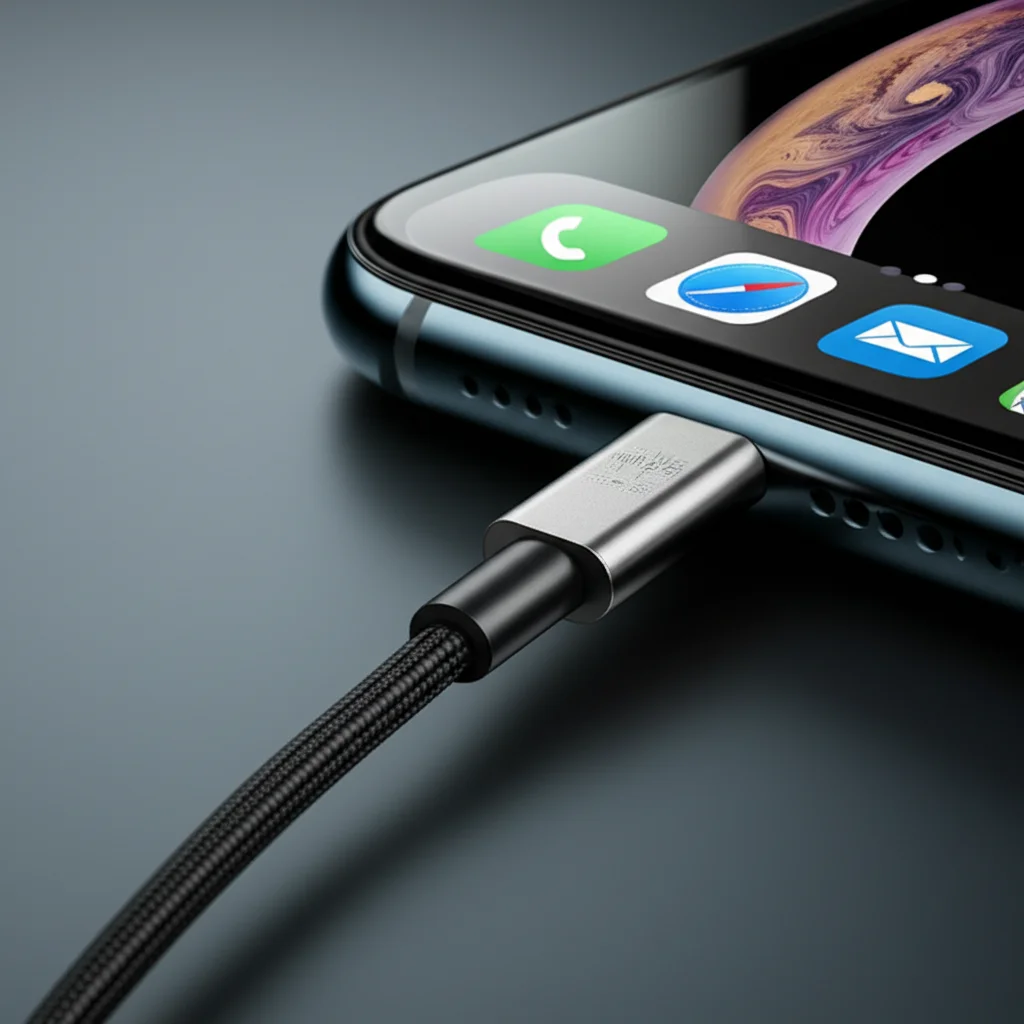
Restore Charging: How to Clean Your iPhone Charging Port Safely
Have you ever plugged in your iPhone, only to find it refuses to charge? A common culprit is often a dirty or obstructed charging port. Over time, lint, dust, and debris collect inside the tiny opening, blocking the connection between your phone and the charging cable. Knowing how to clean an iPhone charging port correctly is important. This simple task can often fix charging problems without a trip to a repair shop.
I understand the frustration of a non-charging phone. It feels like your lifeline is cut off. In this guide, I will walk you through safe, effective methods to clean your iPhone charging port. We will discuss why debris accumulates, what tools to use, and step-by-step instructions for cleaning. I will also provide tips for preventing future blockages and tell you when professional help is needed. Let us get your iPhone charging again!
Takeaway
- Accumulated lint and dust often prevent your iPhone from charging properly.
- Use non-conductive tools like wooden toothpicks or plastic dental picks to clean the port.
- Compressed air can help, but use it carefully and in short bursts.
- Always power off your iPhone before cleaning the charging port.
- Regular cleaning and proper storage can prevent future charging issues.
Clear Your Charging Port: Simple Steps for Your iPhone
You can clean your iPhone charging port by carefully removing accumulated lint and debris. Power off your device first. Use a non-conductive tool like a wooden toothpick or a plastic dental pick to gently scrape out the foreign material. Finish with short bursts of compressed air, if available, to clear loose particles.
Why Your iPhone Charging Port Gets Dirty
Your iPhone goes everywhere with you. It sits in your pocket, purse, or on dusty surfaces. Because of this, its charging port acts like a magnet for tiny particles. These particles include lint from clothing, dust from the environment, and small bits of debris. They slowly pack themselves into the port. This buildup creates a barrier. It prevents the charging cable from making full contact with the internal pins.
This problem is very common. Many iPhone users experience charging issues due to a dirty port before any hardware failure. Recognizing this as the cause can save you time and money. A blocked port means your phone either charges slowly, intermittently, or not at all. Understanding this process helps you see why regular checks are important. It helps you keep your device in good working order.
Common Sources of Debris
Where does all this stuff come from? Pockets are a major source. Lint from jeans or coats easily finds its way into the small opening. Bags and purses also contain a lot of dust and crumbs. Even leaving your phone on a dusty table can contribute. The design of the Lightning port (or USB-C on newer models) makes it easy for debris to get trapped. It is a small, open space.
- Pocket Lint: The most frequent culprit. It compacts easily inside the port.
- Dust: Airborne dust settles into any open space on your device.
- Small Debris: Tiny crumbs, dirt, or sand can enter the port.
- Fabric Fibers: Loose threads from clothes or soft cases.
Regular cleaning helps maintain good connectivity. It ensures your phone charges efficiently. Ignoring the problem can lead to frustration. It might also lead to wear and tear on the port itself. A clean port helps your iPhone last longer. It keeps it ready for use whenever you need it.
Essential Tools for Cleaning Your iPhone Charging Port Safely
Before you start, gather the right tools. Using the wrong tools can damage your iPhone’s delicate internal components. Safety is key when cleaning any electronic device. You want tools that are non-conductive and small enough to fit. They should not scratch the metal pins inside the port. I always choose tools that are readily available and safe for this task.
You might already have most of these items at home. There is no need for specialized, expensive equipment. Simple household items work best. They allow for careful and effective cleaning. Having everything ready before you begin saves time. It also ensures a smoother cleaning process. Let us look at what you will need.
Recommended Cleaning Tools
Selecting the right tools is important for a successful and safe cleaning. Here is a list of what I recommend:
- Wooden Toothpick: This is my top choice. It is soft enough not to scratch metal, but firm enough to dislodge compacted lint. Make sure it has a fine, pointed tip.
- Plastic Dental Pick (Interdental Brush): Similar to a toothpick, these are non-conductive. Their small brushes or flexible tips can be good for sweeping out loose debris.
- Compressed Air Can (for Electronics): Use this with extreme caution. Short, controlled bursts from a distance can blow out dust. Avoid inhaling the air or spraying too close.
- Small, Soft-Bristled Brush: A clean, dry, soft toothbrush or a fine artist’s brush works well for sweeping out loose dust. Make sure it is completely dry.
- Good Lighting: A desk lamp or flashlight helps you see inside the dark port.
- Magnifying Glass (Optional): This can help you see tiny particles more clearly.
Avoid using metal objects like paper clips or needles. These can easily short-circuit the port or scratch the delicate charging pins. Avoid cotton swabs. They often leave behind more lint than they remove. For similar cleaning scenarios, knowing how to clean a phone charging port generally applies to various devices.
Step-by-Step Guide: Cleaning Your iPhone Charging Port with a Toothpick
Cleaning your iPhone’s charging port does not need to be intimidating. With the right approach and a steady hand, you can do it yourself. This method focuses on using a wooden toothpick, which is one of the safest options. I have personally used this technique many times. It often brings dead charging ports back to life. Always remember to prioritize safety. Your iPhone is a valuable device.
Before you start, turn off your iPhone. This step is critical. It prevents any accidental short circuits or damage while you are working inside the port. Unplug any cables connected to the phone. Find a well-lit area. You need to see clearly inside the small, dark port. This preparation ensures you can work effectively and safely.
The Toothpick Method: A Detailed Walkthrough
This method is precise and effective for compacted lint.
- Power Off Your iPhone: Hold down the power button and slide to power off. Wait for the screen to go completely black. This is your most important safety step.
- Illuminate the Port: Use a flashlight or a strong desk lamp. Angle the light so you can see inside the charging port. You will likely see a surprising amount of lint and dust.
- Insert the Toothpick Carefully: Take your wooden toothpick. Gently insert the tip into the charging port. Do not force it. Angle the toothpick so it goes along one of the flat sides of the port, not directly down onto the pins.
- Scrape Gently: Once inside, slowly and gently scrape along the inner walls of the port. Imagine you are scooping out compacted lint. You will often feel a soft resistance. This is the debris. Work from one side to the other.
- Remove Debris: After each pass, pull the toothpick out. You should see lint or dust clinging to the tip. Remove it. You may need to repeat this process several times. Keep scraping until no more debris comes out. Pay special attention to the very back of the port, where the charging pins are. This is where most compacted lint resides.
- Check Connectivity: Once you feel confident the port is clean, plug in your charging cable. See if your iPhone begins to charge. If it does, great! If not, recheck for any remaining debris. Sometimes a tiny bit of lint can still block the connection. This technique is similar to how you would clean a phone charger port on the cable itself, ensuring both ends are clear.
Remember, patience is key. Do not rush the process. A gentle touch prevents damage to the delicate pins inside. If you are cleaning an iPhone with a USB-C port, the principle is the same, but the port shape is different. For specific instructions on that, you might look into how to clean a USB-C charging port.
Using Compressed Air to Clear Debris from Your iPhone Charging Port
While the toothpick method is excellent for compacted lint, compressed air can be useful for loose dust and particles. It offers a non-contact cleaning method. However, it requires careful handling. Using compressed air incorrectly can harm your iPhone or even yourself. I have seen many people misuse compressed air, so pay close attention to these guidelines.
Compressed air works by blasting away loose material. It is effective for dust that has not yet compacted tightly. Think of it as a final sweep after a more thorough cleaning. Or, use it for light, routine maintenance. Never use your mouth to blow into the port. Your breath contains moisture, which can damage internal electronics.
Safe Application of Compressed Air
Follow these steps for a safe and effective compressed air cleaning:
- Power Off Your iPhone: Again, this is essential. Always turn off your device before any cleaning inside sensitive areas.
- Use Electronics-Specific Compressed Air: Do not use industrial air compressors. Buy a can of compressed air designed for electronics. These cans come with a thin straw.
- Hold the Can Upright: Always hold the can upright during use. Tilting it can cause propellants to spray out. These propellants can leave residue or cause extreme cold, damaging your phone.
- Short Bursts, from a Distance: Do not blast the port with a long, continuous spray. Hold the can a few inches away from the port. Use very short, controlled bursts of air. Aim across the port, not directly into it. This helps dislodge debris without pushing it deeper.
- Angle the Spray: Try different angles. This can help dislodge stubborn particles from various sides of the port.
- Avoid Direct Pressure: Do not press the straw directly against the port. The goal is to create airflow, not to force air directly into the phone’s interior.
- Check for Charge: After a few bursts, plug in your charger. Check if the connection is restored. If not, repeat the short bursts or consider the toothpick method again if you suspect compacted lint.
Some experts caution against compressed air entirely due to the risk of moisture or freezing propellants. However, when used carefully, it can be a quick solution for light dust. If you prefer to avoid air entirely, the toothpick method is always a safe bet. When considering all aspects of cleaning, remember that a similar cautious approach applies to cleaning an iPad charger port as well, given the similar port design.
What to Do When Your iPhone Charging Port is Still Not Working
You have cleaned your iPhone charging port thoroughly. You have used toothpicks and compressed air. Yet, your iPhone still refuses to charge. This is definitely frustrating. At this point, the problem might not be just lint. Other issues could be preventing your phone from charging. It is important to troubleshoot further before assuming the worst. Sometimes the issue lies with the accessories or software, not just the port itself.
Do not despair if the cleaning did not immediately solve the issue. There are several other steps you can take. These steps help you identify the real problem. They can often provide a solution without needing a professional repair. I always advise ruling out the simplest causes first. This saves you time and potential repair costs.
Troubleshooting Beyond Cleaning
If cleaning the port did not work, try these diagnostic steps:
- Try a Different Cable and Adapter: This is the first thing I check. A faulty charging cable or wall adapter is a very common cause of charging issues. Cables can fray internally, even if they look fine. Adapters can fail. Try a known good Apple-certified cable and adapter. Borrow one from a friend or family member if you do not have a spare.
- Check the Power Source: Make sure the wall outlet is working. Plug another device into it. Sometimes, a dead outlet is the culprit, not your phone.
- Restart Your iPhone: A simple restart can fix many software glitches. Sometimes, a software bug prevents the phone from recognizing the charger. Power off your iPhone completely, wait a minute, then turn it back on.
- Force Restart Your iPhone: If a regular restart does not work, try a force restart. The method varies by iPhone model:
- iPhone 8 or later (including iPhone SE 2nd/3rd gen, iPhone X, 11, 12, 13, 14, 15): Quickly press and release the Volume Up button. Quickly press and release the Volume Down button. Then, press and hold the Side button until you see the Apple logo.
- iPhone 7/7 Plus: Press and hold both the Volume Down and Sleep/Wake buttons simultaneously until you see the Apple logo.
- iPhone 6s or earlier (including iPhone SE 1st gen): Press and hold both the Home and Sleep/Wake buttons simultaneously until you see the Apple logo.
- Check for Software Updates: Ensure your iPhone is running the latest iOS version. Software bugs can affect charging performance. Go to Settings > General > Software Update.
- Inspect the Charging Cable Tip: Look closely at the metal tip of your charging cable. Is it bent, corroded, or dirty? Sometimes the cable itself needs cleaning. You might use a dry cloth to wipe it gently.
If after all these steps your iPhone still does not charge, the issue might be more serious. It could be a damaged port, battery issue, or another internal hardware problem. At that point, professional help is the next step.
Prevention Tips: Keeping Your iPhone Charging Port Clean
An ounce of prevention is worth a pound of cure, especially when it comes to your iPhone’s charging port. Cleaning it is effective, but preventing debris from getting in there in the first place is even better. I make an effort to keep my own devices clean. It prolongs their life and ensures consistent performance. Small habits can make a big difference over time.
Think about how and where you store your phone. This plays a huge role in how much lint and dust it collects. A little mindfulness goes a long way. These tips are simple to implement. They do not require extra tools or much effort. They just need a slight change in your routine.
Simple Habits for a Cleaner Port
Here are some effective ways to keep your iPhone’s charging port clean:
- Use a Case with a Port Cover: Many iPhone cases come with a small flap or plug that covers the charging port. This is an excellent barrier against lint, dust, and moisture. It adds a layer of physical protection.
- Store Your Phone Smartly:
- Avoid Loose Pockets: If your pockets are full of lint, your phone will pick it up. Try storing your phone in a dedicated, cleaner pocket.
- Use a Clean Compartment in Bags: If you carry your phone in a bag or purse, place it in a separate, clean compartment. Avoid putting it with loose change, tissues, or snack crumbs.
- Screen-Side Down (Carefully): When placing your phone on a surface, putting it screen-side down (if safe) can protect the port from airborne dust. Ensure the surface is clean and soft.
- Regular, Gentle Wipes: Occasionally, take a soft, dry, lint-free cloth (like a microfiber cloth) and gently wipe around the exterior of the charging port. This can remove surface dust before it has a chance to migrate inside. This is similar to how you would clean an iPhone screen protector for dust.
- Consider a Charging Pad (Wireless Charging): If your iPhone supports wireless charging (iPhone 8 and later), using a Qi-compatible charging pad can reduce the wear and tear on your physical charging port. You would plug and unplug your cable far less often. This means less opportunity for debris to be pushed in or for the port to wear out.
These practices help maintain your iPhone’s charging capability. They also contribute to the overall longevity of your device. Taking care of small details now saves you from bigger problems later. A clean port ensures your phone is always ready to go.
When to Seek Professional Help for Charging Port Issues
You have tried everything. You cleaned the port meticulously. You swapped cables and adapters. You even restarted your phone multiple times. Still, your iPhone is not charging. At this point, it is time to consider professional help. Some problems are beyond simple DIY fixes. Attempting more invasive repairs yourself can cause irreversible damage. I always advise knowing your limits when it comes to electronics.
Apple’s iPhone hardware is sophisticated and delicate. The charging port itself is soldered onto the logic board. Damage to these components needs specialized tools and expertise. Bringing it to a professional ensures the repair is done correctly and safely. It also protects your iPhone’s warranty, if it is still active.
Recognizing When a Repair Shop is Needed
Here are signs it is time to take your iPhone to a professional:
- Persistent Charging Failure: If your iPhone still does not charge after thorough cleaning and troubleshooting, the problem is likely hardware-related.
- Loose Charging Cable: If your charging cable feels very loose or wobbly when plugged in, even after cleaning, the internal components of the port might be damaged or bent. This often means the pins are no longer making proper contact.
- Visible Port Damage: You might see bent pins, cracks, or other physical damage inside the port. Do not try to bend pins back yourself. This requires precision.
- Overheating During Charging: If your iPhone or the charging cable gets unusually hot while trying to charge, unplug it immediately. This could indicate a short circuit or battery issue, which is a serious safety concern.
- “Accessory Not Supported” Message (after cleaning): If you keep getting this message, even with a genuine Apple cable, it could point to an electrical fault in the port.
- Water Damage: If your iPhone has been exposed to water, any charging issues need immediate professional attention. Do not attempt to charge it. Water can cause corrosion and short circuits.
Where to Get Professional Help
- Apple Store or Authorized Service Provider: This is always my first recommendation. Apple technicians are trained to repair iPhones. They use genuine parts and their work is guaranteed. If your iPhone is under warranty or AppleCare+, this is your best option.
- Reputable Third-Party Repair Shop: If your warranty has expired, a good independent repair shop can be a more affordable option. Look for shops with positive reviews and certified technicians. Ask about their warranty on repairs and parts.
Be clear about the steps you have already taken. Tell them you tried to clean your iPhone charging port with alcohol (if you did, though this is generally not recommended unless you are very careful and know it evaporates quickly). Explain all your troubleshooting steps. This helps the technician diagnose the problem faster. A professional assessment protects your device and your wallet.
Keeping Other iPhone Components Clean for Optimal Performance
While we are focusing on the charging port, it is important to remember that other parts of your iPhone also need attention. Dust, dirt, and grime can accumulate in other openings. These can affect speaker quality, microphone performance, and even button responsiveness. A holistic approach to cleaning keeps your entire device running smoothly. Just as a dirty port impacts charging, a dirty speaker affects calls.
Taking a few minutes to clean these other areas can prevent future issues. It helps maintain the overall functionality and resale value of your iPhone. I find that regular light cleaning of all ports and openings is far better than waiting for a problem to arise. It is part of good device ownership.
Cleaning Your iPhone’s Speakers and Other Ports
- Speakers and Microphones: The small grilles for your earpiece, bottom speakers, and microphone can get clogged with earwax, dust, and lint.
- Method: Use a soft-bristled brush (like a new, clean toothbrush or a small artist’s brush) to gently brush away debris. Brush outwards from the speaker grille. You can also use a wooden toothpick, very gently, to dislodge compacted grime in the corners of the grilles. Avoid pushing debris further in. This is similar to how to clean a speaker on an iPhone generally. For the bottom ones, specifically, it’s like how to clean iPhone bottom speakers.
- Compressed Air: Use short, controlled bursts of compressed air from a distance, aimed across the speaker grilles. Do not spray directly into them.
- Volume and Power Buttons: The tiny gaps around these buttons can collect dirt, making them sticky or unresponsive.
- Method: Use a dry, soft brush or a dry microfiber cloth to wipe around the button edges. For more stubborn grime, you can lightly dampen a corner of a cloth with isopropyl alcohol (99% pure) and gently wipe around the buttons, being careful not to let liquid seep into the phone. This can be helpful for issues like how to clean volume buttons on iPhone.
- Headphone Jack (Older Models): If your iPhone has a 3.5mm headphone jack, it can also collect lint.
- Method: Use a wooden toothpick or a blast of compressed air to clear it out.
- SIM Card Tray: While not a “port” in the traditional sense, the SIM card tray slot can also attract dust. When you occasionally remove the SIM card, gently wipe around the slot with a dry cloth.
Regular, gentle cleaning of all these areas contributes to your iPhone’s overall health. It prevents minor annoyances from becoming major problems. Keep your iPhone clean, and it will serve you better for longer.
Frequently Asked Questions About Cleaning iPhone Charging Ports
How often should I clean my iPhone charging port?
It depends on how you use your phone. If you carry it in a linty pocket often, I would recommend checking and cleaning it every few months. If you use a case with a port cover, you might only need to clean it once a year or when you notice charging issues. Regular checks are always good.
Can I use rubbing alcohol to clean my iPhone charging port?
Apple generally advises against using liquids for cleaning ports. While some people report success using a small amount of 99% isopropyl alcohol on a cotton swab (never directly spraying), I do not recommend it for novice users. Alcohol can damage internal components if it seeps in. Stick to dry cleaning methods like toothpicks and compressed air first. For more information, see how to clean an iPhone charging port with alcohol.
What are the dangers of using metal objects to clean the port?
Using metal objects like paper clips or needles is highly dangerous. The charging port contains delicate metal pins. A metal object can scratch, bend, or break these pins. It can also cause a short circuit, potentially damaging your iPhone’s logic board or even causing a spark. Always use non-conductive materials like wood or plastic.
How do I know if my charging port is damaged versus just dirty?
A dirty port usually prevents charging or causes intermittent charging. A damaged port might show visible bent pins, or the charging cable might feel very loose. If cleaning does not fix the issue, and you have tried different cables and adapters, physical damage is likely. Professional inspection is best in this case.
Will cleaning the charging port void my iPhone’s warranty?
Cleaning the port gently with a non-conductive tool like a wooden toothpick will generally not void your warranty. However, causing damage during cleaning, especially with metal objects or liquids, could void it. If you are unsure, or if your phone is still under warranty, consider taking it to an Apple Store.
My iPhone charges wirelessly but not with a cable. What does this mean?
This often indicates a problem specifically with the physical charging port or the charging circuit connected to it. Since wireless charging uses a different mechanism, if it works, your battery is likely fine. This strengthens the case for a dirty or damaged charging port being the cause. Focus on cleaning or professional repair for the port.
Conclusion
A clean charging port is essential for your iPhone’s health and functionality. As we have seen, dust, lint, and debris are common culprits behind charging issues. Learning how to clean an iPhone charging port yourself is a valuable skill. It can save you time, money, and a trip to the repair shop. Remember to always power off your device and use non-conductive tools like wooden toothpicks or plastic dental picks. Gentle scraping and careful use of compressed air are your best friends in this task.
If, after your best efforts, your iPhone still refuses to charge, do not lose hope. The problem might lie elsewhere, or it might be time for a professional diagnosis. By understanding common issues and applying safe cleaning practices, you are taking proactive steps to maintain your device. Keep your iPhone’s charging port clean, and enjoy reliable power whenever you need it. If you found this guide helpful, consider sharing it with other iPhone users facing similar charging woes.
- iPhone charging port
- clean phone port
- iPhone repair


