· Todd Martin · Smart Home Devices · 20 min read
How To Clean Irobot Sensors
Restore Your Roomba’s Smarts: How to Clean iRobot Sensors
Is your trusty iRobot Roomba starting to act a little… lost? Perhaps it’s bumping into furniture more often, refusing to clean certain areas, or even falling down stairs? The problem often lies with its sensors. These small but crucial components are your Roomba’s “eyes and ears,” allowing it to navigate your home effectively. Over time, dust, dirt, pet hair, and debris can accumulate on them, hindering their function and making your robot less efficient.
Cleaning iRobot sensors is a simple yet vital maintenance task that can significantly improve your Roomba’s performance and extend its lifespan. I know how frustrating it is when your robot vacuum does not work as expected. This comprehensive guide will walk you through everything you need to know about cleaning different types of iRobot sensors. We will cover the specific tools you need, step-by-step instructions for each sensor, and tips for preventive care. By the end of this article, you will have the knowledge to keep your iRobot operating at its very best.
Takeaway:
- Regularly clean all iRobot sensors—cliff, optical, bumper, and charging contacts—to maintain peak performance.
- Use dry, clean tools like microfiber cloths, compressed air, and cotton swabs.
- Always power off and unplug your iRobot before starting any cleaning process.
- Inspect sensors periodically and address any error messages promptly.
To clean iRobot sensors, power off the device and use a dry microfiber cloth or compressed air to gently wipe away dust and debris from the cliff sensors, optical sensors, bumper sensors, and charging contacts. Avoid using liquids directly on the sensors to prevent damage. Regular cleaning improves navigation and overall performance.
Understanding iRobot Sensors: Why Cleaning Matters
Your iRobot Roomba is a marvel of automated cleaning. It moves around your home with intelligence, avoiding obstacles and cleaning effectively. This smart movement is possible because of its various sensors. Each sensor type plays a unique role in your Roomba’s operation. When these sensors get dirty, the robot’s ability to “see” and “feel” its environment is compromised.
Imagine trying to drive a car with mud on the windshield or a faulty rearview mirror. Your Roomba faces a similar challenge with dirty sensors. Dust and grime can block the optical path of cliff sensors, making the robot think it is at a drop-off even on a flat floor. Similarly, dirt on the bumper sensors might prevent it from detecting walls or furniture, leading to more bumps and scratches. Maintaining these sensors is not just about keeping the robot clean; it is about keeping it smart and efficient.
Types of iRobot Sensors and Their Functions
Roomba models have several types of sensors. Knowing what each one does helps you understand why cleaning them is so important. These sensors ensure smooth navigation and thorough cleaning. If one sensor is dirty, it can affect the robot’s entire cleaning cycle.
- Cliff Sensors: These are located on the underside of the Roomba. They use infrared light to detect drop-offs, like stairs. If blocked by dirt, your Roomba might stop unexpectedly or incorrectly detect a cliff.
- Optical/Dirt Detect Sensors: Found near the brushes, these sensors use light to identify areas with higher concentrations of dirt. They tell the Roomba to spend more time cleaning a specific spot. Accumulation of dust can reduce their accuracy.
- Bumper Sensors: These are mechanical sensors built into the Roomba’s bumper. They detect when the robot makes contact with an obstacle. While they are mechanical, the areas around them can get very dirty, affecting how the bumper reacts.
- Wall-Following Sensors: Some models have specific sensors that help the Roomba follow walls closely to clean edges. Dirt here can make it veer off course.
- Wheel Drop Sensors: Similar to cliff sensors, these detect if a wheel loses contact with the ground.
- Charging Contact Sensors: These metal plates on the bottom of the Roomba and on the home base allow the robot to charge. They need to be clean for a reliable connection. Dirty contacts can prevent your Roomba from charging properly.
Understanding these functions makes it clear why routine maintenance is crucial. A clean sensor means a happy and effective cleaning robot. You want your Roomba to work at its best every time it cleans.
Essential Tools for iRobot Sensor Cleaning
Before you start cleaning your iRobot’s sensors, gathering the right tools makes the process much easier and safer. Using the wrong materials, like abrasive cloths or harsh chemicals, can damage the delicate sensor surfaces. I always recommend using gentle, non-damaging tools. These items are typically inexpensive and readily available.
Having your tools ready before you begin saves time and ensures you do not have to stop mid-process. It also helps prevent any accidental damage to the robot. Think of it like preparing for a small repair job; you need the right wrench for the right nut. Similarly, you need the right cloth for the right sensor.
Recommended Cleaning Supplies
Here is a list of the essential tools you will need for effective iRobot sensor cleaning:
- Dry Microfiber Cloths: These are soft, lint-free, and highly effective at trapping dust and dirt without scratching surfaces. They are perfect for wiping delicate sensor lenses. I use them for almost all my electronics cleaning.
- Compressed Air Can: A can of compressed air is excellent for blowing out dust from crevices and hard-to-reach areas around sensors. Be sure to hold the can upright and use short bursts to avoid moisture build-up.
- Cotton Swabs (Q-tips): These are ideal for precisely cleaning small, recessed areas and around the edges of sensors. You can also slightly dampen them with isopropyl alcohol for charging contacts, but never for optical sensors.
- Small, Soft-Bristled Brush: A clean paintbrush or an old, soft toothbrush can help dislodge stubborn dirt from grooves or brush housings before wiping.
- Isopropyl Alcohol (90% or higher): Use this sparingly and only for cleaning the metal charging contacts. It evaporates quickly and helps remove grime from these surfaces. Never use it on optical or infrared sensors.
- Screwdriver (optional): For some models, you might need a small Philips head screwdriver to remove the side brush or access certain areas for more thorough cleaning. Refer to your specific Roomba model’s manual.
Always make sure your cleaning tools are clean themselves. Using a dirty cloth or brush will only spread grime. This simple preparation step sets you up for a successful sensor cleaning session. For more general robot vacuum maintenance, you can review guides on how to clean an iRobot Roomba.
Cleaning iRobot Cliff Sensors: Step-by-Step Guide
The cliff sensors are arguably the most critical sensors to keep clean. They prevent your iRobot from tumbling down stairs or off ledges. When these sensors are obstructed by dust or debris, your Roomba might stop unexpectedly in the middle of a room, issue an error code, or worse, take an unplanned dive. I always start my Roomba maintenance with these sensors.
Keeping these sensors spotless ensures your robot can navigate safely. Think of them as the robot’s safety net. If that net is compromised, accidents can happen. Regular cleaning of these components is a must for any Roomba owner.
How to Clean Cliff Sensors
Follow these simple steps to effectively clean your Roomba’s cliff sensors:
- Power Off Your Roomba: Always start by turning off your Roomba. This prevents accidental activation and ensures your safety. Many models have a power button on top; hold it down until the lights turn off.
- Flip Your Roomba Over: Gently turn your Roomba upside down to expose its underside. Place it on a soft, clean surface to avoid scratching the robot’s top.
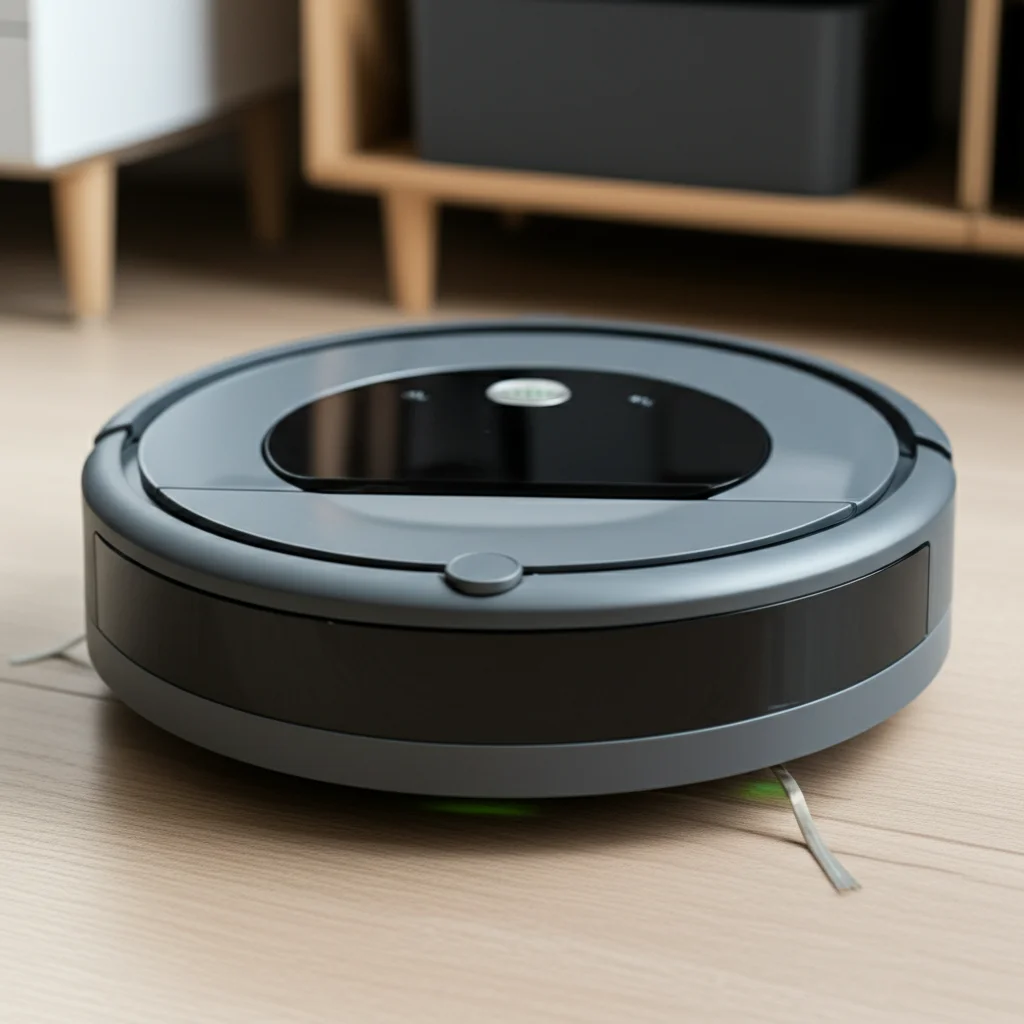
- Locate the Cliff Sensors: You will find four or six small, clear rectangular windows evenly spaced around the edge of the robot’s underside. These are the cliff sensors. Some models may have them recessed slightly.
- Wipe with a Dry Microfiber Cloth: Take your clean, dry microfiber cloth and gently wipe each cliff sensor. Use a soft, circular motion to remove any dust, dirt, or accumulated grime. Be thorough, but do not press too hard.
- Use Compressed Air for Recessed Areas (Optional): If the sensors are recessed or you see dust trapped around their edges, use short bursts of compressed air. Hold the can upright and about 6 inches away, directing the air into the sensor area. This helps dislodge hidden debris.
- Inspect for Remaining Debris: After wiping, visually inspect each sensor to ensure it is clear. Sometimes, pet hair or lint can cling to the edges. A cotton swab can help gently remove any stubborn bits. Do not use liquids directly on these sensors.
By following these steps, you help your Roomba maintain its essential anti-drop functionality. For even more specific guidance on these components, you might also find information on how to clean Roomba sensors helpful. Clean cliff sensors mean worry-free cleaning.
Maintaining iRobot Dust Detection Sensors
Your iRobot Roomba is not just a random cleaner; it is a smart one. Its ability to find and focus on dirtiest areas comes from its dirt detection sensors. These sensors, often optical or acoustic, tell the Roomba where to spend more effort. When these sensors are dirty, your Roomba might miss heavily soiled spots, leading to an uneven clean. I consider these sensors to be the Roomba’s “nose” for dirt.
A Roomba that cannot accurately detect dirt is like a detective missing clues. It might go over a dirty spot once and move on, leaving crumbs or pet hair behind. Keeping these sensors clean ensures your robot provides the thorough clean you expect. It helps it prioritize where to work hardest, making your cleaning cycles more effective.
How to Clean Dirt Detect Sensors
Cleaning the dirt detect sensors involves a slightly different approach than the cliff sensors, as they are often positioned differently.
- Power Off and Invert Your Roomba: As always, power off your Roomba and flip it over. Safety first is my motto when dealing with electronics.
- Locate Dirt Detect Sensors: The location of dirt detect sensors can vary by model. They are typically found on the underside, near the main brushes or around the brush housing. For many models, they are small, clear or dark, optical windows. Some may also have acoustic sensors, which are small openings that should be clear of debris. Refer to your user manual if you cannot find them immediately.
- Wipe with a Dry Microfiber Cloth: Use your dry microfiber cloth to gently wipe any visible dust or debris from these sensor windows. Pay close attention to the area surrounding the sensors, as dust can accumulate there and interfere with their operation.
- Use Compressed Air for Debris (Optional): If there’s dust or hair lodged in the crevices around the dirt detect sensors, use a can of compressed air. Direct short bursts of air to dislodge the debris. Be careful not to spray directly into any acoustic sensor openings with too much force.
- Clean Around Brushes: Since dirt detect sensors are often near the main brushes, it is a good time to also clean the brushes and the brush housing. Large debris or hair tangled in the brushes can also interfere with sensor function indirectly. You can use a small brush or the cleaning tool provided with your Roomba for this.
A clean dirt detect system allows your Roomba to intelligently focus on the grimiest areas. This improves the overall cleanliness of your floors. Regularly inspecting these areas as part of your general Roomba maintenance routine will keep your cleaning powerful.
Caring for iRobot Bumper and Wall Sensors
Your iRobot Roomba uses its bumper as a primary way to detect obstacles. While the bumper itself is a physical component, there are also sensors integrated into or behind it that help the Roomba determine when it has made contact with an object. Additionally, some models have specific wall-following sensors that guide the robot closely along edges. These sensors help your Roomba navigate without constantly bumping into everything.
When these sensors or the bumper are dirty, your Roomba might not register contact correctly. It could then bump harder into furniture, or it might struggle to follow walls, leaving uncleaned strips along the edges. I find that keeping these areas clean significantly improves my Roomba’s gentle navigation.
How to Clean Bumper and Wall Sensors
Cleaning these components ensures smooth and efficient navigation, protecting your furniture and your robot.
- Power Off Your Roomba: Always turn off your Roomba before beginning any cleaning. This prevents accidental movement or damage.
- Inspect the Bumper: The bumper is the large, movable front section of your Roomba. Dust, lint, and pet hair can get trapped in the gap between the bumper and the main body of the robot. This debris can prevent the bumper from registering contact properly.
- Clean the Bumper Gap: Use a dry microfiber cloth to wipe the entire surface of the bumper. For the gap between the bumper and the robot’s body, you can use a cotton swab or a folded corner of your microfiber cloth. Gently slide it into the gap and move it along the entire length to dislodge trapped debris.
- Use Compressed Air (Optional): For stubborn debris deep within the bumper gap, short bursts of compressed air can be effective. Direct the air along the gap to push out any trapped dirt or hair.
- Locate and Clean Wall-Following Sensors: If your Roomba model has dedicated wall-following sensors (often small optical windows on the side of the robot, usually near the bumper), clean these with a dry microfiber cloth. Treat them like the cliff sensors – gentle wiping is key.
- Test Bumper Movement: After cleaning, gently press the bumper inwards at several points around its circumference. It should move freely and spring back easily. If it feels sticky or jammed, there might still be debris preventing its proper movement.
By cleaning the bumper and any associated wall-following sensors, you help your Roomba maintain its spatial awareness. This results in smoother navigation and more effective edge cleaning, ensuring every part of your home gets attention.
Addressing iRobot Charging Contacts and Wheel Sensors
Beyond navigation, two other critical areas of your iRobot that rely on cleanliness are the charging contacts and the wheel sensors. If your Roomba is not charging properly, or if it moves erratically, these could be the culprits. I learned early on that dirty charging contacts are a common reason for a Roomba not returning to its base or not holding a charge.
A robot that cannot charge is a useless robot. Similarly, if its wheels are not moving correctly or if its internal wheel sensors are obstructed, its navigation will suffer. Paying attention to these often-overlooked areas is key to overall performance.
Cleaning Charging Contacts
The charging contacts are small, metallic pads located on the underside of your Roomba and on its Home Base. They must be clean to establish an electrical connection.
- Power Off Your Roomba and Unplug Home Base: Turn off your Roomba and unplug the Home Base from the wall outlet. Safety is always my first concern when dealing with electrical components.
- Locate Charging Contacts: On the Roomba, these are usually two shiny metal strips or circular pads. On the Home Base, they are matching metal plates.
- Wipe with a Dry Microfiber Cloth: For light dust, a dry microfiber cloth is sufficient. Wipe both the contacts on the Roomba and the Home Base thoroughly.
- Use Isopropyl Alcohol for Stubborn Grime: If the contacts appear dull, discolored, or have sticky residue, dampen a cotton swab or a corner of your microfiber cloth with isopropyl alcohol (90% or higher). Gently rub the contacts until they are shiny. Isopropyl alcohol evaporates quickly, leaving no residue. Do not use water or other cleaners.
- Allow to Dry: Ensure the contacts on both the Roomba and the Home Base are completely dry before reconnecting the Home Base to power or placing the Roomba on it.
Cleaning Wheel Sensors (if applicable)
Some Roomba models have sensors that monitor wheel movement or detect when a wheel is stuck. While less common to clean directly, ensuring the wheels themselves are free of hair and debris is vital.
- Inspect Wheels and Wheel Wells: With the Roomba still upside down, examine the main drive wheels and the caster wheel (the small, rotating wheel). Pull out any visible hair or string wrapped around the axles.
- Clean Wheel Wells: Use a small, soft-bristled brush or compressed air to clear any dust or debris from the wheel wells and around the wheel assembly.
- Check for Free Movement: Ensure the wheels can spin freely and are not obstructed. If they are stuck, your Roomba will struggle to navigate.
Regular cleaning of charging contacts ensures reliable charging. Keeping wheels clear of debris promotes smooth movement and accurate navigation, preventing your Roomba from getting stuck or displaying movement errors.
Deep Cleaning Strategies for iRobot Roomba Sensors
While routine wiping and dusting keep your iRobot sensors functional, sometimes a deeper clean is necessary. This is especially true if your Roomba operates in a very dusty environment, has pet hair, or has been giving persistent error messages related to its navigation. A deep clean can address built-up grime that surface cleaning might miss. I like to do a deep clean every few months.
This involves being a bit more thorough with your tools and attention to detail. It is not about using harsher chemicals, but rather about ensuring every nook and cranny around the sensors is free of interference. It helps reset your Roomba’s “vision” completely.
When to Consider a Deep Clean
Consider a deep clean for your Roomba’s sensors if:
- Your Roomba frequently gets stuck or displays navigation errors even after regular wiping.
- It is bumping into walls or furniture more often than usual.
- It avoids certain areas or corners of your home for no clear reason.
- You notice significant dust or pet hair accumulation around sensor openings.
- Your Roomba is not returning to its base or charging reliably.
Advanced Cleaning Techniques
Here are some strategies for a more thorough sensor cleaning:
- Use Bright Light for Inspection: Shine a flashlight directly onto each sensor area. This helps reveal fine dust, lint, or smudges that might be invisible under normal room lighting. You might be surprised at what you find.
- Gentle Scraping (for hardened grime on non-optical parts): For the plastic areas surrounding sensors (not the sensor lenses themselves), if there is hardened dirt or sticky residue, you can very gently use the edge of a plastic pick (like a guitar pick) or a credit card to scrape it away. Be extremely careful to avoid touching the actual sensor window. This is strictly for the surrounding plastic.
- Targeted Compressed Air Use: When using compressed air, aim it at different angles around the sensor openings. Sometimes, dust is wedged in a way that needs an angled blast to dislodge it. Remember to use short, controlled bursts.
- Cleaning Under Side Brush (for some wall sensors): For models with wall-following sensors located near the side brush, sometimes removing the side brush (usually with a small screwdriver) allows better access to wipe the sensor area. Make sure to put the brush back on securely.
- Full Underside Debris Removal: A deep sensor clean should always be part of a broader how to clean Roomba sensors routine. This includes removing the main brushes, side brush, and emptying the dustbin. Clear any hair or debris from the brush bearings and vacuum channels, as this can indirectly affect sensor performance by creating excess dust.
A deep clean ensures your iRobot’s senses are entirely clear. It restores its ability to navigate and clean with precision. This proactive approach helps prevent many common Roomba issues.
Recognizing When iRobot Sensors Need Cleaning
Your iRobot Roomba is designed to be user-friendly, and it often gives you clues when something is wrong. Understanding these signals can help you know exactly when its sensors need attention. Ignoring these signs can lead to reduced cleaning efficiency and potential damage to your robot or furniture. I learned to pay attention to these subtle cues.
Knowing what to look for saves you time and keeps your Roomba working its best. It is like listening to your car; strange noises usually mean something needs checking. Your Roomba gives similar “signals” when its sensors are not performing optimally.
Common Signs of Dirty Sensors
Here are the key indicators that your iRobot sensors are likely in need of a good cleaning:
- Erratic Navigation: This is one of the most common signs. Your Roomba might start bumping into walls more often, get stuck in open areas, or continuously spin in circles. This suggests its bumper or cliff sensors are not working correctly.
- Frequent Error Messages: Your Roomba may display specific error codes. For example, “Error 6” often relates to cliff sensors being dirty or stuck. Other errors might point to wheel issues or navigation problems caused by blocked sensors. Always check your model’s manual for error code meanings.
- Avoiding Stairs or Drop-offs (or falling down them!): If your Roomba stops unexpectedly at a transition between floor types, or simply refuses to cross a dark rug (which can sometimes trigger cliff sensors), its cliff sensors are likely dirty. Conversely, if it attempts to go down stairs, the sensors are not detecting the drop-off at all, which is dangerous.
- Poor Cleaning Performance: If your Roomba seems to miss dirty spots, or cleans some areas thoroughly while neglecting others, its dirt detect sensors might be impaired. It is not “seeing” the dirt effectively.
- Difficulty Docking or Charging: If your Roomba struggles to return to its Home Base or does not charge when it is on the base, the charging contacts on either the robot or the base are likely dirty.
- Getting Stuck More Often: If your Roomba gets stuck under furniture or in tight spots more frequently, its bumper sensors might not be detecting obstacles accurately, or it’s misjudging its path.
- Reduced Battery Life (indirectly): While not a direct sensor issue, inefficient navigation due to dirty sensors can lead to your Roomba running longer and draining its battery faster, giving the impression of poor battery life.
If you observe any of these behaviors, it is a clear signal that it is time to perform a thorough sensor cleaning. Addressing these issues promptly will restore your iRobot’s smart cleaning capabilities and prolong its operational life. A little proactive care goes a long way.
Preventive Measures for Optimal iRobot Sensor Health
Cleaning your iRobot’s sensors is important, but preventing them from getting excessively dirty in the first place is even better. Proactive measures can significantly reduce the frequency of deep cleaning and extend the life of your Roomba. I find that a little prevention saves a lot of hassle down the line.
Think of it like regular house cleaning versus a deep spring clean. You do not want to wait until things are visibly filthy. Similarly, you do not want to wait until your Roomba throws an error before you address its sensors.
Tips for Keeping Sensors Clean Longer
Incorporating these habits into your routine will help maintain your Roomba’s sensor health:
- Regular, Light Cleaning: Do a quick wipe of the cliff sensors and charging contacts after every few cleaning cycles, or at least weekly. This prevents significant build-up. It only takes a minute.
- Clear the Cleaning Area: Before running your Roomba, pick up large debris, cords, and obstacles. This reduces the amount of material the Roomba processes, which in turn reduces dust and hair accumulation around its sensors and brushes.
- Manage Pet Hair: If you have pets, brush them regularly to minimize shedding. Roomba’s primary enemy is pet hair, which can easily clog sensors and brushes.
- Clean Brushes and Dustbin Frequently: Make sure you empty the dustbin after every run and clean the main brushes and side brush weekly. A clean robot from the inside out means less debris circulating to foul sensors.
- Keep Home Base Area Clear: Ensure the area around your Home Base is free of dust and debris. This keeps the charging contacts clean on both the base and the Roomba as it docks.
- Avoid Liquids: Never spray cleaning solutions directly onto your Roomba, especially near sensors. Use dry cloths for most cleaning, and only isopropyl alcohol sparingly on charging contacts.
- Lift, Don’t Drag: When moving your Roomba, always lift it. Dragging it can cause dirt and debris to grind into the sensors or wheels, potentially damaging them.
- Regular Firmware Updates: Keep your Roomba’s firmware updated. Sometimes, software improvements can optimize how the robot uses its sensors, potentially improving navigation and reducing strain on the physical components.
By adopting these preventive measures, you are not just cleaning; you are nurturing your iRobot’s longevity and performance. This proactive approach ensures your smart vacuum remains a reliable part of your home cleaning routine for years to come.
- iRobot maintenance
- Roomba cleaning
- robot vacuum care

Todd Martin
Senior Writer
With over 15 years of experience in home renovation and design, I started HEG to share what I’ve learned with homeowners who want to create spaces that are both beautiful and functional. I’ve always believed in a hands-on approach, and over the years, I’ve picked up practical solutions that actually work. Through HEG, I aim to make home improvement more approachable, sharing real tips that help you create a home you truly love.