· Todd Martin · Appliance Care · 20 min read
How To Clean Lint Filter
Unlock Dryer Efficiency: How to Clean Lint Filter Effectively
A clean lint filter is a simple tool for laundry efficiency. This small part in your dryer plays a huge role in how well your appliance works. Ignoring it can lead to bigger problems. Keeping your lint filter clean saves energy and protects your home.
Many people overlook this quick task. However, a clogged lint filter can reduce airflow. Poor airflow makes your dryer work harder. This increases energy use and drying times. This article shows you how to clean lint filter thoroughly. We provide clear steps to maintain your dryer. We also explain why this simple act is vital for your safety and savings.
Takeaway:
- Clean Regularly: Clear your lint filter after every load to maintain airflow.
- Deep Clean Periodically: Wash your lint filter with soap and water every few months to remove residue.
- Inspect Dryer Vent: Ensure the main dryer vent is also clear of lint buildup for fire safety.
- Enhance Safety: A clean lint filter prevents lint accumulation, reducing fire risk.
- Boost Efficiency: Proper airflow from a clean filter cuts drying times and saves energy.
- Extend Dryer Life: Regular cleaning reduces strain on your appliance, extending its lifespan.
To clean a lint filter, remove it from your dryer and pull off visible lint. For a deep clean, wash the screen with warm, soapy water and a soft brush to remove invisible residue. Rinse thoroughly, then let it air dry completely before returning it to the dryer.
Why Cleaning Your Lint Filter Matters for Home Safety
Understanding the importance of cleaning your lint filter begins with safety. Lint is highly flammable. When it collects in your dryer, it becomes a fire hazard. Many house fires start in the laundry room due to lint buildup.
Your dryer works by blowing hot air through wet clothes. This air picks up tiny fabric fibers, or lint. The lint filter is designed to catch these fibers. If the filter becomes clogged, hot air cannot move freely. This causes heat to build up inside the dryer.
The combination of trapped heat and flammable lint is dangerous. It creates perfect conditions for a fire. Regular lint filter cleaning prevents this dangerous scenario. It ensures a safer home environment for you and your family.
Beyond fire risk, a dirty lint filter affects your dryer’s performance. It restricts airflow, making your dryer less efficient. Clothes take longer to dry, and sometimes they do not dry completely. This wastes energy and increases your utility bills.
A blocked filter also puts a strain on your dryer’s motor. The motor works harder to push air through the obstruction. This extra effort causes wear and tear on the appliance. Over time, it can lead to costly repairs or even premature dryer failure. A simple, consistent cleaning routine can prevent these issues. You protect your home, save money, and extend your dryer’s life.
Gathering Your Tools: What You Need to Clean Your Lint Filter
Before you start cleaning your lint filter, gather the right tools. Most cleaning needs only a few simple items. Having everything ready makes the process easy. You probably have most of these items already in your home.
For a basic clean, you only need your hands. This removes the visible lint after each load. For a deeper clean, you will need a few more things. These items help remove the sticky, invisible residue that builds up over time. This residue can be hard to see. It can block airflow just as much as visible lint.
Here is a list of what you will need:
- Your Hands: Use your fingers to pull off the main layer of lint. This is your first step every time you dry clothes.
- Warm Water: You need this for a thorough wash. It helps loosen caked-on residue.
- Mild Dish Soap: A small amount of dish soap helps break down fabric softener and dryer sheet residue. These products often leave a waxy film.
- Soft Brush (Optional but Recommended): A soft-bristled brush, like an old toothbrush or a small scrubbing brush, can help gently scrub the screen. Do not use anything too abrasive.
- Lint Brush or Vacuum Attachment (Optional): These are useful for reaching into the lint trap housing. This is the space where the filter sits. Many people forget to clean this area. This area can accumulate lint that bypasses the filter.
- Consider specialized tools like a narrow vacuum hose attachment. This attachment is great for reaching into tight spots. It removes lint from the ductwork immediately behind the filter. This improves overall dryer airflow. You can find these attachments online or at hardware stores.
- Towel: You need a towel to dry the area around the lint trap after cleaning. This keeps water from getting into the dryer’s components.
Having these tools ready makes the cleaning process efficient. It ensures you perform a complete and effective clean. This leads to a safer and more efficient dryer. This also prevents build-up, similar to how cleaning your furnace filter helps your HVAC system.
Daily Routine: Basic Lint Filter Cleaning Steps
Establishing a daily routine for your lint filter is simple and crucial. This quick step takes only a few seconds. It makes a big difference in your dryer’s performance. I always make sure to clean the lint filter after every single load. This habit keeps my dryer running efficiently.
Here are the basic steps for daily lint filter cleaning:
Locate the Lint Filter:
- Most dryers have the lint filter located either on top of the dryer or just inside the dryer door opening. It is usually a flat screen that slides out.
- Some models might have a filter that pulls straight up from a slot. Familiarize yourself with your specific dryer model.
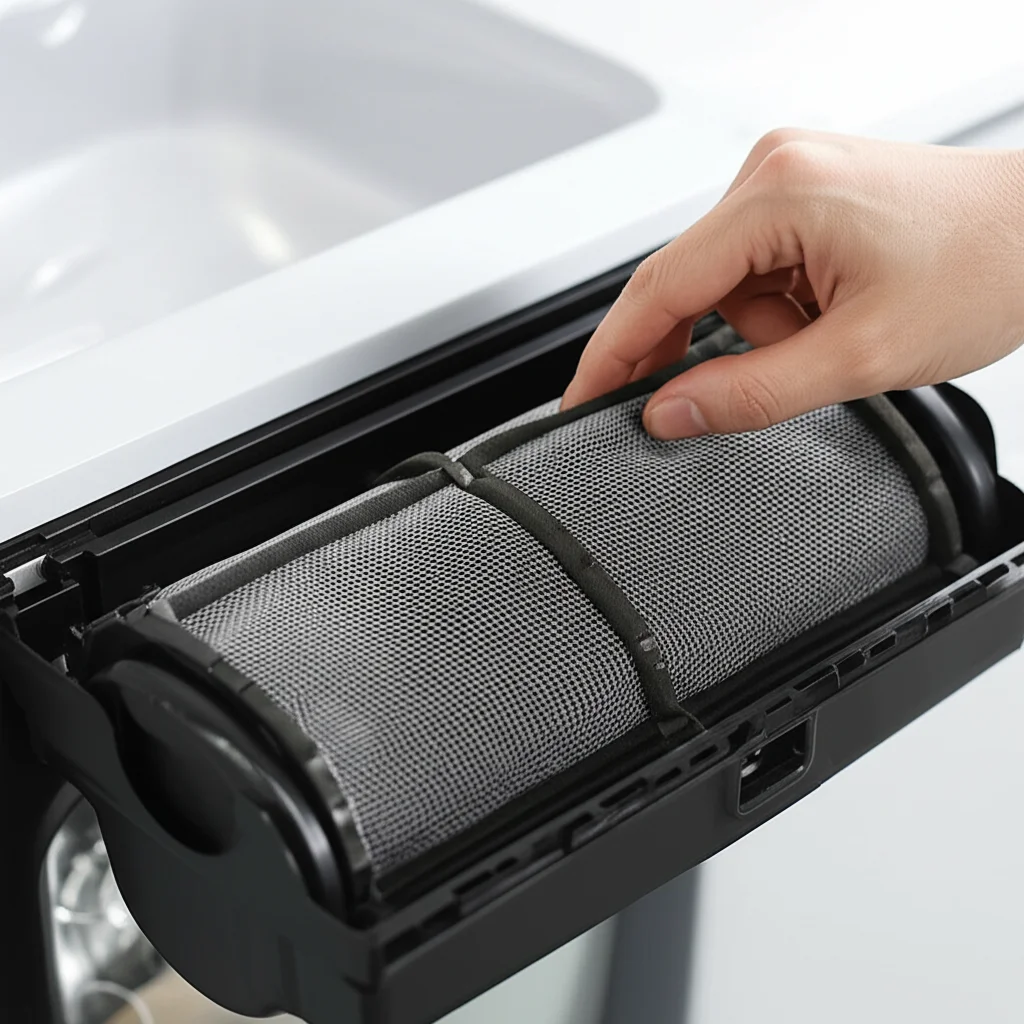
Pull Out the Filter:
- Gently pull the lint filter straight out from its slot. Do not force it.
- It should slide out smoothly. If it feels stuck, check for any obstructions.
Remove Visible Lint:
- Using your fingers, pinch the collected lint and peel it away from the screen. It usually comes off in one sheet.
- Discard the lint in a trash can. Do not flush lint down the toilet, as it can cause clogs.
Reinsert the Filter:
- Slide the clean lint filter back into its slot. Make sure it fits snugly.
- The filter should be fully seated before you start the next drying cycle.
This simple action, done after every load, prevents major lint buildup. It helps maintain optimal airflow. This reduces drying times and energy consumption. It also significantly lowers the risk of dryer fires. Think of it like cleaning your vacuum filter after each use; it keeps the appliance working at its best. Taking these few seconds means a safer, more efficient home.
Deep Cleaning Your Lint Filter: Tackling Stubborn Buildup
While daily lint removal is vital, it is not enough. Over time, a sticky residue builds up on the lint filter screen. This residue comes from fabric softeners and dryer sheets. It creates an invisible film that traps lint and blocks airflow. This film reduces your dryer’s efficiency. It requires a deeper cleaning method. I deep clean my lint filter about once every three months, or if I notice my clothes taking longer to dry.
Here is how to deep clean your lint filter:
Remove and Inspect:
- First, pull out the lint filter as you would for a daily cleaning.
- Peel off all visible lint. Hold the filter up to a light source. If you cannot see light clearly through the screen, it needs a deep clean. This indicates a buildup of residue.
Prepare the Cleaning Solution:
- Fill a sink or a basin with warm water.
- Add a few drops of mild dish soap to the water. Swirl the water to create some suds. Avoid harsh chemicals, as they can damage the filter screen.
Wash the Filter:
- Submerge the lint filter in the soapy water.
- Use a soft brush, like an old toothbrush or a small utility brush, to gently scrub both sides of the screen. Focus on areas where you see residue or poor light visibility.
- Be gentle to avoid damaging the fine mesh of the filter. The soap helps dissolve the waxy buildup.
Rinse Thoroughly:
- Rinse the filter under running warm water. Make sure to rinse both sides.
- Rinse until no soap suds remain and the water runs clear.
- Hold it up to the light again. You should see light passing through clearly and evenly across the entire screen. This confirms the residue is gone.
Allow to Air Dry Completely:
- Shake off excess water.
- Place the filter on a clean towel or hang it to air dry. It is crucial for the filter to be completely dry before you put it back in the dryer. Moisture can cause lint to stick or create a damp environment inside the dryer.
- Drying can take several hours, so plan this cleaning for a time when you do not need the dryer immediately.
- Putting a wet filter back can also lead to lint sticking immediately, undoing your cleaning efforts.
This deep cleaning process restores your lint filter to its optimal state. It ensures maximum airflow and dryer efficiency. It also helps prevent future residue buildup, similar to how cleaning your range hood filter improves its ability to capture grease.
Beyond the Filter: Cleaning the Lint Trap Housing and Dryer Vent
Cleaning the lint filter is essential, but it is only one part of comprehensive dryer maintenance. Lint can escape the filter and collect in other areas. The lint trap housing and the dryer vent hose are prime spots for this. Neglecting these areas creates fire hazards. It also hinders your dryer’s performance. I always make sure to address these areas when I deep clean my lint filter, usually every few months.
Here is how to clean these often-overlooked areas:
Cleaning the Lint Trap Housing:
- The lint trap housing is the cavity where the lint filter slides into. Lint can accumulate here. Some lint bypasses the filter and falls into this space.
- After removing the lint filter, use a narrow vacuum cleaner attachment. A crevice tool works well for this.
- Carefully insert the attachment into the housing. Vacuum out any loose lint or debris you see.
- You can also use a specialized lint brush designed for dryers. These brushes have long handles and flexible bristles. They can reach deeper into the housing.
- Be gentle to avoid damaging any internal components or sensors. This step ensures that no stray lint remains to obstruct airflow at the source.
Cleaning the Dryer Vent Hose:
- The dryer vent hose connects your dryer to the outside of your home. This hose is where the most significant lint buildup outside the filter often occurs. Lint that passes through the filter collects here. This lint gets trapped along the hose walls, especially in bends or kinks.
- Disconnect the Dryer: Unplug the dryer from the electrical outlet. For gas dryers, also turn off the gas supply and disconnect the gas line. Move the dryer away from the wall to access the back.
- Detach the Vent Hose: Carefully disconnect the vent hose from the back of the dryer and from the wall connection. Use a screwdriver if clamps are present.
- Remove Lint from Hose:
- For shorter, flexible hoses, you can often shake out the lint or use a long bottle brush to dislodge it.
- For longer or more rigid ducts, a dryer vent cleaning kit is invaluable. These kits usually contain a flexible rod and a brush attachment. You attach the brush to the rod and push it through the ductwork.
- Work the brush through the entire length of the hose. This dislodges accumulated lint.
- If possible, run a shop vacuum through the duct from both ends. This sucks out the dislodged lint.
- Clean the Exterior Vent Cap:
- Go outside and check the vent cap on your home’s exterior. This cap can also become clogged with lint, bird nests, or other debris.
- Remove any blockages by hand or with a brush. Ensure the flapper opens and closes freely.
- Reconnect and Test: Reconnect the vent hose securely to both the dryer and the wall. Plug the dryer back in (and reconnect gas, if applicable). Run a short cycle with no clothes to check for proper airflow and no leaks.
Regular cleaning of the lint trap housing and dryer vent hose is critical. It drastically reduces fire risk and maintains your dryer’s efficiency. This comprehensive approach to dryer cleaning is just as important as cleaning your air conditioner filter for home air quality and efficiency.
Frequency and Signs: When to Clean Your Lint Filter More Often
Knowing when and how often to clean your lint filter is key to effective dryer maintenance. The daily habit of removing visible lint is a good start. However, certain factors and signs indicate a need for more frequent or deeper cleaning. I adjust my cleaning schedule based on these indicators.
General Cleaning Frequency:
- After Every Load: This applies to removing visible lint from the filter screen. It ensures immediate airflow and efficiency.
- Every 3-6 Months: This is the recommended frequency for a deep clean of the lint filter with soap and water. This removes the invisible film of residue.
- Annually (or more often): The dryer vent hose and the outside vent cap should be inspected and cleaned at least once a year. If you use your dryer heavily, or if you notice specific signs, increase this to twice a year.
Signs You Need to Clean Your Lint Filter (or Vent) More Often:
- Clothes Take Longer to Dry: This is the most common and immediate sign. If a load that normally takes 40 minutes now takes 60 or 80 minutes, it indicates restricted airflow. The dryer is working harder.
- Clothes Feel Hot to the Touch After Drying: This suggests that hot air is trapped inside the dryer due to poor ventilation. The heat cannot escape efficiently. This poses a fire risk.
- The Dryer Itself Feels Hot: If the top or side of your dryer is unusually hot during or after a cycle, it points to heat buildup. This is a clear warning sign.
- A Burning Smell: This is a serious alarm. A burning smell indicates lint inside the dryer or vent is overheating. Stop using the dryer immediately and inspect it thoroughly. This can signal an impending dryer fire.
- Excess Lint on Clothes: If you notice more lint on your dried clothes than usual, it means the filter is not catching it effectively. This can be due to a clogged filter.
- Excessive Humidity in the Laundry Room: A properly vented dryer expels hot, moist air outdoors. If your laundry room feels unusually humid or steamy during drying cycles, it means the moist air is not escaping efficiently. This can be due to a blocked vent.
Paying attention to these signs helps you maintain your dryer. It keeps your home safe. It also ensures your appliance runs efficiently. Being proactive with cleaning prevents small issues from becoming major problems. This is similar to how proactive maintenance on other home filters, like cleaning your dishwasher filter, prevents bigger appliance issues.
Common Lint Filter Issues and Troubleshooting Tips
Even with regular cleaning, you might encounter specific issues related to your lint filter or dryer airflow. Understanding these problems and knowing how to troubleshoot them helps you keep your dryer running smoothly. I have encountered a few of these issues myself. Knowing the quick fixes helps.
Here are some common lint filter issues and troubleshooting tips:
Filter Screen Damage:
- Issue: The mesh of your lint filter can become torn, warped, or develop holes over time. This happens from wear and tear or accidental damage. A damaged screen allows lint to bypass the filter and enter the dryer’s interior or vent system.
- Troubleshooting: Inspect your lint filter regularly for any signs of damage. If you find a tear or hole, even a small one, replace the filter immediately. A new filter is inexpensive and vital for preventing lint buildup in the ductwork. Check your dryer’s manual for the correct replacement part number.
Lint Not Peeling Off Easily:
- Issue: Sometimes, lint sticks stubbornly to the filter. It does not come off in a neat sheet. This often indicates the presence of a waxy buildup from fabric softeners or dryer sheets.
- Troubleshooting: This is a clear sign that your lint filter needs a deep clean. Wash it with warm, soapy water and a soft brush. This removes the invisible film. Once this film is gone, lint should peel off easily again. Adjust your deep cleaning frequency if this happens often.
Dryer Operating But Not Heating:
- Issue: If your dryer tumbles clothes but produces no heat, a clogged lint filter or vent could be a cause. While it is not always the direct cause, restricted airflow can sometimes trigger thermal cut-offs or prevent heating elements from functioning properly.
- Troubleshooting: First, check your lint filter and deep clean it. Then, thoroughly inspect and clean your dryer vent hose and exterior vent cap. If the problem persists after ensuring clear airflow, the issue likely lies with a faulty heating element, thermal fuse, or thermostat. At this point, consult your dryer’s manual or call a professional appliance technician.
Water on the Lint Filter or in the Trap Housing:
- Issue: Finding water or excessive dampness on the lint filter or inside its housing is unusual. It can indicate a problem with the dryer’s moisture sensing system or an internal leak.
- Troubleshooting: Ensure the clothes you are drying are properly spun in the washer. Excessive wetness can lead to some water accumulation. If the issue persists, it might signal a more serious internal problem. This could include issues with the condenser (for condenser dryers) or a drain pump (for some washer-dryer combos). For these issues, professional diagnosis is recommended.
Dryer Takes Multiple Cycles for a Small Load:
- Issue: When a small load of clothes (which should dry quickly) requires two or more full cycles, it points to severely restricted airflow. This means energy waste and increased wear on the dryer.
- Troubleshooting: This symptom strongly indicates a clogged lint filter and, more likely, a heavily obstructed dryer vent. Perform a full deep clean of your lint filter. Then, prioritize a comprehensive cleaning of your entire dryer vent system, including the hose and the exterior vent. Also, check for any kinks or crushes in the flexible vent hose behind the dryer.
Understanding these common issues helps you troubleshoot effectively. It keeps your dryer working efficiently and safely. A quick check and clean often prevent more serious problems down the line.
Benefits of a Clean Lint Filter: Efficiency and Longevity
The benefits of a clean lint filter extend far beyond avoiding a fire hazard. Regular maintenance of this small component has a ripple effect. It impacts your energy bills, the lifespan of your appliance, and the overall efficiency of your laundry routine. I have noticed a significant difference in my utility bills and drying times since I adopted a strict lint filter cleaning regimen.
Let us explore the key benefits:
Enhanced Energy Efficiency:
- A clean lint filter ensures maximum airflow through your dryer. When air flows freely, your dryer does not have to work as hard. It dries clothes more quickly.
- Reduced drying times mean less electricity or gas consumption per load. Over time, this leads to noticeable savings on your utility bills. It makes your home more energy-efficient.
Faster Drying Times:
- No one likes waiting longer for laundry. A clogged lint filter drastically extends drying cycles. The dryer struggles to evaporate moisture when airflow is restricted.
- With a clean filter, hot, dry air can circulate effectively. It quickly picks up moisture from your clothes. This speeds up the entire drying process. You save time and get your laundry done faster.
Extended Appliance Lifespan:
- When your dryer struggles against restricted airflow, its motor and heating element work overtime. This constant strain causes premature wear and tear.
- Regular lint filter cleaning reduces this stress. It allows the dryer to operate under optimal conditions. This minimizes wear and helps your appliance last longer. You defer the cost of an expensive dryer replacement.
Improved Clothes Care:
- A properly functioning dryer dries clothes evenly and gently. When airflow is poor, some areas of clothing might remain damp. Other areas might get exposed to excessive heat.
- Consistent drying helps maintain the quality and feel of your fabrics. It reduces the chance of heat damage or mildew smell on clothes.
Reduced Fire Risk:
- This is arguably the most critical benefit. Lint is highly combustible. When it accumulates in a hot, enclosed space like a dryer or its vent, it creates a significant fire hazard.
- A clean lint filter captures lint effectively. It prevents it from building up in the dryer’s internal components or the exhaust vent. This vastly reduces the risk of dryer fires, protecting your home and family.
Better Air Quality in Laundry Room:
- While subtle, a properly functioning dryer with a clean filter ensures that lint and moisture are effectively expelled outside. A clogged filter or vent can allow some of these particles to escape into your laundry room.
- Maintaining proper ventilation helps keep the air in your home cleaner. It reduces potential allergens from fabric fibers.
By taking a few seconds to clean your lint filter after every load, and performing a deep clean periodically, you invest in your home’s safety and efficiency. This simple habit yields significant returns.
FAQ Section
Q1: How often should I clean my lint filter? A1: You should clean the visible lint from your dryer’s lint filter after every single load of laundry. Additionally, perform a deep clean using warm, soapy water every three to six months. This removes unseen residue from fabric softeners and dryer sheets. Regular cleaning boosts efficiency and safety.
Q2: What happens if I do not clean my lint filter? A2: Not cleaning your lint filter causes lint buildup. This restricts airflow, making your dryer less efficient. Clothes take longer to dry, wasting energy. More critically, accumulated lint is a major fire hazard. It can overheat and ignite, posing a serious risk to your home.
Q3: Can a dirty lint filter damage my dryer? A3: Yes, a dirty lint filter can damage your dryer. When airflow is restricted, the dryer’s motor and heating element work harder. This excessive strain causes premature wear and tear on these components. Over time, it can lead to expensive repairs or shorten the lifespan of your appliance.
Q4: How can I tell if my lint filter needs a deep clean? A4: After removing visible lint, hold the filter up to a light source. If you cannot see light clearly through the screen, or if water beads up on it when you run it under a faucet, it needs a deep clean. This indicates a waxy residue buildup that restricts airflow.
Q5: Is it safe to use a vacuum to clean the lint trap housing? A5: Yes, it is safe and recommended to use a narrow vacuum attachment to clean the lint trap housing. This is the area where the filter sits. Always ensure the dryer is unplugged before inserting any tools. This removes lint that bypasses the filter, improving overall airflow and reducing fire risk.
Q6: Does cleaning the lint filter affect drying time? A6: Absolutely. A clean lint filter allows hot air to circulate freely through your clothes. This accelerates the evaporation of moisture. As a result, your clothes dry much faster. A clogged filter traps hot air, slowing down the drying process and wasting energy.
Conclusion
Keeping your lint filter clean is a small task with significant rewards. This simple habit protects your home, saves you money, and extends the life of your dryer. By removing visible lint after every load and performing a deeper wash every few months, you maintain optimal airflow. This ensures your dryer operates efficiently and safely, preventing common issues like prolonged drying times and potential fire hazards.
Remember, a well-maintained lint filter is a cornerstone of responsible home appliance care. It contributes to lower energy bills and fewer repairs. Make this simple cleaning routine a regular part of your laundry day. Your dryer, your clothes, and your wallet will thank you. Start today to experience the benefits of a clean lint filter. Optimize your laundry routine for a safer, more efficient home.
- lint filter cleaning
- dryer maintenance
- dryer safety
- home essentials
- laundry tips
- appliance longevity

Todd Martin
Senior Writer
With over 15 years of experience in home renovation and design, I started HEG to share what I’ve learned with homeowners who want to create spaces that are both beautiful and functional. I’ve always believed in a hands-on approach, and over the years, I’ve picked up practical solutions that actually work. Through HEG, I aim to make home improvement more approachable, sharing real tips that help you create a home you truly love.