· Todd Martin · Home Care · 20 min read
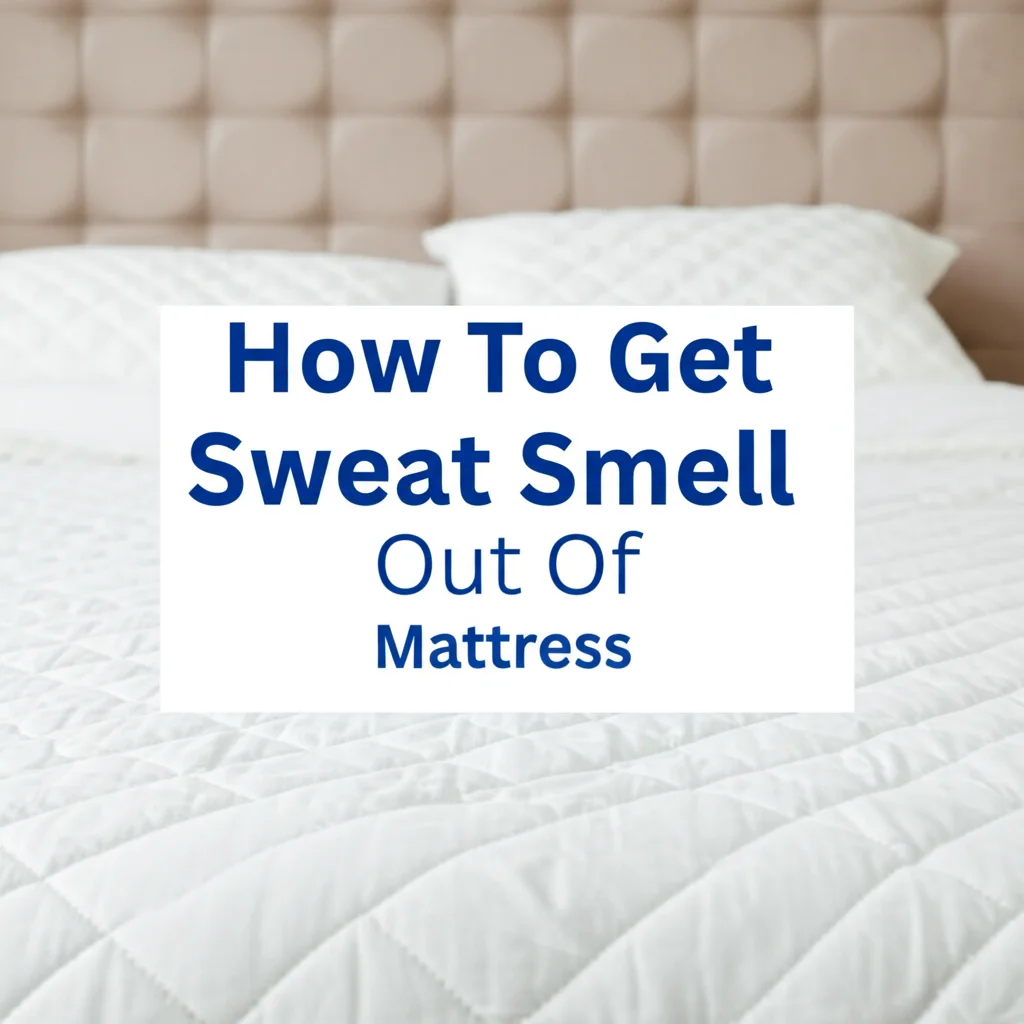
How To Clean Mattress After Child Pees Bed

How To Clean Mattress After Child Pees Bed Effectively
A parent’s nightmare often involves a wet bed. When your child has an accident and pees the bed, the sight of a soiled mattress can feel overwhelming. You might worry about permanent stains or a lingering odor in the bedroom. This common issue needs quick and proper cleaning to save your mattress.
Cleaning a mattress after a child pees the bed is not hard with the right steps. Fast action prevents urine from soaking deep into the mattress fibers. This article guides you through a step-by-step process. We will cover immediate actions, cleaning methods, and ways to prevent future accidents. You will learn how to clean mattress after child pees bed, remove stains, and eliminate odors for a fresh sleeping surface.
Takeaway:
- Act Quickly: Strip the bed immediately to prevent urine from setting into the mattress.
- Blot, Do Not Rub: Use clean towels to absorb as much urine as possible.
- Use Effective Cleaners: Baking soda, white vinegar, or enzymatic cleaners work best for urine stains and odors.
- Dry Thoroughly: Ensure the mattress is completely dry before remaking the bed to prevent mold growth.
- Protect Your Mattress: A waterproof mattress protector is your best defense against future accidents.
To effectively clean a mattress after a child pees the bed, act quickly. First, strip all bedding. Then, blot the wet area with clean towels to absorb liquid. Apply a cleaning solution like a baking soda and vinegar paste or an enzymatic cleaner. Let it work, then blot again and allow the mattress to air dry completely.
Immediate Steps: Act Fast When Your Child Pees the Bed
Discovering a wet mattress after your child has peed the bed requires fast action. Speed is important to keep urine from soaking deeply into the mattress. The longer urine stays, the harder it is to remove the stain and odor. Taking immediate steps saves your mattress from lasting damage.
Your first move is to remove all bedding. This includes sheets, blankets, and mattress pads. Put these items directly into the washing machine. Wash them on the hottest setting safe for the fabric to kill bacteria and remove the urine smell. While the bedding washes, you can focus on the mattress itself.
Once the bedding is off, grab some old towels or absorbent cloths. Press firmly onto the wet area of the mattress. Do not rub the stain. Rubbing spreads the urine and pushes it deeper into the fibers. You want to blot and absorb as much liquid as possible. Keep blotting until the towels come up mostly dry. This initial absorption is key to successful cleaning.
Gather Your Supplies
Before you start cleaning, gather all necessary items. Having everything ready saves time and makes the process smooth. You likely have most of these items at home already. This preparation step helps you clean the mattress efficiently.
Here is a list of supplies you will need:
- Clean, absorbent towels or cloths: For blotting fresh urine and cleaning solutions.
- Paper towels: Useful for initial blotting and absorbing excess liquid.
- Baking soda: A natural deodorizer and stain absorber.
- White vinegar: An acid that neutralizes urine odors and helps break down stains.
- Spray bottle: For applying liquid solutions evenly.
- Enzymatic cleaner: (Optional but highly recommended) Specifically designed to break down organic matter like urine.
- Dish soap (mild): A few drops can be added to water for a gentle cleaning solution.
- Vacuum cleaner with an upholstery attachment: For removing dried baking soda.
- Rubber gloves: To protect your hands during cleaning.
- Fan or hairdryer: To speed up drying.
- Waterproof mattress protector: For future prevention.
Having these items ready will help you tackle the pee stain with confidence. This preparation helps clean the mattress quickly and thoroughly. The faster you act, the better your results will be.
Tackling Fresh Urine Stains: Essential Cleaning Methods
Once you have blotted the excess urine, it is time to apply a cleaning solution. Several effective methods exist for fresh urine stains. The goal is to break down the uric acid and remove the yellow discoloration. You want to eliminate both the visible stain and the underlying odor.
Choosing the right cleaner makes a big difference. Common household items like baking soda and vinegar work well. For more stubborn odors, an enzymatic cleaner is often the best choice. I find that a combination of these methods gives the best results. You will see your mattress come back to its clean state.
The Baking Soda and Vinegar Method
This method is a classic for a reason. Baking soda and white vinegar are powerful natural cleaners. They work together to neutralize odors and lift stains. This approach is safe for most mattress types.
Follow these steps for the baking soda and vinegar method:
- Create a vinegar solution: Mix equal parts white vinegar and water in a spray bottle. Add a few drops of mild dish soap for extra cleaning power if desired.
- Saturate the stain: Lightly spray the urine-affected area with the vinegar solution. Do not over-saturate the mattress, especially if it is a memory foam or pillow-top mattress. The goal is to dampen the stain, not soak the mattress.
- Blot the solution: Use a clean towel to blot the vinegar solution into the stain. Press firmly to work the solution into the fibers. Again, avoid rubbing.
- Apply baking soda: Sprinkle a generous amount of baking soda directly onto the damp, treated area. Make sure the entire stained area is covered. The baking soda will absorb the remaining urine, moisture, and odors.
- Let it sit: Allow the baking soda to sit for several hours, ideally overnight. The longer it sits, the more odor and moisture it will absorb. I usually let it sit for at least 8-10 hours.
- Vacuum the baking soda: Once the baking soda is completely dry and has hardened, use a vacuum cleaner with an upholstery attachment to remove it. Ensure all baking soda particles are gone.
This method works wonders for fresh stains and helps dry out the area. You can even read more about how this method works to clean stains off a mattress with baking soda.
Using an Enzymatic Cleaner
Enzymatic cleaners are special cleaning products. They contain enzymes that break down organic waste like urine. This process eliminates both the stain and the odor at their source. These cleaners are particularly effective for protein-based stains, which urine is.
Here is how to use an enzymatic cleaner:
- Read product instructions: Always follow the specific directions on your enzymatic cleaner bottle. Different brands may have slightly different application instructions.
- Apply the cleaner: Spray or pour the enzymatic cleaner directly onto the urine stain. Ensure the area is thoroughly saturated. The cleaner needs to reach the urine deep within the mattress fibers.
- Let it dwell: Allow the cleaner to sit for the time recommended by the manufacturer. This “dwell time” lets the enzymes work their magic. It typically ranges from 15 minutes to several hours.
- Blot excess liquid: After the dwell time, use a clean, dry towel to blot up any excess liquid. Do not rinse the mattress with water unless the product instructions tell you to.
- Air dry: Let the mattress air dry completely. You can use a fan to speed up this process. The enzymes continue to work as the mattress dries.
Enzymatic cleaners are very effective at removing persistent odors. They are a good choice if the baking soda and vinegar method does not fully remove the smell. For more details on cleaning general pee stains, check out tips on how to clean pee off a mattress. If you are specifically dealing with foam, learn about how to clean urine out of a foam mattress.
Deep Cleaning for Stubborn Stains and Odors
Sometimes, a fresh accident goes unnoticed for a while. Or perhaps the initial cleaning was not enough. This can lead to stubborn stains and persistent odors. Deep cleaning becomes necessary in these cases. You want to make sure the mattress is truly clean and fresh.
Dealing with dried urine is different from fresh urine. The uric acid crystals have time to set. This makes both the stain and the smell harder to remove. But it is not impossible. With patience and the right products, you can refresh your mattress.
Addressing Older Urine Stains
Older urine stains often appear yellow or brownish. They also come with a stronger, more ingrained odor. A simple blotting and spray might not cut it. You need a more focused approach. This often involves repeated treatments or stronger solutions.
Here’s how to tackle older urine stains:
- Re-wet the stain: Lightly dampen the old stain with a mix of warm water and a small amount of liquid dish soap. This helps reactivate the urine crystals.
- Apply a vinegar paste: Mix baking soda with white vinegar to form a thick paste. Apply this paste generously over the entire old stain. The paste should be thick enough to stay on the surface.
- Let it sit for longer: Allow the paste to sit for several hours, or even a full day. For very old or dark stains, I might let it sit for up to 24 hours. The longer dwell time helps break down the set-in compounds.
- Scrape and vacuum: Once the paste is completely dry, gently scrape off the hardened residue. Then, vacuum up all remaining baking soda. You might need to use a stiff brush to loosen the dried paste before vacuuming.
- Repeat if necessary: For very stubborn stains, you might need to repeat this process. Sometimes, it takes two or three treatments to fully lighten an old stain.
You can find more detailed guidance on how to clean a pee-stained mattress if the stain has really set in.
Eliminating Lingering Urine Odors
Even if the stain is gone, a faint urine smell can remain. This is due to uric acid crystals that have soaked deep into the mattress fibers. Standard cleaners do not always break down these crystals completely. This is where specialized treatments shine.
To fully eliminate lingering urine odors:
- Use an enzymatic cleaner again: If you did not use one before, now is the time. Enzymatic cleaners are designed to break down the uric acid molecules. They effectively eliminate the source of the odor. Follow the instructions on the product for best results.
- Apply heavily and let it dwell: For persistent odors, be generous with the enzymatic cleaner. Ensure it soaks into the area where the odor is strongest. Let it sit for the maximum recommended time, or even longer if the smell is severe.
- Baking soda follow-up: After blotting the enzymatic cleaner, sprinkle a fresh layer of baking soda over the entire area. Let it sit for another 12-24 hours. Baking soda is a powerful odor absorber. It helps pull out any remaining smells.
- Air out the mattress: Once the cleaning is done and the mattress is dry, try to air it out. Open windows, use a fan, or even take the mattress outside on a sunny day if possible. Sunlight is a natural disinfectant and deodorizer.
- Consider an odor neutralizer spray: As a last resort, if a very faint odor remains, you can use a fabric odor neutralizer spray. Choose one designed for pet odors or general fabric odors. Do a spot test first to ensure it does not stain.
Remember, patience is key when dealing with odors. It often takes several steps and good drying to completely remove the smell. This also applies to general how to clean stains from a mattress if the issue is a set-in stain.
Cleaning Specific Mattress Types: What You Need to Know
Mattresses come in many different types. Each type has its own unique construction and materials. This means the cleaning approach can vary slightly. You need to be careful not to damage your specific mattress type. Using the wrong cleaning method could void your warranty or harm the mattress.
For example, memory foam mattresses are very absorbent. They require less liquid during cleaning. Pillow-top mattresses have an extra layer that needs gentle care. Knowing your mattress type helps you clean it safely and effectively. This ensures the mattress lasts longer.
Cleaning a Memory Foam Mattress
Memory foam mattresses are popular for their comfort. However, they are also highly absorbent. This means a child’s urine accident can soak in quickly. Cleaning memory foam needs a careful approach to avoid over-saturating the material. Excess moisture can damage the foam and lead to mold.
Here are the steps to clean a memory foam mattress:
- Blot, do not rub: As with any mattress, immediately blot the urine with clean towels. Press firmly to absorb as much liquid as possible. Do not rub, as this can spread the urine deeper into the foam.
- Use a gentle solution: Mix a small amount of mild dish soap with water in a spray bottle. You can also use a mixture of white vinegar and water (50/50). Avoid harsh chemicals or strong detergents.
- Lightly spray: Lightly mist the stained area with your chosen solution. Use as little liquid as possible. You want to dampen the surface, not soak the foam.
- Dab, do not scrub: Use a clean cloth to gently dab the solution into the stain. Again, avoid scrubbing, which can damage the foam’s structure.
- Rinse (if necessary) by blotting: If you used soap, dampen a clean cloth with plain water and blot the area to “rinse” it. This removes soap residue.
- Apply baking soda: Sprinkle a generous layer of baking soda over the damp area. This helps absorb remaining moisture and neutralize odors.
- Allow extensive drying: This is the most crucial step for memory foam. Let the baking soda sit for at least 8-10 hours, or even longer. Place a fan nearby or open windows to ensure good air circulation. Memory foam takes a long time to dry.
- Vacuum: Once completely dry, vacuum up the baking soda.
For more specific advice on how to clean a memory foam mattress or how to clean foam mattress, refer to detailed guides.
Caring for Pillow-Top Mattresses
Pillow-top mattresses have an extra layer of padding sewn into the top. This adds comfort but also presents a unique cleaning challenge. The pillow top can be thick and trap moisture easily. Cleaning needs to be gentle to protect this plush layer.
Here is how to care for a pillow-top mattress:
- Blot immediately: Just like other mattresses, start by blotting the urine. Press down firmly with clean towels to soak up as much liquid as possible.
- Use minimal liquid: The pillow top can absorb a lot of moisture. This makes drying difficult and increases mold risk. Apply cleaning solutions sparingly. Use a spray bottle and mist lightly.
- Gentle cleaning solutions: A solution of white vinegar and water (50/50) or a diluted enzymatic cleaner works well. Apply it with a soft cloth, dabbing gently onto the stain.
- Avoid soaking: Do not pour liquid directly onto the mattress. The pillow top’s extra padding can hold water. This leads to longer drying times and potential damage.
- Baking soda application: Sprinkle a good amount of baking soda over the damp area. Let it sit for several hours, or overnight. This helps absorb odors and moisture from the pillow top.
- Thorough vacuuming: Once dry, vacuum up the baking soda. Use an upholstery attachment to get into the crevices of the pillow top.
- Ensure full drying: Air circulation is critical for pillow-top mattresses. Use fans or position the mattress in a well-ventilated room. It must be completely dry before you remake the bed.
For deeper insights into keeping your plush mattress clean, refer to articles on how to clean pillow-top mattress.
Drying Your Mattress Safely and Thoroughly
Drying is a critical step in cleaning a mattress after a child pees the bed. If you do not dry the mattress completely, moisture can lead to mold and mildew growth. Mold causes unpleasant smells and can pose health risks. It can also permanently damage your mattress.
Patience is key during the drying process. Do not rush to remake the bed. I always make sure my mattresses are bone dry before putting sheets back on. This prevents further problems down the road.
Air Drying Techniques
Air drying is the best and safest way to dry your mattress. It allows natural evaporation and reduces the risk of heat damage. Good air circulation speeds up the process. You want to create an environment where moisture can escape easily.
Here are effective air drying techniques:
- Open windows: If weather permits, open windows in the room. This creates cross-ventilation and helps air move through the room. Fresh air also helps dissipate odors.
- Use fans: Place a fan or two near the mattress, pointing directly at the treated area. This significantly increases air circulation. A box fan or a standing fan works well.
- Elevate the mattress: If possible, stand the mattress on its side or prop it up against a wall. This exposes more surface area to the air, helping it dry from all sides.
- Sunny spot (if feasible): Sunlight is a natural disinfectant and helps dry surfaces. If you can, move the mattress to a sunny spot, either outside or near a large window. Direct sunlight can kill bacteria and help fade stains. Be careful not to expose memory foam to direct sunlight for too long, as it can degrade the material.
- Flip and rotate: For large stains, flip the mattress after a few hours to allow the underside to dry. This ensures even drying.
Speeding Up the Drying Process
Sometimes you need the mattress to dry faster. While natural air drying is best, there are ways to speed it up. These methods help, but always prioritize thorough drying. You do not want any moisture left behind.
Ways to speed up mattress drying:
- Hairdryer (on cool setting): You can use a hairdryer set to the cool or low heat setting. Hold it several inches away from the mattress surface. Keep the dryer moving to avoid concentrating heat in one spot. Never use a hot setting, especially on memory foam, as it can damage the material.
- Dehumidifier: A dehumidifier in the room can pull moisture from the air. This speeds up the drying process. Place it near the mattress and let it run.
- Towels for absorption: After initial blotting, place dry towels on the treated area. Press down firmly to absorb more moisture. You can even place a heavy object on top of the towels for a few hours. Change the towels as they become damp.
- Warm room: Keep the room temperature slightly warm but not hot. A warm room allows for quicker evaporation. Ensure there is still good air flow.
No matter which method you use, check the mattress thoroughly. Feel the surface and press down to check for any dampness. A completely dry mattress is a clean and healthy mattress.
Preventing Future Accidents: Proactive Mattress Protection
Dealing with a wet mattress can be a hassle. The best way to manage child bedwetting accidents is to prevent them. Proactive measures save you time, effort, and stress. A protected mattress also gives you peace of mind.
Prevention involves both physical barriers and routine adjustments. You want to create a system that catches accidents before they reach the mattress. This makes cleanup much easier. My family found these steps helpful.
Investing in a Waterproof Mattress Protector
A waterproof mattress protector is your mattress’s best friend. This item creates a barrier between your child and the mattress. It catches all liquids, from urine to spilled drinks. This simple addition saves your mattress from ever getting wet.
Why a waterproof mattress protector is essential:
- Complete protection: It fully encases or covers the top and sides of the mattress. This stops liquid from reaching the mattress fabric.
- Easy to clean: When an accident happens, you simply remove the protector and wash it. Most are machine washable and dryable.
- Hygienic barrier: It protects against dust mites, allergens, and bacteria, in addition to liquids. This contributes to a healthier sleep environment.
- Cost-effective: A protector is much cheaper than replacing a stained or smelly mattress. It extends the life of your current mattress.
- Peace of mind: You can rest easy knowing your mattress is safe from spills and accidents.
When buying, look for one that is both waterproof and breathable. Some protectors can make the bed feel hot, so check reviews for comfort. A good protector fits snugly and does not crinkle loudly. For more information on maintaining these protectors, check out how to clean mattress protector.
Bedtime Routines to Reduce Accidents
While a protector handles spills, routines can help reduce the frequency of accidents. Establishing a consistent evening routine supports your child’s journey to nighttime dryness. This takes pressure off both the child and the mattress.
Consider these bedtime routine adjustments:
- Limit liquids before bed: Reduce your child’s fluid intake in the hour or two before bedtime. This does not mean restricting all fluids, but focusing on small sips.
- Bathroom trip before bed: Make sure your child uses the bathroom right before getting into bed. Even if they say they do not need to go, encourage them to try.
- Wake for a “dream pee”: For children prone to bedwetting, consider gently waking them up to use the bathroom once during the night. This is often done a few hours after they fall asleep.
- Positive reinforcement: Praise your child for dry nights. Avoid punishment or shaming for accidents. Bedwetting is not voluntary. Positive support helps build confidence.
- Consistency: Stick to the routine every night, even on weekends. Consistency helps train the bladder and body clock.
- Consider a bedwetting alarm: If bedwetting is frequent, a bedwetting alarm can be very effective. It wakes the child as soon as they start to wet, helping them learn to recognize bladder signals.
Combining a reliable mattress protector with supportive bedtime routines gives you the best chance for dry nights. It helps keep your mattress clean and your child comfortable.
When to Call the Professionals or Consider Replacement
Despite your best efforts, some mattress accidents are too severe for home cleaning. There are times when professional help is necessary. Sometimes, replacement is the only logical next step. Knowing when to make these decisions saves you time, money, and frustration.
It is important to assess the situation honestly. Do not put your health or comfort at risk. A severely soiled mattress can become a breeding ground for bacteria or mold. This creates an unhealthy sleep environment.
Consider calling professionals or replacing your mattress if:
- Extensive saturation: The urine has soaked through the entire mattress, top to bottom. This happens with very large accidents or if the urine sits for a long time. Home cleaning methods cannot reach deep enough.
- Persistent, strong odor: You have tried multiple cleaning methods, but a strong, lingering urine smell remains. This often means the uric acid crystals are deeply embedded. Professionals have stronger equipment and chemicals.
- Visible mold or mildew: If you see any signs of mold growth, such as black, green, or white spots, or a musty smell that is not urine, it is a serious issue. Mold can be harmful to health and is very hard to remove completely from deep within a mattress.
- Multiple, repeated accidents: If your child has frequent, large accidents on the same spot, the mattress might be beyond repair. The accumulated moisture and contaminants can degrade the mattress material.
- Allergies or respiratory issues: If anyone in the household develops new allergies or respiratory problems after an accident, a moldy mattress could be the cause.
- Age of the mattress: If your mattress is already old (8-10 years or more) and has a major accident, it might be time to replace it anyway. Old mattresses already harbor dust mites and allergens.
Professional mattress cleaners have specialized equipment. They use powerful extractors and industrial-strength enzymatic solutions. They can often clean stains and odors that home methods cannot touch. However, even professionals might not be able to save a mold-infested mattress. They may also not be able to deeply clean a general how to deep clean your mattress scenario.
If professional cleaning is too expensive or not effective, buying a new mattress is the healthier choice. When considering a replacement, remember to invest in a high-quality waterproof mattress protector from day one. This will prevent similar issues in the future.
FAQ Section
Q1: Can I
- mattress cleaning
- child bedwetting
- urine stain removal
- pee odor removal
- bed hygiene

Todd Martin
Senior Writer
With over 15 years of experience in home renovation and design, I started HEG to share what I’ve learned with homeowners who want to create spaces that are both beautiful and functional. I’ve always believed in a hands-on approach, and over the years, I’ve picked up practical solutions that actually work. Through HEG, I aim to make home improvement more approachable, sharing real tips that help you create a home you truly love.