· Todd Martin · Kitchen Cleaning · 20 min read
How To Clean Metal Pans
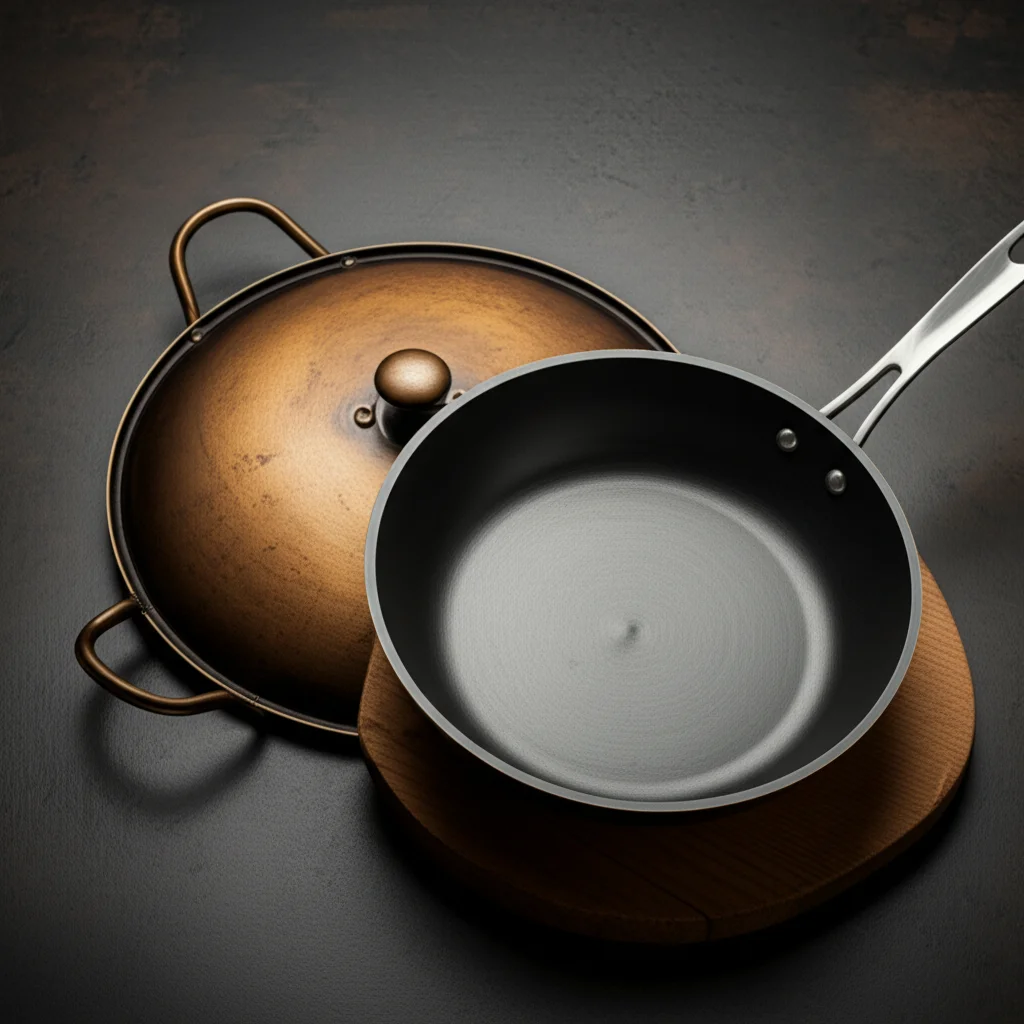
How To Clean Metal Pans: Shine Like New
Your metal pans are kitchen workhorses. They face high heat, sticky sauces, and stubborn food residues. Over time, pans can lose their shine and accumulate grime. Cleaning metal pans correctly ensures they perform well and last longer. A well-maintained pan cooks food evenly and is a joy to use. This guide will show you how to restore your pans, from basic washes to tackling tough stains. We will cover different types of metal pans and specific cleaning challenges. You will learn practical methods to keep your cookware looking its best.
Takeaway
- Identify your pan’s metal type for proper cleaning.
- Use warm water and soap for daily cleaning.
- Address burnt food with soaking and gentle scrubbing.
- Remove baked-on grease using baking soda or commercial degreasers.
- Restore shine with natural or specialized cleaners.
- Avoid harsh abrasives or chemicals that can damage finishes.
- Prevent future stains by cleaning pans immediately after use.
To clean metal pans effectively, first identify the pan’s material. Then, select appropriate cleaning agents like dish soap, baking soda, or vinegar. Always start with the least abrasive method. For tough stains, allow for soaking time before scrubbing. Finish by rinsing thoroughly and drying the pan completely to prevent water spots and rust.
Understanding Your Metal Pans: Different Types and Their Needs
Metal pans come in many forms, each with unique cleaning requirements. Knowing your pan’s material helps you choose the right cleaning method. I learned this the hard way, damaging a favorite pan with the wrong cleaner. Stainless steel is durable and resists rust. Cast iron needs careful seasoning and avoids harsh soaps. Aluminum pans are lightweight but can discolor. Copper pans are beautiful but require polishing to maintain their luster. Non-stick pans, often with a metal base, need gentle care to protect their coating.
Stainless Steel Pans: Built to Last
Stainless steel pans are popular for their durability and even heating. They are relatively easy to clean. You can usually use soap and water for everyday messes. For tougher stains, they can handle a bit more scrubbing. However, even stainless steel can suffer from burnt food or stubborn discoloration. Special care ensures they retain their gleam. I always make sure to dry my stainless steel pans completely after washing. This step prevents water spots that can be difficult to remove later.
Cast Iron Skillets: Seasoning is Key
Cast iron pans are known for their excellent heat retention and non-stick properties when seasoned well. Cleaning cast iron is different from other metals. You avoid harsh soaps that strip the seasoning. Water and a stiff brush are often enough. After cleaning, you must dry cast iron thoroughly and reapply a thin layer of oil. This process keeps it rust-free and maintains its natural non-stick surface. Properly cared for, cast iron can last generations. For more general advice on maintaining your cookware, consider learning how to clean pots and pans effectively.
Aluminum Pans: Lightweight and Versatile
Aluminum pans are affordable and conduct heat quickly. They are prone to discoloration, especially from acidic foods or hard water. Aluminum can also scratch easily. Avoid abrasive scrubbers or strong alkaline cleaners. Mild dish soap and soft sponges work best for daily cleaning. To remove discoloration, some suggest boiling water with a bit of lemon juice or cream of tartar. This can help brighten the surface.
Copper Bottom Pans: A Touch of Elegance
Copper-bottom pans are prized for their heat conductivity and classic look. The copper often discolors quickly, especially with heat. The copper layer needs regular polishing to keep its bright finish. The interior cooking surface, often stainless steel, is cleaned like any other stainless steel pan. You can use specialized copper cleaners or natural remedies like lemon and salt to polish the copper exterior. It takes a little more effort, but the beauty is worth it. For detailed steps on maintaining these specific pans, you can find helpful tips on how to clean copper bottom pans.
Non-Stick Pans with Metal Bases: Gentle Cleaning
Non-stick pans, like those from Circulon or Caraway, have a special coating. This coating makes food release easy. The underlying pan material is often aluminum or stainless steel. The key is to protect the non-stick surface. Use soft sponges and mild dish soap. Never use abrasive cleaners, metal utensils, or harsh scrubbing pads. These can scratch and ruin the non-stick coating. Even if the pan has a robust metal base, the delicate cooking surface needs gentle handling. For brand-specific advice, you might look into guides on how to clean Circulon pans or how to clean Caraway pans.
Basic Cleaning for Everyday Metal Pan Care
Everyday cleaning is crucial for maintaining your metal pans. It prevents food residue from hardening and stains from setting in. I always try to clean my pans right after cooking. This simple habit saves a lot of effort later. A quick wash often does the trick. You need warm water, dish soap, and a soft sponge.
The Standard Dish Soap Method
This method works for most metal pans, especially stainless steel, non-stick, and light aluminum.
- Rinse Immediately: As soon as the pan cools down, rinse it with warm water. This removes loose food bits.
- Add Soap: Apply a few drops of mild dish soap to a soft sponge or cloth.
- Wash Gently: Scrub the pan’s interior and exterior in circular motions. Focus on any food residue.
- Rinse Thoroughly: Rinse the pan under running warm water until all soap is gone.
- Dry Immediately: Use a clean towel to dry the pan completely. Air drying can lead to water spots or rust, especially on cast iron or aluminum. I always dry my pans quickly to avoid any issues.
Using Hot Water for Light Residues
Sometimes, simply hot water is enough for quick clean-ups. If food is not heavily stuck, try this.
- Fill with Hot Water: After cooking, let the pan cool slightly. Fill it with hot tap water.
- Let Sit Briefly: Let the hot water sit in the pan for a few minutes. This loosens minor residues.
- Scrape and Rinse: Use a wooden or silicone spatula to gently scrape any loosened bits. Then, pour out the water and rinse.
- Dry: Dry the pan completely with a towel.
This method is great for preventing build-up on pans that are used frequently but not for heavily cooked or burnt items.
Targeting Burnt Food and Stains on Metal Pans
Burnt food is a common problem in kitchens. It sticks firmly to the pan’s surface. These stubborn stains often require more than just soap and water. I remember once burning a sauce and thinking my pan was ruined. Luckily, there are effective ways to tackle these issues. Patience is a virtue when dealing with burnt-on messes. The right approach can save your favorite cookware.
Soaking to Loosen Burnt Residue
Soaking is the first line of defense against burnt food. It softens the hardened bits, making them easier to remove.
- Fill with Water and Soap: Fill the pan with warm water. Add a generous squirt of dish soap.
- Heat Gently (Optional): For very stubborn burns, you can gently heat the water on the stove for a few minutes. Do not boil vigorously, especially for non-stick pans. Let it cool before proceeding.
- Soak Overnight: Let the pan soak for several hours, or even overnight. This gives the water and soap time to break down the burnt layers.
- Scrub Gently: After soaking, use a non-abrasive scrubber, a nylon brush, or a plastic scraper. The burnt bits should come off more easily. Avoid metal scrubbers, especially on stainless steel or non-stick, as they can cause scratches. This method is effective for various residues, including those on the outside bottom of your pans. You can find more details on how to clean the outside bottom of pans.
Baking Soda and Water Paste
Baking soda is a gentle abrasive and a natural deodorizer. It works wonders on burnt-on food.
- Make a Paste: Mix baking soda with a small amount of water to form a thick paste.
- Apply to Stain: Spread the paste generously over the burnt area.
- Let Sit: Let the paste sit for 15-30 minutes, or longer for tough stains. Overnight is ideal for very severe burns.
- Scrub and Rinse: Use a non-abrasive sponge or brush to scrub the paste. The baking soda helps lift the burnt particles. Rinse thoroughly. This method is especially helpful for stainless steel. For tough burnt stains on stainless steel, this technique is also covered in how to clean burnt stainless steel pans.
Vinegar and Baking Soda Combo
This combination creates a fizzing action that helps loosen stubborn burnt food. It is great for tackling tough spots inside the pan.
- Pour Vinegar: Pour a layer of white vinegar into the pan, just enough to cover the burnt area.
- Heat (Optional): You can heat the vinegar gently on the stove for a few minutes, then remove from heat.
- Add Baking Soda: Sprinkle a generous amount of baking soda over the vinegar. It will fizz.
- Let Sit: Let the mixture sit for 15-30 minutes. The fizzing action works to lift the burnt bits.
- Scrub and Rinse: Drain the mixture. Use a non-abrasive scrubber to remove the softened residue. Rinse well. This is a common and effective method, also detailed in how to clean stainless steel pans with baking soda.
Effective Strategies for Baked-On Grease Removal
Baked-on grease is often sticky and dark. It can accumulate on the exterior and interior of pans, especially on the bottom. This type of grease is tough to remove with regular washing. I have battled many pans with layers of old grease. It requires specific approaches to break down these stubborn layers. Effective removal makes pans look cleaner and improves heat distribution.
The Power of Baking Soda and Peroxide
This combination creates a powerful degreasing agent. It works wonders on the baked-on grease found on the outside and bottom of pans.
- Create a Paste: Mix baking soda with a small amount of hydrogen peroxide to form a thick paste. Aim for a consistency like toothpaste.
- Apply Generously: Spread the paste thickly over the areas with baked-on grease.
- Let Sit for Hours: This is crucial. Let the paste sit on the pan for several hours, or even overnight. The longer it sits, the more it breaks down the grease.
- Scrub and Rinse: After soaking, use a stiff brush or a non-scratch scouring pad to scrub the treated areas. The grease should lift away. Rinse the pan thoroughly with warm water. This method is particularly effective for how to clean baked-on grease from pans and even for burnt grease from the bottom of frying pans.
Dish Soap and Boiling Water Method
For more recent or less severe baked-on grease, this method can be effective.
- Fill Pan with Water: Fill the pan with water, covering the greased areas.
- Add Dish Soap: Add a generous amount of dish soap to the water.
- Boil Gently: Place the pan on the stove and bring the water to a gentle boil. Let it simmer for 10-15 minutes. The hot soapy water helps to emulsify and lift the grease.
- Cool and Scrub: Let the water cool down. Then, carefully pour out the water. Use a non-abrasive scrubber to wipe away the loosened grease. Rinse and dry the pan.
Using Commercial Degreasers
For very old and stubborn baked-on grease, a specialized commercial degreaser might be necessary.
- Read Instructions: Always read the product label carefully. Follow all safety warnings and application instructions. Some products require gloves and ventilation.
- Apply and Wait: Apply the degreaser to the affected areas. Allow it to sit for the recommended time.
- Scrub and Rinse: Use a stiff brush or appropriate scrubber to remove the grease. Rinse the pan extremely well to ensure no chemical residue remains. I advise caution with these products; they are powerful and can be harsh on skin or pan finishes if not used correctly. For similar issues on stove elements, you can check guides like how to clean burner pans or even how to clean stove drip pans.
Restoring the Luster of Stainless Steel Pans
Stainless steel pans are renowned for their sleek appearance. Over time, however, they can develop dullness, water spots, or a rainbow-like discoloration. This happens due to mineral deposits or overheating. Restoring their shine makes them look new again. I find immense satisfaction in seeing my stainless steel pans gleam after a good cleaning. It truly makes a kitchen feel brighter. For general stainless steel maintenance, learning how to clean stainless steel surfaces can offer broader insights.
Vinegar for Water Spots and Rainbow Stains
White vinegar is an excellent, natural cleaner for stainless steel. It cuts through mineral deposits and removes the heat-induced rainbow discoloration.
- Apply Vinegar: Pour a small amount of white vinegar onto a soft cloth or paper towel.
- Wipe and Buff: Wipe the pan’s surface, especially focusing on water spots or discolored areas. Rub in the direction of the metal’s grain.
- Rinse and Dry: Rinse the pan thoroughly with water to remove all vinegar residue. Immediately dry with a clean, soft cloth to prevent new water spots. The acidity of vinegar helps dissolve the mineral deposits that cause dullness.
Bar Keepers Friend for Deep Cleaning and Shine
Bar Keepers Friend is a popular cleaner for stainless steel. It contains oxalic acid, which effectively removes rust, tarnish, and tough stains without being overly abrasive.
- Wet Pan and Powder: Wet the pan surface slightly. Sprinkle Bar Keepers Friend powder onto a damp cloth or sponge.
- Rub Gently: Rub the pan gently in the direction of the grain. For tougher spots, you can apply a bit more pressure.
- Rinse Thoroughly: Rinse the pan completely to remove all cleaner residue. Leaving it on can cause new stains.
- Dry and Buff: Dry the pan immediately with a soft towel. You can buff it for extra shine. I use this cleaner whenever my stainless steel pans start to look dull. It brings back their original luster every time. For specific instructions on cleaning stainless steel pans, this product is often recommended in guides like how to clean stainless steel pans.
Olive Oil for a Final Polish
After cleaning, a tiny bit of olive oil can enhance the shine of your stainless steel pans.
- Apply Small Amount: Put a drop or two of olive oil on a clean, dry cloth.
- Buff the Surface: Rub the pan’s surface in the direction of the grain. This helps to repel water and finger-prints, giving it a polished look.
- Wipe Excess: Wipe off any excess oil. You want a subtle shine, not a greasy feel.
Caring for Specific Metal Pans: Cast Iron and Non-Stick
Different metal pans require tailored care. What works for stainless steel may harm cast iron or non-stick surfaces. I have learned to respect the specific needs of each pan type. Proper care extends the life of your cookware and ensures optimal cooking performance. Treating each pan according to its material is a key part of maintaining a functional kitchen.
Cleaning and Re-Seasoning Cast Iron
Cast iron pans gain a natural non-stick surface through a process called seasoning. This layer of polymerized oil needs protection.
- Avoid Harsh Soap: For everyday cleaning, avoid using traditional dish soap. It can strip the seasoning.
- Hot Water and Stiff Brush: Rinse the pan with hot water immediately after cooking. Use a stiff nylon brush or a pan scraper to remove food bits. For very stuck-on food, a bit of coarse salt can act as an abrasive.
- Dry Thoroughly: This is critical. Place the pan on the stove over low heat for a few minutes until completely dry. Any moisture will cause rust.
- Re-season: Once dry, apply a very thin layer of high smoke point oil (like vegetable or flaxseed oil) to the entire pan, inside and out. Wipe off any excess with a paper towel. Heat the pan on the stove or in the oven at a moderate temperature (e.g., 375°F/190°C for an hour) to polymerize the oil. This maintains the non-stick surface. I always make sure my cast iron is dry and oiled after each use.
Gentle Cleaning for Non-Stick Pans
Non-stick coatings are delicate. They scratch easily. Protecting this coating is vital for the pan’s performance and longevity.
- Use Soft Tools: Always use soft sponges, dishcloths, or silicone scrubbers. Never use abrasive pads, steel wool, or metal utensils on non-stick surfaces.
- Mild Dish Soap: Use mild dish soap and warm water. Avoid harsh detergents or oven cleaners.
- Cool Pan First: Allow the pan to cool completely before washing. Submerging a hot non-stick pan in cold water can warp it.
- Avoid Dishwasher: Most manufacturers recommend hand washing non-stick pans. Dishwashers can degrade the non-stick coating over time due to harsh detergents and high heat. I always hand wash my non-stick pans to protect their surface.
Dealing with Discoloration and Tarnish on Metal Pans
Discoloration and tarnish can make metal pans look old and dirty. These issues are common, especially with aluminum and copper. They result from mineral deposits, oxidation, or heat exposure. I used to think a discolored pan was beyond help. But often, it just needs the right treatment to bring back its original look. Addressing these issues improves both the appearance and perceived cleanliness of your pans.
Brightening Aluminum Pans
Aluminum pans can develop a dull, dark, or stained appearance. This often happens from boiling water with certain minerals or from cooking acidic foods.
- Boil with Acid: Fill the pan with water. Add two tablespoons of cream of tartar, white vinegar, or lemon juice per quart of water.
- Simmer: Bring the mixture to a simmer for 10-15 minutes. The acidic solution helps to lift the discoloration.
- Cool and Scrub: Let the solution cool. Pour it out. Use a soft sponge or cloth to gently scrub any remaining stains.
- Wash and Dry: Wash the pan with mild dish soap and warm water. Dry it immediately. This method works well for aluminum and helps restore its natural brightness.
Polishing Copper and Copper-Bottom Pans
Copper naturally tarnishes and discolors due to oxidation and heat. Regular polishing is needed to maintain its signature shine.
- Lemon and Salt Method: Cut a lemon in half. Sprinkle a generous amount of coarse salt onto the cut surface of the lemon.
- Rub Copper: Use the lemon half to rub the salt onto the tarnished copper areas. The acid in the lemon and the abrasive salt work together to remove tarnish.
- Rinse and Dry: Rinse the pan thoroughly with warm water. Dry immediately and buff with a soft cloth.
- Commercial Polish: For heavy tarnish, a commercial copper polish can be very effective. Follow the product instructions carefully. Ensure you rinse all residue completely to prevent food contamination. My copper pans always look their best with this routine.
Advanced Cleaning Techniques for Deep-Set Issues
Sometimes, pans face problems that basic cleaning cannot solve. Deep-set stains, heavy rust, or extremely burnt layers require more intensive methods. These techniques go beyond everyday maintenance. I use these for pans that I thought were lost causes. They can salvage cookware and save money on replacements. These methods are powerful, so use them carefully and follow safety guidelines.
Oven Cleaner for Extreme Burnt-On Residue (Use with Caution)
Oven cleaner is very strong. It can dissolve tough baked-on grease and carbon deposits. Only use it on the exterior or non-cooking surfaces of metal pans, and never on non-stick, aluminum, or cast iron.
- Protect Yourself: Wear rubber gloves and ensure good ventilation. Work in a well-aired area or outside.
- Apply Cleaner: Spray or apply oven cleaner onto the heavily burnt or greasy areas on the pan’s exterior or bottom. Avoid contact with the cooking surface or handles.
- Wrap and Wait: For best results, wrap the pan in a plastic bag or plastic wrap. This keeps the cleaner moist and allows it to penetrate. Let it sit for several hours or overnight, as recommended by the product.
- Scrub and Rinse: Carefully unwrap the pan. Use a stiff brush or a non-scratch scouring pad to scrub away the loosened grime. Rinse the pan thoroughly with very hot, soapy water. Rinse several times to remove all chemical residue. This method works exceptionally well for stubborn exterior grease, like those found on the very bottom of your pan.
Electrolysis for Rust Removal (Advanced Cast Iron)
Electrolysis is a highly effective method for removing heavy rust from cast iron. It uses an electric current to convert rust back into iron. This is for serious rust problems and requires specific equipment.
- Setup: You need a plastic container, water, washing soda (sodium carbonate), a battery charger, and a piece of sacrificial steel (anode). The pan acts as the cathode.
- Process: Submerge the rusted pan in the washing soda solution. Connect the battery charger terminals correctly. The rust will migrate from the pan to the sacrificial anode.
- Clean: After several hours or overnight, remove the pan. The rust will often be gone or easily wiped away.
- Re-season: Immediately clean and re-season the cast iron pan to prevent new rust. This is a powerful but involved method, best for restoring heavily rusted cast iron pieces.
Hydrogen Peroxide and Baking Soda for Persistent Stains
This mixture creates a strong oxygen-based cleaner. It is good for general stubborn stains on stainless steel.
- Sprinkle Baking Soda: Sprinkle a generous layer of baking soda over the stained area.
- Pour Peroxide: Pour hydrogen peroxide over the baking soda until it is saturated.
- Let Sit: Allow the mixture to sit for at least 30 minutes, or longer for very tough stains.
- Scrub and Rinse: Scrub with a non-abrasive brush or sponge. The bubbling action helps lift the stains. Rinse thoroughly and dry. This technique is often used in broader stainless steel cleaning guides.
Preventative Steps for Keeping Your Metal Pans Clean
Prevention is easier than cure, especially with metal pans. Taking a few simple steps after each use can save you hours of scrubbing later. I have found that a little effort upfront makes a big difference in maintaining my cookware’s appearance and performance. These habits keep your pans in top shape and prolong their life.
Clean Pans Immediately After Use
Do not let food sit and harden. As soon as the pan cools enough to handle, clean it.
- Rinse Promptly: A quick rinse with warm water before food sets prevents many stains.
- Avoid Dried-On Food: Dried food becomes cemented to the pan. It is much harder to remove later.
- Warm Water Soak: If you cannot clean immediately, fill the pan with warm, soapy water. This keeps food from drying onto the surface.
Avoid Overheating Empty Pans
Overheating can cause discoloration, especially on stainless steel. It can also damage non-stick coatings.
- Add Food or Liquid: Always add oil, butter, or liquid to the pan before heating it.
- Use Medium Heat: Most cooking does not require very high heat. Medium heat is often sufficient and prevents scorching.
- Monitor Heat: Pay attention to your pan. If it starts smoking without food, it is too hot.
Use Appropriate Utensils
The right tools prevent scratches and damage to the pan’s surface.
- Non-Stick: Always use silicone, wood, or plastic utensils. Metal utensils will scratch the delicate non-stick coating.
- Stainless Steel: Silicone, wood, or metal utensils are generally fine. Avoid sharp metal tools that could scratch the finish.
- Cast Iron: Metal spatulas are generally safe once the pan is well-seasoned.
Season Cast Iron Regularly
For cast iron pans, regular seasoning is vital for their non-stick properties and rust prevention.
- After Every Wash: After washing and thoroughly drying your cast iron, apply a very thin layer of cooking oil.
- Heat to Polymerize: Heat the pan gently to polymerize the oil. This maintains the seasoning layer.
- Prevents Rust: A well-seasoned pan resists rust and performs better.
Dry Pans Completely
Moisture is the enemy of many metal pans, especially cast iron and some stainless steel types.
- Towel Dry: Always dry your pans with a clean towel immediately after washing.
- Air Dry Risk: Air drying leaves water spots and can lead to rust. This is especially true for the bottom of the pan, where water can pool.
- Heat Dry Cast Iron: For cast iron, place it on low heat on the stove for a few minutes to ensure it is bone dry.
- metal pan cleaning
- burnt food removal
- stainless steel pans
- cast iron care


