· Davia Murnell · Home Cleaning · 16 min read
How To Clean Mirrors Streak Free
Clean Mirrors Streak Free: Your Guide to a Flawless Reflection
Have you ever cleaned your mirror, only to step back and find frustrating streaks? It is a common problem. Streaks can make a clean space look messy. They hide your true reflection. I know the feeling of wanting a perfectly clear surface. This guide will show you how to clean mirrors streak free, every time. We will explore the right tools and methods. You will learn simple steps for a sparkling, clear reflection. Get ready to enjoy a truly clean mirror.
Takeaway
- Use proper tools like microfiber cloths or newspaper.
- Choose the right cleaning solution, store-bought or homemade.
- Employ specific techniques to avoid streaks.
- Clean mirrors regularly to maintain clarity.
How to Clean Mirrors Streak Free?
You can clean mirrors streak free by preparing the surface first, using a suitable cleaning solution, and wiping with a clean, lint-free cloth in a consistent pattern. Finish by buffing the mirror with a dry, clean cloth to remove any remaining moisture or residue.
Understanding the Enemy: What Causes Mirror Streaks?
Streaks on mirrors are a common frustration. They can make your mirror look dirtier than before you started cleaning. Many factors contribute to these annoying lines. Knowing what causes streaks helps you prevent them. It ensures a clearer, cleaner surface.
One main cause is using the wrong cleaning solution. Many commercial cleaners leave a film behind. This film shows up as streaks when it dries. Some cleaners contain soaps or dyes that cling to the glass. These additives do not evaporate cleanly. Using too much cleaner also creates problems. An excess of liquid leaves residue that becomes visible streaks. This residue traps dust and dirt particles.
Another big culprit is the type of cloth you use. Terry cloth towels or paper towels can leave lint. This lint sticks to the wet mirror. When the mirror dries, you see tiny fibers everywhere. These fibers catch the light and look like streaks. Dirty cloths also transfer grime back onto the mirror. If your cloth is not spotless, your mirror will not be either.
Even hard water can cause streaks. Minerals in hard water leave deposits when the water evaporates. These deposits appear as white spots or hazy streaks. If you live in an area with hard water, this is an important factor. Cleaning in direct sunlight also makes streaks worse. The sun dries the cleaner too quickly. This does not allow enough time for proper wiping and buffing. Understanding these causes helps you choose the right approach.
Gathering Your Arsenal: Essential Tools and Supplies for Streak-Free Cleaning
To achieve perfectly clean, streak-free mirrors, you need the right supplies. Using the correct tools makes a big difference. You do not need many items. A few key essentials will get the job done right. Having these items ready saves time. It also prevents frustration.
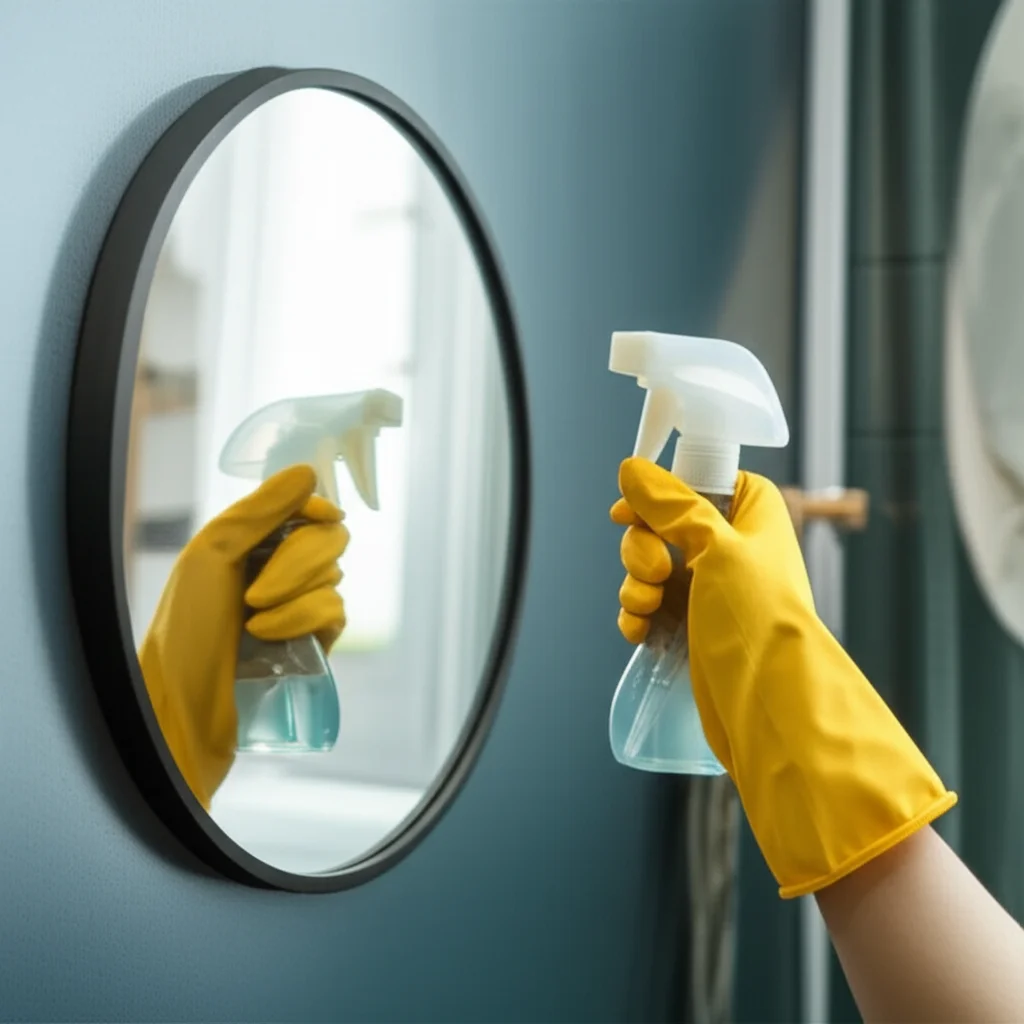
First, you need a good cleaning solution. You can buy commercial glass cleaner. Make sure it is ammonia-free if you have tinted mirrors. Ammonia can damage certain mirror backings. For a homemade option, distilled white vinegar works wonders. Mix equal parts vinegar and distilled water in a spray bottle. This solution cuts through grime effectively. Many people find this simple solution is the best mirror cleaner.
Next, you need the right wiping material. This is perhaps the most crucial item. Avoid paper towels or old cotton rags. These leave lint and fibers. Instead, choose high-quality microfiber cloths. Microfiber is excellent at trapping dirt and moisture. It leaves no lint behind. Have at least two microfiber cloths ready: one for applying cleaner and one for buffing dry. Some people prefer using old newspapers for buffing. Newspaper ink does not transfer to glass. It leaves a lint-free shine. You can learn more about general cleaning tools and their uses for different surfaces. Maintaining a clean bathroom often involves similar tools and approaches.
Finally, consider having a small bucket or basin. This is useful if you are making your own solution. It helps keep your cleaning area organized. A squeegee can also be very effective for large mirrors. Professionals often use squeegees for a reason. They provide a smooth, even wipe. Ensure the squeegee blade is clean and soft. A damaged blade can scratch the mirror. Having these items on hand prepares you for successful mirror cleaning.
The Art of Cleaning Mirrors: Step-by-Step Method for Perfect Results
Cleaning a mirror for a streak-free finish involves more than just spraying and wiping. It is a process. Following a specific sequence ensures the best outcome. This method helps eliminate streaks before they even appear. You will achieve a crystal-clear reflection every time.
Preparing the Surface
Begin by dusting the mirror surface. Use a soft, dry microfiber cloth. This removes loose dust and particles. Dusting prevents these particles from turning into muddy streaks when wet. If the mirror has a lot of dust, use a vacuum cleaner with a brush attachment. Be gentle when vacuuming. After dusting, inspect the mirror for any obvious grime. You might see toothpaste splatters or hairspray residue. For stubborn spots, apply a small amount of cleaner directly. Let it sit for a few seconds. This pre-treatment helps break down tough stains. This step is similar to preparing other surfaces before cleaning. For instance, cleaning bathroom mirrors often requires dealing with similar initial grime.
Applying the Cleaner
Once the mirror is dusted, apply your chosen cleaning solution. Do not spray too much. A light mist is enough for most mirrors. Hold the spray bottle about six inches from the mirror. Spray evenly across the surface. For larger mirrors, work in sections. This prevents the cleaner from drying too quickly. Drying too fast can lead to streaks. If you are using a homemade vinegar solution, shake it gently first. This ensures proper mixing. Apply enough cleaner to wet the surface but not saturate it.
Wiping and Buffing for Shine
This is the most critical step for streak-free mirrors. Use a clean, dry microfiber cloth or newspaper. Start wiping from the top corner of the mirror. Move in an “S” pattern, or overlapping strokes. Work your way down the mirror. This technique pushes dirt and cleaner downward. It prevents re-depositing grime on already clean areas. Overlap each stroke slightly. This ensures no missed spots. After the initial wipe, switch to a fresh, dry microfiber cloth. Buff the mirror until it shines. Use circular motions for buffing. This removes any remaining moisture or residue. A final buff makes the mirror truly streak-free. This technique is also helpful when you clean windows to avoid streaks.
DIY Solutions: Homemade Cleaners for Sparkling Mirrors
You do not need harsh chemicals to get sparkling, streak-free mirrors. Many effective cleaning solutions are already in your home. These DIY options are often safer and more economical. They also work incredibly well. I find homemade cleaners give a clearer shine.
Vinegar and Water Solution
The most popular homemade mirror cleaner is a simple mix of vinegar and water. Distilled white vinegar is acidic. This acid breaks down dirt, grease, and mineral deposits. It leaves glass incredibly clean. I recommend using distilled water. Tap water can contain minerals. These minerals might leave new streaks when they dry.
To make this solution:
- Get an empty spray bottle.
- Pour one part distilled white vinegar into the bottle.
- Add one part distilled water.
- Seal the bottle and shake it well.
This solution is ready to use. Spray it lightly on your mirror. Then wipe it with a clean microfiber cloth. You will be amazed by the results. The vinegar smell disappears quickly as it dries. This solution is also safe for many surfaces around the home.
Rubbing Alcohol for Extra Shine
For an extra boost, or to cut through tough grime, add rubbing alcohol. Rubbing alcohol evaporates quickly. This characteristic helps prevent streaks. It also disinfects the surface. This is a great addition for bathroom mirrors. They often deal with toothpaste and hairspray residue.
To make this solution:
- Mix one cup of rubbing alcohol.
- Combine it with one cup of distilled water.
- Add one tablespoon of white vinegar (optional, but helps with grime).
- Pour into a spray bottle and shake gently.
Use this solution just like the vinegar and water mix. It works especially well for mirrors that get a lot of use. It leaves a very crisp, clean finish. This method is effective for various cleaning tasks. It delivers a superior shine without much effort.
Cornstarch for Stubborn Grime
Cornstarch might seem unusual for cleaning. However, it is an excellent abrasive. It helps lift away stubborn grime and residue. This makes it perfect for heavily soiled mirrors. It works by absorbing oils and dirt. This technique gives you a very clear surface.
To use cornstarch:
- Mix two tablespoons of cornstarch into your vinegar and water solution.
- Shake the bottle very well before each use.
- Spray onto the mirror.
- Wipe vigorously with a clean microfiber cloth.
The cornstarch mixture can leave a slight powdery residue initially. This is normal. Just buff the mirror with a second dry microfiber cloth. The mirror will shine beautifully. These DIY solutions show that effective cleaning does not require expensive products. They offer simple, powerful ways to get sparkling mirrors.
Advanced Techniques: Tackling Tough Stains and Foggy Mirrors
Sometimes, mirrors have more than just everyday dust and grime. They can accumulate stubborn stains. They might also suffer from persistent fogging. These issues require a bit more effort. Applying advanced techniques helps restore your mirror’s clarity. Do not give up on a mirror with tough problems.
Removing Stubborn Spots and Hard Water Stains
Hard water spots are common, especially in bathrooms. These spots are mineral deposits. Regular cleaning often fails to remove them. For these, try using a stronger acidic solution. You can use undiluted white vinegar on a paper towel. Place the vinegar-soaked paper towel directly on the hard water spot. Let it sit for 5-10 minutes. The acid in the vinegar will break down the mineral buildup. Then, wipe it away with a clean cloth. You might need to gently scrape with a plastic scraper. Be careful not to scratch the glass. After removing the stain, clean the whole mirror as usual. For very stubborn spots, a lemon cut in half can work similarly. Rub the lemon directly on the stain. Its acidity helps dissolve deposits. This method is also useful when trying to clean bathroom surfaces.
Paint splatters, nail polish, or glue can also mar a mirror. For these, use a razor blade scraper. Hold the blade at a shallow angle to the mirror. Carefully push the blade under the dried substance. It should lift right off. Always be cautious with sharp blades. Test a small, inconspicuous area first. If scraping is not an option, try rubbing alcohol or nail polish remover (acetone) on a cotton ball. Apply it sparingly to the spot. Let it sit for a moment. Then gently rub the stain away. Immediately clean the area with your regular mirror cleaner to remove any residue.
Preventing Mirror Fog
Foggy mirrors are a nuisance, especially after a hot shower. Fog forms when warm, moist air meets a cool mirror surface. Preventing fog involves creating a barrier. You can apply specific products or use simple household items.
One simple trick is to rub a bar of soap on the dry mirror. Use a dry bar of soap. Rub it lightly over the entire mirror surface. It will leave a faint, hazy film. Then, buff the mirror clean with a dry microfiber cloth. The thin, invisible layer of soap prevents condensation. This stops fog from forming. This effect lasts for several days or even weeks.
Another option is using shaving cream. Apply a small amount of shaving cream to the mirror. Rub it in with your fingers. Then, wipe it off completely with a clean cloth. The cream leaves a thin film. This film prevents water droplets from collecting. This is a very effective anti-fog method. Dedicated anti-fog sprays are also available. These products work by creating a similar hydrophobic layer. These advanced techniques help you tackle more challenging mirror issues. They ensure your mirrors stay clear and functional.
Maintaining the Shine: How to Keep Your Mirrors Streak-Free Longer
Achieving streak-free mirrors is one thing. Keeping them that way is another challenge. Regular maintenance is key. Simple habits can extend the time between deep cleans. They help your mirrors stay pristine. I find these small steps make a big difference in my home.
Regular Light Cleaning
Do not wait for your mirrors to become visibly dirty. A quick wipe-down regularly prevents grime buildup. For bathroom mirrors, a daily or every-other-day wipe is ideal. Use a dry microfiber cloth to dust off surfaces. This removes new dust, hairspray, and toothpaste splatters. If you see a small smudge, use a very light mist of cleaner. Then buff it immediately. This prevents tough stains from forming. A consistent, light touch reduces the need for heavy scrubbing later. This approach is similar to general home cleaning strategies.
Controlling Environmental Factors
The environment plays a role in mirror cleanliness. High humidity can lead to more condensation and potential streaks. Ensure good ventilation in bathrooms. Open a window or use an exhaust fan during and after showers. This reduces moisture in the air. Less moisture means less fogging and fewer water spots. Dust is another environmental factor. Regularly dust your entire home, not just mirrors. Less dust in the air means less dust settling on your mirrors. You can also minimize direct sunlight exposure. Direct sunlight can cause cleaners to evaporate too fast. This often leaves streaks. Clean mirrors during cloudy days or when direct light is absent.
Protective Measures and Product Choices
Consider applying a mirror sealant. These products create a protective layer. This layer repels water and prevents mineral buildup. They are especially useful for bathroom mirrors. Apply sealants according to product instructions. They can extend the streak-free period significantly. When buying commercial cleaners, choose wisely. Look for ammonia-free and streak-free formulas. Avoid cleaners with heavy fragrances or dyes. These often leave residues. Some people find that specific cleaning tools also help. A good quality squeegee can be faster and more effective for large mirrors. Remember to keep the squeegee blade clean. By incorporating these maintenance tips, your mirrors will stay clearer for longer. This reduces your cleaning effort in the long run.
Common Mistakes to Avoid When Cleaning Mirrors
Cleaning mirrors seems simple. Yet, many common mistakes lead to frustrating streaks. Avoiding these pitfalls is as important as using the right techniques. Knowing what not to do saves you time and effort. It ensures a sparkling, clear finish every time.
Using Too Much Cleaner
One of the biggest mistakes is over-spraying. Applying too much cleaner saturates the mirror. This leaves excess liquid and residue. When this residue dries, it forms unsightly streaks. More cleaner does not mean a cleaner mirror. It means more work to buff away the excess. A light mist is always sufficient. For stubborn spots, apply cleaner directly to a cloth first. Then dab the spot. This prevents over-saturating the entire mirror. Remember, less is often more when it comes to cleaning solutions.
Using the Wrong Cloth
Using paper towels or old cotton rags is a common mistake. Paper towels break apart when wet. They leave behind tiny paper fibers. Cotton rags often shed lint. These fibers cling to the mirror surface. They become visible streaks or dust spots as the mirror dries. Always use high-quality microfiber cloths. They are designed to trap dirt and absorb moisture without leaving lint. Always use a clean cloth. A dirty cloth just moves grime around. It smears dirt onto the mirror instead of removing it. Using a dedicated cloth for mirror cleaning makes a big difference.
Cleaning in Direct Sunlight
It might seem logical to clean mirrors when you can clearly see the dirt. However, cleaning in direct sunlight is counterproductive. The sun’s heat causes the cleaning solution to evaporate too quickly. This leaves little time for you to wipe away the residue. The cleaner dries before you can buff it properly. This results in stubborn streaks. Always clean mirrors during cooler parts of the day. Choose a time when direct sunlight is not hitting the mirror. If you must clean in sunlight, work very quickly. Use plenty of clean, dry buffing cloths.
Neglecting Regular Maintenance
Another mistake is waiting too long between cleanings. When dirt and grime build up, they become harder to remove. This requires more cleaner and more scrubbing. This increases the chances of streaks. Regular, light dusting prevents heavy buildup. A quick wipe once a week is easier than a deep clean once a month. Consistent effort keeps your mirrors in top condition. Avoiding these common errors ensures a truly streak-free shine. You will be happier with the results and save time.
FAQ Section
Why do my mirrors always streak after cleaning?
Mirrors often streak due to using too much cleaning solution, using the wrong type of cloth (like paper towels that leave lint), or having minerals in your tap water. Cleaning in direct sunlight can also cause streaks because the solution dries too quickly, leaving residue behind.
What is the best cloth for cleaning mirrors streak-free?
The best cloth for cleaning mirrors streak-free is a high-quality microfiber cloth. Microfiber cloths are excellent at trapping dirt and moisture without leaving lint or fibers behind. You should use one damp cloth for cleaning and a separate dry one for buffing.
Can I use newspaper to clean mirrors?
Yes, you can use old newspaper to clean mirrors. Newspaper ink is typically soy-based and does not transfer to glass, making it a lint-free alternative to paper towels. Crumple the newspaper into a ball and use it to buff the mirror dry after applying your cleaner.
How often should I clean my mirrors?
The frequency depends on the mirror’s location and use. Bathroom mirrors, which often get toothpaste and hairspray, benefit from a quick wipe-down every few days. Decorative mirrors in living areas might only need cleaning once a week or every couple of weeks.
Is vinegar safe for all mirrors?
Distilled white vinegar is generally safe for most mirrors. However, avoid using it heavily or letting it sit for too long on mirrors with antique or decorative frames, as its acidity could potentially affect some finishes. Also, avoid it on mirrors with special anti-reflective coatings without checking.
How do professionals clean mirrors streak-free?
Professionals often use a squeegee with a fresh, clean rubber blade, a professional-grade glass cleaner, and specific techniques like overlapping strokes. They also ensure the mirror surface is free of dust before applying the cleaner. Buffing with a dry, lint-free cloth is crucial for the final shine.
Conclusion
Achieving streak-free mirrors is not a mystery. It is a science. You now have the complete guide to make your mirrors shine. We covered understanding why streaks happen. We looked at essential tools like microfiber cloths and effective cleaning solutions. We explored the step-by-step method for perfect results. You also learned about powerful DIY cleaners and how to tackle tough stains. We discussed how to maintain that sparkle and avoid common cleaning mistakes.
By following these simple yet powerful tips, you can transform your mirrors. No more frustrating lines or hazy reflections. Imagine a perfectly clear mirror that brightens your space. You can now enjoy that crisp, clean view every single day. Take these steps and see the difference. Start cleaning your mirrors streak free today! Your reflections will thank you.
- mirror cleaning
- streak-free
- cleaning tips
- home maintenance
- glass cleaning

Davia Murnell
Room Cleaning Expert
Before joining HEG, I spent over a decade running my own window cleaning business, where I perfected streak-free techniques and learned the ins and outs of specialty glass care. Now, I bring that expertise to a broader mission—helping homeowners maintain sparkling windows and beautiful outdoor spaces. From skylights and sliding doors to patio glass and outdoor furniture, I believe every surface deserves attention and care. I share practical tips and proven methods that make even the toughest cleaning jobs feel manageable. Whether you're battling pollen on the porch or smudges on high windows, I’m here to help you see your home in a whole new light—literally.