· Todd Martin · Home Cleaning · 18 min read
How To Clean Tile Floors

Master the Art of Cleaning Tile Floors
Do you dream of sparkling tile floors? I know the feeling. Tile floors are durable and beautiful, but they attract dirt and grime. Keeping them clean makes a big difference in your home’s appearance. A clean tile floor can make a room feel fresh and inviting. This guide will show you exactly how to clean tile floors. We will cover everything from daily care to deep cleaning. You will learn about different tile types, the right tools, and effective cleaning solutions. Get ready to transform your tile floors.
Takeaway:
- Understand your specific tile type.
- Gather the right cleaning tools and solutions.
- Follow a consistent cleaning routine.
- Address grout lines and stubborn stains.
- Implement protective measures for long-lasting shine.
Cleaning tile floors involves regular sweeping or vacuuming, followed by mopping with a suitable pH-neutral cleaner. Specific techniques depend on your tile material and the level of dirt. Always dry the floor completely to prevent streaks and mildew.
Understanding Your Tile Type: A Foundation for Effective Cleaning
Every tile floor has unique needs. Knowing your tile type helps you clean it correctly. Different materials react differently to cleaners and methods. Using the wrong product can damage your floor. It can also leave a dull finish. I always recommend identifying your tile before you start cleaning.
Common Tile Types and Their Care:
- Ceramic Tile: This is a very common type. Ceramic tile is durable and resistant to water. It often has a glazed surface. This glaze makes it less porous. You can clean ceramic tile with most general-purpose cleaners. Avoid harsh abrasives that might scratch the glaze. Ceramic tile is relatively easy to maintain.
- Porcelain Tile: Porcelain tile is similar to ceramic but denser. It absorbs less water. This makes it highly resistant to stains. Many porcelain tiles are unglazed. They may require different cleaning. You can clean porcelain tile floors without streaks by using a micro-fiber mop and drying quickly. Porcelain is tough, but it can still show streaks if not dried well.
- Natural Stone Tile (e.g., Marble, Travertine, Slate, Granite): Natural stone is beautiful. It is also more delicate. These tiles are porous. They can absorb liquids and stains easily. You must use pH-neutral cleaners on natural stone. Acidic or alkaline cleaners will etch or dull the surface. Sealing is critical for natural stone tiles. It protects them from damage. I clean travertine tile in my own home. I always check the cleaner’s pH. It prevents damage.
- Quarry Tile: Quarry tile is unglazed and very dense. It is often used in high-traffic areas. This tile is durable but can be porous. It may require more scrubbing.
- Terracotta Tile: This tile is made from baked clay. It is very porous. Terracotta needs regular sealing. You should use gentle, pH-neutral cleaners. Strong chemicals can strip the sealant.
Always test any new cleaning solution. Apply it to an inconspicuous area. Wait a few minutes. Check for any discoloration or damage. This simple step prevents big mistakes. Understanding your tile type is the first step. It leads to a truly clean floor. You want to protect your investment.
Gathering Your Tools and Cleaning Solutions for Tile Floors
You need the right equipment before you start cleaning. Having everything ready saves time. It also makes the job easier. Proper tools ensure effective cleaning. They also protect your tile floors. I always prepare my tools first. It helps me stay organized.
Essential Cleaning Tools:
- Vacuum cleaner or broom: Use this for initial dirt removal. A vacuum with a hard floor setting is best. It prevents scratching. A soft-bristle broom works well too.
- Dustpan: Collects loose debris.
- Two buckets: One for clean solution, one for rinse water. This prevents spreading dirty water. It keeps your clean solution effective.
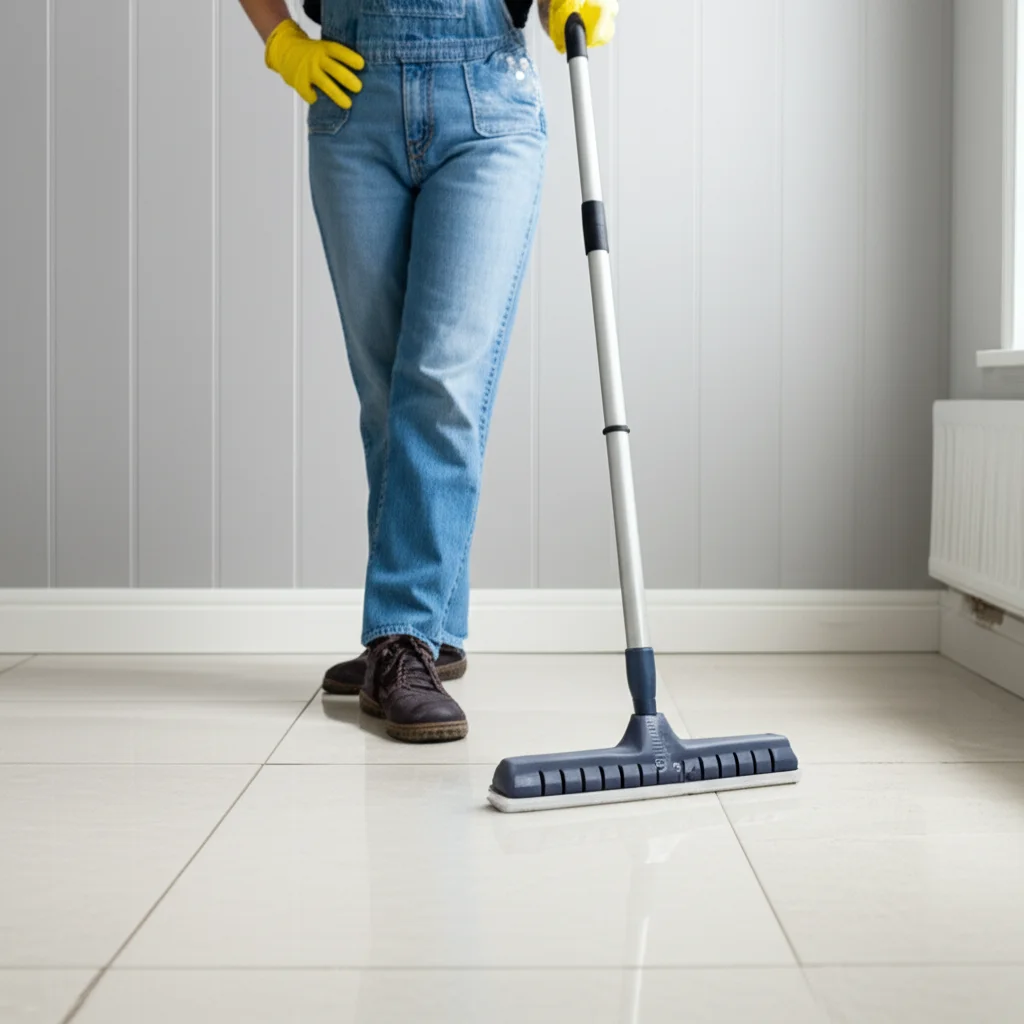
- Mop: A micro-fiber mop is excellent. It absorbs well and does not leave lint. A sponge mop can also work. Avoid string mops. They can push dirty water around.
- Soft-bristle brush or grout brush: Essential for scrubbing grout lines. Grout often collects dirt. A dedicated grout brush makes a big difference.
- Microfiber cloths: Use these for drying or spot cleaning. They are very absorbent. They leave surfaces streak-free.
- Knee pads (optional but recommended): Protect your knees during deep cleaning. It makes the task more comfortable.
Choosing Your Cleaning Solutions:
- pH-Neutral Floor Cleaner: This is the safest choice for all tile types. It does not contain harsh acids or alkalis. Look for “pH-neutral” on the label. This type of cleaner cleans well. It also protects your tile’s finish.
- Mild Dish Soap: A few drops of mild dish soap in warm water can work. This is a good option for ceramic and porcelain. Be careful not to use too much. Excess soap leaves a residue. This residue can attract more dirt.
- White Vinegar Solution: Vinegar is a natural disinfectant. It helps cut through grease and grime. Mix half a cup of white vinegar with a gallon of warm water. This solution is great for ceramic and porcelain. However, avoid vinegar on natural stone. It is acidic. It can etch or dull the surface. I sometimes use vinegar to clean ceramic tile shower walls. I always rinse thoroughly afterwards.
- Baking Soda Paste: Good for tough stains on unglazed tiles. Mix baking soda with a little water to form a paste. Apply it to the stain. Let it sit. Then scrub gently.
- Commercial Grout Cleaner: For very dirty grout, a specialized cleaner may be necessary. Always read the instructions. Ensure it is safe for your specific tile and grout type. Some cleaners are formulated for specific grout colors.
Always dilute concentrated cleaners according to the manufacturer’s directions. More is not always better. Too much cleaner can leave a sticky film. This film attracts more dirt. Prepare your area. This includes moving furniture. It also means sweeping thoroughly. You are now ready to clean.
Step-by-Step Daily and Weekly Tile Floor Cleaning Routine
Maintaining clean tile floors does not need to be a huge chore. A consistent routine keeps them looking great. It also prevents dirt from building up. I find that daily and weekly tasks make a big difference. They save time in the long run. Follow these steps for regular upkeep.
1. Daily Quick Clean:
- Sweep or Vacuum: Start by removing loose dirt and debris. Use a soft broom or a vacuum with a hard floor attachment. This prevents scratches. Dirt particles can act like sandpaper underfoot. Pay attention to high-traffic areas. Do this daily or every other day.
- Spot Clean Spills: Address spills immediately. Use a damp cloth and mild cleaner. This prevents stains from setting. For liquid spills, blot them up. Do not wipe. Wiping spreads the spill. Quick action saves a lot of work later.
2. Weekly Mopping Routine:
- Prepare Your Space: Clear the floor of rugs and small furniture. This allows full access to the tile. It makes mopping more efficient.
- Sweep or Vacuum Thoroughly: Repeat the initial sweeping or vacuuming. Ensure no loose grit remains. This step is crucial. It prevents dirty water from becoming muddy water. You want to lift dirt, not spread it.
- Prepare Cleaning Solution: Fill one bucket with clean, warm water and your chosen pH-neutral tile cleaner. Follow dilution instructions. Fill the second bucket with plain, clean rinse water. This two-bucket system is vital. It keeps your cleaning solution fresh.
- Mop in Sections: Dip your mop into the cleaning solution. Wring out excess liquid. Your mop should be damp, not dripping. Mop a small section of the floor. Overlap your strokes slightly. Focus on one area at a time. This ensures consistent cleaning.
- Rinse the Mop: After mopping a section, rinse your mop in the bucket of clean rinse water. Wring it out thoroughly. This removes dirty water from the mop.
- Rinse the Floor (Important for streak-free results): Mop the freshly cleaned section again with the clean, damp mop. This removes any cleaner residue. It is a critical step for preventing streaks. For porcelain tile floors without streaks, rinsing thoroughly is key.
- Dry the Floor: Immediately dry the mopped section. Use a clean, dry microfiber cloth or a separate dry mop. Air drying can leave streaks, especially with hard water. Drying prevents water spots. It also helps prevent slips.
- Repeat: Move to the next section. Continue until the entire floor is clean. Change your rinse water frequently. Change the cleaning solution if it becomes too dirty. A good rinse is the secret to shine.
This routine makes weekly cleaning manageable. It keeps your tile floors hygienic and beautiful. Consistency is the real secret. You will be amazed by the results.
Deep Cleaning Tile Floors: Tackling Stubborn Dirt and Grime
Sometimes, routine cleaning is not enough. Tile floors, especially grout lines, accumulate stubborn dirt. Deep cleaning addresses embedded grime. It restores your tile’s original luster. I find a deep clean necessary every few months. It depends on traffic and use. This process is more intensive. It yields impressive results.
When to Deep Clean:
- When grout lines look dark or discolored.
- When tile surfaces appear dull or hazy.
- After heavy foot traffic or events.
- If you notice a sticky residue despite regular cleaning.
Deep Cleaning Steps:
- Prepare the Area: Remove all furniture and rugs. Sweep or vacuum the floor thoroughly. This removes all loose debris. You need a clear surface to work on.
- Focus on Grout Lines: Grout is porous. It traps dirt, mold, and mildew easily. This is where most deep cleaning effort goes.
- Choose a Grout Cleaner: Use a specialized grout cleaner. Make sure it is safe for your tile type. For natural stone, use a pH-neutral cleaner. For ceramic or porcelain, an oxygenated bleach cleaner or a baking soda paste works well.
- Apply Cleaner: Apply the cleaner directly to the grout lines. Follow the product’s dwell time. This lets the cleaner penetrate the dirt.
- Scrub the Grout: Use a stiff-bristle grout brush. Scrub the lines vigorously. You will see dirt lift away. For particularly dirty areas, you might need extra elbow grease. I have found that a good tile grout cleaner and a strong brush can make old grout look new.
- Rinse Grout: Wipe up the dirty solution. Use a damp cloth or mop. Rinse the grout lines thoroughly with clean water. Do not let the cleaner dry on the tile.
- Deep Clean the Tile Surface:
- Choose a Cleaner: For a deep clean, you might use a slightly stronger pH-neutral cleaner. Or, you can use a steam mop. Steam mops are effective. They use hot steam to loosen dirt. They do not require chemicals. This is great for an eco-friendly approach.
- Apply and Scrub: Apply the cleaner to a small section of the floor. Let it sit for a few minutes. Use a scrub brush or a mop with a scrubbing pad. Work in small sections. Scrub gently but firmly.
- Rinse Thoroughly: Use your two-bucket system. Mop the cleaned section with clean water. Rinse several times until no residue remains. This step is crucial for shine.
- Dry Completely: Immediately dry the floor with clean microfiber cloths. Any standing water can leave streaks. It can also encourage mildew.
- Address Any Remaining Stubborn Spots: If any stains remain, target them individually. Use specific stain removal techniques. We will discuss these in the next section.
- Consider Sealing Grout: After deep cleaning, consider sealing your grout. This protects it from future stains. It also makes future cleaning easier. This is especially important for unsealed or very porous grout.
Deep cleaning brings your tile floors back to life. It makes your entire home feel cleaner. You will be amazed at the transformation. Do not skip this important step.
Specialized Stain Removal for Tile Floors
Even with regular cleaning, accidents happen. Stains can appear on tile floors. Different types of stains require different approaches. Knowing how to tackle specific marks saves your floor. I have dealt with many kinds of stains. Each one has its trick.
Common Tile Floor Stains and Solutions:
- Food and Beverage Stains (Coffee, Wine, Juice):
- Method: Blot the stain immediately with a clean cloth. For dried stains, mix baking soda with a small amount of water. Create a thick paste. Apply the paste directly to the stain. Let it sit for 15-30 minutes. Scrub gently with a soft brush. Rinse thoroughly with clean water. Repeat if necessary.
- Caution: Avoid using abrasive scrubbers on glazed tiles. They can scratch the surface.
- Grease and Oil Stains:
- Method: Sprinkle a generous amount of cornstarch or baking soda over the fresh grease stain. Let it sit for 15-20 minutes. It will absorb the oil. Sweep up the powder. Then, use a solution of warm water and a few drops of dish soap. Mop the area. Rinse well. For older stains, you might need a degreasing cleaner.
- Tip: Hot water can sometimes set grease. Use warm water instead.
- Ink Stains:
- Method: For fresh ink, try rubbing alcohol on a cotton ball. Dab the stain. Do not rub. Rubbing spreads the ink. For stubborn ink, a diluted bleach solution (1 part bleach to 10 parts water) can work on light-colored, unsealed ceramic or porcelain tile. Always test in an inconspicuous area first. Rinse immediately.
- Caution: Never use bleach on natural stone or colored grout. It can cause discoloration.
- Scuff Marks:
- Method: Many scuff marks from shoes or furniture are just surface marks. They do not damage the tile. Use a clean pencil eraser to gently rub the mark. A melamine foam eraser (like a “magic eraser”) also works well. For tougher marks, a little non-abrasive cleaner on a cloth can help.
- Paint Spills:
- Method: Fresh paint should be wiped up immediately with a damp cloth. For dried latex paint, gently scrape it with a plastic scraper. Avoid metal. You can also try softening it with rubbing alcohol or a mild paint stripper meant for floors. For oil-based paint, mineral spirits might be needed. Always test these harsh chemicals in a hidden spot. Cleaning paint off tile needs careful attention to the paint type.
- Rust Stains:
- Method: Rust can be tricky. Use a commercial rust remover specifically designed for tiles. Follow the product instructions carefully. Some mild acids, like lemon juice or vinegar, can help with light rust on ceramic/porcelain. Apply, let sit, then scrub and rinse. Avoid on natural stone.
- Mildew and Mold (especially in grout):
- Method: Mix 1 part bleach with 1 part water. Apply to the affected area of grout. Let it sit for 10-15 minutes. Scrub with a grout brush. Rinse thoroughly. For natural stone, use hydrogen peroxide solution (3%) instead of bleach. Or, use a specialized mold cleaner that is pH-neutral. I have used a similar approach to clean mold in a shower. Ensure good ventilation.
Always wear gloves when using strong cleaners. Work in a well-ventilated area. After treating any stain, always rinse the area thoroughly. This removes all chemical residue. Prompt action is the best defense against stubborn stains.
Restoring Shine and Protecting Your Tile Floors
After all that cleaning, you want your tile floors to shine. You also want to protect them from future dirt. Restoring the luster and applying protective measures extend your floor’s life. It makes daily cleaning easier too. I always take these extra steps. They are worth the effort.
Bringing Back the Shine:
- Thorough Rinsing: The most common reason for dull or streaky tile is residue. This comes from cleaners or hard water. Ensure you rinse your floors completely. Use clean water and a clean mop. Mop several times if needed. Dry immediately.
- Microfiber Polishing: After cleaning and rinsing, go over the dry floor with a clean, dry microfiber cloth. Buff the tiles. This will remove any remaining haze. It also enhances the natural shine.
- Specialty Polishes (for unglazed tiles): Some unglazed tiles, like certain natural stones or terracotta, benefit from specific polishes. These products are designed to penetrate the tile. They enhance color and add a subtle sheen. Always choose a polish compatible with your tile type. Test it in a hidden area first. Glazed tiles usually do not need polish. Their shine comes from the glaze itself.
Protecting Your Tile Floors:
- Sealing Grout: Grout is very porous. It absorbs spills and stains easily. Sealing your grout is one of the most important protective steps.
- Process: After deep cleaning and drying the grout, apply a good quality grout sealer. Use a small brush or applicator. Follow the manufacturer’s instructions for application and drying time. You may need two coats.
- Frequency: Grout typically needs sealing every 1-2 years. High-traffic areas might need it more often. Water beads on the surface when sealed properly. If it soaks in, it is time to reseal.
- Sealing Porous Tiles (Natural Stone, Unsealed Terracotta): Many natural stone tiles are also porous. They benefit greatly from sealing.
- Process: Use a penetrating sealer specifically for your stone type. Apply it evenly. Allow it to soak in. Wipe off any excess before it dries.
- Frequency: Stone tiles may need sealing every 1-5 years. Again, check if water beads on the surface.
- Use Floor Mats and Rugs: Place mats at all entry points. This traps dirt, sand, and moisture from shoes. It prevents them from spreading across your tile floors. Use rugs in high-traffic areas. This protects the tile from wear and tear. Ensure rugs have a non-slip backing. Or use rug pads for tile floors.
- Furniture Pads: Attach felt pads to the bottom of furniture legs. This prevents scratches and scuffs when furniture moves. Even small movements can cause damage over time.
- Avoid Harsh Cleaners: Stick to pH-neutral cleaners for regular use. Harsh chemicals can strip sealants. They can also dull the tile finish. Acids and strong alkalis are particularly damaging to natural stone.
- Trim Pet Nails: Long pet nails can scratch tile surfaces. Keep your pet’s nails trimmed. This protects your floors from scratches.
By following these steps, you will keep your tile floors looking new. The added protection makes cleaning easier in the future. Your floors will remain a beautiful part of your home.
Troubleshooting Common Tile Cleaning Problems
Even with the best intentions, problems can arise. Tile floors can present specific challenges. Understanding these common issues helps you fix them quickly. I have encountered many of these. Knowing the solution saves frustration.
1. Streaky or Hazy Tile Floors:
- Problem: This is a very common complaint. It usually comes from cleaning solution residue. It can also be from hard water minerals. Using too much cleaner, or not rinsing enough, leaves a film.
- Solution:
- Rinse Thoroughly: The best fix is often more rinsing. Mop the floor again with only clean, hot water. Change the water frequently.
- White Vinegar Rinse: For ceramic or porcelain, a diluted white vinegar solution (1/2 cup to 1 gallon of water) can cut through residue. Mop with this solution. Then rinse with plain water. Do not use on natural stone.
- Dry Completely: After rinsing, immediately dry the floor with a clean, dry microfiber cloth or mop. Air drying can leave water spots, especially with hard water.
2. Dull-Looking Tile:
- Problem: Tile floors can lose their shine over time. This happens due to residue buildup. It also comes from abrasive cleaners or wear.
- Solution:
- Deep Clean and Rinse: A thorough deep clean, focusing on removing all old cleaner residue, is often enough. Use a pH-neutral cleaner. Rinse exceptionally well.
- Re-seal (if applicable): If you have natural stone or unglazed tile, a dull look might mean the sealant has worn off. Clean the tile. Then re-apply an appropriate sealer.
- Avoid Wax: Do not use wax on most tile floors. It can build up. It makes the floor look dull and sticky.
3. Discolored or Moldy Grout:
- Problem: Grout is porous. It traps dirt, soap scum, mold, and mildew. This makes it look dark and unhygienic.
- Solution:
- Grout Cleaner: Use a specialized grout cleaner. For non-natural stone grout, an oxygen bleach cleaner works well. For natural stone grout, use hydrogen peroxide or a pH-neutral cleaner.
- Scrubbing: A stiff grout brush is essential. Scrub the grout lines vigorously.
- Bleach Solution (for non-natural stone): A mixture of 1 part bleach to 1 part water can lift stubborn mold and mildew. Apply it. Let it sit for 10-15 minutes. Scrub. Rinse extremely well. Ensure good ventilation. I find this especially useful to clean grout in a shower, which faces constant moisture.
- Sealing: Once clean, seal the grout. This prevents future discoloration.
4. Scratches on Tile:
- Problem: Scratches can occur from dragging furniture. They also come from grit trapped under shoes.
- Solution:
- Prevention: Use furniture pads. Place mats at entryways. Sweep or vacuum regularly. These steps are the best defense.
- Repair: For minor surface scratches on glazed tile, sometimes a car scratch remover (test first!) or specialized tile repair kits can help. Deep scratches usually require professional attention or tile replacement.
- Dullness from scratches: A scratch cannot be “cleaned” away. Prevention is key.
5. Sticky Residue After Cleaning:
- Problem: This often means too much cleaning solution was used. It could also mean the wrong type of cleaner. It leaves a sticky film that attracts more dirt.
- Solution:
- Dilute Cleaner: Always use less cleaner than you think you need. Follow package directions strictly.
- Rinse Thoroughly: Mop with plain, hot water several times. This removes the sticky film. Change rinse water often.
- Vinegar Rinse: For non-natural stone, a vinegar rinse can help dissolve sticky residue.
Troubleshooting these issues helps maintain your tile’s beauty. Do not get discouraged by problems. Most have simple solutions. Consistency and proper product choice are your best friends.
- tile cleaning
- floor care
- grout cleaning
- home maintenance
- cleaning tips

Todd Martin
Senior Writer
With over 15 years of experience in home renovation and design, I started HEG to share what I’ve learned with homeowners who want to create spaces that are both beautiful and functional. I’ve always believed in a hands-on approach, and over the years, I’ve picked up practical solutions that actually work. Through HEG, I aim to make home improvement more approachable, sharing real tips that help you create a home you truly love.