· Todd Martin · Home Maintenance · 17 min read
How To Clean Moldy Caulk

How To Clean Moldy Caulk: A Complete Guide
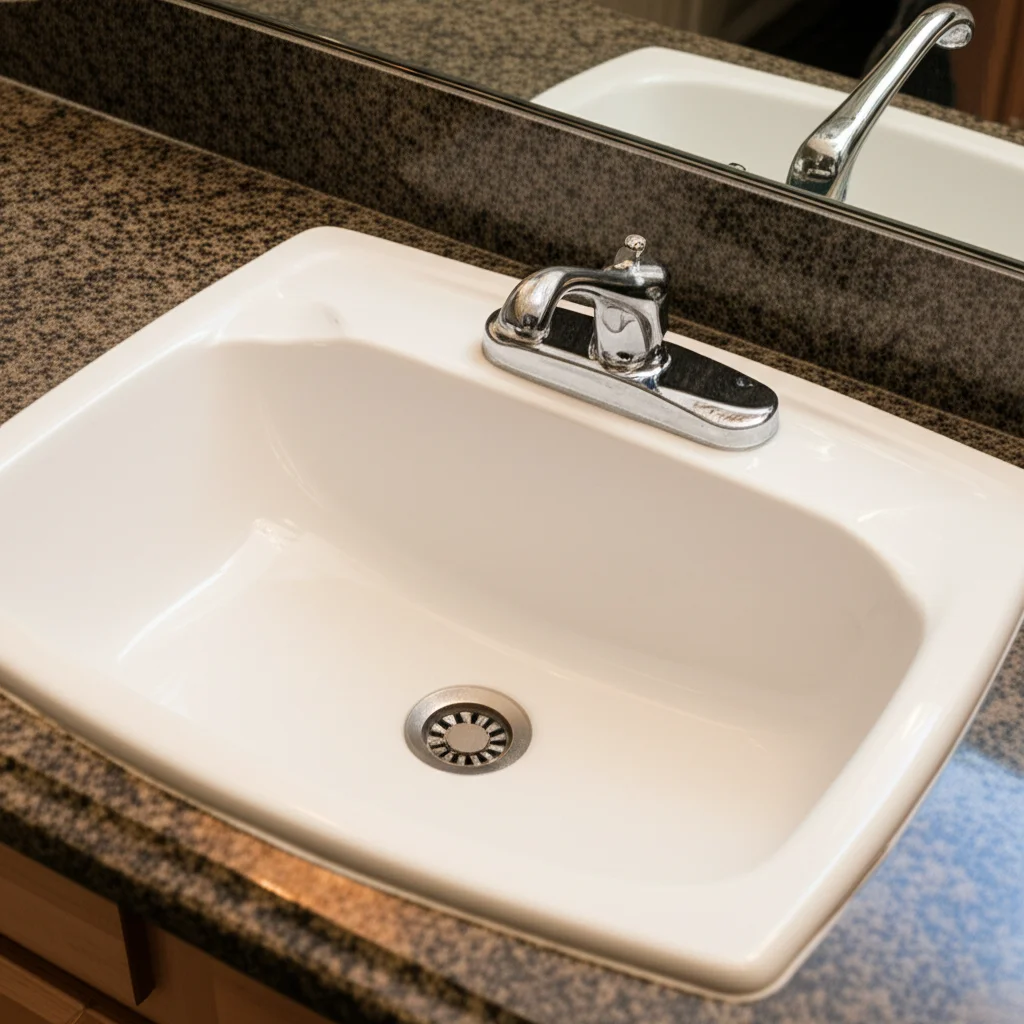
Is your once-pristine caulk now sporting unsightly black spots? That familiar dark discoloration often means mold has taken root. Moldy caulk is a common issue in humid areas like bathrooms and kitchens. It looks unpleasant and can indicate deeper moisture problems.
Many people think cleaning moldy caulk is a tough job, but it does not have to be. With the right approach and supplies, you can restore your caulk’s appearance. This guide will help you understand why caulk gets moldy. It will also provide steps for safe and effective cleaning methods. You will learn natural solutions and stronger options for tough cases. I will also share tips to keep mold from coming back. Let us get your caulk looking fresh and clean again!
Takeaway
Cleaning moldy caulk requires a systematic approach.
- Always prioritize safety with proper ventilation and protective gear.
- Start with gentle, natural cleaners like vinegar or baking soda.
- Use stronger solutions like bleach for stubborn mold, if necessary.
- Follow specific application, scrubbing, and rinsing steps.
- Prevent future mold growth by controlling moisture and improving ventilation.
- Consider recaulking if the mold is severe or the caulk is damaged.
To clean moldy caulk, identify the mold type, gather safety gear and cleaning agents, and then follow specific application and scrubbing techniques. Choose between natural solutions like vinegar or hydrogen peroxide, or stronger options like diluted bleach, always rinsing thoroughly. Ensure proper ventilation during the entire process.
Understanding Moldy Caulk and Why It Forms
Mold and mildew love damp, warm places. Your bathroom and kitchen caulk often provide the perfect environment. You might see black, green, or even pink spots on the caulk lines. These are all signs of mold or mildew growth. It is more than just an eyesore. It can also point to excess moisture in your home.
This section explains what causes mold to grow on caulk. We will also discuss the differences between mold and mildew. Knowing these facts helps you pick the best cleaning method. It also helps in preventing future problems.
What is Caulk Mold?
Caulk mold refers to the fungal growth that appears on the sealant around your sinks, tubs, and showers. This dark discoloration is typically a type of mildew. It thrives on moisture and organic matter. Caulk, being porous, can absorb water and soap scum. This creates a food source for mold spores.
Once mold settles, it can be tricky to remove. Its roots penetrate into the caulk material. Regular cleaning is important to stop its spread. If ignored, the mold can damage the caulk over time.
Common Causes of Mold Growth
Mold does not just appear by magic. Several factors contribute to its growth on caulk. The main culprit is high humidity and poor ventilation. When warm, moist air cannot escape, it condenses on cool surfaces. Caulk lines often stay wet for long periods. This creates an ideal breeding ground for spores.
- Poor Ventilation: Showers and baths produce a lot of steam. Without a good exhaust fan or open window, this moisture stays trapped. It settles on walls, ceilings, and caulk.
- Constant Moisture: Leaky faucets or pipes keep caulk perpetually damp. Even splashed water left un-wiped can be enough. Caulk around tubs and showers is especially prone to this.
- Lack of Sunlight: Mold prefers dark environments. Bathrooms often lack natural light, making them more hospitable for mold.
- Soap Scum and Dirt: These residues provide a food source for mold spores. Cleaning your shower and tub regularly helps remove these materials. For effective strategies to keep your shower bottom clean, consider visiting our guide on how to clean the bottom of a shower.
- Old or Damaged Caulk: Over time, caulk can crack, peel, or lose its seal. These tiny openings trap moisture and make it easier for mold to penetrate. If you are dealing with mold in your shower, our article on how to clean mold in a shower offers more specific advice.
Understanding these causes helps you address the root issue. Cleaning the mold is only half the battle. Preventing its return is equally important for a healthy home. Maintaining clean bathroom areas is crucial for preventing mold. Our guide on how to clean bathroom mold provides broader strategies for this.
Essential Safety Measures Before You Begin
Safety is paramount when you clean moldy caulk. Mold spores can irritate your respiratory system. Cleaning chemicals can cause skin or eye irritation. Taking the right precautions protects your health. It also ensures a safer cleaning process.
Always put your safety first. Do not rush through these steps. A few minutes of preparation can prevent hours of discomfort or worse. Let us look at what you need to do before starting.
Personal Protective Equipment (PPE)
Protecting your body from mold and cleaning solutions is critical. You should wear several items to minimize exposure. Each piece of equipment serves an important purpose. Never skip these steps.
- Gloves: Use rubber or latex gloves. These protect your hands from harsh chemicals and mold contact. Mold can cause skin irritation.
- Eye Protection: Safety goggles or glasses shield your eyes. Splashes from cleaning solutions can be very damaging. Mold spores can also irritate your eyes.
- Face Mask: An N95 respirator mask is ideal. It filters out mold spores. This prevents you from inhaling them, which can cause respiratory issues. A basic dust mask offers some protection, but an N95 is better.
- Old Clothes: Wear old clothes that cover your skin. This protects your clothing from bleach stains. It also reduces skin exposure to mold and chemicals.
Ensuring Good Ventilation
Proper airflow is vital when dealing with mold and strong cleaners. Cleaning products release fumes. Mold spores can become airborne during cleaning. Good ventilation disperses these airborne particles. It also helps prevent the accumulation of hazardous fumes.
- Open Windows and Doors: Open any windows and doors in the work area. This creates a cross-breeze. It helps air out the space.
- Use an Exhaust Fan: Turn on your bathroom’s exhaust fan if you have one. Let it run during and after cleaning. It pulls moist and contaminated air out of the room.
- Portable Fan: If natural airflow is limited, use a portable fan. Position it to blow air out a window or door. Do not aim it at the moldy area, as this can spread spores.
- Take Breaks: If the fumes are strong, step outside for fresh air. Do not stay in a poorly ventilated space for too long. Your health matters most.
By following these safety steps, you can clean your moldy caulk with confidence. You minimize risks to yourself and your home. Always read product labels for specific safety warnings.
Gentle Approaches to Clean Moldy Caulk (Natural Solutions)
Sometimes, you do not need harsh chemicals to tackle mold. Many natural solutions are effective for lighter mold stains. These methods are safer for your family and pets. They are also environmentally friendlier. I prefer to start with these gentler options. They often do the job well without strong fumes.
Let us explore some popular natural remedies. These solutions use common household items. They can help you clean moldy caulk without compromise.
White Vinegar Method
White vinegar is a powerful natural cleaner and disinfectant. Its acidic nature helps break down mold and mildew. It is safe for most surfaces and leaves no harmful residue. I often reach for vinegar first. It is readily available and works wonders.
- Prepare the Solution: Pour undiluted white vinegar into a spray bottle. You do not need to dilute it for caulk mold.
- Apply to Caulk: Spray the vinegar directly onto the moldy caulk. Make sure the area is completely saturated.
- Let it Sit: Allow the vinegar to sit on the mold for at least 30 minutes to an hour. For tougher stains, you can let it sit longer. The longer it sits, the more it penetrates.
- Scrub the Area: Use an old toothbrush or a stiff-bristled brush. Scrub the moldy areas vigorously. You will see the mold lifting away.
- Rinse Thoroughly: Rinse the caulk and surrounding area with clean water. You can use a damp cloth or a spray of water.
- Dry Completely: Dry the caulk thoroughly with a clean cloth. This prevents new mold from forming.
White vinegar is excellent for general mold. Our guide on how to clean mold with vinegar offers more details. For shower-specific issues, see our article on how to clean a shower with vinegar. You can also apply similar vinegar techniques for broader bathroom cleaning tasks, as detailed in our article on how to clean a bathroom with vinegar.
Hydrogen Peroxide Solution
Hydrogen peroxide is another effective, non-toxic mold killer. It works by oxidizing the mold. This helps lift the stains. It is a good alternative if you do not like the smell of vinegar. It is also safer than bleach.
- Prepare the Solution: Use a 3% hydrogen peroxide solution. This is the common strength found in drugstores. Pour it into a spray bottle.
- Apply to Caulk: Spray the peroxide generously onto the moldy caulk. Ensure it covers all affected areas.
- Let it Sit: Allow the solution to sit for 10-15 minutes. It needs time to penetrate the mold.
- Scrub and Rinse: Scrub the caulk with a brush. Then, rinse the area well with water.
- Dry Completely: Wipe the caulk dry with a clean towel. Ensure no moisture remains.
Baking Soda Paste
Baking soda is a mild abrasive and a natural deodorizer. It is effective at scrubbing away mold stains. It also absorbs odors. Using it as a paste gives you good scrubbing power.
- Make a Paste: Mix baking soda with a small amount of water. Create a thick paste. It should be consistency like toothpaste.
- Apply to Mold: Apply the paste directly onto the moldy caulk. Cover the spots completely.
- Let it Sit: Allow the paste to sit for 10-15 minutes. For tougher stains, let it sit longer.
- Scrub Gently: Use an old toothbrush or a small scrub brush. Gently scrub the paste into the mold. The abrasive action helps remove the stains.
- Rinse Thoroughly: Rinse the caulk with clean water. Make sure all baking soda residue is gone.
- Dry Completely: Dry the caulk thoroughly with a clean cloth. This step is important for mold prevention.
These natural methods are great for maintenance. They are also good for light to moderate mold. For severe black mold, you might need stronger measures.
Advanced Techniques for Stubborn Caulk Mold
Sometimes, natural cleaners are not enough. Stubborn black mold can deeply penetrate caulk. In these cases, you might need more potent solutions. Bleach-based cleaners or commercial products can be effective. These methods require extra caution. Always ensure excellent ventilation and proper safety gear.
This section covers stronger cleaning agents. Use them only when natural options fail. Remember to follow all safety guidelines.
Bleach-Based Solutions (Bleach and Water)
Bleach is a powerful disinfectant and whitener. It kills mold spores and removes stains effectively. However, it is a strong chemical. You must dilute it properly and use it carefully. Bleach can cause discoloration on certain surfaces. It can also irritate your skin and respiratory system.
- Dilute Bleach: Mix one part bleach with 10 parts water. For example, 1/4 cup bleach with 2 1/2 cups water. Always add bleach to water, not the other way around. Never mix bleach with other cleaners, especially ammonia or vinegar. This creates toxic fumes.
- Apply with Caution: Dip cotton balls or paper towels in the solution. Place them directly onto the moldy caulk. Make sure they adhere to the caulk. This concentrates the bleach on the mold.
- Let it Sit: Allow the bleach-soaked cotton to sit for a few hours. For very tough stains, leave it overnight. Check periodically to ensure the cotton remains wet.
- Remove and Scrub: Remove the cotton balls. Use a stiff-bristled brush or an old toothbrush. Scrub the remaining mold away. You might notice the mold has faded significantly or disappeared.
- Rinse Thoroughly: Rinse the area completely with fresh water. Ensure no bleach residue remains. Bleach can damage caulk over time if left on.
- Dry the Area: Wipe the caulk dry with a clean cloth. This prevents water from sitting on the cleaned surface.
When dealing with tough mold, especially in hard-to-reach areas like the bottom of the shower, this method can be very effective. For more tips on tackling mold in this area, refer to our article on how to clean the bottom of a shower.
Commercial Mold Cleaners
Many commercial products are designed to kill and remove mold. These often contain bleach or other strong chemicals. They come in spray bottles or gel formulas. Follow the product instructions carefully. They are formulated for specific types of mold and surfaces.
- Choose the Right Product: Read labels to ensure the cleaner is safe for caulk. Some products are specifically for bathroom mold.
- Follow Directions: Always follow the manufacturer’s instructions for application. Pay attention to dwell time and ventilation requirements.
- Apply Directly: Spray or apply the cleaner directly onto the moldy caulk. Ensure good coverage.
- Scrub and Rinse: After the recommended dwell time, scrub the caulk. Use a suitable brush. Rinse the area thoroughly with water.
- Dry Completely: Dry the caulk to prevent new mold growth.
Commercial cleaners can be very effective for heavy mold. However, they are often stronger than homemade solutions. Always prioritize safety when using them. Ensure your work area is well-ventilated throughout the process. Our guide on how to clean mold in a shower also offers additional insights into powerful mold removal techniques that can be applied to caulk.
Step-by-Step Guide to Cleaning Your Moldy Caulk
Now that you know the different cleaning solutions, let us walk through the process. This step-by-step guide helps ensure you clean your moldy caulk effectively. It covers everything from preparation to the final rinse. Follow these steps for the best results.
Remember, patience and thoroughness are key. Do not rush any part of this process. A little extra time now means cleaner caulk for longer.
1. Prepare the Area and Yourself
Before you touch any cleaning agents, get ready. This initial preparation makes the job safer and more efficient. I always start here.
- Clear the Area: Remove all items from around the caulk. This includes shampoo bottles, soaps, and decorative items. You need a clear workspace.
- Ensure Ventilation: Open windows, turn on the exhaust fan, or use a portable fan. Good airflow is essential.
- Wear PPE: Put on your gloves, safety goggles, and face mask. Protect your eyes, skin, and lungs.
- Gather Supplies: Have your chosen cleaning solution (vinegar, peroxide, baking soda, or bleach), a scrub brush or old toothbrush, and clean cloths ready.
- Dry the Surface: Make sure the caulk surface is as dry as possible. This helps the cleaning solution penetrate the mold.
2. Apply Your Chosen Cleaning Solution
Once everything is ready, it is time to apply the cleaner. The method depends on the solution you choose. Be precise with your application.
- For Vinegar or Hydrogen Peroxide: Spray directly onto the moldy caulk. Saturate the area well.
- For Baking Soda Paste: Apply a generous layer of the paste directly onto the mold spots.
- For Bleach Solution: Soak cotton balls or paper towel strips in the bleach solution. Press them firmly onto the moldy caulk. Ensure they make good contact. This keeps the bleach concentrated on the mold.
- For Commercial Cleaners: Follow the product’s specific application instructions. Some are sprays, others are gels.
3. Allow for Dwell Time
This step is crucial. The cleaning solution needs time to work. It needs to break down and kill the mold. Do not skip this waiting period.
- Vinegar: 30 minutes to 1 hour (or longer for tough spots).
- Hydrogen Peroxide: 10-15 minutes.
- Baking Soda Paste: 10-15 minutes.
- Bleach Solution: A few hours, up to overnight for severe mold.
- Commercial Cleaners: Refer to product instructions (usually 5-15 minutes).
During this time, keep the area well-ventilated. I often use this time to clean other parts of the bathroom. For example, if you’re cleaning the shower, you might consider how to tackle the bottom of the shower, as covered in our specific guide on how to clean the bottom of a shower.
4. Scrub Away the Mold
After the dwell time, it is time to put in some elbow grease. The cleaning agent has weakened the mold. Now, you need to physically remove it.
- Use a Stiff Brush: An old toothbrush or a small scrub brush is ideal for caulk lines.
- Scrub in Circles: Work in small circular motions. Apply firm but not excessive pressure. You do not want to damage the caulk.
- Focus on Stains: Concentrate on the areas with visible mold stains. You should see the dark spots begin to lighten or disappear.
- Reapply if Needed: For very stubborn spots, you might need to reapply the solution. Let it sit again, then scrub.
5. Rinse and Dry Thoroughly
The final steps are important for cleanliness and prevention. Rinsing removes loosened mold and cleaning residues. Drying prevents new mold growth.
- Rinse with Clean Water: Use a spray bottle with clean water or a damp cloth to rinse the caulk. Make sure all cleaning solution and mold debris are gone. This is especially important after using bleach. Leftover bleach can degrade caulk over time.
- Wipe Dry: Use a clean, dry towel to wipe the caulk completely dry.
- Air Dry: If possible, leave windows open or the fan running for a bit longer. This helps the area air dry thoroughly.
- Inspect: Check the caulk for any missed spots or remaining discoloration. If mold persists, you might need to try a stronger method. Or, it might be time to consider recaulking. Our guide on how to clean mold in a shower provides more context on assessing and addressing persistent mold issues.
By following these steps, you can effectively clean moldy caulk. You will restore its appearance and improve your home’s hygiene.
Preventing Future Mold Growth on Caulk
Cleaning moldy caulk is a great start. But the best solution is to prevent it from growing back. Mold thrives on moisture. Controlling humidity and ensuring good airflow are key. Implementing regular cleaning habits also helps. I always emphasize prevention to my clients. It saves time and effort in the long run.
This section provides practical steps to keep your caulk mold-free. These are simple changes that make a big difference.
Improve Ventilation
Proper ventilation removes moist air from your home. This is especially important in bathrooms and kitchens. Without it, humidity builds up. This leads to condensation on surfaces, including caulk.
- Use Exhaust Fans: Always turn on your bathroom exhaust fan during showers and baths. Leave it running for at least 15-20 minutes afterward. This pulls out steam and moisture.
- Open Windows: If you do not have an exhaust fan, open windows during and after using hot water. Even a small crack helps.
- Consider Dehumidifiers: In very humid climates or damp basements, a dehumidifier can help. It removes excess moisture from the air.
- Increase Air Circulation: Keep bathroom doors open when not in use. This allows air to circulate more freely.
Regular Cleaning Habits
Consistent cleaning prevents mold spores from settling and growing. It removes soap scum and dirt that mold feeds on. A quick wipe-down can prevent major problems later.
- Daily Wipe-Down: After showering, quickly wipe down the caulk lines. Use a towel or squeegee. This removes standing water.
- Weekly Cleaning: Include caulk in your regular bathroom cleaning routine. Use a mild all-purpose cleaner or a diluted vinegar solution. A guide like how to clean a bathroom with vinegar offers routines that integrate caulk care.
- Remove Soap Scum: Soap scum provides food for mold. Clean it off surfaces regularly.
- Check for Mold: Periodically inspect caulk for any tiny black spots. Address them immediately. Do not let them grow.
Addressing Leaks
A continuous water source is a mold’s best friend. Even small leaks can provide enough moisture for mold growth. Ignoring a leak will only worsen your mold problem.
- Inspect Faucets and Pipes: Regularly check for drips or leaks around sinks, tubs, and showers.
- Repair Promptly: Fix any leaks as soon as you find them. This stops the constant supply of water to the caulk.
- Check Under Sinks: Mold often grows under sinks due to hidden leaks. Inspect these areas too.
Using Mold-Resistant Caulk
When it is time to replace your caulk, choose a mold-resistant type. Many modern caulks contain fungicides. These additives inhibit mold growth.
- Silicone Caulk: Silicone caulk is generally more mold-resistant than acrylic latex caulk. It is also more durable and waterproof.
- Look for “Mildew Resistant”: Check product labels for “mildew resistant” or “mold-resistant” claims.
- Proper Application: Even mold-resistant caulk needs proper application. Ensure a smooth, complete seal. This prevents water from getting trapped underneath.
By combining good ventilation, regular cleaning, prompt leak repairs, and smart material choices, you can effectively prevent mold from returning to your caulk. Consistent effort pays off with a cleaner, healthier home.
- moldy caulk
- caulk cleaning
- mold removal
- bathroom cleaning
- shower cleaning
- mildew prevention

Todd Martin
Senior Writer
With over 15 years of experience in home renovation and design, I started HEG to share what I’ve learned with homeowners who want to create spaces that are both beautiful and functional. I’ve always believed in a hands-on approach, and over the years, I’ve picked up practical solutions that actually work. Through HEG, I aim to make home improvement more approachable, sharing real tips that help you create a home you truly love.