· Todd Martin · PC Maintenance · 19 min read
How To Clean Motherboard
Clean Your Motherboard: Boost PC Performance
Has your computer started running slower? Do you hear unusual fan noises? Dust buildup often causes these problems. A dirty motherboard can overheat your system and reduce its lifespan. Learning how to clean your motherboard correctly is important. This guide gives you clear steps to safely clean your computer’s brain. You can restore speed and keep your PC healthy for years.
Takeaway:
- Turn off and unplug your PC before cleaning.
- Use anti-static tools to prevent damage.
- Remove dust with compressed air and soft brushes.
- Use isopropyl alcohol for stubborn grime.
- Clean fans and heatsinks for better airflow.
Cleaning your motherboard involves carefully removing dust and debris from its surface and connected components. You will use specialized tools like compressed air, anti-static brushes, and isopropyl alcohol. This process helps prevent overheating, improves performance, and extends the life of your computer.
Why Cleaning Your Motherboard Matters for PC Health
Dust acts like an insulator inside your computer. It settles on components and traps heat. This causes temperatures to rise significantly. High temperatures harm sensitive electronics. They can make your computer run slower. Over time, high heat can permanently damage parts.
A clean motherboard ensures proper airflow. Air moves through the computer case. It carries heat away from components. When dust covers these parts, air cannot reach them. This stops the cooling process. Your CPU and GPU then work harder to stay cool. This extra work uses more power and creates more heat.
Regular cleaning prevents these issues. It keeps your PC running efficiently. You will notice faster boot times. Programs will open quickly. Games will run without slowdowns. A clean system performs better than a dirty one. It also lasts longer, saving you money on repairs or replacements. Think of it as preventative care for your investment. Keeping your PC tidy inside means it works its best outside.
Dust contains small abrasive particles. These particles can scratch delicate circuits over time. They can also conduct electricity in humid conditions. This creates a risk of short circuits. Such shorts can damage your motherboard beyond repair. Proper cleaning removes these threats. It protects the many tiny connections on the board. A clean board reduces unexpected crashes. It also minimizes error messages. You gain a more stable and reliable computer system. A little time spent cleaning now saves big headaches later.
Essential Tools for Cleaning a Motherboard Safely
Gathering the right tools before you start makes the job easier and safer. Using proper equipment prevents damage to delicate circuits. You can find these items at electronics stores or online. Do not use regular household cleaning supplies, as they can harm components.
Here is a list of what you will need:
- Compressed Air Can: This is for blowing away loose dust. Make sure it is an “electronics-safe” version. Hold the can upright to prevent propellant discharge. Short bursts are best.
- Anti-Static Wrist Strap: Static electricity can severely damage PC components. Wear this strap and connect it to a metal part of your PC case. This grounds you, stopping static discharge.
- Soft-Bristle Anti-Static Brush: Use this to gently dislodge stubborn dust. Choose a brush specifically designed for electronics. A paint brush can also work if its bristles are soft and non-shedding.
- Isopropyl Alcohol (99% pure): This is for cleaning sticky residues or thermal paste. It evaporates quickly and leaves no residue. Lower purity alcohol contains water, which can cause corrosion.
- Microfiber Cloths or Coffee Filters: Use these with isopropyl alcohol. They are lint-free and do not scratch surfaces. Avoid paper towels, which can leave fibers behind.
- Cotton Swabs: These are good for reaching small, tight spaces. Dip them in isopropyl alcohol for precise cleaning.
- Small Phillips Head Screwdriver: You will need this to open your PC case. You will also use it to remove components. Make sure it is magnetized to avoid dropping tiny screws.
- Work Surface: A clean, flat, and well-lit area is important. Make sure it is not carpeted. Carpets generate a lot of static electricity. A wooden or non-conductive table works well.
Having these items ready saves time. It also makes sure your cleaning process is effective. Do not skip any of these tools. Each plays a role in protecting your valuable hardware.
Safety First: Preparing to Clean Your Motherboard
Before you touch any part inside your computer, safety is critical. Electricity and static discharge pose real threats to electronics. You must take steps to protect yourself and your hardware. Rushing this part can cause permanent damage. Always prioritize safety over speed.
First, turn off your computer completely. Do not just put it to sleep. Shut down the operating system. Then, turn off the power supply switch on the back of the PC. Finally, unplug the power cable from the wall outlet. This stops all power flow. It makes the system safe to work on.
Move your computer to a suitable workspace. A hard, non-carpeted surface is best. Wood or plastic tables work well. Avoid working on carpet or rugs. These surfaces create static electricity. Good lighting also helps you see small details. You can avoid missing any dust.
Wear your anti-static wrist strap. Attach one end to your wrist. Connect the other end to an unpainted metal part of your PC case. This continuously grounds your body. It prevents static buildup. Static discharge can destroy microchips instantly. Do not skip this step. This practice is similar to how you must be careful when handling other sensitive electronics. For instance, when cleaning an Xbox One, you also handle delicate parts. Learning how to clean an Xbox One offers similar advice on careful handling.
Open your PC case. Most cases have side panels held by screws or latches. Remove both side panels if possible. This gives you better access to all components. Lay the case on its side. Take pictures of your current setup. This helps you remember where all cables and components go. You will need these photos later for reassembly.
Remove large components for better access. These include your graphics card, RAM sticks, and any expansion cards. Gently unclip cables. Unscrew any mounting screws. Store these components in anti-static bags or on a clean, safe surface. This lets you reach the motherboard directly. It also lets you clean individual components more thoroughly.
Step-by-Step Dust Removal from Your Motherboard
Once your PC is powered down and components are removed, you can start removing dust. Dust is the main enemy of a PC’s cooling system. Focus on carefully dislodging and expelling it. Use short, controlled actions to avoid damage.
Begin with the compressed air can. Hold the can upright. Use short bursts of air. Point the nozzle at an angle, not directly down. This helps lift dust away. Work from one end of the motherboard to the other. Pay close attention to heatsinks, fans, and small crevices. Do not hold the can too close to components. The force can damage small parts. Also, do not tilt the can too much. This can release cold liquid propellant. This liquid can cause moisture damage.
Next, use your anti-static brush. Some dust might cling to surfaces. Gently brush away any remaining dust. Use light strokes. Brush dust towards an open area where you can blow it out. Avoid pressing hard on components. The brush helps dislodge dust trapped in tight spots. You can also use the brush on fan blades.
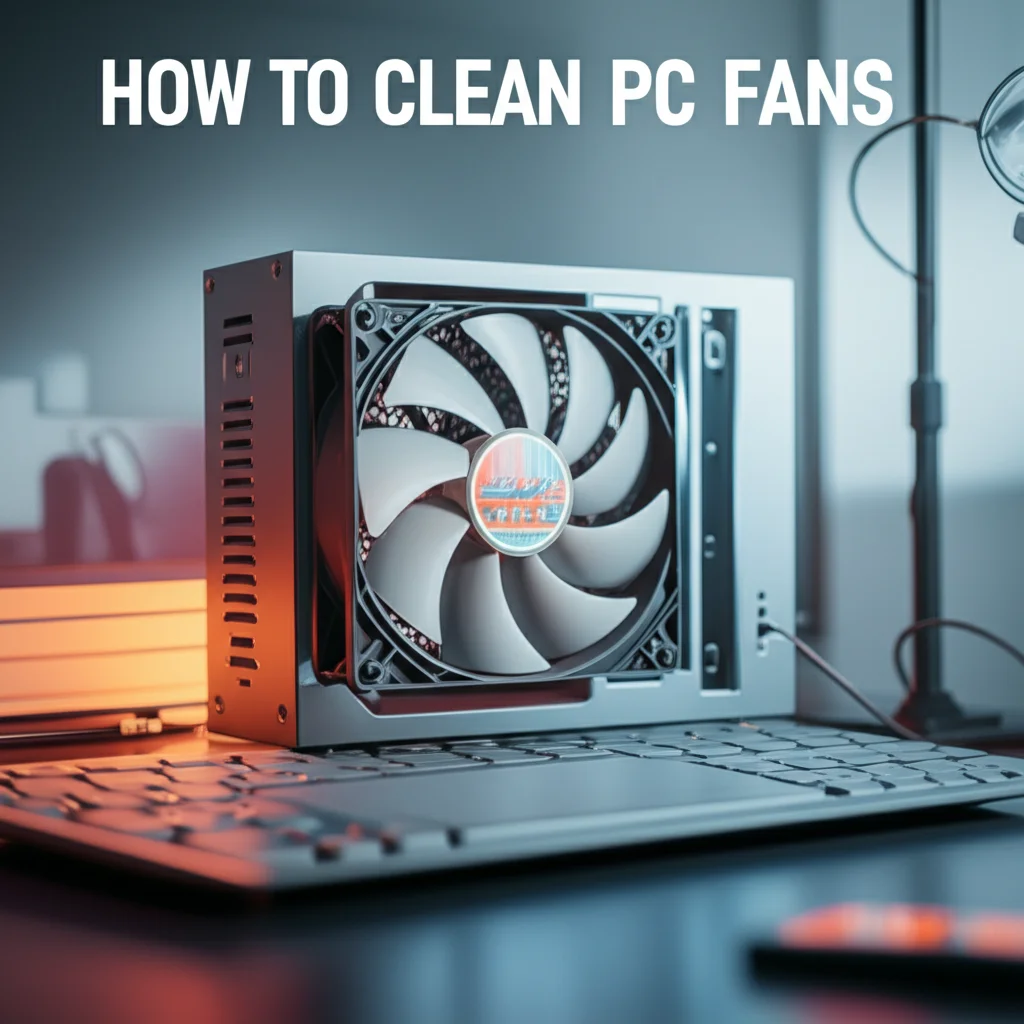
Cleaning Fans and Heatsinks
Fans pull air into or push air out of the case. They accumulate a lot of dust. Hold the fan blades still with your finger or a cotton swab. This stops them from spinning. Spinning fans can generate voltage. It can also damage the fan bearings. Spray compressed air through the fan blades. Brush away any caked-on dust from the blades.
Heatsinks have many fins. Dust gets trapped between these fins. This reduces their ability to cool. Use compressed air to blow through the fins. Blow from different angles. Use your brush to dislodge stubborn dust. Work slowly to clear all channels. Proper heatsink cleaning greatly improves cooling.
Removing Dust from Slots and Ports
PCIe slots, RAM slots, and various ports also collect dust. Use compressed air to clear these openings. Blow air directly into the slots. For very stubborn dust, a cotton swab can help. Gently insert the swab into the slot. Twist it slightly to pick up dust. Be careful not to bend any pins. This part is important. Clean slots ensure good connections for your components. Dust in these areas can cause connectivity problems.
You can compare cleaning these slots to maintaining other systems that filter out unwanted particles. For example, cleaning a water filter regularly ensures clean water flow. Similarly, a clean motherboard’s slots ensure smooth data flow.
Deep Cleaning Motherboard Components: When and How
Sometimes, dust is not enough. You might find sticky residue, old thermal paste, or light corrosion. This requires a deeper cleaning method. Isopropyl alcohol (99% pure) is your friend here. It is safe for electronics. It evaporates quickly. It leaves no conductive residue.
Before applying alcohol, ensure all power is disconnected. The board must be completely dry before reassembly. Use this method only for specific issues. Do not drench the entire board. Focus on affected areas.
First, identify the problematic spots. This could be dried spills, flux residue from manufacturing, or old thermal paste on the CPU. Dip a cotton swab or a corner of a microfiber cloth into the isopropyl alcohol. The swab should be damp, not dripping.
Gently wipe the affected area. For stubborn spots, apply a little pressure. The alcohol will dissolve the grime. Let the alcohol evaporate completely. It usually takes a few seconds. If residue remains, repeat the process with a fresh swab. Never scrub aggressively. This can scratch the board or dislodge small components.
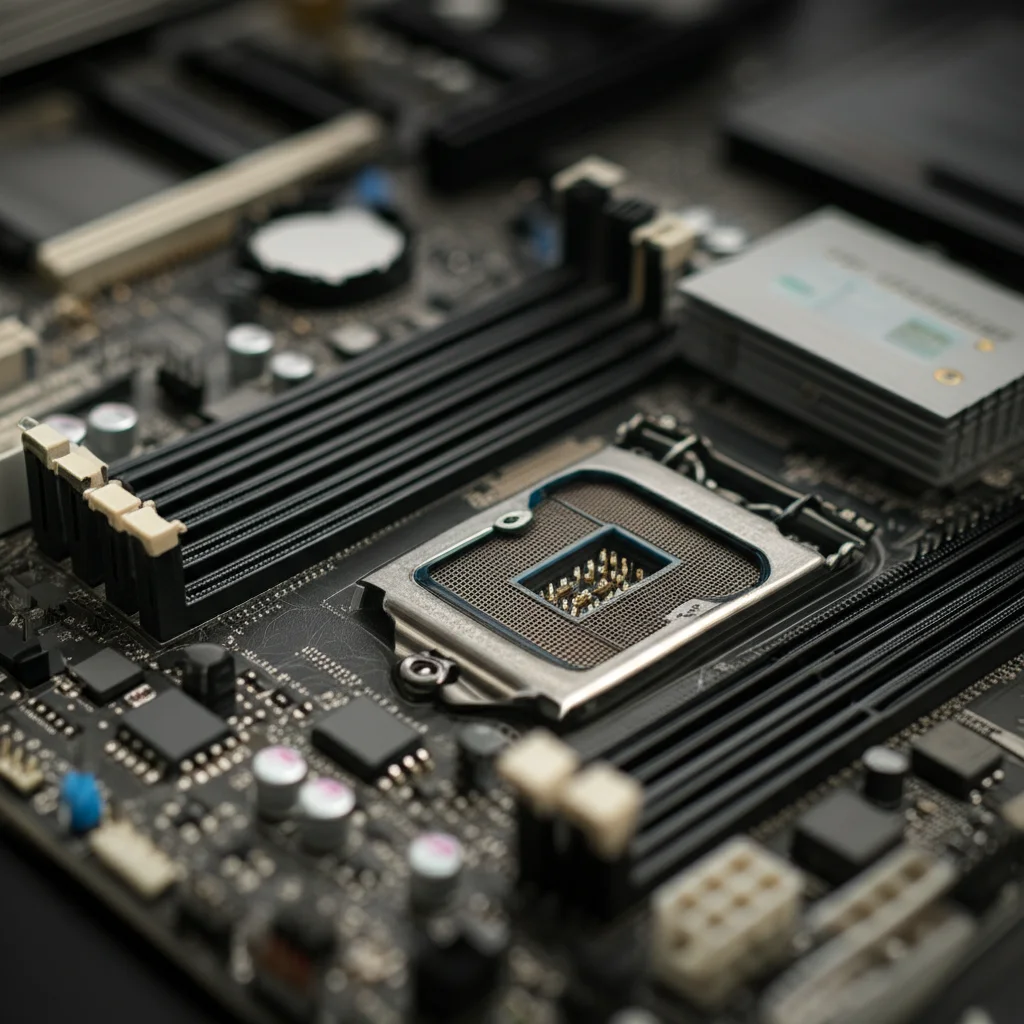
Cleaning CPU and Old Thermal Paste
The CPU is arguably the most important component. It often has old, dried thermal paste. This paste sits between the CPU and its heatsink. It helps transfer heat. Over time, it can dry out and lose effectiveness. You need to remove the old paste before applying new.
Apply a small amount of isopropyl alcohol to a microfiber cloth or cotton swab. Gently rub the top surface of the CPU. The old paste will soften. Wipe it away completely. Do not use sharp objects to scrape off paste. You can damage the CPU surface. Clean the heatsink’s contact surface too. Make sure both surfaces are spotless. This ensures optimal contact for new thermal paste.
When cleaning the CPU, be very gentle. The pins on the CPU or socket are fragile. Bending them renders the CPU or motherboard useless. Take your time. Ensure no fibers or dust remain. A clean surface allows for excellent thermal transfer. This is important for CPU performance and longevity.
Wiping Down RAM Sticks
RAM sticks plug into dedicated slots on the motherboard. Their gold contacts can collect dust or grime. This can cause memory errors. Remove RAM sticks from their slots. Hold them by their edges. Do not touch the gold contacts.
Lightly dampen a clean microfiber cloth with isopropyl alcohol. Gently wipe the gold contacts on the bottom edge of each RAM stick. Wipe along the direction of the contacts. Do not wipe across them. This cleans the connection points. Let the alcohol dry fully before reinserting the RAM. Clean RAM sticks help ensure stable system operation. They prevent memory-related crashes.
Remember, precision is key for deep cleaning. Use minimal alcohol. Always ensure everything is dry. This process will keep your components working well.
Addressing Corrosion and Spills on Your Motherboard
Accidents happen. Liquid spills or high humidity can cause corrosion on a motherboard. This requires a different approach than simple dust removal. Corrosion is damage to metal surfaces. It hinders electrical connections. If you see green or white powdery residue, it is likely corrosion.
For minor corrosion, you can try cleaning it yourself. First, ensure the board is completely disconnected from power. If the board is still wet from a spill, let it dry for at least 24-48 hours. You can use a fan to aid drying, but avoid direct heat.
Once dry, use a soft toothbrush or an anti-static brush. Dip it in 99% isopropyl alcohol. Gently scrub the corroded areas. The alcohol helps dissolve and lift the corrosion. You might need to repeat this several times. Use a clean cotton swab or microfiber cloth to wipe away the loosened residue. Be very careful around tiny components. Do not apply too much pressure.
If the corrosion is severe, or if liquid got into complex components like chips, professional help is best. Extensive corrosion can damage internal circuits beyond simple cleaning. A repair shop has specialized tools and knowledge. They can assess the damage better. They can also perform ultrasonic cleaning for heavy corrosion.
Water damage also requires quick action. If you spill liquid, immediately disconnect power. Remove the battery if it is a laptop. Do not try to turn it on. Disassemble the computer and remove the motherboard. Clean any wet spots with isopropyl alcohol. Allow it to dry completely. Even after cleaning, components might have internal damage. Corrosion can appear later if any moisture remains. It is like cleaning a grease filter – some messes are simple, others require more attention or replacement.
Preventing spills is always better than cleaning them. Keep drinks away from your computer. Use a coaster. Maintain good airflow in your room to reduce humidity. High humidity can cause slow, ongoing corrosion. A desiccant pack in your case can help in humid environments.
Reassembling Your PC After Motherboard Cleaning
You have cleaned your motherboard. All parts are dry. Now, it is time to put your computer back together. This step requires careful attention. Mistakes here can prevent your PC from booting. Refer to the pictures you took earlier. They are your guide.
Start by reinstalling the components you removed. Begin with the CPU if you took it out. Reapply new thermal paste to the CPU. A small pea-sized dot in the center is usually enough. Then, carefully reseat the CPU heatsink and fan assembly. Make sure it is securely fastened. Connect the CPU fan cable to the correct header on the motherboard.
Next, insert the RAM sticks. Line them up with their slots. Push down firmly on both ends until the clips snap into place. You should hear a click. Check that they are fully seated. Improperly installed RAM is a common cause of PC boot failures.
Reinstall any expansion cards, such as your graphics card. Line up the card with its PCIe slot. Push it firmly into the slot until it clicks. Secure it with the retaining clip or screw. Connect any required power cables to the graphics card. Make sure these cables are fully inserted.
Reconnect all power cables from the power supply to the motherboard. This includes the large 24-pin ATX power connector. It also includes the smaller 4-pin or 8-pin CPU power connector. Connect any SATA data and power cables to your storage drives. Reconnect front panel connectors. These include USB, audio, power button, and reset button wires. These tiny wires can be tricky. Use your motherboard manual or the pictures you took.
Manage your cables inside the case. Route them neatly behind the motherboard tray if your case allows. This improves airflow. It also makes future cleaning easier. Use zip ties or Velcro straps to bundle cables. Good cable management helps your PC run cooler. It also makes the inside look clean.
Finally, close the PC case. Reinstall the side panels. Screw them back on. Plug in your monitor, keyboard, mouse, and power cable. Turn on your power supply switch. Press the power button. Your PC should boot up. If it does not, check all connections again. Sometimes, a component is not fully seated. A successful boot means your cleaning worked. Your PC should now run cooler and faster.
Regular Maintenance Tips for a Clean Motherboard
Cleaning your motherboard is not a one-time job. Regular maintenance keeps dust away. It ensures your PC stays healthy and performs well. Creating a routine helps prevent major dust buildup. This makes future cleaning much faster and easier.
Aim to dust your PC internally every 3 to 6 months. This frequency depends on your environment. If you have pets, live in a dusty area, or smoke, clean more often. If your home is very clean, you might extend the time. A quick external dusting should happen more often. Wipe down the case vents weekly.
Consider investing in dust filters for your PC case. Many modern cases come with them. If yours does not, you can buy magnetic filter sheets. Install them over intake fan openings. These filters catch dust before it enters the case. You just need to clean the filters. This prevents dust from reaching your motherboard. Cleaning these filters is similar to maintaining other household filters. Just like you might regularly clean your filter in a dishwasher for optimal performance, PC filters need attention too.
Maintain good airflow around your PC. Do not place your computer in a confined space. Make sure there is plenty of room for air to circulate. Keep it off the carpet if possible. Carpet fibers can get pulled into fans. Elevate your PC case slightly. This helps improve airflow to bottom-mounted fans.
Monitor your PC’s temperatures. Use software tools to check CPU and GPU temperatures. If temperatures start to rise, it is a sign. It means dust might be building up again. This gives you an early warning. It tells you when it is time for another cleaning session. This proactive approach saves your hardware from heat damage.
Keep your room clean. A clean room means less dust in the air. Less dust in the air means less dust entering your PC. Vacuum regularly. Dust surfaces often. This helps reduce the overall dust load on your computer. Simple habits make a big difference.
Common Mistakes to Avoid When Cleaning a Motherboard
Cleaning your motherboard can greatly improve PC health. However, some mistakes can cause more harm than good. Knowing what not to do is as important as knowing what to do. Avoid these common errors to keep your system safe.
First, do not forget static electricity. Static discharge is the biggest threat. A small spark can destroy microchips on contact. Always use an anti-static wrist strap. Touch a grounded metal object before touching components. Do not work on carpeted floors. This generates static easily. Many people skip this step, but it is critical.
Second, do not use the wrong cleaning agents. Never use water, household cleaners, or rubbing alcohol with low purity. Water leaves behind minerals and can cause short circuits. Household cleaners contain chemicals that can corrode circuits. Rubbing alcohol (70%) contains too much water. Only use 99% isopropyl alcohol. It evaporates quickly and leaves no residue.
Third, do not use high pressure compressed air or tilt the can. Holding the nozzle too close can damage small components. The force of the air can break off tiny parts. Also, do not tilt the can too much. This can release liquid propellant. This liquid is cold and can cause moisture damage. Use short, controlled bursts. Keep the can upright.
Fourth, do not touch gold contacts or circuit board directly with bare hands. Oils and salts from your skin can leave residues. These residues can cause corrosion over time. Handle components by their edges. Use clean gloves if you prefer. This keeps surfaces clean and prevents problems.
Fifth, do not force components during reassembly. If a part does not fit, something is wrong. Check its alignment. Make sure no pins are bent. Forcing components can bend pins or break slots. Take your time. Refer to your pictures or manual. Proper alignment prevents damage.
Sixth, do not clean too often or too aggressively. While regular cleaning is good, over-cleaning can cause wear. Brushing too hard can scratch the board or dislodge surface-mounted devices. Be gentle. Clean only when necessary. Focus on dusty areas. A light touch is always best for electronics.
Avoiding these pitfalls ensures your cleaning process is safe and effective. Your motherboard will thank you.
FAQ Section
How often should I clean my motherboard?
You should clean your motherboard every 6 to 12 months. This depends on your environment. If you have pets or live in a dusty area, clean it every 3 to 6 months. Regular light dusting of the case can extend these intervals. Look for signs like rising temperatures or increased fan noise.
Can I use water to clean my motherboard?
No, never use water to clean your motherboard. Water contains minerals that can cause short circuits and corrosion. Water also takes a long time to dry completely. Always use 99% isopropyl alcohol. It is safe for electronics. It evaporates quickly without leaving residue.
Is compressed air safe for cleaning a motherboard?
Yes, compressed air is generally safe for cleaning a motherboard. Use it in short bursts. Hold the can upright to prevent propellant discharge. Keep the nozzle a few inches away from components. Avoid spinning fans by holding their blades. Compressed air is excellent for removing loose dust.
What is static electricity and why is it dangerous?
Static electricity is an electrical charge that builds up on your body. When you touch electronic components, this charge can discharge. This sudden flow of electricity can instantly damage sensitive microchips. Always wear an anti-static wrist strap. Ground yourself before touching any internal parts.
Do I need to remove all components to clean the motherboard?
You do not need to remove all components every time. For basic dusting, removing the graphics card and RAM often gives enough access. For deep cleaning or removing old thermal paste, you should remove the CPU and heatsink. Take pictures to help with reassembly.
Can cleaning a motherboard fix performance issues?
Yes, cleaning your motherboard can often fix performance issues. Dust buildup leads to overheating. Overheating causes your PC to slow down. It “throttles” its performance to prevent damage. Removing dust allows for better cooling. This restores your PC to its normal operating speed.
Conclusion
Cleaning your motherboard is a vital part of PC maintenance. It might seem like a daunting task, but it is simple with the right tools and precautions. You now understand how dust impacts performance and component lifespan. You know how to safely prepare your workspace and what tools to use. From using compressed air to tackling stubborn grime with isopropyl alcohol, you have a complete guide.
Regular maintenance helps your PC run faster and last longer. It prevents expensive repairs. Keep your system free of dust and debris. This small effort provides big rewards in terms of performance and reliability. Take charge of your computer’s health. Give your motherboard the care it deserves. Start cleaning your motherboard today and enjoy a snappier, more reliable machine!
- PC Cleaning
- Computer Care
- Dust Removal
- Electronics Maintenance
- DIY Computer

Todd Martin
Senior Writer
With over 15 years of experience in home renovation and design, I started HEG to share what I’ve learned with homeowners who want to create spaces that are both beautiful and functional. I’ve always believed in a hands-on approach, and over the years, I’ve picked up practical solutions that actually work. Through HEG, I aim to make home improvement more approachable, sharing real tips that help you create a home you truly love.