· Todd Martin · Home Maintenance · 20 min read
How To Clean My Mini Split Air Conditioner
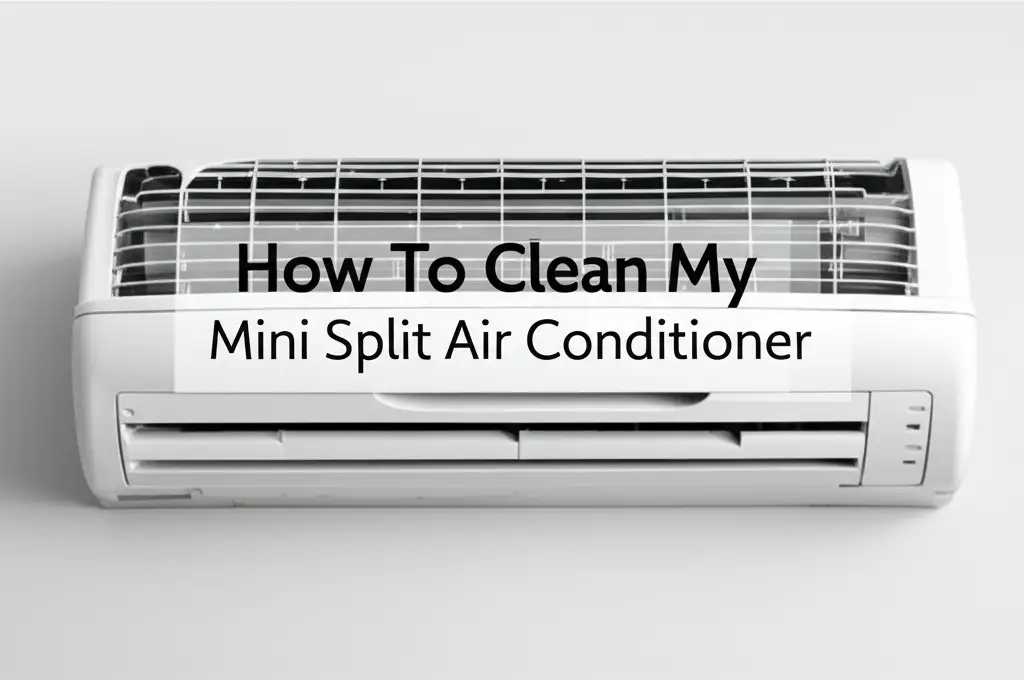
How To Clean My Mini Split Air Conditioner
Imagine a fresh breeze flowing through your home, clean and pure. Now imagine that air feeling stale, maybe even smelling a bit off. If you own a mini split air conditioner, you know its power to cool or heat a space efficiently. But what happens when it starts to underperform or impact your indoor air quality? The answer often lies in needing a good cleaning. Learning how to clean my mini split air conditioner is a skill every homeowner can master. This guide will walk you through the simple steps to restore your unit’s performance, improve air quality, and save on energy bills. We will cover everything from routine filter cleaning to a deeper dive into coils and drain lines, ensuring your ductless mini split runs like new.
Takeaway:
- Regular mini split cleaning improves air quality and efficiency.
- Gather the right tools before you start cleaning.
- Cleaning filters is a simple, frequent task.
- Deep cleaning coils and blower wheels boosts performance.
- Clearing the drain line prevents leaks and mold.
- Maintaining the outdoor unit keeps your system running well.
Cleaning your mini split air conditioner involves routine tasks like washing filters and more thorough cleanings of coils, blower wheels, and drain lines. You need to turn off power, gently access internal components, and use appropriate cleaning solutions to remove dust, mold, and debris. This helps maintain efficiency, improve air quality, and extend the unit’s lifespan.
Why Regular Mini Split Cleaning Matters
Do you ever wonder why your mini split unit might not be cooling as well as it used to? Or perhaps you have noticed a strange odor when it runs. These are common signs that your mini split air conditioner needs a thorough cleaning. Over time, dust, dirt, pet dander, and even mold can accumulate inside your unit. This buildup does not just make your air conditioner dirty; it also impacts its ability to work correctly.
A dirty mini split has to work harder to achieve the desired temperature. This increased effort leads to higher energy consumption and, in turn, bigger electricity bills for you. It also puts more strain on the internal components, which can shorten the lifespan of your unit. Think of it like a car engine; if you do not change the oil, it will eventually break down faster. The same principle applies to your mini split. You can learn more about general AC cleaning at how to clean air conditioner.
Beyond efficiency, the air quality in your home is directly affected. A dirty mini split can circulate dust, allergens, and mold spores throughout your living space. This can cause respiratory issues, allergies, and an unpleasant smell. I know I want the air in my home to be as fresh and healthy as possible. Regular cleaning ensures your mini split provides clean, crisp air. It also prevents costly repairs by catching small issues before they become big problems. Investing time in cleaning your mini split saves you money and improves your home environment. This preventative maintenance is a smart move for any homeowner.
Gathering Your Mini Split Cleaning Supplies
Before you dive into cleaning your mini split, it is smart to gather all your tools. Having everything ready saves time and makes the process smoother. You do not want to be halfway through a task only to realize you are missing something important. Preparation is key for an efficient cleaning session.
Here is a list of what you will need for a comprehensive clean:
- Safety Gear: Rubber gloves and safety glasses are essential. They protect your hands from cleaning solutions and your eyes from dust or splashes.
- Dust Sheets or Tarps: Lay these on the floor under the indoor unit. They will catch any water, dust, or debris that falls during cleaning. This protects your flooring and makes cleanup easier.
- Vacuum Cleaner with Brush Attachment: This is perfect for sucking up loose dust from filters and other accessible areas.
- Soft Brush or Old Toothbrush: Useful for gently scrubbing away stubborn grime on coils or in tight spots.
- Microfiber Cloths or Soft Rags: For wiping down surfaces and drying components.
- Spray Bottle: For applying cleaning solutions evenly.
- Coil Cleaner: Choose a non-rinse, evaporator coil cleaner specifically designed for AC units. These often come in an aerosol can. You can find these at most hardware stores.
- Mild Dish Soap or All-Purpose Cleaner: For washing filters and the exterior casing.
- Water Bucket: For rinsing filters or mixing cleaning solutions.
- Bleach (Optional, Diluted): For stubborn mold in the drain line, but use sparingly and carefully.
- Wet/Dry Shop Vac: This is helpful for clearing a clogged drain line.
- Screwdriver Set: You might need this to open the casing or access certain parts, depending on your mini split model. Always check your owner’s manual first.
Having these items on hand ensures you can tackle every part of the cleaning process effectively. I always make sure my cleaning supplies are ready before I start any home project, and cleaning my mini split is no exception.
How to Clean Your Mini Split Filters
Cleaning the filters is the easiest and most frequent mini split maintenance task. It is also one of the most important for maintaining your unit’s efficiency and the air quality in your home. I typically clean my filters every 2-4 weeks, especially during peak usage seasons. Neglecting filter cleaning can quickly lead to decreased airflow and higher energy bills.
Follow these simple steps to clean your mini split filters:
- Turn Off the Power: Safety first! Before doing anything, always turn off the circuit breaker that powers your mini split unit. Do not just use the remote control. This prevents accidental starts and protects you from electrical hazards.
- Open the Front Panel: Most mini split indoor units have a hinged front panel that swings open. Gently lift or pull the panel according to your unit’s design. Refer to your owner’s manual if you are unsure.
- Remove the Filters: Inside, you will see two mesh filters. They usually slide out easily from their slots. Note their orientation so you can put them back correctly. Handle them carefully to avoid spreading dust.
- Clean the Filters:
- Vacuuming: For light dust, you can often just use a vacuum cleaner with a brush attachment to remove the loose particles. Do this outside if possible to avoid releasing dust indoors.
- Washing: For a more thorough clean, wash the filters under cool, running water. You can add a few drops of mild dish soap and gently scrub them with a soft brush if they are very dirty.
- Rinsing: Rinse them thoroughly until all soap and debris are gone.
- Drying: Shake off excess water and let the filters air dry completely. Place them on a clean towel in a well-ventilated area. Do not put them back into the unit while damp, as this can encourage mold growth. This is a crucial step to avoid future issues. You can find more detailed information on filter cleaning at how to clean mini split filters.
- Reinstall and Power On: Once the filters are completely dry, slide them back into their slots. Close the front panel securely. Now, you can go back to your circuit breaker and turn the power back on. Your mini split is now ready to run with cleaner air and improved efficiency. Regular filter cleaning is a game-changer for your mini split’s performance.
Deep Cleaning Your Mini Split Coils and Blower Wheel
While filter cleaning is a frequent task, deep cleaning the evaporator coils and blower wheel is something you should aim to do at least once a year, or more often if your unit sees heavy use or you have pets. These parts are crucial for transferring heat and moving air, but they are also magnets for mold and dust. A dirty coil can significantly reduce your unit’s cooling power, and a dusty blower wheel makes it less effective at moving air. You can find more specific advice on cleaning specific brands like a Mitsubishi mini split.
Here’s how to tackle this deeper clean:
- Safety First: Just like with filters, always turn off the power to the unit at the circuit breaker before you begin. This step cannot be stressed enough for your safety.
- Prepare the Area: Lay down your dust sheets or tarps directly underneath the indoor unit. This protects your floors from any drips or dirt that might fall during the cleaning process.
- Access the Coils and Blower Wheel:
- Open the front panel and remove the filters as you did before.
- Many mini split units have an additional plastic cover or louvers that need to be removed to access the coils and blower wheel. This might involve unsnapping clips or removing a few screws. Consult your owner’s manual for specific instructions for your model. Take pictures with your phone as you go to remember how to reassemble everything.
- Once the covers are off, you will see the metal fins of the evaporator coil. Just behind them, often hidden, is the cylindrical blower wheel. This component can be difficult to access without removing it. However, you can clean it without full removal. Information on how to clean mini split blower wheel without removing can be very helpful here.
- Clean the Evaporator Coils:
- Vacuuming: Use a soft brush attachment on your vacuum cleaner to gently remove any loose dust or debris from the coil fins. Be very careful not to bend the delicate fins.
- Apply Coil Cleaner: Spray a specialized no-rinse evaporator coil cleaner directly onto the coils. Follow the product instructions carefully. These cleaners are designed to foam up, break down grime, and then drain away through the unit’s drain line. Let the cleaner sit for the recommended time, usually 10-15 minutes. The cleaner will work its way through the coils.
- Clean the Blower Wheel:
- This part is often the dirtiest and most challenging to clean thoroughly. Use a soft brush, like a long-handled bottle brush or a clean, stiff paintbrush, to reach into the squirrel cage blower wheel. Gently brush away the dust and mold from the blades.
- You can also spray some of your coil cleaner or a mild soapy solution onto the blower wheel. Let it sit for a few minutes. Then, wipe away the loosened grime with a damp cloth, reaching as far as you can. It helps to spin the blower wheel manually to access all parts.
- For really stubborn buildup, some people use compressed air to blow out debris, but be prepared for a mess and ensure proper ventilation.
- Wipe Down and Reassemble: Use a clean, damp cloth to wipe down any accessible surfaces. Once everything is clean and dry, reattach any covers or louvers you removed. Slide the dry filters back into place. Close the front panel securely. Finally, turn the power back on at the circuit breaker. You will notice a big difference in airflow and air quality after this deep clean.
Clearing the Mini Split Drain Line
The drain line is a small, often overlooked, but vital part of your mini split system. Its job is to carry away the condensation that forms on the evaporator coils. As your mini split cools the air, moisture condenses, just like water droplets on a cold drink. This water drips into a drain pan and then flows out through the drain line. When this line gets clogged, usually with algae, mold, or sludge, the water has nowhere to go. This can lead to water leaks from your indoor unit, dripping down walls, and potentially causing damage. It also creates a perfect breeding ground for mold and mildew inside your unit.
Here is how to clear a clogged mini split drain line:
- Turn Off Power: As always, ensure the power to your mini split is turned off at the circuit breaker before you start any work.
- Locate the Drain Line: The drain line is a small, flexible plastic hose that usually exits the back or side of your indoor unit and runs outdoors. It often exits near the outdoor condenser unit or just leads to a nearby drain.
- Check for Obvious Clogs (Outdoor): First, check the outdoor end of the drain line. Sometimes, debris, dirt, or even insects can block the opening. Clear any visible obstructions. You might see a slow drip or no drip at all if it is clogged.
- Flush the Line (Indoor):
- You will need to access the drain pan inside the indoor unit. This usually means opening the front panel, removing filters, and possibly some additional covers, similar to when cleaning coils.
- Locate the small drain pan underneath the evaporator coils. You might see standing water if the line is clogged.
- Pour a solution slowly into the drain pan. You can use a mixture of warm water and a few drops of dish soap, or a diluted bleach solution (1 cup bleach to 1 gallon of water). Alternatively, some people use distilled white vinegar. Use a funnel or a small cup to pour the solution carefully.
- The goal is for the solution to flow down the drain line and flush out any blockages. Pour slowly to avoid overflowing the pan.
- You should see the water dripping steadily from the outdoor end of the drain line after some time. If it still does not drain, the clog is more severe.
- Use a Wet/Dry Shop Vac (For Stubborn Clogs):
- If flushing does not work, the clog is likely more stubborn. Go to the outdoor end of the drain line.
- Seal the nozzle of a wet/dry shop vac tightly around the end of the drain line. You might need to use duct tape or your hand to create a good seal.
- Turn on the shop vac to its suction setting. The strong suction will pull out the clog. You might hear a gurgling sound as the clog clears. Be ready to catch any出てくる debris in the shop vac.
- After using the shop vac, re-flush the line with water to ensure it runs clear.
- Reassemble and Test: Once you are sure the drain line is clear, reassemble any covers you removed. Turn the power back on. Run your mini split in cooling mode for about 15-20 minutes to generate condensation and verify that water is now dripping steadily from the outdoor drain line. A clear drain line means no leaks and better humidity control. More detailed instructions can be found at how to clean mini split drain line.
Cleaning the Mini Split Outdoor Unit
While most of your mini split cleaning efforts focus on the indoor unit, the outdoor condenser unit also needs attention. This part of your system works hard to dissipate heat from your home, and it is exposed to all kinds of weather and outdoor debris. A dirty outdoor unit can reduce your mini split’s efficiency, forcing it to work harder and consume more power. This is similar to how a dirty radiator affects a car.
Here is how to clean your mini split outdoor unit:
- Turn Off the Power: This is a critical first step. Go to your home’s main electrical panel and turn off the circuit breaker that supplies power to your outdoor mini split unit. Do not rely on the thermostat or remote control alone.
- Clear Debris Around the Unit: Start by removing any leaves, grass clippings, twigs, or other debris that have accumulated around the base of the unit. Ensure there is at least two feet of clear space around all sides of the condenser for proper airflow. Trim back any bushes or plants that are growing too close.
- Clean the Exterior: Use a garden hose to gently spray down the outside of the unit. This helps remove loose dirt, dust, and spiderwebs from the grilles and casing. Avoid using high-pressure washers, as they can damage the delicate fins.
- Clean the Condenser Fins:
- The condenser fins are the thin metal slats that wrap around the unit. They are essential for heat exchange.
- You can use a soft brush or a fin comb (a specialized tool for straightening bent fins) to carefully remove debris that might be stuck between the fins. Brush downwards in the direction of the fins to avoid bending them.
- For a deeper clean, you can use a specialized outdoor coil cleaner or a solution of mild dish soap and water. Spray the cleaner onto the fins, let it sit for the recommended time (usually 10-15 minutes), then gently rinse it off with a garden hose. Ensure the water drains away freely.
- Be careful not to get water into the electrical components. Some units have a top cover that can be removed for better access, but only do so if you are comfortable and have disconnected the power.
- Check the Fan Blades: If your unit has a removable top grille and you are comfortable, you can inspect the fan blades inside. They can accumulate dirt and debris. Carefully wipe them down with a damp cloth if accessible. Again, ensure the power is off.
- Inspect the Base: Look for any pooling water or blockages around the base of the unit where water drains. Clear any mud or debris.
- Reassemble and Power On: Once everything is clean and dry, replace any covers or grilles you removed. Turn the power back on at the circuit breaker. Cleaning the outdoor unit regularly will help your mini split run more efficiently and prolong its life. For more general advice on cleaning the outdoor unit, you can refer to how to clean split air conditioner outdoor unit.
Maintaining Your Mini Split for Longevity
Cleaning your mini split is not just a one-time event; it is part of an ongoing maintenance plan. Regular upkeep ensures your unit provides reliable and efficient cooling or heating for many years. Think of it as investing in the longevity and performance of your home comfort system. I have found that a consistent maintenance schedule saves money on repairs and energy in the long run.
Here are key aspects of maintaining your mini split for longevity:
- Follow a Cleaning Schedule:
- Filters: Aim to clean your indoor unit’s air filters every 2-4 weeks, or monthly, especially during heavy usage seasons. If you have pets or allergies, you might need to clean them more often. This is the simplest yet most effective routine task.
- Coils (Indoor & Outdoor): Deep clean the indoor evaporator coils and outdoor condenser coils at least once a year. This is best done before the peak cooling or heating season begins. A thorough cleaning prevents efficiency loss and component strain. You can also review how to clean the evaporator coils on split systems for more specific guidance.
- Drain Line: Inspect and flush the drain line annually, or immediately if you notice any leaks or signs of a clog. Prevention is key here to avoid water damage and mold growth.
- Monitor Performance: Pay attention to how your mini split is operating. Is it cooling as effectively as before? Are there any strange noises or odors? Early detection of issues can prevent them from becoming major problems. If you notice a significant drop in performance after cleaning, it might indicate a more serious issue that requires professional attention.
- Keep the Area Clear: Ensure there is always proper airflow around both the indoor and outdoor units. Do not block the indoor unit with furniture or curtains. For the outdoor unit, maintain a clear space of at least two feet around all sides. Trim back vegetation regularly.
- Professional Servicing: While DIY cleaning is important, consider scheduling a professional inspection and tune-up every 1-2 years. Technicians can perform tasks you cannot, such as checking refrigerant levels, inspecting electrical connections, and deep cleaning components with specialized tools. They can identify wear and tear or potential failures before they happen. This can prevent unexpected breakdowns and extend the life of your unit.
- Read Your Manual: Your mini split’s owner’s manual is a valuable resource. It contains specific cleaning instructions, maintenance schedules, and troubleshooting tips tailored to your model. Different brands, like those by Senville, might have unique recommendations. Always refer to it for model-specific advice.
By following these maintenance practices, you are not just cleaning your mini split; you are ensuring its long-term health and your continued comfort. This proactive approach saves you money and hassle down the road.
FAQ Section
How often should I clean my mini split filters? You should clean your mini split air filters every 2 to 4 weeks during periods of heavy use. If you have pets, allergies, or live in a dusty environment, consider cleaning them even more frequently. Regular filter cleaning is crucial for maintaining good airflow, unit efficiency, and indoor air quality. It is the most impactful and easiest routine maintenance task.
Can I use water to clean the indoor unit of my mini split? You can use water, especially for washing the removable filters under a faucet. When cleaning the coils and other internal parts, it is better to use a specialized no-rinse coil cleaner or a very lightly damp cloth. Avoid spraying water directly into electrical components. Always ensure all parts are completely dry before reassembling and powering on the unit to prevent electrical hazards and mold growth.
What causes a mini split to smell bad? A common cause of bad odors from a mini split is the accumulation of mold, mildew, and bacteria on the evaporator coils and blower wheel due to condensation. Dust and debris trapped inside the unit can also contribute to stale smells. A clogged drain line can lead to stagnant water and mold growth, worsening the odor. Regular deep cleaning often resolves these issues.
Is it safe to clean my mini split myself? Yes, it is generally safe to clean your mini split yourself, provided you follow proper safety precautions. Always turn off the power at the circuit breaker before touching the unit. Use appropriate safety gear like gloves and eye protection. If you are uncomfortable accessing internal components or if the unit needs a deeper clean than you can provide, call a professional HVAC technician.
How much does it cost to professionally clean a mini split? The cost for a professional mini split cleaning can vary based on your location, the number of units, and the extent of cleaning needed. Generally, a professional deep cleaning can range from $75 to $200 per indoor head. This service often includes thorough coil cleaning, drain line flushing, and overall system inspection. This cost is separate from a full system tune-up.
What happens if I don’t clean my mini split? If you do not clean your mini split, its efficiency will decrease, leading to higher energy bills as it works harder to cool or heat your space. Air quality will suffer due to circulating dust, allergens, and mold spores, potentially causing health issues and unpleasant odors. The unit’s lifespan may shorten, and you risk facing costly repairs for issues like frozen coils or water leaks from clogged drain lines.
Conclusion
Learning how to clean my mini split air conditioner is a valuable skill that every homeowner should embrace. We have covered the essential steps, from the routine cleaning of filters to the more involved process of deep cleaning the coils, blower wheel, and drain line, and even maintaining the outdoor unit. By consistently performing these maintenance tasks, you are not just keeping your unit looking good; you are actively improving its performance, ensuring cleaner air for your home, and significantly extending its lifespan.
Remember the key takeaways: safety first by always cutting power, preparing your tools, and drying everything thoroughly. Regular cleaning prevents costly repairs and keeps your energy bills in check. Your mini split air conditioner is an important investment in your home comfort. Giving it the proper care ensures it delivers cool, fresh air efficiently for many years. Start your mini split cleaning routine today and breathe easier knowing your unit is running at its best.
- mini split cleaning
- AC maintenance
- ductless AC
- DIY cleaning
- indoor air quality

Todd Martin
Senior Writer
With over 15 years of experience in home renovation and design, I started HEG to share what I’ve learned with homeowners who want to create spaces that are both beautiful and functional. I’ve always believed in a hands-on approach, and over the years, I’ve picked up practical solutions that actually work. Through HEG, I aim to make home improvement more approachable, sharing real tips that help you create a home you truly love.