· Todd Martin · Bathroom Care · 20 min read
How To Clean Pebble Stone Shower Floor
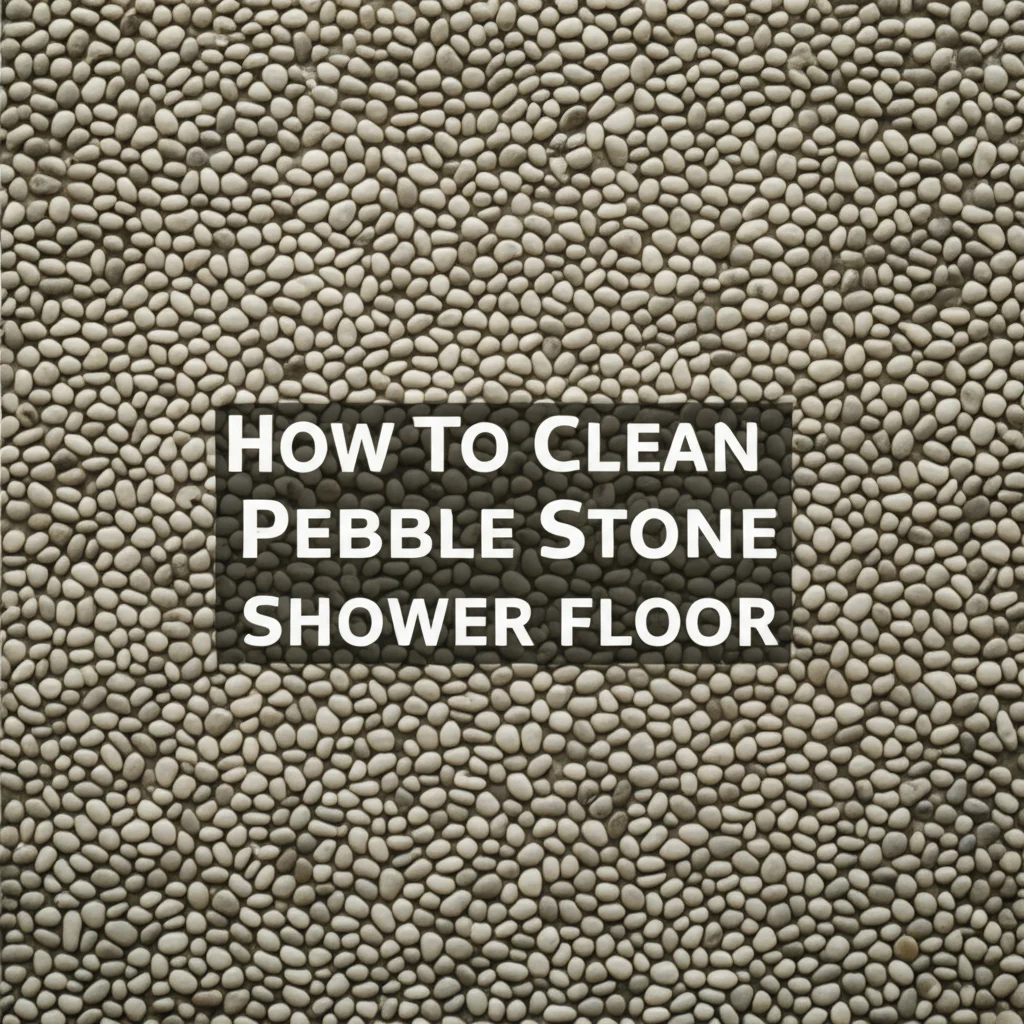
Restore Your Pebble Stone Shower: Simple Cleaning Steps
Is your beautiful pebble stone shower floor losing its luster? Over time, soap scum, mineral deposits from hard water, and stubborn mold can diminish its natural charm. I know how frustrating it is to see a once-stunning shower look dull and dirty. Properly maintaining this unique surface is key to preserving its beauty and ensuring a hygienic space. This guide provides comprehensive steps on how to clean pebble stone shower floor effectively. You will learn about essential tools, safe cleaning solutions, and preventative measures. We will cover everything from routine cleaning to tackling tough stains, helping you keep your pebble stone shower looking its best.
Takeaway:
- Regularly clean pebble stone shower floors using pH-neutral cleaners and soft brushes.
- Address specific issues like soap scum, mold, and hard water stains with appropriate, gentle methods.
- Seal your pebble stone floor to protect it and simplify future cleaning tasks.
To clean pebble stone shower floors, use a pH-neutral cleaner with a soft brush for daily grime. For tougher stains like soap scum or mold, use a mild solution of warm water and dish soap, or a dedicated stone cleaner, rinsing thoroughly and drying the surface.
Understanding Your Pebble Stone Shower Floor: Its Nature and Challenges
Pebble stone shower floors offer a unique, natural aesthetic. They create a spa-like feel in any bathroom. These floors consist of many small, individual stones set into grout. This natural material, often made of river rocks, is porous. It can absorb liquids and minerals. The uneven surface and numerous grout lines also create challenges. Dirt, soap scum, and mold can easily accumulate in these crevices. Understanding these characteristics helps in choosing the right cleaning methods.
Pebble stones are natural. This means they are sensitive to harsh chemicals. Acidic cleaners, for instance, can etch the stone’s surface. They can also degrade the grout over time. Alkaline cleaners can also cause damage. The goal is to clean effectively without harming the material. Regular maintenance is more important for pebble stone than for smooth tile. Its texture traps more grime. This requires a consistent cleaning routine. Ignoring this leads to stubborn stains and growth.
The grout between the pebbles is often cement-based. Grout is also porous. It can harbor mold and mildew. This is especially true in a humid shower environment. Hard water leaves mineral deposits. These deposits appear as white, chalky stains. Soap scum builds up from shampoo, conditioner, and body wash. These residues cling to the irregular surface. Knowing these challenges helps us select safe and effective cleaning strategies. You want to make sure your stone shower tile remains beautiful.
Proper care preserves the beauty and integrity of your pebble stone shower. It extends the life of the floor. It also ensures a clean and healthy bathroom environment. I always recommend proactive care. It makes deep cleaning less frequent and less demanding.
Essential Tools and Gentle Cleaners for Pebble Stone Showers
Gathering the right tools and cleaners makes a big difference. Using improper tools or harsh chemicals can damage your pebble stone shower floor. Always start with gentle options. You want to protect the natural stone and the grout. My go-to tools include soft-bristled brushes. These brushes can reach into the textured surface without scratching the stones. A grout brush is also essential for those tight spaces between pebbles.
For cleaning solutions, pH-neutral cleaners are a must. These cleaners will not etch or discolor the natural stone. Many manufacturers make specific stone cleaners. You can find these at hardware stores or online. Simple dish soap mixed with warm water also works well for routine cleaning. Look for mild, non-abrasive formulas. These are safest for your floor. You can also use a mixture of baking soda and water. This creates a gentle scrubbing paste.
Here is a list of essential items:
- Soft-bristled scrub brush: For the main surface.
- Grout brush or old toothbrush: For tight grout lines.
- Microfiber cloths or old towels: For drying.
- Spray bottle: For applying cleaning solutions.
- Bucket: For mixing solutions and rinsing.
- pH-neutral stone cleaner: Specifically designed for natural stone.
- Mild dish soap: A good alternative for general cleaning.
- Baking soda: For a gentle abrasive paste.
- Warm water: For mixing and rinsing.
- Natural stone sealer: For long-term protection.
Avoid using harsh acids like vinegar or strong bleach directly on pebble stone. While vinegar can clean mold in a shower or help with cleaning a shower with vinegar on other surfaces, it can damage natural stone and grout. Bleach can also discolor grout and potentially harm the stone’s finish. Always test new cleaners in an inconspicuous area first. This ensures no adverse reactions occur. Protecting your investment means choosing the right supplies.
Step-by-Step Daily and Weekly Cleaning Routine for Pebble Stone
A consistent cleaning routine prevents buildup. It keeps your pebble stone shower floor looking pristine. Daily and weekly habits are key to easy maintenance. I always suggest a quick rinse after each shower. This washes away loose soap and hair. This simple step significantly reduces future cleaning efforts. It prevents soap scum from hardening on the surface.
Daily Maintenance Steps:
- Rinse: After every shower, thoroughly rinse the floor with warm water. Use your showerhead to spray down all areas. Make sure to get into the crevices between pebbles.
- Squeegee or Towel Dry: Use a squeegee or a clean microfiber towel to dry the floor. This removes excess moisture. It prevents water spots and mildew growth. This is crucial for natural stone.
Weekly Cleaning Steps:
- Clear the Area: Remove all shower products, bottles, and accessories from the floor. This gives you full access to the surface.
- Pre-Rinse: Wet the entire pebble stone floor with warm water. This loosens initial grime. It prepares the surface for cleaning.
- Apply Cleaner: Mix a small amount of pH-neutral stone cleaner with warm water in a bucket. Alternatively, use a few drops of mild dish soap. Apply the solution to the entire floor using a spray bottle or directly from the bucket. Make sure it covers all pebbles and grout lines.
- Gentle Scrubbing: Use a soft-bristled brush to scrub the floor. Work in small sections. Pay extra attention to areas with visible buildup. For the grout lines, use a dedicated grout brush or an old toothbrush. Be firm but gentle. You do not want to scratch the stone or damage the grout.
- Rinse Thoroughly: Rinse the entire floor with clean, warm water. Ensure all cleaning solution is gone. Residue can attract more dirt. I always rinse until the water runs clear.
- Dry Completely: Use a clean, dry microfiber towel or squeegee to dry the floor. This helps prevent water spots and inhibits mold growth. Proper drying is vital for maintaining any stone floor.
Following this routine helps you clean your shower floor effectively. It also prevents the need for harsh chemicals. Consistent effort now saves a lot of hard work later.
Tackling Common Issues: Soap Scum, Mold, and Hard Water Stains
Even with regular cleaning, some common issues can appear on pebble stone shower floors. Soap scum, mold, and hard water stains require specific attention. Each type of stain needs a targeted, yet gentle approach. My experience shows that patience and the right products make all the difference.
Removing Soap Scum:
Soap scum is a persistent problem in showers. It results from the reaction between soap and hard water minerals. On textured pebble stone, it clings to every nook.
- Mild Solution: Mix warm water with a few drops of mild dish soap. You can also use a specialized stone soap.
- Apply and Dwell: Spray the solution generously over the affected areas. Let it sit for 5-10 minutes. This helps to break down the scum.
- Scrub: Use a soft-bristled brush or grout brush. Scrub the areas firmly. The mild abrasion helps lift the residue.
- Rinse and Dry: Rinse thoroughly with clean water. Dry the floor completely to prevent new buildup. For tough soap scum, you might need a non-abrasive nylon scrubber.
Eliminating Mold and Mildew:
Mold thrives in damp, warm environments. The porous nature of pebble stone and grout makes it susceptible.
- Natural Solution: Create a paste using baking soda and a small amount of water. Apply this paste directly to the moldy areas. Let it sit for 15-20 minutes.
- Scrub Gently: Use a grout brush or old toothbrush to scrub the mold. The baking soda provides a gentle abrasive action.
- Hydrogen Peroxide: For stubborn mold, a 3% hydrogen peroxide solution can be effective. Spray it on, let it sit for 10-15 minutes, then scrub. Hydrogen peroxide is safer for natural stone than bleach. It helps you clean mold off natural stone without damage.
- Rinse Well: Always rinse thoroughly with water after treating mold. Dry the surface completely. Ensure good ventilation to prevent mold recurrence.
Eradicating Hard Water Stains:
Hard water leaves behind mineral deposits, appearing as white, chalky residue. These stains can be tricky on natural stone.
- Mild Acidic Cleaner (Caution!): While generally avoided, a very diluted solution of white vinegar (1 part vinegar to 10 parts water) can sometimes be used. Always test in an inconspicuous area first. If the stone is sealed and not highly porous, this might work. Avoid this on unsealed or highly sensitive stones.
- Commercial Stone Descaler: The safest option is a specially formulated stone descaler. These products are designed to remove mineral buildup without harming the stone. Follow the product instructions carefully.
- Poultice Method: For very stubborn stains, a poultice can draw out minerals. Mix baking soda with a small amount of water to form a thick paste. Apply it to the stain, cover with plastic wrap, and let it sit overnight. The paste draws out the minerals. Scrub and rinse the next day. This method is effective for various stone cleaning tasks.
Always prioritize gentle methods. Move to stronger, but still stone-safe, options only if needed. Consistent drying is your best defense against all these common problems.
Deep Cleaning Your Pebble Stone Shower Floor and Grout
Sometimes, routine cleaning is not enough. A deep clean revitalizes your pebble stone shower floor. This process tackles ingrained dirt and neglected areas. It focuses on both the pebbles and the grout. I recommend a deep clean every few months, depending on usage. This ensures your shower maintains its original beauty. Deep cleaning is also essential for a truly hygienic space.
Preparing for Deep Cleaning:
- Clear the Shower: Remove all items from the shower. This includes bottles, bath mats, and anything else on the floor.
- Ventilation: Open windows or turn on the bathroom fan. Good airflow is important when using cleaning solutions.
- Warm Water Rinse: Thoroughly wet the entire pebble stone floor with warm water. This loosens surface dirt.
Deep Cleaning the Pebbles:
- Stone-Specific Cleaner: Use a high-quality pH-neutral stone cleaner. Follow the product’s instructions for dilution and application. Apply it evenly over the entire pebble surface. Many good cleaners are available for natural stone tile and grout.
- Allow Dwell Time: Let the cleaner sit for the recommended time, usually 5-10 minutes. This allows it to break down grime. Do not let the cleaner dry on the surface.
- Scrub Thoroughly: Use a sturdy, soft-bristled brush. Scrub the entire pebble surface. Apply consistent pressure. Work in small sections to ensure full coverage. Pay close attention to the textured areas of each stone.
- Rinse: Rinse the floor completely with clean, warm water. Make sure no cleaner residue remains. Rinse until the water runs clear.
Deep Cleaning the Grout Lines:
The grout between pebbles is often the dirtiest part. It collects a lot of grime and mold.
- Grout Cleaner: Use a pH-neutral grout cleaner designed for natural stone. Apply it directly to the grout lines. You can use a spray bottle for precise application.
- Baking Soda Paste (Alternative): For a natural option, make a thick paste of baking soda and water. Apply this paste generously along all grout lines.
- Grout Brush Action: Take a dedicated grout brush or an old toothbrush. Scrub the grout lines vigorously. The bristles get deep into the narrow spaces. You will see dirt lifting away. This is crucial when you want to clean grout in a shower effectively.
- Rinse and Repeat: Rinse the grout lines with warm water. If stains persist, repeat the application and scrubbing. Sometimes, tough stains need multiple treatments.
Final Steps:
- Inspect: Check the entire floor for any missed spots.
- Final Rinse: Give the entire floor a final, thorough rinse.
- Dry Completely: Use a clean towel or squeegee to dry the floor. Proper drying prevents new issues. A dry surface also helps when you prepare to seal your stone. This deep cleaning process will bring your pebble shower floor back to life.
Maintaining and Protecting Your Pebble Stone Shower for Longevity
Cleaning your pebble stone shower floor is one step. Protecting it for the long term is another. Proper maintenance extends the life and beauty of your unique flooring. It also makes future cleaning much easier. My key recommendation for protecting pebble stone is regular sealing. This step is often overlooked but provides significant benefits.
The Importance of Sealing:
Pebble stone, like most natural stones, is porous. This means it has tiny openings that can absorb liquids. Water, soap, and dirt can penetrate the stone and grout. This leads to staining, mold growth, and eventual degradation. A stone sealer creates a protective barrier. It fills these pores. This barrier prevents liquids from soaking in.
- Stain Resistance: Sealing makes the stone and grout highly resistant to stains. Spills and residues sit on the surface, making them easy to wipe away.
- Mold and Mildew Prevention: By preventing water absorption, sealers greatly reduce the environment mold needs to grow. This is especially important in a damp shower.
- Easier Cleaning: Sealed surfaces are much easier to clean. Dirt and soap scum do not cling as readily.
- Preserves Appearance: Sealing protects the stone’s natural color and finish. It keeps your pebble stone looking new.
How to Seal Your Pebble Stone Shower Floor:
- Clean First: The floor must be perfectly clean and dry before sealing. Any dirt or moisture trapped under the sealer will become permanent. Complete a deep clean before sealing.
- Choose the Right Sealer: Use a penetrating, impregnating sealer specifically designed for natural stone. These sealers soak into the stone and grout. They do not leave a film on the surface. Avoid topical sealers, as they can make the floor slippery and peel over time.
- Application:
- Apply the sealer evenly with a paint roller, sponge, or sprayer. Work in small sections.
- Allow the sealer to dwell for the time recommended by the manufacturer. This usually ranges from 10-20 minutes.
- Wipe off any excess sealer before it dries. Do not let it dry on the surface, as it can leave a hazy residue. Buff with a clean, dry cloth.
- Apply a second coat if recommended by the sealer manufacturer. This often provides better protection.
- Curing Time: Allow the sealer to cure completely. This can take 24-72 hours. Do not use the shower during this time. The sealer needs to fully bond and harden.
Ongoing Maintenance for Protection:
- Ventilation: Always run the bathroom fan or open a window during and after showers. This reduces humidity, which is a major enemy of natural stone and grout.
- Daily Drying: Squeegee or wipe down the floor after every shower. This is the simplest yet most effective way to prevent hard water spots and mold.
- pH-Neutral Cleaners: Continue using only pH-neutral cleaners for regular cleaning. Even with a sealer, harsh chemicals can degrade its effectiveness over time.
- Re-Sealing: Re-seal your pebble stone shower floor every 1-3 years. The frequency depends on shower usage and sealer type. Water tests indicate if resealing is needed: if water darkens the stone or soaks in quickly, it is time to re-seal.
By incorporating sealing and mindful daily habits, your pebble stone shower floor will remain a beautiful, low-maintenance feature for many years. This proactive approach is key to its longevity.
What to Avoid: Harmful Practices for Pebble Stone Cleaning
Knowing what to avoid is as important as knowing what to do. Certain cleaning practices and products can severely damage your pebble stone shower floor. Using the wrong items can lead to etching, discoloration, or weakening of the stone and grout. I have seen many beautiful natural stone surfaces ruined by improper care. My goal is to help you prevent these mistakes.
Harsh Acids:
- Vinegar: Many common household cleaners contain vinegar. While great for glass or ceramic, vinegar is highly acidic. It will etch and dull natural stone over time. This includes marble, granite, and pebble stone. Even diluted vinegar can cause damage, especially to unsealed stone or grout. It can also degrade grout. Do not use vinegar to clean a stone shower or any natural stone surface.
- Lemon Juice: Similar to vinegar, lemon juice is acidic and should be avoided for the same reasons.
- Toilet Bowl Cleaners: These are often very acidic and should never be used on natural stone.
Strong Alkalines and Bleach:
- Ammonia-Based Cleaners: Products like Windex often contain ammonia. These can strip sealers and dull the stone’s finish.
- Bleach: While effective at killing mold, bleach can discolor grout. It can also weaken the grout structure over time. For natural stone, it is generally too harsh and can cause irreversible damage. Use safer alternatives like hydrogen peroxide for mold removal. Avoid using bleach to clean a shower with pebble stone.
Abrasive Cleaners and Tools:
- Scouring Powders: These contain abrasive particles that can scratch the polished surface of stones. They can also scratch softer pebbles.
- Steel Wool or Stiff Brushes: Using metal brushes or stiff nylon brushes can scratch the stone. They can also damage the grout. Stick to soft-bristled brushes for scrubbing.
- Abrasive Sponges: Avoid sponges with rough scouring pads. These can create micro-scratches that dull the stone.
Oil-Based Soaps and Waxes:
- Oil-Based Cleaners: Some floor cleaners leave an oily residue. This residue can trap dirt and create a film on the stone. It can also make the floor slippery.
- Waxes: Natural stone does not need waxing. Waxes can build up, attracting dirt and creating a yellowish film. They can also make re-sealing difficult.
Improper Drying:
- Air Drying: Allowing your pebble stone shower floor to air dry after every use contributes to hard water spots and mold growth. Water contains minerals that precipitate when the water evaporates. Consistent drying is crucial to prevent these issues.
By avoiding these harmful practices, you can ensure the longevity and beauty of your pebble stone shower floor. Always read product labels carefully. When in doubt, stick to pH-neutral cleaners specifically designed for natural stone. Your pebble stone floor will thank you for the gentle care.
Addressing Stubborn Stains and Restoring Luster
Sometimes, despite best efforts, stubborn stains appear. Or, perhaps your pebble stone shower floor has lost its original luster over time. Restoring its appearance requires specific, careful steps. I often find that a targeted approach works best for these challenges. These methods go beyond routine cleaning. They aim to rejuvenate the stone.
Poultice for Deep Stains:
For stains that have penetrated the stone, a poultice can draw them out. This method is effective for oil-based stains, deep hard water deposits, or even some organic stains.
- Prepare the Poultice: Mix an absorbent material (like baking soda, kaolin clay, or diatomaceous earth) with a chemical agent. The agent depends on the stain type. For oil, use acetone. For organic stains, use hydrogen peroxide (3-6%). For hard water, a commercial stone poultice might be best. Create a thick, peanut butter-like paste.
- Apply and Cover: Apply the paste thickly over the stain. Extend it beyond the stain’s edges. Cover the poultice with plastic wrap. Tape the edges down to prevent it from drying out too quickly.
- Dwell Time: Let the poultice sit for 12-48 hours. The longer it sits, the more it can draw out.
- Remove and Clean: Once dry, scrape off the hardened poultice with a plastic scraper. Avoid metal. Rinse the area thoroughly with clean water.
- Repeat if Necessary: Stubborn stains may require multiple applications.
Addressing Etching and Dullness:
Etching occurs when acidic substances react with the stone, creating dull, rough spots. This is a common issue for marble shower floors and pebble stone.
- Professional Help: For severe etching, professional stone restoration is often the best solution. They can re-hone or re-polish the surface.
- DIY Polishing (Small Areas): For very minor etching, you might try a stone polishing compound designed for natural stone. Apply it with a soft cloth and buff gently. This is usually more effective on smooth, polished stone than on textured pebble stone. Test thoroughly in a hidden area first. This aims to restore some of the stone’s shine.
Restoring Grout Color:
Grout can become discolored or stained over time, even with deep cleaning.
- Grout Colorant/Sealer: If the grout is permanently discolored, a grout colorant can restore its original look. These products also act as a sealer, providing new protection.
- Grout Re-grouting: For severely damaged or crumbling grout, re-grouting might be necessary. This involves removing the old grout and applying new grout. This is a more involved process.
Final Luster Boost:
After deep cleaning and addressing specific issues, ensure the floor is dry. Then, apply a fresh coat of penetrating stone sealer. This will enhance the stone’s natural color. It also provides a protective layer. This final step brings back the richness of your pebble stone shower floor. Always remember that prevention through regular cleaning and proper sealing is the best way to maintain luster and avoid major restoration projects.
FAQ Section
How often should I clean my pebble stone shower floor?
You should rinse and dry your pebble stone shower floor daily after each use to prevent soap scum and mold. A light cleaning with a pH-neutral cleaner is recommended weekly. Perform a deep clean every few months, or as needed, to tackle stubborn grime and maintain the floor’s appearance.
Can I use bleach on pebble stone?
No, avoid using bleach on pebble stone. Bleach is too harsh for natural stone and grout. It can cause discoloration, weaken grout lines, and potentially damage the stone’s finish over time. Opt for milder, pH-neutral stone cleaners or natural alternatives like hydrogen peroxide for mold.
What is the best cleaner for pebble stone grout?
The best cleaner for pebble stone grout is a pH-neutral grout cleaner specifically designed for natural stone. You can also use a paste of baking soda and water, applied with a grout brush. For stubborn mold, a 3% hydrogen peroxide solution is effective and safer than bleach.
How do I remove hard water stains from pebble stone?
To remove hard water stains, use a commercial stone descaler that is pH-neutral and safe for natural stone. Alternatively, a thick paste of baking soda and water applied as a poultice can draw out mineral deposits. Always avoid acidic cleaners like vinegar, as they can etch the stone.
Does pebble stone need sealing?
Yes, pebble stone absolutely needs sealing. As a porous natural stone, it readily absorbs water, soap, and minerals. Sealing creates a protective barrier, preventing stains, inhibiting mold and mildew growth, and making the floor much easier to clean and maintain its beauty. Re-seal every 1-3 years.
Can I use a steam cleaner on pebble stone?
Using a steam cleaner on pebble stone is generally safe, but with caution. The high heat can potentially compromise existing sealers over time. If you use one, ensure it has a soft brush attachment. Use distilled water to avoid mineral deposits and always re-seal the floor after steam cleaning to maintain protection.
Conclusion
Cleaning your pebble stone shower floor might seem daunting at first, but with the right approach, it becomes a manageable task. We have covered everything from understanding the unique nature of pebble stone to daily maintenance, tackling tough stains, and crucial long-term protection through sealing.
Remember, consistency is key in preserving your shower’s beauty and hygiene. Regularly rinsing and drying, along with weekly pH-neutral cleaning, will go a long way. When facing more persistent issues like soap scum, mold, or hard water stains, use the targeted, stone-safe methods we discussed. Most importantly, avoid harsh chemicals and abrasive tools to protect your valuable natural stone. By committing to these practices, you ensure your pebble stone shower floor remains a clean, inviting, and beautiful part of your home for years to come. Start implementing these tips today to enjoy a sparkling clean shower space!
- Pebble stone cleaning
- Shower floor maintenance
- Natural stone care
- Grout cleaning
- Mold removal shower
- Hard water stains
- Bathroom cleaning tips

Todd Martin
Senior Writer
With over 15 years of experience in home renovation and design, I started HEG to share what I’ve learned with homeowners who want to create spaces that are both beautiful and functional. I’ve always believed in a hands-on approach, and over the years, I’ve picked up practical solutions that actually work. Through HEG, I aim to make home improvement more approachable, sharing real tips that help you create a home you truly love.