· Todd Martin · Food Preparation · 10 min read
How To Clean Radishes

How To Clean Radishes for Crisp Freshness
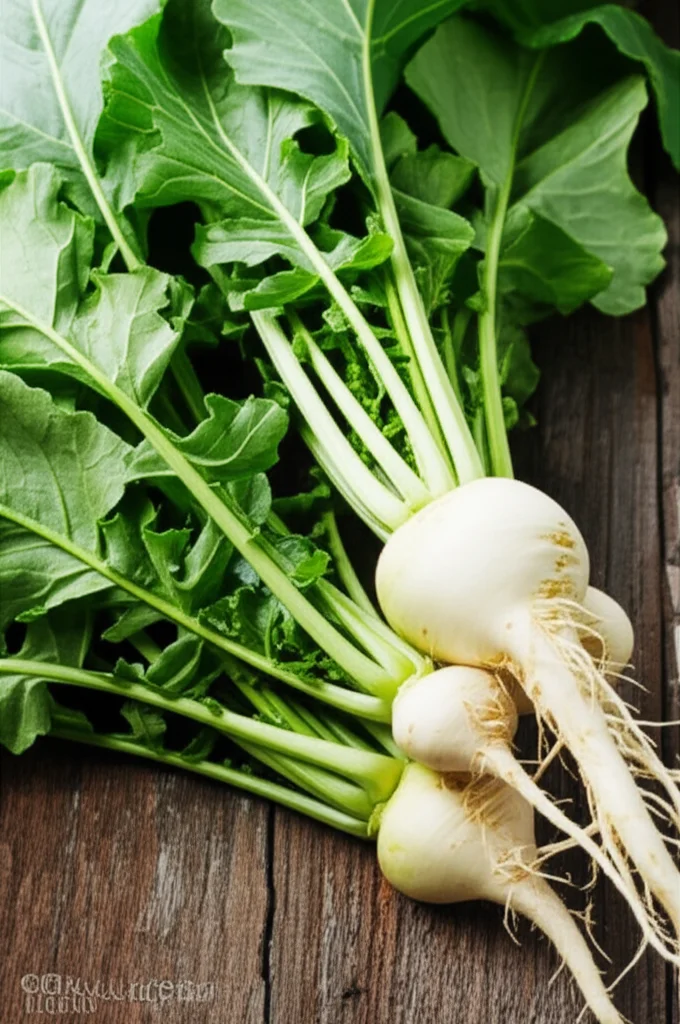
Imagine biting into a perfectly crisp, peppery radish, fresh from the garden or farmer’s market. That simple pleasure often starts with a fundamental step: proper cleaning. Radishes grow in the ground, so they gather soil, grit, and sometimes even tiny insects. Ensuring your radishes are sparkling clean makes them safer to eat and much more enjoyable.
Learning how to clean radishes correctly helps preserve their unique texture and flavor. Dirty radishes can bring an unpleasant gritty texture to your salads or snacks. They can also carry bacteria from the soil. This guide will walk you through everything you need to know. We cover tools, techniques, and storage tips. Get ready to enjoy your radishes at their very best.
Takeaway
- Trim tops and roots from radishes.
- Rinse radishes thoroughly under cool running water.
- Gently rub or scrub away dirt and debris.
- Dry radishes completely before storage to maintain crispness.
- Store cleaned, dry radishes in an airtight container in the refrigerator.
To clean radishes, first trim off their leafy tops and root ends. Then, rinse them under cool running water while gently scrubbing the skins to remove all dirt and debris. Dry them well before using or storing. This simple process ensures your radishes are safe, clean, and delicious for any dish.
The Importance of Clean Radishes: Taste, Health, and Appearance
You might think a quick rinse is enough for root vegetables like radishes. However, truly clean radishes offer many benefits. They taste better, are safer to eat, and look more appealing on your plate. I always make sure my radishes are spotless.
Radishes grow underground, so they pick up dirt. This soil can carry bacteria. Washing removes these unwanted elements. It helps prevent foodborne illnesses. Clean radishes are safe to consume raw, which is how most people enjoy them.
Beyond safety, cleanliness affects taste and texture. No one enjoys a gritty crunch in their salad. Unwanted soil masks the radish’s natural peppery flavor. A thorough wash brings out the true, crisp taste.
Finally, clean radishes look better. Their vibrant colors shine through when free of dirt. A bowl of brightly colored, clean radishes is inviting. This simple step makes a big difference in how you experience your food.
Essential Tools for Washing Radishes
Cleaning radishes does not require many special tools. Most items you likely already have in your kitchen. Having the right equipment makes the job easier and more efficient. I find these tools very helpful for getting radishes perfectly clean.
A colander is a must-have. It lets water drain while holding your radishes. This keeps them from rolling away in the sink. A large bowl is also useful for soaking very dirty radishes.
For scrubbing, a soft vegetable brush works well. You can use your hands too. Sometimes, a clean cloth is helpful for gentle rubbing. I often use a brush because it reaches into small crevices better than my fingers.
Lastly, paper towels or a clean kitchen towel are necessary for drying. Drying is a critical step for keeping radishes crisp. Wet radishes can spoil faster in storage. Make sure all your tools are clean before you start the process.
Step-by-Step Radish Cleaning Process: From Garden to Plate
Cleaning radishes is a simple process. It ensures they are ready for eating. Following these steps will give you perfectly clean, crisp radishes every time. I follow this method for all my radishes.
First, prepare your radishes. Trim off the leafy green tops. Cut off the small root end. These parts are often still attached. Removing them makes cleaning easier and focuses on the edible root.
Next, place the trimmed radishes in a colander. Rinse them under cool running water. Use your hands to gently rub each radish. This helps loosen any clinging dirt. Water pressure also helps rinse away loose soil.
For stubborn dirt, use a soft vegetable brush. Gently scrub the radish skin. Be careful not to bruise the radish. Continue rinsing until the water runs clear and no visible dirt remains. This ensures a thorough clean, similar to how one might clean broccoli or other firm vegetables.
Once clean, transfer radishes to a clean towel or paper towels. Gently pat them dry. Ensuring they are completely dry prevents them from becoming soft or slimy in storage. Dry radishes stay crisp longer.
Handling Radish Greens: Cleaning and Using Them
Many people throw away radish greens. However, these greens are edible and quite nutritious. They have a peppery flavor, similar to the radish root. Learning to clean them lets you use the whole vegetable.
Radish greens often hold more dirt than the roots. They have many nooks and crannies. I always give them extra attention during cleaning. They can add a fresh taste to salads or be cooked like spinach.
To clean radish greens, separate them from the roots. Place the greens in a large bowl of cold water. Swirl them around gently. This helps loosen any soil particles. The dirt will sink to the bottom of the bowl.
Lift the greens from the water, leaving the dirt behind. Discard the dirty water. Repeat this process until no dirt remains in the water. You may need to do this two or three times. This ensures the greens are truly clean. Once washed, spin them dry in a salad spinner or pat them dry with towels. They are then ready for cooking or eating raw.
Advanced Cleaning Techniques for Extra Dirty Radishes
Sometimes radishes come from very muddy soil. A simple rinse might not be enough. For these extra dirty radishes, I use a few advanced techniques. These methods ensure even the grimiest radishes become perfectly clean. This is similar to how you might need extra steps when cleaning a skillet with baked-on grime.
First, consider a pre-soak. Place the uncleaned radishes in a large bowl of cold water. Let them soak for 10-15 minutes. The water helps to soften and loosen caked-on dirt. This makes the subsequent cleaning much easier.
After soaking, drain the dirty water. Rinse the radishes again under running water. Use your vegetable brush more firmly this time. Pay attention to any remaining spots of dirt. Work on each radish individually if needed.
For very stubborn patches, a soft sponge or a clean cloth can provide more friction. Gently rub the affected areas. You want to remove dirt without damaging the skin. Some people even use a specialized brush for root vegetables. Be patient; a little extra effort now means better eating later. Always ensure all dirt is gone before moving to the drying stage. Proper cleaning for produce is as important as knowing how to clean cookware after a meal.
Proper Storage After Cleaning: Keeping Radishes Crisp
Cleaning radishes correctly is only half the battle. Storing them well keeps them crisp and fresh for longer. Incorrect storage can make them soft and unappealing quickly. I always make sure to store mine properly.
First, ensure your radishes are completely dry after cleaning. Any moisture left on them encourages spoilage. Pat them very dry with a clean towel or paper towels. This step is non-negotiable for lasting crispness.
Next, place the dry radishes in an airtight container or a resealable plastic bag. Adding a paper towel to the container can absorb any residual moisture. This helps keep the environment inside dry. The paper towel acts as a moisture buffer.
Store the container of radishes in your refrigerator’s crisper drawer. This drawer offers optimal humidity for vegetables. Radishes stored this way can remain crisp for one to two weeks. Regular checks for softness or slime are good practice. Proper storage, like knowing how to clean shrimp before cooking, makes a big difference in food quality.
Common Radish Cleaning Mistakes to Avoid
Even a simple task like cleaning radishes can have common pitfalls. Avoiding these mistakes ensures your radishes remain delicious and safe. I have learned these lessons over time.
One common mistake is not trimming the greens and root ends first. Leaving them on can trap dirt. It also draws moisture from the radish root, making it go soft faster. Always trim before washing.
Another error is not washing thoroughly enough. Some people just a quick splash of water. This leaves behind grit and potential contaminants. A proper rinse with gentle scrubbing is important. Think of it like making sure your steamer is clean for food preparation; thoroughness matters.
Skipping the drying step is also a major mistake. Wet radishes stored in the fridge will become slimy and spoil quickly. Mold can grow on them. Always pat them completely dry before putting them away.
Lastly, do not wash radishes until you are ready to use or store them. Washing too far in advance without proper drying and storage can actually reduce their shelf life. Keep unwashed radishes in the fridge in a plastic bag until you need them. This approach helps maintain their natural freshness until cleaning time.
FAQ Section
Do I need to peel radishes before eating them?
No, you do not need to peel radishes. The skin is edible and contains beneficial nutrients. The skin also gives radishes their distinct peppery flavor. A good scrub to remove dirt is all that is necessary. Peeling them removes some of their character and crunch.
Can I eat radish greens?
Yes, radish greens are edible and nutritious. They have a slightly peppery taste, similar to the radish root. You can use them in salads, sauté them like spinach, or add them to soups. Always wash radish greens very thoroughly, as they can hold a lot of dirt.
How long do cleaned radishes last in the refrigerator?
Cleaned and properly dried radishes can last one to two weeks in the refrigerator. Store them in an airtight container or a sealed plastic bag. Adding a paper towel inside the container helps absorb any excess moisture, keeping them crisp.
What if my radishes are very muddy?
For very muddy radishes, start with a pre-soak. Place them in a bowl of cold water for 10-15 minutes to loosen the dirt. Then, drain the water and proceed with rinsing under running water, using a soft vegetable brush to scrub away remaining soil.
Is a vegetable brush necessary for cleaning radishes?
A vegetable brush is not strictly necessary but it is highly recommended. It helps remove stubborn dirt more effectively than just your hands. If you do not have a brush, you can use a clean, rough cloth or simply rub them more vigorously with your fingers under running water.
Can I wash radishes in advance for a party?
Yes, you can wash radishes in advance. Ensure they are completely dry before storing them. Place them in an airtight container with a paper towel. They will stay crisp in the refrigerator for a few days. This preparation saves time later.
Conclusion
Cleaning radishes is a simple but important step. It helps ensure they are safe, tasty, and beautiful. We started by discussing why proper cleaning matters for health and flavor. Then, we looked at the few basic tools you need. The step-by-step process guides you through trimming, rinsing, and drying. This ensures every radish is ready for enjoyment.
We also covered how to clean and use nutritious radish greens. For very dirty radishes, we explored advanced soaking and scrubbing techniques. Proper storage after cleaning keeps your radishes crisp for longer. Avoiding common mistakes helps you get the best results every time. Follow these simple guidelines to always enjoy your radishes at their peak. This thorough approach to “how to clean radishes” will make a difference in your kitchen. So go ahead, clean those radishes, and add that delightful crunch to your next meal!
- radish cleaning
- fresh radishes
- vegetable preparation
- root vegetables
- kitchen tips


