· Todd Martin · Electronics Care · 18 min read
How To Clean Record Player
Clean Your Record Player for Optimal Sound
Do you love the warm, rich sound of vinyl records? Many people do. But imagine that perfect sound turning dull, crackly, or even distorted. Often, the culprit is a dirty record player. Knowing how to clean record player components is vital. Regular cleaning keeps your turntable working its best. It also protects your precious record collection.
Cleaning your record player is not just about looks. It directly impacts sound quality. Dust, grime, and static buildup can damage your stylus and records. This guide will walk you through the proper steps. We cover cleaning the platter, dust cover, casing, and most importantly, the delicate stylus. By the end, you will feel confident maintaining your audio equipment. Your records will sound clearer than ever.
Takeaway
- Improve Sound Quality: Regular cleaning removes dirt that causes distorted audio.
- Extend Equipment Lifespan: Protect delicate components like the stylus and motor from wear.
- Preserve Records: A clean player prevents grime transfer to your vinyl.
- Maintain Value: Keep your record player looking good and functioning properly.
- Enhance Listening: Enjoy clear, rich sound from your favorite albums.
To clean a record player effectively, you must regularly remove dust and grime from all surfaces. Use specialized tools for the stylus and platter. This includes a soft brush, microfiber cloths, and gentle cleaning solutions. Regular, careful maintenance ensures peak performance and protects your valuable equipment.
Why Regular Record Player Cleaning Matters
A record player is more than just a piece of electronics. It is a precision instrument. Dust, dirt, and microscopic debris collect on its surfaces over time. This buildup does not just make your player look messy. It actively harms its performance. Understanding why regular cleaning is important helps you commit to the task.
Dirt acts as an abrasive. When your stylus tracks a record, it rides in tiny grooves. If dust is present, it can grind against the stylus and the record. This causes wear on both. Over time, this wear degrades sound quality. It leads to skips, pops, and distorted audio. A clean player ensures your music sounds its best.
Regular cleaning also extends the life of your equipment. Dust can get into moving parts. It can affect the motor or the tonearm’s pivot. This causes friction and strain. A well-maintained record player lasts longer. It gives you many more years of listening enjoyment. Think of it as a small investment in your music experience.
You also protect your record collection. A dirty stylus can transfer grime to your vinyl. This creates a cycle of dirt. Cleaning your player helps keep your records pristine. It is part of a complete vinyl care routine. Your music sounds better, and your equipment stays healthy.
Essential Tools for Record Player Cleaning
Having the right tools makes the cleaning process easy and safe. You cannot just grab any old cloth. Record player components are delicate. Using the wrong material or chemical can cause damage. We will list the essential items you need. Then, we explain why each tool matters.
First, you need a high-quality microfiber cloth. These cloths are soft and lint-free. They will not scratch surfaces. They also pick up dust very well. Avoid paper towels or rough cloths. They can leave fibers behind or even scratch. You will use this cloth for the general body and dust cover.
Next, a record cleaning brush is a must. This is a soft, anti-static brush designed for vinyl. It removes surface dust from your records before play. Clean records reduce the amount of dust transferred to your stylus. This keeps your record player cleaner. Many people clean records before every play.
A stylus cleaning brush is critical. This tiny brush has very fine, stiff bristles. It sweeps away debris from the delicate stylus tip. Using a specific stylus brush prevents damage. You should never use your fingers or harsh materials on the stylus. For a deeper dive into this specific cleaning task, consider reading our guide on how to clean record player needle.
You might also need isopropyl alcohol (99% pure). This is great for general cleaning of plastic and metal parts. It evaporates quickly and leaves no residue. Make sure it is high purity. Lower purity alcohol contains more water. This can be harmful to electronics. Use cotton swabs or a clean microfiber cloth with the alcohol. For cleaning glass components like the dust cover, a specialized glass cleaner that prevents streaks can be beneficial.
Finally, consider a compressed air can. This helps remove dust from hard-to-reach areas. Use it carefully. Hold the can upright to prevent propellant from spraying out. A small artist’s paintbrush (new and clean) can also work for dusting tight spots without harsh chemicals. Having these tools ready ensures a thorough and safe cleaning job.
How to Clean Record Player Components (Step-by-Step)
Cleaning your record player requires a systematic approach. Do not rush the process. Taking your time prevents damage. Always start by unplugging your record player from the power outlet. This prevents any accidental electrical shocks. It also ensures parts do not move while you are cleaning them.
Prepare your workspace. Lay down a clean, soft cloth or towel. This protects your record player from scratches. It also keeps small parts from rolling away. Gather all your cleaning tools. Having everything at hand makes the process smoother. Work in a well-lit area. This helps you see all the dust and grime.
Start with the largest parts first. This prevents dust from settling on already cleaned areas. We will go through each component. Be gentle with all parts. Record players are sensitive instruments. Aggressive cleaning can cause misalignment or damage. Follow these steps for a thorough clean.
Remember, patience is key. Each component plays a role in sound quality. A clean component contributes to a better listening experience. You will notice the difference once your player is spotless. Enjoy the improved clarity and depth of your favorite tracks.
Cleaning the Platter and Mat
The platter is the large disc where you place your record. The mat sits on top of the platter. Both can collect dust and static. Start by removing the record mat. This is often made of felt, rubber, or cork. Shake it outdoors to remove loose dust. If it is a felt mat, use a lint roller or a dry brush to clean it. For rubber or cork mats, wipe them gently with a damp microfiber cloth. Let them dry completely before putting them back.
Next, lift the platter off the spindle. Some platters are heavy. Lift straight up. Be careful not to bend the spindle. Once the platter is off, you can see the sub-platter or motor area. Use a dry microfiber cloth to wipe down the top and bottom of the platter. Remove any dust or fingerprints.
Check the spindle and the inside of the platter for any grime. You can use a cotton swab with a tiny bit of isopropyl alcohol for sticky spots. Wipe carefully. Ensure no liquid drips into the motor housing. Reattach the platter gently when done. Make sure it sits level. A clean platter provides a stable surface for your records. This helps reduce unwanted vibrations.
Cleaning the Dust Cover
The dust cover protects your record player when not in use. It is usually made of acrylic or plastic. It can accumulate dust, smudges, and even scratches. Cleaning it properly is important. A dirty dust cover lets light and dust through. It defeats its purpose.
First, remove the dust cover from its hinges if possible. This makes it easier to handle. Use a dry microfiber cloth to wipe away loose dust. Do not press hard. Dust can act as an abrasive. Gently wipe in one direction.
For smudges or fingerprints, dampen a clean microfiber cloth with a small amount of warm water. You can add a drop of mild dish soap to the water for tougher marks. Wipe the dust cover gently. Avoid harsh chemical cleaners. They can cloud or damage the plastic. If your dust cover has any metal hinges or accents, you might find tips on cleaning various metal surfaces, including stainless steel, useful to maintain their shine and prevent corrosion. You can learn more about how to clean stainless steel components effectively.
After cleaning, use a dry microfiber cloth to buff the surface. This removes any water spots and restores shine. Ensure the dust cover is completely dry before placing it back. A clean dust cover not only looks better but also allows you to see your beautiful record player clearly. It remains a functional barrier against airborne particles.
Cleaning the Casing and Controls
The casing is the main body of your record player. It can be made of wood, plastic, or metal. Controls include buttons, switches, and dials. These areas attract dust and fingerprints. Cleaning them regularly keeps your player looking new. It also ensures buttons work smoothly.
Begin by wiping the entire casing with a dry microfiber cloth. Go over all flat surfaces. Also, wipe the sides and back. Pay attention to corners and crevices where dust might hide. Use a gentle hand. You do not want to accidentally push or bend anything.
For stubborn marks or grime, lightly dampen a microfiber cloth with isopropyl alcohol. Wipe down plastic or metal surfaces. Avoid getting alcohol into sensitive areas like the tonearm pivot or directly on wood finishes. Alcohol can strip certain finishes. Always test a small, hidden area first. For wooden casings, use a specialized wood cleaner designed for electronics.
Use cotton swabs for small, tight spots around buttons and dials. Dip the swab in isopropyl alcohol. Gently clean around the edges. This removes grime that can make buttons stick. Ensure the swabs are not dripping wet. Pressing buttons while cleaning can also dislodge trapped dust.
After cleaning the casing and controls, dry everything with a clean, dry microfiber cloth. This prevents streaks. It also removes any remaining moisture. A clean casing enhances the overall look of your record player. It also prevents dirt from migrating to internal components.
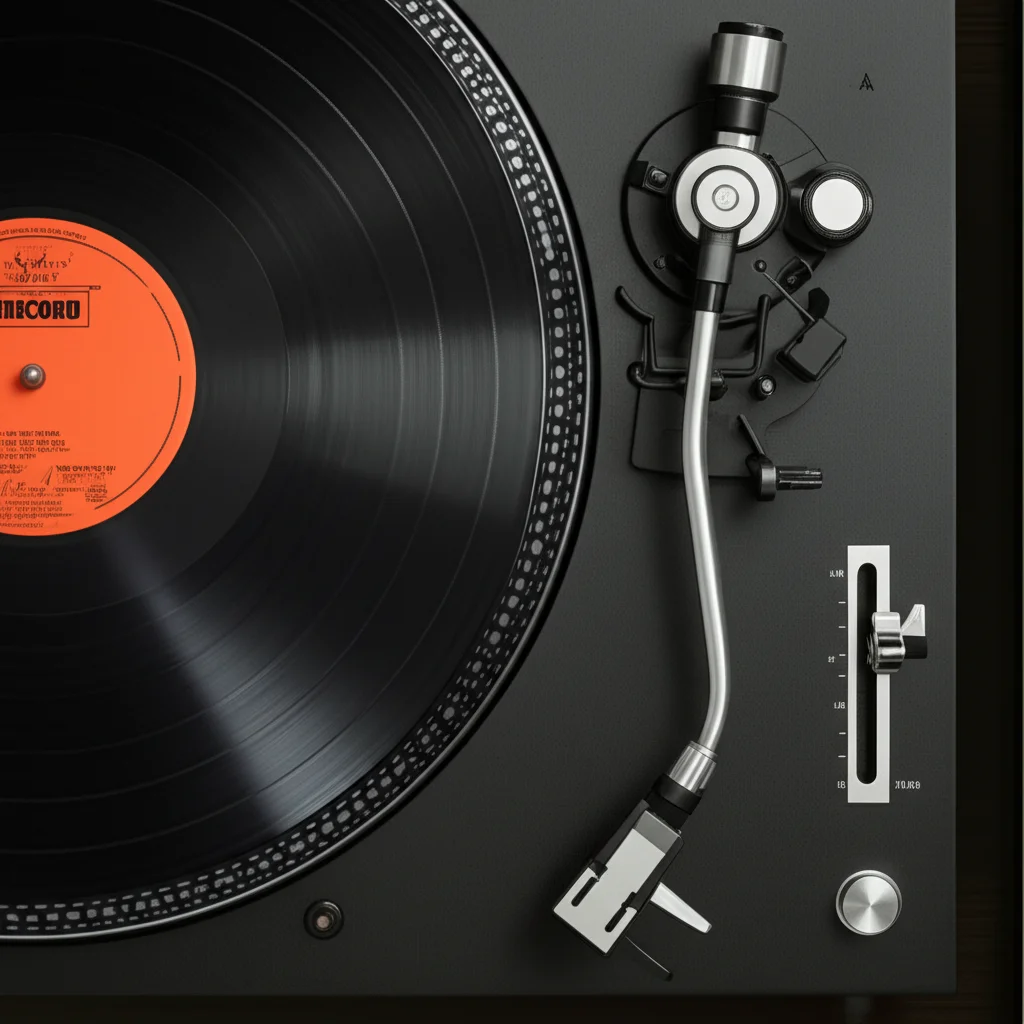
Cleaning the Tonearm
The tonearm is a very delicate part of your record player. It holds the cartridge and stylus. It pivots to allow the stylus to track the record grooves. Cleaning it requires extreme care. Rough handling can damage bearings or misalign the tonearm. This will affect sound quality and tracking.
First, lock the tonearm in its resting position. Most record players have a small clip or lock for this purpose. This prevents accidental movement. Use a soft, dry artist’s paintbrush or a very soft, clean microfiber cloth. Gently dust the tonearm tube. Brush away any visible dust or lint.
Avoid using liquids or alcohol on the tonearm unless absolutely necessary. The pivot points are sensitive. Introducing moisture can cause issues. If you notice any sticky residue, use a barely-damp cotton swab. Immediately dry the area with a dry swab. Work slowly and methodically.
Do not apply any pressure to the tonearm. Its balance and alignment are crucial for proper playback. Even a slight bend can cause problems. Treat it like a fragile scientific instrument. This careful attention helps maintain proper tracking force and anti-skate settings. A clean tonearm moves freely. This allows the stylus to follow the record grooves accurately. This precision is vital for clear, undistorted sound reproduction.
The Critical Task: How To Clean Record Player Needle (Stylus)
The stylus, or needle, is the most important and delicate part of your record player. It is the tiny diamond tip that reads the record grooves. A clean stylus is essential for clear sound. A dirty stylus will scrape against your records, distorting audio and causing wear. Cleaning it requires precision and specific tools.
Always clean the stylus with utmost care. Never touch the stylus with your fingers. Oils and dirt from your skin can damage it. Even a small amount of residue can build up quickly. This creates a cushion between the stylus and the record. This cushion prevents proper contact.
One common method uses a stylus cleaning brush. This brush has very fine, stiff bristles. You brush the stylus from back to front, never side to side. Repeat this motion a few times. The bristles dislodge dust and debris. Always brush in the direction the stylus moves across the record. This is usually from the rear of the cartridge to the front. Using the proper technique prevents bending the delicate cantilever. The cantilever is the tiny arm holding the diamond tip.
For more stubborn dirt, you can use a liquid stylus cleaner. These solutions are specifically formulated for stylus cleaning. They are often alcohol-based or have other gentle solvents. Apply a tiny drop to your stylus cleaning brush. Then, gently brush the stylus from back to front. Some liquid cleaners come with a small pad. You can gently lower the stylus onto the pad a few times. Always follow the product’s instructions carefully.
Another option is a stylus gel or putty. This is a soft, sticky material. You gently lower the stylus onto the gel. The gel pulls dirt off the tip. Lift the stylus straight up. This method is very safe and effective. It removes even microscopic particles.
How often should you clean the stylus? It depends on your listening habits and environment. I clean my stylus before every listening session. At a minimum, clean it after every 10-20 hours of play. A clean stylus provides superior sound. It also prolongs the life of your records. For a more detailed guide on this crucial step, refer to our comprehensive article on how to clean record player needle. This will ensure your stylus performs its best.
Maintaining Your Vinyl Records for Better Playback
While this article focuses on cleaning the record player itself, record maintenance is closely related. A clean record player works best with clean records. Dirty records will quickly re-contaminate your stylus and player components. Think of it as a two-way street. Both player and records need care.
Dust and fingerprints on your vinyl are common enemies. These contaminants create unwanted noise. They also accelerate wear on your stylus. Always handle records by their edges or the label. Avoid touching the grooves. This prevents transferring oils and dirt from your hands.
Before playing any record, give it a quick brush. Use a dedicated carbon fiber record brush. Place the record on the platter. Let the platter spin. Lightly hold the brush on the record surface for a few rotations. Then, sweep the brush outwards to remove the dust. This simple step removes loose surface dust. This is the first line of defense.
For deeper cleaning, especially for used or very dirty records, a wet cleaning method is best. You can use a record cleaning machine. These machines are effective but can be expensive. A more budget-friendly option involves a record cleaning solution and a microfiber cloth. Apply the solution to the record. Wipe gently in the direction of the grooves. Use a separate dry cloth to remove excess liquid. Always ensure records are completely dry before playing.
Proper storage also helps keep records clean. Store records upright in proper inner and outer sleeves. This protects them from dust and static. It also prevents warping. Keep your records away from direct sunlight and heat sources. A clean record will sound better and last longer. It also reduces the workload on your record player’s stylus.
Advanced Record Player Cleaning Tips and Tricks
Beyond the routine cleaning, some advanced steps can further improve your record player’s performance. These tasks are not for every cleaning session. They are important for long-term maintenance. They address deeper issues or less obvious areas. Approach these with care. If you feel unsure, consult a professional.
First, consider the drive belt. Many turntables use a belt to connect the motor to the platter. Over time, belts can stretch, crack, or become sticky. This affects speed stability. Remove the platter (and sub-platter if present). Inspect the belt for wear. If it looks worn, replace it. You can usually find replacement belts online. Make sure it is the correct size for your model. A clean and healthy belt ensures consistent playback speed.
Next, lubrication might be needed for some older models. The platter bearing can benefit from a tiny drop of specialized oil. This reduces friction and noise. However, this is not a universal recommendation. Check your record player’s manual. Using the wrong type of oil can cause damage. Many modern turntables use self-lubricating bearings. Avoid over-lubricating. A single drop is often enough.
Grounding issues can cause hum or buzzing noises. This is not a cleaning task, but related to performance. Check that your record player’s ground wire is securely connected. It usually connects to the ‘ground’ terminal on your amplifier or receiver. A loose ground wire can introduce electrical interference. Ensure all connections are tight and clean.
Finally, know when to seek professional help. Some issues are beyond home cleaning or basic maintenance. If your player develops a persistent hum, speed fluctuations, or major tracking problems, professional repair is best. Technicians have specialized tools and knowledge. They can diagnose and fix complex internal issues. Trying to fix it yourself could cause more damage. Regular advanced checks keep your player running perfectly.
Preventing Future Dust Buildup and Wear
Prevention is often easier than cleaning. You can significantly reduce the need for deep cleaning with smart habits. Protecting your record player from dust and environmental factors is key. These steps help maintain its pristine condition and sound quality. They also extend the life of your equipment.
First and foremost, always use your dust cover. This seems obvious, but many forget. When you are not actively playing records, lower the dust cover. It acts as a physical barrier. It stops airborne dust, pet hair, and other particles from settling on the platter, tonearm, and stylus. Even if your room is clean, dust is always present. A good dust cover is your primary defense.
Consider the placement of your record player. Avoid placing it near open windows. This lets in more dust and direct sunlight. Sunlight can degrade plastic components over time. Also, keep it away from heating or cooling vents. These can blow dust directly onto your player. A stable, level surface is also important. Vibrations can cause dust to settle more easily into crevices.
Develop a habit of light, regular cleaning. Before each play, quickly brush your record with a carbon fiber brush. This prevents transferring dust to your stylus. After a listening session, gently wipe down the dust cover and casing with a microfiber cloth. This takes only seconds. This frequent, light cleaning prevents major dust buildup. It makes deep cleaning less necessary.
You can also use air purifiers in your listening space. These devices filter airborne particles. They reduce the amount of dust that settles on your surfaces, including your record player. This is especially helpful if you live in a dusty environment or have pets. A cleaner air environment means a cleaner record player.
Lastly, proper record storage minimizes dust on your vinyl. Store records vertically in anti-static inner sleeves and strong outer sleeves. This protects them from dust and static. Records attract dust. Keeping them clean helps keep your player clean too. Investing a little time in prevention saves a lot of cleaning effort later.
FAQ Section
How often should I clean my record player?
You should clean your record player regularly. Wipe the dust cover and casing weekly with a microfiber cloth. Clean your stylus before every play session or at least after every 10-20 hours of use. Deep cleaning the platter and other components can be done every few months or as needed. This schedule keeps your player in top condition.
Can I use regular alcohol to clean my stylus?
No, do not use regular rubbing alcohol. It often contains water and impurities that can harm your stylus. Always use 99% pure isopropyl alcohol or a specialized stylus cleaning fluid. These high-purity solutions evaporate quickly and leave no residue. They are safe for delicate stylus tips.
What are common mistakes to avoid when cleaning?
Avoid touching the stylus with your fingers, using harsh chemicals, or applying excessive force. Do not use paper towels or abrasive cloths, as they can scratch surfaces. Never use water directly on electronic components. Always unplug the player before cleaning. These mistakes can damage your equipment.
How do I clean older, dusty record players?
For very dusty or neglected record players, start with a dry microfiber cloth to remove loose dust. Use compressed air in crevices. For grime, apply 99% isopropyl alcohol with cotton swabs to plastic and metal parts. Be extra gentle with all components, as older plastics can be brittle.
Does cleaning affect sound quality?
Yes, cleaning profoundly affects sound quality. A clean stylus makes better contact with record grooves, resulting in clearer, more accurate sound. Dust and grime cause distortion, pops, and crackles. Regular cleaning ensures your record player performs at its best. It enhances your listening experience greatly.
Conclusion
Cleaning your record player is a simple yet vital task. It directly impacts your listening pleasure and the lifespan of your valuable equipment. We have explored why a clean player matters, the essential tools you need, and a step-by-step approach for each component. From the delicate stylus to the robust casing, every part benefits from your attention.
By following these guidelines on how to clean record player components, you protect your investment. You also ensure your vinyl collection sounds its very best. Remember, consistent, gentle care prevents major issues. So, gather your tools, set aside some time, and give your record player the care it deserves. Your ears—and your records—will thank you for it. Enjoy the crystal-clear sound of a well-maintained turntable today!
- record player cleaning
- turntable maintenance
- vinyl care
- audio equipment cleaning
- how to clean turntable

Todd Martin
Senior Writer
With over 15 years of experience in home renovation and design, I started HEG to share what I’ve learned with homeowners who want to create spaces that are both beautiful and functional. I’ve always believed in a hands-on approach, and over the years, I’ve picked up practical solutions that actually work. Through HEG, I aim to make home improvement more approachable, sharing real tips that help you create a home you truly love.