· Todd Martin · Home Maintenance · 23 min read
How To Clean Rusty Scissors
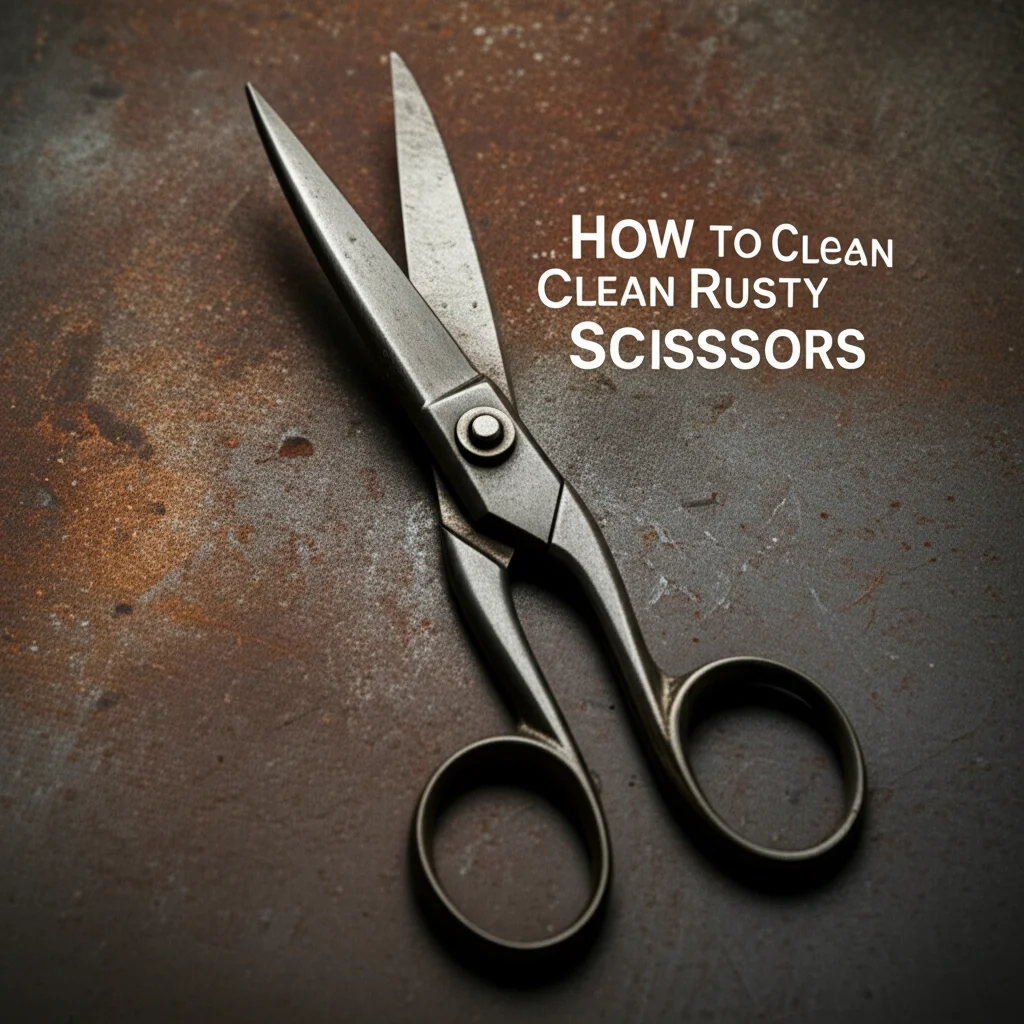
How To Clean Rusty Scissors: A Comprehensive Guide
Do you have a favorite pair of scissors that has fallen victim to rust? It feels frustrating when your reliable tools lose their sharpness and smooth operation because of corrosion. Rust makes scissors hard to use and can even damage the materials you try to cut. But do not worry. You do not need to throw them away.
This article provides a complete guide on how to clean rusty scissors. We will explore various methods, from simple household remedies like vinegar and baking soda to stronger commercial solutions. You will learn the right tools to use, important safety steps, and how to maintain your scissors after cleaning. By the end, your scissors will look and perform like new. Get ready to bring life back to your trusty cutting tools.
Takeaway
- Identify the type of rust and select the best cleaning method based on its severity.
- Gather necessary safety gear and common household items before starting.
- Apply natural solutions like vinegar or baking soda for light rust.
- Use stronger commercial products or abrasives for stubborn rust.
- Always dry and lubricate scissors properly after cleaning to prevent future rust.
Rusty scissors are a common household problem, but you can clean them effectively. Use common items such as white vinegar, baking soda, or specialized rust removers to remove the rust. Apply your chosen solution, scrub the affected areas, and then dry the scissors completely. This process restores their function and appearance.
Understanding Rust on Your Scissors: Why It Happens
Rust is a common enemy for metal tools, especially scissors. It appears as a reddish-brown flaky coating. This forms when iron or its alloys, like steel, react with oxygen and water. This chemical process is called oxidation. Understanding why rust appears helps you prevent it in the future.
Scissors often encounter moisture in various ways. You might leave them near a damp sink. They could sit in a humid environment like a bathroom drawer. Sometimes, cutting wet materials also introduces moisture. Even condensation from temperature changes can cause rust. When moisture stays on the metal surface for long periods, rust begins to form.
The type of metal in your scissors also plays a role. Most scissors use steel, which contains iron. Stainless steel resists rust better because it has chromium. Chromium forms a protective layer, but even stainless steel can rust if exposed to harsh conditions or corrosive substances for too long. My own experience shows even my “stainless” kitchen shears get spots if left wet.
Rust weakens the metal. It makes the blades dull. It also causes the pivot point to stiffen. This makes the scissors hard to open and close. Rust can spread quickly. Therefore, it is important to address it as soon as you notice it. Early action makes cleaning much easier.
Preparing for Rust Removal: Safety and Tools
Before you start to clean rusty scissors, gathering the right tools is important. Taking safety precautions is also vital. This preparation step ensures a smooth and safe cleaning process. My goal is to make this task easy for you.
First, protect your hands. Rust can be sharp, and cleaning solutions can irritate skin. I always wear chemical-resistant gloves before touching any cleaning agents. Safety glasses protect your eyes from splashes, especially when scrubbing vigorously. Good ventilation is also important. Open a window or work in a well-aired space. This prevents you from breathing in fumes from cleaning products.
Next, collect your cleaning supplies. You will need a sturdy surface to work on. Cover it with old newspapers or a towel to protect it from spills. You also need a few key items. These include a scrubbing tool, a rust-removing agent, and a drying cloth. I like to lay everything out before I start.
Here is a list of essential items:
- Safety Gear:
- Rubber or nitrile gloves
- Safety glasses
- Cleaning Agents (choose based on method):
- White vinegar
- Baking soda
- Lemon juice and salt
- Commercial rust remover (e.g., WD-40, CLR, naval jelly)
- Scrubbing Tools:
- Old toothbrush
- Steel wool (fine grade)
- Aluminum foil (crumpled)
- Wire brush (only for very heavy-duty, non-delicate items)
- Scouring pad
- Other Supplies:
- Clean cloths or paper towels
- Small container or bowl (for soaking)
- Mineral oil, machine oil, or cooking oil (for lubrication)
Having all these items ready saves time. It also prevents interruptions during the cleaning process. Proper preparation makes the job safer and more efficient.
Vinegar Method: A Natural Way to Clean Rusty Scissors
White vinegar is an excellent natural rust remover. It contains acetic acid, which reacts with rust. This helps dissolve the rust away from the metal surface. This method is effective for light to moderate rust on your scissors. I often use it for items around my house. You might find similar success when you clean mold with vinegar.
Here is how you can use vinegar to clean your rusty scissors:
- Gather Your Supplies: You will need white vinegar, a small bowl, an old toothbrush or scrub brush, and a clean cloth. Safety gloves are also a good idea.
- Soak the Scissors: Pour enough white vinegar into the bowl to fully submerge the rusty parts of your scissors. If only the blades are rusty, you can just soak the blades. For stubborn rust, you might need to soak the entire pair. I usually let them soak for a few hours. For heavy rust, overnight soaking works best.
- Check and Scrub: After soaking, remove the scissors from the vinegar. The rust should appear softened or loosened. Use an old toothbrush or scrub brush to gently scrub away the rust. For tougher spots, crumple up a piece of aluminum foil and use it to scrub. The foil is softer than steel but abrasive enough to remove rust without scratching the metal. I find this method works surprisingly well.
- Rinse Thoroughly: Once you remove all the rust, rinse the scissors under warm running water. Make sure to wash away all vinegar residue. Leftover vinegar can cause new rust to form if not fully removed.
- Dry Completely: This step is critical. Use a clean, dry cloth to thoroughly dry the scissors. Pay close attention to the pivot point and any crevices. Moisture left behind will cause rust to return. I sometimes use a hairdryer on a cool setting for extra drying.
- Lubricate: Apply a small amount of mineral oil, machine oil, or even cooking oil to the pivot point and along the blades. Open and close the scissors several times. This distributes the oil and ensures smooth operation. This step also provides a protective layer against future rust.
This vinegar method is gentle yet powerful. It works for many household items beyond scissors. You might even use it for cleaning rusty coins. Give it a try for your rusty scissors.
Baking Soda: An Abrasive Solution for Rust
Baking soda is another excellent household item for tackling rust on scissors. Its mild abrasive properties help scrub away corrosion without damaging the metal underneath. When mixed with water, it forms a powerful paste that adheres to the rust. This method is effective for light to moderate rust stains. I have used baking soda for many cleaning tasks, including cleaning stainless steel.
To use baking soda for rust removal:
- Create the Paste: In a small bowl, mix baking soda with a little water. Add water slowly until you form a thick paste. The paste should be consistent, like toothpaste. You want it thick enough to stick to the scissors.
- Apply the Paste: Apply the baking soda paste generously over all the rusty areas of your scissors. Ensure complete coverage. I often use a spoon or my gloved finger to spread it evenly.
- Let It Sit: Allow the paste to sit on the rust for at least an hour. For heavier rust, you can leave it on for several hours or even overnight. This gives the baking soda time to work on loosening the rust. The longer it sits, the more effective it becomes.
- Scrub Away Rust: Once the paste has had time to work, use a scrubbing tool. An old toothbrush, a scouring pad, or even a crumpled piece of aluminum foil works well. Gently scrub the rusty areas. You will see the rust start to lift away with the paste. Apply firm, steady pressure.
- Rinse and Dry: Rinse the scissors thoroughly under warm water to remove all baking soda residue and loosened rust. Any paste left behind can attract moisture. Dry the scissors completely with a clean cloth. Ensuring no moisture remains is key to preventing new rust.
- Lubricate: Apply a small amount of oil, such as mineral oil, to the pivot point. Open and close the scissors several times. This step helps ensure smooth movement. It also creates a protective barrier against future rust.
Baking soda is a safe and readily available option for rust removal. It avoids harsh chemicals, which is a big plus for me. It is also good for small, detailed areas on scissors.
Lemon Juice & Salt: Another Natural Rust Remover
Lemon juice and salt offer another natural and effective way to clean rusty scissors. Both ingredients are mild acids and abrasives, respectively, making them a great team against rust. The citric acid in lemon juice helps to dissolve the rust, while the salt acts as a gentle scrubbing agent. This combination is especially good for light rust spots. I often turn to natural remedies for household issues.
Here is how you can use this method:
- Prepare the Mixture: Squeeze the juice from one or two lemons into a small bowl. Add a generous amount of salt to the lemon juice. Stir the mixture until it forms a thick paste. It should be thick enough to cling to the scissors. I like to use table salt for this, but coarser salt works too.
- Apply to Rust: Spread the lemon juice and salt paste over the rusty areas of your scissors. Make sure to cover all affected spots thoroughly. You can use a spoon or your finger to apply the paste.
- Let It Work: Allow the paste to sit on the rust for at least an hour. For more stubborn rust, you can let it sit for a few hours. The acid in the lemon juice needs time to react with the rust.
- Scrub and Clean: After the sitting time, use a scrubbing tool. An old toothbrush, a scouring pad, or even the inside of a lemon rind works well. Gently scrub the rusty areas. The salt provides the abrasive action needed to lift the rust. You will see the rust loosening and coming off.
- Rinse Thoroughly: Rinse the scissors under warm running water. Make sure to remove all traces of the lemon-salt paste and loosened rust. Any residue can cause issues later.
- Dry Completely: This step is very important. Use a clean, dry cloth to dry the scissors completely. Pay special attention to the pivot point and any small crevices where moisture might hide. Rust thrives on moisture.
- Lubricate: Finish by applying a small amount of mineral oil, machine oil, or even cooking oil to the pivot point and blade surfaces. Open and close the scissors a few times. This lubricates them and creates a protective barrier against future rust.
This method is safe and uses common kitchen ingredients. It is a good choice for people who prefer avoiding commercial chemicals. It works wonders on various metallic items, not just scissors.
Commercial Rust Removers and Abrasives: When to Use Them
Sometimes, natural methods are not enough for very stubborn or extensive rust. This is when commercial rust removers and stronger abrasives become necessary. These products contain chemicals designed to break down rust quickly and effectively. They can tackle rust that has deeply corroded the metal. I consider these my last resort for heavy-duty jobs. You might also use similar products when you clean rusty grill grates.
When using commercial products, always read the manufacturer’s instructions carefully. Safety is paramount here. Ensure good ventilation, wear gloves, and protect your eyes. Some products emit strong fumes.
Here are some common types and how to use them:
Chemical Rust Removers (e.g., CLR, Naval Jelly):
- What they are: These products contain stronger acids or chemicals that chemically convert or dissolve rust. They are very effective but can be harsh.
- How to use: Apply the product directly to the rusty areas using a cloth or brush. Let it sit for the recommended time (usually just a few minutes). Do not let it dry on the surface.
- Scrubbing: Use an old toothbrush or a non-abrasive pad to scrub the loosened rust away.
- Rinse and Dry: Rinse thoroughly with water immediately after scrubbing. Neutralize the surface if the product requires it. Dry completely.
- Caution: These products can damage painted surfaces or plastics. They might also discolor certain metals. Test in an inconspicuous area first.
WD-40 or Penetrating Oil:
- What it is: WD-40 is not a dedicated rust remover, but it can help loosen light rust and lubricate. It penetrates and breaks the bond between rust and metal.
- How to use: Spray WD-40 directly on the rusty parts. Let it sit for 15-30 minutes.
- Scrubbing: Use a wire brush, steel wool, or a sturdy scrub pad to physically scrub the rust away. The WD-40 helps lift it.
- Clean and Lubricate: Wipe off the residue. WD-40 itself provides some lubrication. You can follow with a dedicated machine oil if desired.
Abrasive Tools (Steel Wool, Sandpaper):
- What they are: These physically abrade the rust off the surface. Use fine-grade steel wool (#000 or #0000) or very fine-grit sandpaper (400-600 grit).
- How to use: Gently rub the rusty areas with the chosen abrasive. Work in small sections. Apply light pressure at first and increase if needed.
- Caution: Abrasives can scratch the scissor blades. Always use the finest grade possible. Work with care, especially on polished or delicate surfaces. This method is best for very heavy rust on robust scissors, like garden shears, where appearance is less critical. For items like chrome, you need to be very careful, as scratching is easy when you clean rusty chrome.
- Finish: After removing rust, clean off any debris. Lubricate the scissors to protect them.
Always prioritize safety when using commercial products. They are powerful and effective when used correctly, bringing heavily rusted tools back to life.
Advanced Techniques for Heavily Rusted Scissors
Sometimes, scissors are so heavily rusted that standard methods just don’t cut it. The rust might be thick, deep, or cover a large area. For these extreme cases, you need more robust techniques. These advanced methods usually involve a combination of chemical action and stronger physical abrasion. I reserve these for scissors I might otherwise discard.
One powerful approach is electrolysis. This method uses an electric current to remove rust. It pulls rust ions off the metal surface and deposits them onto a sacrificial piece of metal. This technique is highly effective for severely rusted items. It requires specific equipment: a battery charger (or power supply), a plastic container, water, washing soda (sodium carbonate, not baking soda), and a piece of scrap steel (the sacrificial anode).
Here is a simplified process:
- Set Up: Place the rusty scissors in a plastic container. Make sure the scissors do not touch the sacrificial steel. Fill the container with water mixed with washing soda (about 1 tablespoon per gallon).
- Connect Wires: Connect the positive terminal of the battery charger to the sacrificial steel. Connect the negative terminal to the rusty scissors.
- Activate: Turn on the charger. Bubbles will form, and the rust will slowly transfer from the scissors to the sacrificial steel. This process can take several hours or even overnight.
- Clean Up: Once the rust is gone, disconnect everything. Rinse the scissors thoroughly and dry them completely.
Caution: Electrolysis involves electricity and water. This can be dangerous if not done correctly. Always follow safety guidelines. Use rubber gloves and work in a well-ventilated area. Never let the positive and negative terminals touch.
Another advanced approach involves rust converter products. These products chemically transform rust into a stable black coating. This coating can then be painted over. This method is good for scissors that will not be used for precision cutting, like garden shears that you plan to paint. The rust is not physically removed but converted. This makes it stable and prevents further spread.
- Application: Clean loose rust and dirt from the scissors first. Apply the rust converter product with a brush or cloth.
- Curing: Allow the product to dry and cure according to the manufacturer’s instructions. The rusty areas will turn black.
- Finishing: You can then paint over the treated surface. This protects the metal and improves its appearance.
Finally, for rust that is extremely stubborn but localized, rotary tools with abrasive attachments can be used. A Dremel tool with a small wire brush or polishing wheel can precisely target rusted spots. This requires a very steady hand. It is easy to damage the surrounding metal or dull the blade edge. This is a very aggressive method. I only recommend it for situations where precision is less important. Always finish by sharpening and lubricating the blades.
These advanced methods are more involved. They are best for truly challenging rust. Always prioritize safety and understand the process fully before attempting these techniques.
Care and Lubrication After Cleaning Rusty Scissors
You have successfully cleaned the rust from your scissors. Now, the next crucial step is proper care and lubrication. This ensures they operate smoothly. It also prevents new rust from forming. This step is as important as the cleaning itself. I always make sure to finish the job completely.
First, ensure complete dryness. After rinsing your scissors, they must be absolutely dry. Even a tiny bit of moisture can restart the rusting process. Use a clean, lint-free cloth to wipe every surface. Pay special attention to the pivot screw and the inner surfaces of the blades. These areas can trap water. For extra assurance, you can use a hairdryer on a cool setting. You can also let them air dry for an hour or two in a dry environment.
Next, lubricate the pivot point. This is the screw or pin that holds the two blades together. It is where most friction occurs. A well-lubricated pivot allows the blades to open and close with ease. Apply a small drop of appropriate oil to this point.
Here are common oils you can use:
- Mineral Oil: This is a food-safe option, ideal for kitchen scissors. It is non-toxic.
- Machine Oil: Light machine oil, like sewing machine oil, works well for general-purpose or craft scissors.
- 3-in-1 Oil: This is a multi-purpose oil often found in homes. It offers good lubrication and some rust protection.
- WD-40 (for lubrication, not just rust removal): While used for initial rust loosening, a small spray of WD-40 can also lubricate the pivot. Wipe away excess.
After applying the oil, open and close the scissors several times. This action helps the oil work its way into the joint. You will immediately feel the difference in how smoothly they operate. The blades should glide past each other with minimal effort.
Finally, apply a thin layer of oil to the blades. This creates a protective barrier. It repels moisture and oxygen, which cause rust. Use a clean cloth with a tiny bit of oil on it. Wipe down the entire surface of both blades. This protective layer is very important for long-term rust prevention. My garden shears always get this treatment after use.
Regular lubrication keeps your scissors in top condition. It extends their lifespan. It also ensures they are always ready for your next task.
Preventing Rust: Keeping Your Scissors Rust-Free Long Term
Cleaning rusty scissors is a great skill to have. However, preventing rust in the first place is even better. With proper care, your scissors can remain rust-free and sharp for many years. This saves you time and effort. I always prioritize prevention for my tools.
Here are essential tips to prevent rust on your scissors:
- Dry Scissors Immediately After Use: This is the most crucial step. Water is the primary cause of rust. After cutting anything wet or washing your scissors, wipe them completely dry with a clean cloth. Pay attention to the areas around the pivot and inside the blades, where moisture can hide. Never put wet scissors away in a drawer or case.
- Store in a Dry Environment: Humidity is a rust promoter. Avoid storing scissors in damp places like bathrooms or near kitchen sinks where steam is common. A kitchen drawer away from the sink or a toolbox in a dry garage is ideal. Consider using silica gel packets in toolboxes or knife blocks. These packets absorb moisture.
- Apply a Protective Oil Layer: After cleaning or after every few uses, apply a thin layer of oil to your scissors. A light coating of mineral oil, machine oil, or even cooking oil on the blades and pivot point works wonders. This oil creates a barrier against moisture and air. Open and close the scissors to distribute the oil evenly. This is especially important for cleaning and maintaining grill grates and other metal tools.
- Avoid Corrosive Substances: Try not to use your scissors to cut through substances that can cause corrosion. This includes strong acids, alkaline materials, or some chemicals. If you must use them, clean and dry them immediately afterward.
- Consider Stainless Steel: When buying new scissors, choose a pair made from high-quality stainless steel. While not entirely rust-proof, stainless steel is much more resistant to corrosion than regular carbon steel. It contains chromium, which forms a passive layer that protects against rust.
- Regular Cleaning: Even if not rusty, clean your scissors periodically. Remove any gunk, adhesive residue, or debris that might hold moisture against the metal. A simple wipe-down can prevent many issues.
By following these simple prevention steps, you can keep your scissors in excellent condition. This extends their life and ensures they are always ready for your cutting tasks. Prevention truly is the best cure when it comes to rust.
Sharpening and Maintaining Blades After Rust Removal
Once you have removed rust and lubricated your scissors, another important step is to assess and potentially restore their cutting edge. Rust often dulls blades. It can also create tiny imperfections. Sharpening and proper maintenance ensure your hard work results in fully functional tools. I always check the sharpness after a deep clean.
First, check the sharpness. Try cutting a piece of paper or fabric. Do the scissors cut cleanly, or do they snag and tear? If the edges feel rough or struggle to cut, they need sharpening. Dull blades are not only less effective but can also cause frustration.
There are several ways to sharpen scissors at home:
- Aluminum Foil Method: Fold a piece of aluminum foil several times to create a thick strip. Cut through this foil strip multiple times (10-20 cuts). The abrasive nature of the foil helps to refine and sharpen the blade edges. This is a very gentle method, great for lightly dulled scissors. It can also help if you had to clean rusty chrome and need a light polish.
- Sandpaper Method: Use fine-grit sandpaper (around 200-400 grit). Cut through the sandpaper as if cutting fabric. Make several cuts. The abrasive grit will sharpen the edges. Always cut away from the handle, following the natural angle of the blade.
- Sharpening Stone/Honing Steel: For more precise sharpening, use a sharpening stone. Hold the blade at its original angle (usually 60-70 degrees) against the stone. Move it across the stone in one direction. Repeat for both blades. This takes practice to get the angle right. A honing steel, typically used for knives, can also provide a quick touch-up.
- Specialized Scissor Sharpeners: Many kitchen supply stores sell sharpeners designed specifically for scissors. These are often easy to use and provide consistent results. They guide the blade at the correct angle.
After sharpening, clean off any metal dust or particles. Use a dry cloth or paper towel. Then, re-lubricate the pivot point and wipe a thin layer of oil over the blades again. This prevents any new rust from forming from metal particles left behind.
Regular maintenance is key to keeping scissors sharp and rust-free. This includes:
- Cleaning Gunk: Periodically wipe blades clean of sticky residues like tape adhesive or sap. Rubbing alcohol or a mild adhesive remover works well.
- Proper Storage: Store scissors in a way that protects the blades. A knife block slot, a protective sheath, or a dedicated scissor holder works best. This prevents accidental damage to the edges.
- Avoid Misuse: Do not use good quality scissors to cut materials they are not designed for. For example, using kitchen scissors for craft wire will dull them quickly.
By following these sharpening and maintenance tips, your rust-free scissors will stay sharp and effective for all your cutting needs.
FAQ Section
Is it safe to use rusty scissors?
Using rusty scissors is generally not safe. Rust can transfer to materials you cut, leaving stains. The rust can also harbor bacteria, making it unsanitary for kitchen or medical use. Additionally, rust dulls the blades and makes them difficult to use, increasing the risk of cuts or uneven results.
How long does it take to remove rust from scissors?
The time it takes depends on the severity of the rust and the method you choose. For light rust using vinegar or baking soda, it may take a few hours of soaking and scrubbing. Heavy rust could require overnight soaking or stronger commercial rust removers, with scrubbing taking longer.
Can I use WD-40 to remove rust?
Yes, you can use WD-40 to help remove light rust and lubricate scissors. While not a primary rust remover like acid-based solutions, its penetrating oil properties can help loosen rust. Spray it on, let it sit for a short period, then scrub with a wire brush or steel wool to physically remove the rust. Always wipe clean and re-lubricate afterward.
What is the best way to prevent scissors from rusting?
The best way to prevent rust is to keep your scissors dry. Always wipe them completely dry after use, especially if they have come into contact with water or wet materials. Store them in a dry place. Applying a thin layer of mineral or machine oil to the blades and pivot point also creates a protective barrier against moisture and air.
When should I replace rusty scissors instead of cleaning them?
You should replace scissors if the rust is very deep and has pitted the metal significantly, especially on the cutting edges. If the rust has compromised the structural integrity, causing parts to become brittle or loose, replacement is safer. Also, consider replacement if the rust is so severe that it cannot be removed, or if the cost of professional cleaning or specialized products outweighs the cost of new scissors.
Does rust damage scissor blades permanently?
Rust can cause permanent damage to scissor blades if left untreated. It corrodes the metal, creating pits and uneven surfaces. This permanent damage can make the blades dull and unable to hold a sharp edge, even after the rust is removed. Light, surface rust usually does not cause permanent damage and can be cleaned effectively.
Conclusion
Finding rust on your trusty scissors can be disheartening. However, as we have explored, a little effort can bring them back to life. You now know how to clean rusty scissors using various methods. From simple pantry staples like white vinegar, baking soda,
- rust removal
- scissor cleaning
- household cleaning
- rust prevention
- metal cleaning

Todd Martin
Senior Writer
With over 15 years of experience in home renovation and design, I started HEG to share what I’ve learned with homeowners who want to create spaces that are both beautiful and functional. I’ve always believed in a hands-on approach, and over the years, I’ve picked up practical solutions that actually work. Through HEG, I aim to make home improvement more approachable, sharing real tips that help you create a home you truly love.