· Davia Murnell · Home Maintenance · 19 min read
How To Clean Scratched Glass
Restore Clear Views: How to Clean Scratched Glass Effectively
Are you tired of looking through glass marred by unsightly scratches? Perhaps your favorite coffee table, a cherished window, or even a glass appliance panel has suffered some minor damage. It is a common problem in any home. Knowing how to clean scratched glass can save you money and bring back the sparkle to your surfaces.
I have faced this issue many times, and I know the frustration of a cloudy or damaged glass surface. This guide will walk you through various methods to address different types of glass scratches. We will cover everything from simple home remedies for light scuffs to more advanced techniques for deeper marks. You will learn about essential preparations, effective tools, and even prevention tips.
Takeaway
Restoring scratched glass is achievable with the right approach.
- First, identify the scratch depth. This determines the best repair method.
- Minor scratches often respond to simple home remedies like toothpaste.
- Deeper damage may require abrasive compounds like cerium oxide.
- Always clean the glass thoroughly before attempting any repair.
- Safety gear is important for all tasks.
- Prevention is key to keeping glass surfaces pristine.
To clean scratched glass, thoroughly clean the surface, then assess the scratch depth. For minor scuffs, use fine abrasive pastes like toothpaste or baking soda. For deeper scratches, apply cerium oxide with a felt pad or consider a specialized repair kit. Always work carefully and follow product instructions for best results.
Understanding Scratched Glass and Types of Damage
Glass appears strong, but it is quite vulnerable to scratches. Many everyday actions can cause damage. Moving furniture, using abrasive cleaners, or even dust can leave marks. Understanding the nature of these scratches is the first step in effective repair. Different types of damage require different cleaning and repair strategies.
I always start by examining the scratch closely. This helps me determine its depth and type. This assessment guides my choice of repair method. Not all scratches are the same, and what works for one might not work for another. You need to know what you are dealing with before you begin.
Identifying Scratch Depth
Scratches generally fall into two main categories: minor surface scratches and deeper gouges. It is important to tell the difference. You can perform a simple test to check the scratch depth. Run your fingernail gently across the scratch. If your fingernail catches, the scratch is likely deep. If it glides smoothly over the mark, it is probably a minor surface scratch.
Minor scratches typically affect only the top layer of the glass. They often appear as hazy lines or faint scuffs. These are usually easier to address with common household items. Deep scratches, on the other hand, penetrate further into the glass material. They are more noticeable and feel rough to the touch. These require more abrasive materials or specialized repair kits for effective treatment. Knowing the depth prevents you from wasting time on ineffective methods.
Common Causes of Glass Scratches
Scratches can appear from many sources. Moving objects without care is a frequent cause. A child’s toy scraping against a window can leave a mark. Cleaning glass with rough sponges or abrasive powders can also create fine scratches. Even everyday dust contains tiny abrasive particles that can scratch surfaces when wiped without proper lubrication.
Environmental factors like wind-blown sand or debris can scratch outdoor glass. Pet claws on sliding doors are another common culprit. Understanding these causes helps you prevent future damage. It also makes you more mindful of how you interact with glass surfaces in your home. Careful handling and proper cleaning habits are essential for preserving glass clarity.
Essential Preparations Before Cleaning
Before you attempt to clean scratched glass, proper preparation is crucial. This step ensures safety and maximizes the effectiveness of your chosen repair method. Rushing this stage can lead to more damage or unsatisfactory results. I always take my time with these initial steps. It really makes a difference in the final outcome.
Thorough cleaning of the glass surface is non-negotiable. Any dirt, dust, or grime left on the glass can act as an abrasive during the repair process. This could create new scratches or worsen existing ones. You want a perfectly clean surface to work on. This preparation sets the stage for a successful repair.
Prioritize Safety Measures
Working with glass and potentially abrasive compounds requires safety precautions. Always wear appropriate personal protective equipment (PPE). This includes safety glasses or goggles to protect your eyes from glass dust or chemical splashes. Gloves are also important to protect your hands from abrasives or cleaning solutions.
Ensure the area is well-ventilated, especially if you are using chemical cleaners or polishing compounds. Keep children and pets away from the work area. If working on a large window or mirror, ensure it is stable and secure. My personal rule is: “Safety first, always.” It protects both you and the glass.
Thoroughly Clean the Glass Surface
A clean surface is paramount for scratch repair. Start by wiping down the glass with a soft, lint-free cloth to remove loose dust and debris. Then, use a glass cleaner or a simple solution of soap and water to wash the entire surface. Make sure to remove all fingerprints, smudges, and dirt. For stubborn grime, you might need a more potent cleaner.
Vinegar is an excellent natural option for cleaning glass. You can mix equal parts white vinegar and water in a spray bottle. Spray the solution onto the glass and wipe it clean with a microfiber cloth. This method is effective for removing residues and preparing the surface. Learn more about effective natural cleaning methods by reading how to clean glass with vinegar.
After cleaning, rinse the glass thoroughly with clean water to remove any soap or cleaner residue. Dry the glass completely with a clean, dry microfiber cloth. Avoid leaving any streaks or water spots, as these can obscure the scratches you are trying to fix. For tips on avoiding streaks, see how to clean glass without streaks. A perfectly clean and dry surface allows for accurate scratch assessment and effective treatment.
Protect Surrounding Areas
If you are working on a piece of glass that is part of a larger item, like a window frame or a piece of furniture, protect the surrounding materials. Use painter’s tape or masking tape to cover edges, frames, or adjacent surfaces that you do not want to expose to cleaning or polishing compounds. This prevents accidental damage or discoloration.
For example, when working on a glass-topped table, tape off the wood or metal frame. If repairing a window, protect the window sill and wall. This small step can save you a lot of time and effort in post-repair cleanup. It helps you focus on the scratch without worrying about incidental damage to other parts.
Simple Home Remedies for Minor Scratches
Minor surface scratches can often be fixed using common household items. These methods are gentle and non-abrasive, making them ideal for light scuffs. I often try these first before moving to more intensive solutions. They are cost-effective and surprisingly effective for superficial damage.
Always start with the least aggressive method. You want to remove the scratch without creating new problems. These home remedies work by gently filling or buffing the tiny imperfections in the glass surface. They can restore clarity and make those annoying light scratches disappear.
The Toothpaste Method
Toothpaste is a popular remedy for minor glass scratches. It works due to its mild abrasive properties. You need to use a non-gel, white toothpaste for this method. Gel toothpastes do not contain the necessary abrasive particles. I always double-check the type of toothpaste before starting.
To apply, put a small amount of white toothpaste onto a soft, clean cloth. Rub the toothpaste into the scratch using small, circular motions. Apply moderate pressure for about 30 seconds to a minute. Do not press too hard, as this could worsen the scratch. After buffing, wipe away the excess toothpaste with a damp cloth. Then, buff the area with a dry, clean cloth. Repeat the process a few times if the scratch is still visible. This method is surprisingly effective for light surface marks.
Using Baking Soda Paste
Baking soda is another common household item that can serve as a mild abrasive. It creates a gentle polishing paste when mixed with water. This paste can help buff out minor scratches. I find this method particularly good for slightly larger, but still shallow, imperfections.
To prepare the paste, mix one part baking soda with one part water in a small bowl. Stir until you get a thick, consistent paste. Apply this paste to a clean, soft cloth. Gently rub the paste onto the scratched area in circular motions. Continue rubbing for a minute or two, applying light to moderate pressure. Rinse the area thoroughly with clean water to remove all baking soda residue. Then, dry the glass with a lint-free cloth. Repeat as needed until the scratch is less visible or gone.
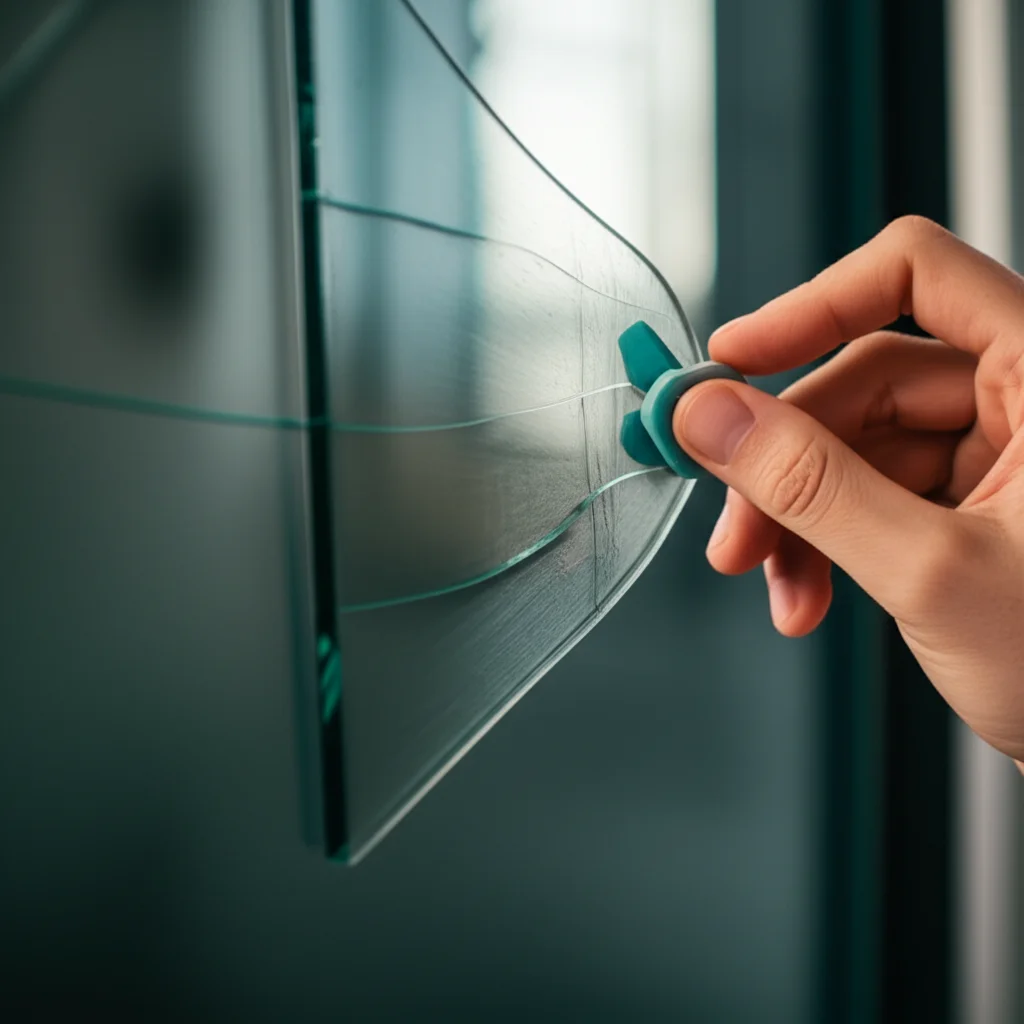
Clear Nail Polish or Super Glue (for very fine lines)
For very fine, hairline scratches, clear nail polish or even clear super glue can sometimes fill the void. This method is more about filling the scratch than buffing it out. It works by making the scratch less noticeable by eliminating the light refraction that makes it visible. I use this method very sparingly and only for the finest lines.
Carefully apply a very thin layer of clear nail polish or super glue directly into the scratch. Use a small brush or a toothpick for precision. Allow it to dry for a few minutes. Before it fully hardens, gently wipe away any excess with a clean cloth dampened with nail polish remover (for polish) or a small amount of acetone (for super glue). Be very careful not to get the solvent on the surrounding un-scratched glass. This method is a quick fix for very shallow marks.
Advanced Techniques for Deeper Scratches
When home remedies do not work, or if the scratch is deeper, you need more advanced techniques. These methods involve more abrasive materials designed to remove a very thin layer of glass. This allows the surface to be leveled and the scratch to disappear. These methods require more care and precision. I only move to these if the scratch is genuinely noticeable and my basic methods fail.
The key to these techniques is controlled abrasion. You are essentially polishing the glass. This is similar to how a jeweler polishes a gemstone. It takes patience and the right tools. Do not rush this process.
Cerium Oxide Polishing Compound
Cerium oxide is a professional-grade glass polishing compound. It is widely used by glass manufacturers and repair shops. This white powder, when mixed with water, creates a powerful polishing slurry. It is effective for removing medium to deep scratches. I consider this my go-to for more stubborn glass imperfections.
You will need a rotary tool (like a drill) with a felt polishing pad. First, mix the cerium oxide powder with water to form a thick paste. Apply a small amount of this paste to the felt pad. Start the rotary tool at a low to medium speed. Gently press the pad onto the scratched area. Keep the pad moving constantly in small, circular motions. Do not let the pad stay in one spot, as this can cause heat buildup and potentially crack the glass. Keep the glass surface moist by periodically spraying water or adding more paste. Continue polishing until the scratch fades. This can take several minutes or even longer, depending on the scratch depth. Wipe the glass clean and inspect your work regularly. You might find this process useful for repairing scratches on tough surfaces, such as those discussed in how to clean black glass stove top scratches.
Wet Sanding with Fine-Grit Sandpaper
Wet sanding is an aggressive method for deeper scratches. It should be used with extreme caution and only as a last resort before professional help. This technique involves using extremely fine-grit sandpaper (e.g., 2000-grit or higher) with water. The goal is to gradually abrade the glass surface down to the level of the scratch. I approach this method with a lot of care.
Always keep the sandpaper and glass surface wet throughout the process. Start with the finest grit sandpaper you have available. If the scratch is very deep, you might need to start with a slightly coarser grit (e.g., 1500-grit) and then gradually move to finer grits. Gently rub the wet sandpaper over the scratch in small, circular motions. Apply very light pressure. The idea is to remove a minimal amount of glass at a time. After sanding, use a cerium oxide compound to polish the hazy area created by the sanding. This brings back the clarity of the glass. This method can be challenging, but it can be effective for stubborn marks. The principles of careful polishing are similar to those for how to clean scratched plexiglass, though glass is harder and less forgiving.
Using a Dremel Tool with Polishing Attachments
A Dremel tool or similar rotary tool can be very useful for precise scratch repair. These tools offer variable speed settings and a range of polishing attachments. You can get small felt wheels or rubber polishing bits. This allows for targeted work on small or intricate glass surfaces. I find this especially helpful for small pieces or edges.
Attach a suitable felt polishing bit to your Dremel tool. Apply a small amount of cerium oxide paste directly to the bit or the scratched glass. Set the Dremel to a low-to-medium speed. Gently press the spinning bit onto the scratch. Keep the tool moving constantly to prevent heat buildup. Work in small sections, always keeping the glass and bit moist with water or more compound. This method offers great control for focused scratch removal. It requires a steady hand and patience.
Specialized Glass Scratch Repair Kits
For those who prefer a ready-made solution, specialized glass scratch repair kits are available. These kits typically contain everything you need. They are designed to make the repair process simpler and more accessible. I have used these kits, and they offer a convenient way to tackle glass damage.
These kits often include abrasive compounds, polishing pads, and sometimes even a small buffer. They are formulated to address different types of glass damage. Choosing the right kit depends on the nature and depth of your scratch. Reading reviews and product descriptions is helpful.
What to Look for in a Repair Kit
When selecting a glass scratch repair kit, consider the type of glass you are working on. Some kits are specific to automotive glass, while others are for household surfaces. Check if the kit is designed for minor scuffs or deeper gouges. Kits for deeper scratches will usually contain stronger abrasives like cerium oxide. Ensure the kit includes all necessary accessories, such as polishing pads, cloths, and instructions.
Also, look for kits that clearly outline the process. Good instructions are vital for success. Some kits might include multiple stages of abrasion, starting with a coarser compound and finishing with a finer polish. This multi-stage approach often yields better results for more significant damage. An all-in-one kit saves you from buying individual components.
Types of Kits: Abrasive Compounds vs. Resin Fillers
Glass scratch repair kits generally fall into two main categories: those using abrasive compounds and those using resin fillers.
Abrasive Compound Kits: These kits work similarly to the cerium oxide method. They contain a fine abrasive powder or paste that you use to polish away the scratch. You typically apply the compound with a polishing pad, often attached to a drill or a hand tool. The abrasive material removes a microscopic layer of glass around the scratch. This smooths out the surface. These kits are effective for scratches where material needs to be removed. They are good for shallow to medium-depth scratches. They literally make the scratch disappear by leveling the glass.
Resin Filler Kits: These kits use a clear resin that fills the scratch rather than removing glass. You apply the liquid resin into the scratch. Then, you cure it with UV light (sometimes a small UV lamp is included). The cured resin hardens within the scratch, making it less visible. These kits are excellent for deeper scratches where removing material is not feasible or desired. They work by reducing light refraction within the scratch. The scratch becomes less noticeable because light passes through the clear resin instead of scattering. This is more of a cosmetic fix than a true removal. Always read the kit instructions carefully before starting.
Step-by-Step Kit Application
Applying a glass scratch repair kit usually involves a few key steps:
- Preparation: Clean the glass surface thoroughly as described earlier. Ensure it is completely dry. Tape off any surrounding areas if needed.
- Application (Abrasive Kits): Apply the polishing compound to the included polishing pad. Attach the pad to your drill or rotary tool. Start polishing the scratched area. Keep the pad moving constantly in small circles. Maintain light to moderate pressure. Keep the surface moist with water. Polish until the scratch is gone or significantly reduced. This might take several passes.
- Application (Resin Filler Kits): Apply a tiny drop of the resin directly into the scratch. Use the applicator provided to spread it thinly and evenly. Ensure the scratch is completely filled. Place the UV light over the filled scratch and cure the resin according to the kit’s instructions. This usually takes a few minutes.
- Finishing: Once the repair is complete, wipe away any excess compound or resin. Buff the area with a clean, dry microfiber cloth to restore clarity and shine. Always follow the specific instructions provided with your chosen kit. Each product might have slight variations in its application process. Patience and precision are key for a successful repair.
When to Call a Professional (and Cost Considerations)
Not all glass scratches can be fixed at home. Sometimes, the damage is too severe, or the type of glass requires expert handling. Knowing when to call a professional can save you time, effort, and potential further damage. I understand the desire to do it yourself, but sometimes, an expert is truly necessary.
Professional glass repair services have specialized tools and experience. They can often tackle damage that is beyond the scope of DIY methods. Consider the value of the glass item and the extent of the damage before deciding. This decision often balances cost, time, and potential risks.
Recognizing Severe Damage
A professional repair is generally recommended for several scenarios:
- Deep and Wide Scratches: If your fingernail catches significantly in the scratch, or if the scratch is very wide, DIY methods are unlikely to yield satisfactory results. Such damage might require extensive grinding and polishing that home tools cannot provide.
- Cracked or Chipped Glass: Scratches that extend into cracks or result in chips compromise the structural integrity of the glass. These are safety hazards and should be addressed by professionals. They can assess if repair is even possible or if replacement is necessary.
- Safety Glass (Tempered or Laminated): Attempting to repair scratches on safety glass, like car windshields, shower doors, or oven doors, is risky. Tempered glass can shatter unexpectedly if its surface tension is disturbed. Laminated glass, found in car windshields, has multiple layers, and improper repair can delaminate it. These types of glass require specific repair techniques and expertise. For instance, fixing a scratched shower door might seem straightforward, but if it’s tempered, professional help is safer.
- Large Glass Surfaces: Repairing large windows or glass panels is challenging for one person. Professionals have the right equipment and manpower to handle large sheets of glass safely and effectively.
- Valuable or Irreplaceable Items: If the scratched item is an expensive antique, a piece of art, or has high sentimental value, it is best to entrust it to an expert. The risk of irreversible damage from DIY attempts is too high.
Estimating Repair vs. Replacement Costs
The decision to repair or replace often comes down to cost. Professional glass repair can range from a few hundred dollars to more, depending on the scratch’s severity and the glass type. Specialized repairs, like those for historical windows or complex glass structures, will be more expensive.
Replacement costs can vary widely. A small window pane might be inexpensive to replace. A custom-cut glass tabletop or a large insulated window unit can be very costly. I usually get quotes for both repair and replacement. This allows me to make an informed decision. Sometimes, the cost of repair approaches or exceeds the cost of replacement, especially for standard-sized glass. A professional can offer an honest assessment of whether repair is feasible and cost-effective. They can also advise on the longevity of a repair versus a full replacement. For example, considering the overall condition of a scratched glass table top can help decide if repair or replacement is better.
Preventing Future Glass Scratches
After putting in the effort to clean scratched glass, you will want to keep it pristine. Prevention is always better than cure. Adopting good habits and using protective measures can significantly reduce the risk of future damage. I have learned over time that a little caution goes a long way.
Protecting your glass surfaces means being mindful of how you clean and use them. It also involves considering external factors. Simple steps can prevent costly repairs down the line. Let’s explore some effective prevention strategies.
Proper Cleaning Techniques and Tools
Many scratches occur during routine cleaning. Using the wrong cleaning materials or methods can be abrasive. Always use soft, lint-free cloths, such as microfiber towels, when cleaning glass. Avoid paper towels, sponges with abrasive sides, or rough rags. These can contain fibers or particles that scratch the surface.
Use a gentle, non-abrasive glass cleaner. Ammonia-free cleaners are generally safer for all types of glass. Spray the cleaner directly onto the cloth, not the glass. This prevents overspray onto other surfaces and controls the amount of liquid. Wipe the glass gently in one direction or with light, circular motions. Always ensure the glass is free of loose dirt or dust before wiping. A dry wipe on a dusty surface acts like sandpaper. For comprehensive cleaning without specialized products, you can refer to how to clean glass without glass cleaner.
Use Protective Measures
Consider applying protective measures to high-traffic glass surfaces.
- Protective Films: Clear protective films are available for windows, tabletops, and even phone screens. These films act as a sacrificial layer. They absorb impacts and scratches, protecting the glass underneath. If the film gets scratched, you can replace it easily.
- Coasters and Mats: For glass tabletops or counters, always use coasters under drinks and placemats under plates. This prevents scratches from dishware, glasses, or cutlery.
- Edge Guards: For glass table edges or shelves, install clear edge guards. These protect against chips and impact scratches, especially in homes with children or active pets.
- Soft Pads for Furniture: If you have decorative items or electronics on a glass surface, ensure they have soft felt pads on their bases.
- glass repair
- scratch removal
- DIY cleaning
- glass cleaning

Davia Murnell
Room Cleaning Expert
Before joining HEG, I spent over a decade running my own window cleaning business, where I perfected streak-free techniques and learned the ins and outs of specialty glass care. Now, I bring that expertise to a broader mission—helping homeowners maintain sparkling windows and beautiful outdoor spaces. From skylights and sliding doors to patio glass and outdoor furniture, I believe every surface deserves attention and care. I share practical tips and proven methods that make even the toughest cleaning jobs feel manageable. Whether you're battling pollen on the porch or smudges on high windows, I’m here to help you see your home in a whole new light—literally.