· Todd Martin · Home Cleaning & Maintenance · 21 min read
How To Clean Sewage Backup
Expert Guide: How to Clean Sewage Backup Safely
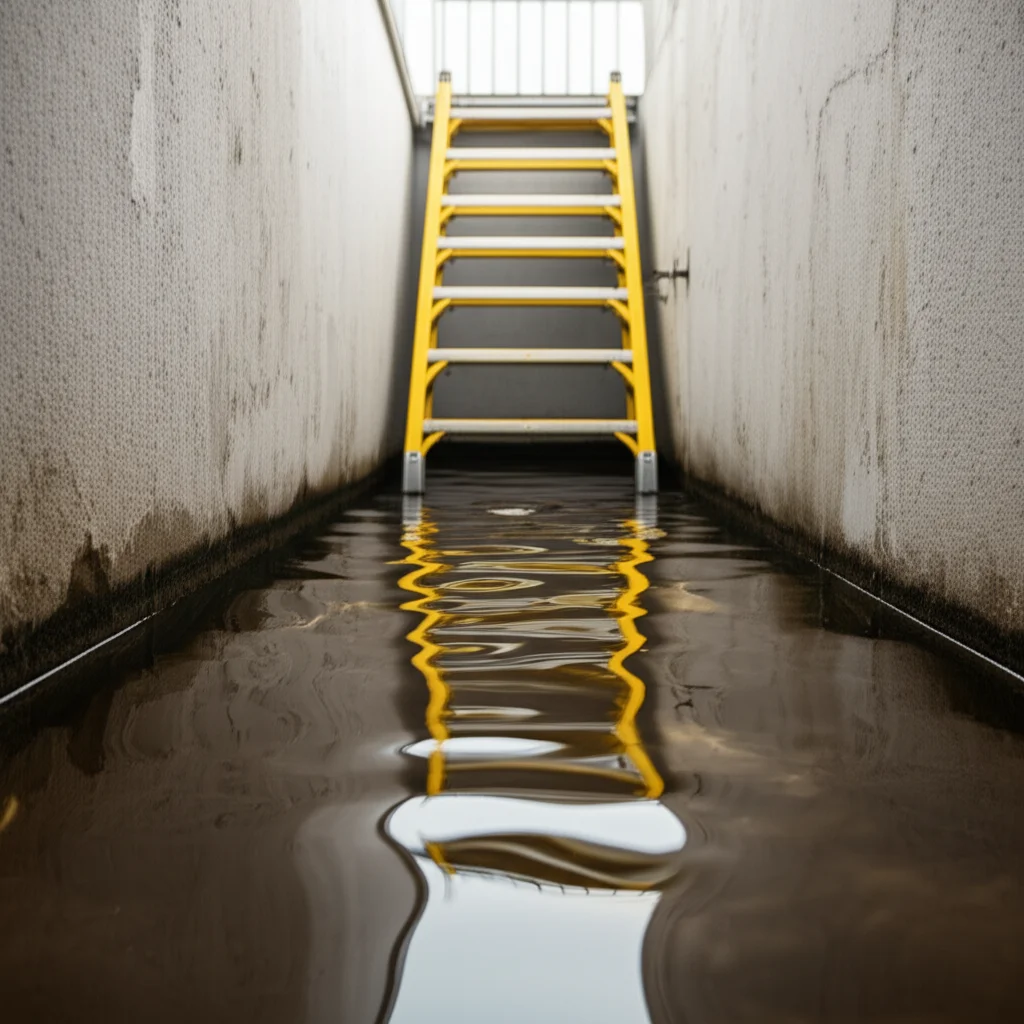
A sewage backup is a homeowner’s nightmare. It brings contaminated water into your living space. This event creates health risks and causes significant damage. Cleaning sewage backup requires immediate action and careful steps. It is important to handle the situation correctly. Otherwise, you risk further contamination and property damage. I will guide you through the process of cleaning sewage backup. This article explains the necessary safety measures, cleaning techniques, and disinfection methods. You will learn how to restore your home safely. I cover everything from initial assessment to final deodorization. Follow these instructions to manage a sewage overflow effectively.
Takeaway
- Prioritize personal safety by wearing full protective gear immediately.
- Stop the source of the backup and shut off affected utilities.
- Remove all contaminated water and porous materials quickly.
- Clean and disinfect all affected hard surfaces thoroughly.
- Ensure complete drying and dehumidification to prevent mold growth.
- Call professionals for large spills or health concerns.
How do you clean sewage backup?
Cleaning sewage backup involves immediate safety measures, removing contaminated water and porous items, thoroughly cleaning and disinfecting all hard surfaces with strong antimicrobials, and ensuring the affected area is completely dry to prevent mold growth. Proper disposal of waste and persistent odor removal are also critical steps in the cleanup process.
Immediate Steps and Safety First When Cleaning Sewage Backup
Dealing with sewage backup can feel overwhelming. Your first priority must be personal safety. Sewage water contains harmful bacteria, viruses, and other pathogens. Direct contact with it poses serious health risks. I recommend you act quickly but with extreme caution. Do not wade into standing sewage without proper protection. Always assume the water is highly contaminated. Your immediate response sets the stage for a safer cleanup.
You should prevent anyone from entering the contaminated area unnecessarily. Keep children and pets away from the affected space. They are especially vulnerable to the hazards present in sewage. Inform family members about the danger. Isolate the area to limit exposure. These initial steps protect your health and the health of others.
Personal Protective Equipment (PPE) Essentials
Wearing the right personal protective equipment (PPE) is critical. This gear creates a barrier between you and the sewage. You need head-to-toe protection. I always ensure I have these items before starting any cleanup.
- Heavy-Duty Waterproof Boots: These protect your feet and lower legs from contaminated water. Choose boots that extend past your ankles.
- Waterproof Overalls or a Hazmat Suit: Disposable suits are best. They cover your entire body. This prevents skin contact with sewage.
- N95 Respirator or Full-Face Respirator: Sewage releases harmful airborne particles and gases. A respirator protects your lungs.
- Heavy-Duty Waterproof Gloves: Wear at least two pairs of gloves. A sturdy outer layer protects against punctures. A thin inner layer offers extra protection.
- Eye Protection: Goggles or a face shield prevent splashes from reaching your eyes.
- Disposable Head Covering: This keeps your hair from coming into contact with sewage.
Remember to dispose of all disposable PPE after use. Non-disposable items like boots need thorough cleaning and disinfection. Handle them carefully to avoid spreading contamination.
Shutting Down Utilities and Ventilating the Area
Before you touch anything, secure the area. This involves cutting off power and ensuring proper airflow. This prevents electrical hazards and reduces airborne contaminants.
- Turn Off Electricity: Water conducts electricity. Standing water near electrical outlets or appliances creates a shock hazard. Locate your home’s main electrical panel. Turn off the power to the affected area immediately. If you are unsure, turn off power to the entire house.
- Turn Off Water Supply: Identify the source of the sewage backup. Is it a blocked toilet, a burst pipe, or a main sewer line issue? If the source is within your control, shut off the main water supply to your home. This prevents more water from entering the area.
- Ensure Ventilation: Open windows and doors in the affected space. This helps dissipate foul odors and reduces the concentration of airborne contaminants. Use fans to create cross-ventilation. Point fans towards open windows to blow contaminated air outside. Good airflow is important for your safety and for faster drying later.
These initial safety measures are not optional. They protect you from severe risks. Do not proceed with cleanup until these steps are complete.
Assessing the Damage and Containing the Spill
Once you secure the area, you need to understand the extent of the damage. This assessment helps you plan your cleanup strategy. It also helps you identify what can be saved and what must be discarded. Containing the spill quickly is essential to prevent further spread of contamination. Sewage does not stay in one place. It can seep into walls, floors, and adjacent rooms.
You must work systematically. Do not rush this phase. A thorough assessment prevents missed spots. Missed spots can lead to lingering odors or mold growth. Your goal is to map out every contaminated surface. This ensures a complete and effective cleanup operation. Remember, patience here saves time and trouble later.
Identifying Contaminated Areas
Look closely at all surfaces. Sewage can spread beyond what you initially see. Check areas that might have absorbed water.
- Floor Coverings: Carpets, rugs, and padding are highly porous. They absorb sewage quickly. Assume any carpet touched by sewage is contaminated.
- Walls and Baseboards: Water wicks up walls. Check the height of water damage on drywall and baseboards. Any material that shows water lines needs attention.
- Furniture and Personal Belongings: Upholstered furniture, clothing, books, and electronics can absorb sewage. Evaluate each item. Porous items are often unsalvageable.
- Subflooring and Structural Elements: If water sat for long, it might have seeped into subflooring or even joists. Look for dark spots or soft areas.
- HVAC System: If your HVAC system was running, it could have pulled contaminated air or even water into its ducts. This requires professional inspection.
Make a mental or physical note of all affected areas. This list guides your cleaning efforts. It helps ensure no contaminated spot is overlooked.
Creating Containment Barriers
Preventing the spread of sewage is crucial. You need to contain the contaminated zone. This keeps clean areas safe.
- Seal Off the Area: Use heavy-duty plastic sheeting and duct tape. Cover doorways and any openings leading to uncontaminated rooms. This creates a physical barrier.
- Create a Decontamination Zone: Set up a small area just outside the contaminated zone. This is where you will remove your PPE. Place a large trash can lined with heavy-duty bags here. This prevents tracking sewage into clean parts of your home.
- Protect Drains: If the sewage came from a drain, ensure the drain is clear. Place sandbags or old towels around other floor drains to prevent backflow into them if you are removing water.
Containment minimizes the risk of cross-contamination. It protects other parts of your home. This step is as important as wearing your PPE.
Removing Contaminated Water and Debris
Once you have secured the area and assessed the damage, the next critical step is to remove the standing water. The longer sewage water remains, the more damage it causes. It saturates materials, weakens structures, and promotes mold growth. This stage involves physical removal of liquid waste and affected solid materials. You must work efficiently. The quicker you remove the bulk of the contamination, the better your chances of preventing long-term problems.
Remember to continue wearing all your personal protective equipment. The water and debris are still highly hazardous. This is where your preparedness pays off. Be methodical in your approach. Do not leave any standing water behind. Every drop of sewage needs to be removed from your home.
Water Extraction Techniques
Removing the water is the first major physical step. You need the right tools for effective extraction.
- Wet/Dry Vacuum: For smaller spills, a wet/dry vacuum cleaner works well. Ensure it is powerful enough for water extraction. Empty the tank frequently. Dispose of the collected water in a toilet or an outside drain, if local regulations allow.
- Sump Pump or Utility Pump: For larger volumes of water, a submersible sump pump is more efficient. Place the pump directly in the deepest part of the standing water. Run a discharge hose to a safe disposal point, like a utility sink or an outdoor drain. Ensure the discharge point can handle contaminated water.
- Buckets and Mops: For very shallow water or tight spaces, buckets and mops are useful. Use dedicated cleaning tools that you will discard or thoroughly disinfect afterward. Do not use your regular household cleaning tools.
Work from the outside edges of the spill towards the center. This prevents spreading the water to new, clean areas. Continue water extraction until no standing water remains. The floor should appear merely damp, not wet.
Disposing of Contaminated Materials
Many items exposed to sewage cannot be salvaged. Porous materials absorb contaminants. They become impossible to disinfect fully. It is safer to discard them.
- Carpet and Padding: Any carpet, rug, or padding that touched sewage should be removed and thrown away. Cut it into manageable pieces. Roll it up from the edges.
- Drywall: Remove any drywall that absorbed sewage. Cut it about 12-18 inches above the highest water mark. This ensures you remove all affected material.
- Upholstered Furniture, Mattresses, Cushions: These items are highly absorbent. They cannot be disinfected properly. Discard them immediately.
- Books, Papers, Fabric Items: Most paper goods and textiles will be ruined. Bag them for disposal.
- Contaminated Debris: Any other items, such as wood scraps, broken pipes, or general debris, that came into contact with sewage must be bagged and disposed of.
Place all discarded materials into heavy-duty, sealed plastic bags. Double-bag them for extra security. Label the bags as “Hazardous Waste” if your local waste disposal service requires it. Check with your municipal waste management for proper disposal guidelines for biohazardous materials. Do not simply put them out with regular trash. This prevents others from coming into contact with dangerous waste.
Cleaning and Disinfecting Affected Surfaces
After removing water and debris, the next step is thorough cleaning and disinfection. This is a critical stage. It eliminates harmful bacteria, viruses, and fungi left behind by the sewage. You must clean all surfaces that came into contact with the sewage. This includes floors, walls, and any salvageable hard-surface items. Simple cleaning is not enough. You need to sanitize the area completely.
This phase requires specific cleaning agents. They must be effective against biohazards. Do not cut corners here. Inadequate disinfection can lead to ongoing health risks. It also leaves lingering odors and allows mold to grow. I approach this step with extreme care. My goal is to make the area safe for living again.
Essential Cleaning Solutions for Sewage Cleanup
Using the right cleaning solutions makes a big difference. You need powerful disinfectants.
- Bleach Solution: A common and effective disinfectant is a bleach solution. Mix one cup of household bleach with one gallon of water. This solution kills most bacteria and viruses. Apply it to hard, non-porous surfaces. Let it sit for 10-15 minutes before wiping. Always test a small, inconspicuous area first. This checks for discoloration or damage.
- Commercial Disinfectants: Many commercial cleaners are designed for biohazard cleanup. Look for products labeled as “disinfectant” or “virucide.” Follow the manufacturer’s instructions carefully for dilution and contact time. These products often have specific formulations for sewage contamination.
- Hydrogen Peroxide: For surfaces sensitive to bleach, hydrogen peroxide is an alternative. A 3% solution can disinfect many surfaces. It also helps with odor. It is less corrosive than bleach.
- Vinegar: While vinegar is a good natural cleaner and can kill some molds, it is generally not strong enough for sewage cleanup. I use vinegar for routine cleaning or for specific mold issues, but not as the primary disinfectant for sewage. For example, you can use vinegar to clean mold on non-porous surfaces after the initial sewage cleanup.
Always use separate cleaning tools for contaminated areas. Use disposable cloths or sponges. If using brushes, ensure they are dedicated to this task and disinfected afterward.
Thorough Disinfection Procedures
Disinfection is more than just wiping surfaces. It requires proper application and contact time.
- Remove All Residue: Before disinfecting, scrub all surfaces to remove any visible dirt or sewage residue. Use a stiff brush and a cleaning solution (not yet the disinfectant). Rinse surfaces with clean water.
- Apply Disinfectant: Apply your chosen disinfectant solution generously. Ensure all affected surfaces are thoroughly saturated. Do not just lightly mist them.
- Allow Contact Time: This is crucial. Disinfectants need time to kill pathogens. Read the product label for the recommended contact time. It is usually between 5-15 minutes. Do not wipe it off too soon.
- Rinse and Dry: After the contact time, rinse the surfaces with clean water. Then, wipe them dry with clean cloths.
- Repeat if Necessary: For heavily soiled or porous hard surfaces, you might need to repeat the cleaning and disinfection process. Pay extra attention to concrete floors. Cleaning concrete stains often requires multiple applications.
- Clean Hard Floors: For hard surfaces like tile or vinyl, scrub thoroughly. You can learn how to clean tile floors effectively for regular maintenance, but for sewage, use the stronger disinfectants mentioned above. Ensure the grout lines are also cleaned and disinfected, as they can harbor contaminants.
Remember to ventilate the area during disinfection. Bleach and other disinfectants produce fumes. Good airflow minimizes exposure to these fumes.
Drying and Dehumidifying the Area to Prevent Mold
After cleaning and disinfecting, the area might look clean, but it is not truly safe until it is completely dry. Moisture is the primary ingredient for mold growth. Even a small amount of residual dampness can lead to a mold infestation. Mold can begin to grow within 24-48 hours in damp conditions. This makes rapid drying absolutely essential. Mold poses its own set of health risks. It can also cause further structural damage to your home.
Your goal in this phase is to eliminate all moisture. This includes moisture absorbed into porous building materials that could not be removed. A dry environment prevents mold spores from taking root. I always emphasize speed and thoroughness here. Do not leave this step to chance. It forms a crucial barrier against secondary damage and health hazards.
Accelerating the Drying Process
You need to create an environment that promotes rapid evaporation. Combine several methods for the best results.
- Air Circulation: Use powerful fans to move air across wet surfaces. Position fans strategically to create a strong airflow. Aim them at walls, floors, and any other damp areas. Open windows and doors to vent moist air outside. This creates a cross-ventilation effect.
- Dehumidifiers: These machines pull moisture directly from the air. Place industrial-strength dehumidifiers in the affected area. Empty their collection reservoirs regularly. For very large areas, you might need multiple units. Dehumidifiers are vital for removing hidden moisture in the air and materials.
- Heat: Increasing the temperature in the room can help. Use space heaters, but do so safely. Keep heaters away from flammable materials. Never leave them unattended. The combination of heat, air circulation, and dehumidification creates optimal drying conditions.
- Open Cabinets and Drawers: If any built-in cabinets or drawers were affected, open them. This allows air to circulate inside and helps them dry out. Remove any items from them first.
Continue these drying efforts for several days. Even if surfaces feel dry, hidden moisture might remain. The duration depends on the extent of the water damage and humidity levels.
Monitoring Moisture Levels
You cannot rely on touch alone to determine if an area is truly dry. Moisture meters provide an accurate reading.
- Moisture Meters: These devices measure the moisture content in building materials like drywall and wood. They are inexpensive and easy to use. Insert the probes into the material. Readings indicate the level of dampness.
- Regular Checks: Continuously monitor moisture levels. Check affected areas daily. Compare readings to dry, unaffected areas of your home. This helps you identify if the drying process is working.
- Professional Assessment: For severe backups, consider a professional restoration company. They have advanced equipment. This equipment includes thermal imaging cameras. These cameras can detect hidden pockets of moisture. They ensure that no dampness remains.
The drying process is complete only when moisture readings return to normal levels. This means they are consistent with readings from unaffected areas. If you discover mold during drying, you will need to clean mold in the shower or on walls using specific mold remediation techniques. Proper drying prevents the need for extensive mold removal from walls later.
Restoration and Odor Removal
Once the affected area is completely dry and disinfected, you can begin the restoration process. This involves repairing any structural damage and replacing items that were discarded. However, another challenge often remains: lingering odors. Sewage leaves a very distinct and unpleasant smell. This odor permeates materials. It can persist long after the visible cleanup. Eliminating these odors is crucial for making your home livable again.
This phase is about returning your home to a healthy, normal state. It requires attention to detail. Do not rush the odor removal steps. A thorough job ensures your home feels clean and fresh again. This final stage brings peace of mind after a difficult experience.
Repairing Structural Damage
Sewage backup can cause significant damage to building components. You need to repair or replace these.
- Replace Drywall: If you cut out contaminated drywall, you must replace it. Install new drywall sections. Tape, mud, and sand the seams. Then, prime and paint the new surface.
- Replace Flooring: Any removed flooring, such as carpet or subflooring, needs replacement. Ensure the new subfloor is dry and secure before installing new floor coverings. Consider moisture-resistant flooring options for areas prone to future water issues.
- Inspect Electrical Systems: If any electrical outlets, wiring, or fixtures were submerged, have a licensed electrician inspect them. Do not assume they are safe. Water damage can lead to short circuits or fire hazards.
- Check HVAC Ducts: If your heating, ventilation, and air conditioning (HVAC) system was affected, have it professionally cleaned and inspected. Contaminated ducts can spread odors and pathogens throughout your home.
Perform these repairs only after confirming the area is completely dry. Installing new materials over damp surfaces can trap moisture. This leads to hidden mold growth and further damage.
Tackling Persistent Odors
Lingering sewage odors are a common problem. They require specific treatments.
- Deep Cleaning and Disinfection: The best way to combat odors is through thorough cleaning and disinfection. Ensure you did not miss any spots. Odors often come from microscopic organic residue.
- Activated Charcoal: Place bowls of activated charcoal in the affected area. Activated charcoal is porous. It absorbs odors from the air. Replace the charcoal periodically until the smell dissipates.
- Ozone Generators: For severe odors, an ozone generator can be effective. Ozone destroys odor-causing molecules. Caution: Ozone is harmful to living things. You must vacate the area completely when an ozone generator is running. Follow the manufacturer’s instructions carefully. Ventilate the area thoroughly after use before re-entering.
- Odor Encapsulants: Some commercial products are designed to encapsulate and neutralize odors. These can be sprayed or painted onto surfaces. They create a barrier that prevents odors from escaping.
- Air Fresheners: Do not just mask the smell with air fresheners. They only provide temporary relief. Address the root cause of the odor.
Persistent odors indicate that some contamination or moisture might still be present. If odors persist despite your efforts, consider professional help. Restoration companies have specialized equipment and chemicals to eliminate tough smells.
When to Call Professionals for Sewage Backup Cleaning
While cleaning sewage backup yourself can save money, some situations demand professional intervention. Sewage is a Category 3 water loss, meaning it is highly unsanitary and dangerous. Knowing when to call a professional restoration company is crucial for your safety and the complete recovery of your home. Professionals have specialized training, equipment, and certifications. They can handle biohazardous materials safely and effectively. Trying to tackle a large or complex sewage cleanup without the right expertise can lead to incomplete remediation, ongoing health risks, and further property damage.
I recommend professional help in specific scenarios. Your health and the integrity of your home depend on making the right decision. Do not hesitate to seek expert assistance if the situation is beyond your comfort or skill level.
Understanding Different Contamination Levels
The extent of the contamination often dictates whether you can handle the cleanup yourself or need professional help.
- Small Spill (Category 1): This is clean water from a broken pipe or overflow. You can usually clean this yourself. However, once clean water mixes with sewage, it becomes Category 3.
- Medium Spill (Category 2): This is “gray water” from a washing machine or dishwasher overflow. It may contain contaminants. This level often warrants professional help, especially if it affects significant areas.
- Large Spill (Category 3 - Black Water): This is the most dangerous. It is grossly contaminated water containing human waste, pathogens, and toxins. Sewage backup falls into this category. Always consider professional help for Category 3 water.
Call professionals if:
- The sewage affects more than one room.
- The sewage has been standing for more than 24-48 hours.
- Your HVAC system, electrical system, or main structural elements (like subflooring, joists, or walls) are affected.
- You or anyone in your household has pre-existing health conditions (e.g., respiratory issues, weakened immune systems).
- The thought of handling contaminated waste yourself feels overwhelming or unsafe.
Professionals are equipped to handle these high-risk scenarios. They ensure a complete and safe remediation process.
Benefits of Professional Sewage Remediation
Hiring professionals offers several advantages. Their expertise ensures a thorough and safe cleanup.
- Specialized Equipment: Professionals use industrial-grade equipment. This includes powerful water extractors, high-capacity dehumidifiers, air scrubbers, and specialized disinfectants. This equipment performs faster and more complete drying and disinfection.
- Expertise in Biohazard Cleanup: Restoration technicians are trained in handling biohazardous materials. They follow strict safety protocols. They know how to contain contamination. They also dispose of hazardous waste properly.
- Thorough Disinfection: They use hospital-grade disinfectants and antimicrobial treatments. These products kill a wider range of pathogens than typical household cleaners. They also apply them effectively.
- Mold Prevention and Remediation: Professionals have the tools and knowledge to prevent mold. If mold has already started, they can perform effective mold remediation. This ensures long-term health and structural integrity. For instance, they know how to address large mold colonies, unlike simply cleaning a mold under sink spot.
- Insurance Claims Assistance: Many restoration companies assist with insurance claims. They document the damage and cleanup process. This can simplify your claim process.
- Peace of Mind: Knowing that experts have thoroughly cleaned and disinfected your home provides peace of mind. You can trust that your home is safe again.
While the cost of professional services might seem high, it is an investment in your health and property value. Incomplete cleanup can lead to future problems. These problems include mold, lingering odors, and structural damage. These issues can be more expensive to fix in the long run.
Frequently Asked Questions (FAQ)
Is sewage backup dangerous to your health?
Yes, sewage backup is very dangerous. It contains harmful bacteria, viruses, and parasites. These pathogens can cause severe illnesses. Contact with sewage can lead to infections, respiratory problems, and skin irritations. Always wear protective gear and treat it as a biohazard. Do not expose yourself or others to direct contact.
Can I clean sewage backup myself?
You can clean small sewage backups if you follow strict safety protocols. This includes wearing full PPE and using strong disinfectants. However, I recommend calling professionals for large spills. Also seek professional help if the sewage has been standing for a long time. Professionals have the right equipment and training for safe cleanup.
How long does it take to clean up sewage backup?
The actual cleanup and disinfection can take anywhere from a few hours to a full day for a small area. The drying and dehumidification process takes much longer. It often requires 3 to 5 days, or even more, depending on the extent of moisture. Do not rush the drying phase. This prevents mold growth.
What causes sewage backup in a home?
Common causes of sewage backup include clogged sewer lines, tree roots invading pipes, broken or collapsed sewer lines, heavy rainfall overwhelming municipal sewer systems, and even issues with a septic system. Identifying and fixing the cause prevents future backups. Regular drain maintenance helps.
What do you do with items affected by sewage?
Most porous items affected by sewage must be discarded. This includes carpets, upholstered furniture, mattresses, books, and clothing. Hard, non-porous items like tile, plastic, or metal can often be cleaned and disinfected thoroughly. Bag and seal all discarded items as hazardous waste.
How can I prevent future sewage backups?
Prevent future sewage backups by being mindful of what goes down your drains. Do not flush grease, hygiene products, or large amounts of food waste. Regularly clean your drains and consider professional drain inspections. Avoid planting trees with invasive root systems near sewer lines. Install a backwater valve to prevent municipal sewer backups.
Conclusion
Cleaning sewage backup is a challenging and hazardous task. It demands immediate action, strict safety measures, and thorough procedures. You must prioritize your health by wearing proper protective equipment. Removing contaminated water and disposing of unsalvageable materials quickly is essential. Once surfaces are clear, a rigorous cleaning and disinfection process is vital. This eliminates harmful pathogens and prevents future health risks. Remember that complete drying and dehumidification are crucial steps. They stop mold from growing.
While you can manage small spills, larger or more complex sewage backups often require professional help. Expert restoration companies have the specialized equipment and knowledge to handle biohazards effectively. They ensure your home is fully safe and restored. Taking swift and proper action when dealing with sewage backup protects your property and the well-being of your household. Stay vigilant with drain maintenance to help prevent future occurrences.
- sewage cleanup
- water damage restoration
- emergency cleanup

Todd Martin
Senior Writer
With over 15 years of experience in home renovation and design, I started HEG to share what I’ve learned with homeowners who want to create spaces that are both beautiful and functional. I’ve always believed in a hands-on approach, and over the years, I’ve picked up practical solutions that actually work. Through HEG, I aim to make home improvement more approachable, sharing real tips that help you create a home you truly love.