· Todd Martin · Kitchen Cleaning · 20 min read
How To Clean Stove Coils
How To Clean Stove Coils: A Complete Guide
Is your electric stove looking a bit dingy? Those heating elements, often called stove coils, can collect a lot of spills and grime over time. I know how frustrating it feels to see burnt-on food on my coils. Cleaning these parts is not just about aesthetics.
It also affects how well your stove works and how safe it is to use. A dirty coil takes longer to heat up. It can even smoke when you cook. This guide will show you how to clean stove coils effectively. We will cover necessary tools, step-by-step methods, and important safety tips. You will learn how to make your stove shine and work like new.
Takeaway:
- Always unplug your stove before cleaning.
- Remove loose debris first.
- Use baking soda paste for tough grime.
- Clean drip pans separately.
- Regular maintenance prevents buildup.
To clean stove coils, first ensure the stove is unplugged and cool. Remove the coils and drip pans. Wipe off loose debris. For stubborn grime, create a baking soda paste and apply it to the coils and drip pans. Let it sit, then scrub gently with a non-abrasive brush. Rinse and dry all parts completely before reassembling.
Understanding Your Stove Coils
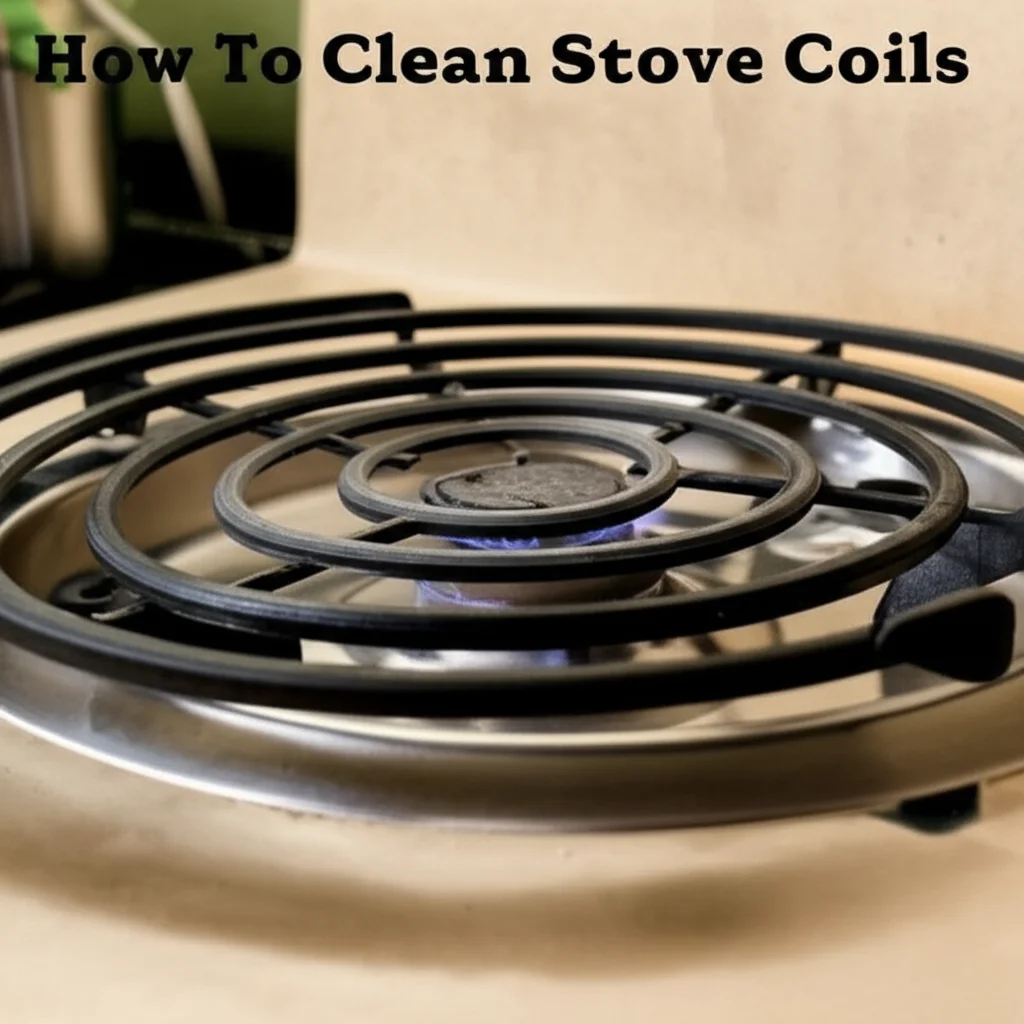
Electric stove coils are the workhorses of your kitchen. They heat up to cook your food. These coils are typically made of metal tubing. Inside the tubing is a resistive wire. This wire heats up when electricity flows through it. This heat then transfers to your pots and pans.
You might notice these coils come in different sizes on your stove. Larger coils are for larger pots and higher heat cooking. Smaller ones are for simmering or smaller pans. Each coil usually sits in a metal drip pan. The drip pan catches spills and crumbs.
Types of Stove Coils
When we talk about stove coils, we usually refer to electric heating elements. Gas stoves have grates and burner caps instead. These electric coils are removable. They plug into a terminal at the back of the stove top. This design makes them somewhat easier to clean.
Smooth-top electric stoves do not have exposed coils. Instead, they have heating elements under a glass or ceramic surface. Cleaning these types of surfaces is different. This guide focuses on traditional exposed electric stove coils.
Why Cleaning is Crucial
Cleaning your stove coils is more important than you might think. First, it helps your stove work better. Dirty coils heat unevenly. This means your food might not cook properly. You could end up with burnt spots or undercooked areas.
Second, cleaning improves safety. Burnt food and grease on coils can smoke. They can even cause small fires. Keeping them clean reduces fire risks in your kitchen. Lastly, clean coils simply look better. A sparkling stove makes your whole kitchen feel cleaner. Regular cleaning also helps your stove last longer. It prevents corrosion and damage from spills.
Essential Tools and Supplies for Coil Cleaning
Before you start cleaning your stove coils, gather all your supplies. Having everything ready saves time. It also makes the cleaning process smoother. You probably have most of these items already in your home. I always make sure to have a dedicated set of cleaning tools for tough jobs like this.
You will need some basic protective gear. This includes a pair of rubber gloves. They protect your hands from cleaning solutions. They also keep your hands clean from grime. Safety glasses are a good idea too. They protect your eyes from splashes.
Basic Cleaning Agents
For most coil cleaning, simple household items work best. You will need dish soap. Liquid dish soap is great for cutting through grease. Warm water is essential for mixing solutions and rinsing. Baking soda is another powerful cleaner. It creates a gentle abrasive paste. This paste lifts stubborn stains.
White vinegar is also very useful. It helps break down grease and mineral deposits. It also neutralizes odors. I keep a spray bottle of diluted vinegar on hand for many kitchen cleaning tasks. These natural cleaners are effective and safe for your home.
Cleaning Tools
You will need various tools for scrubbing and wiping. Start with a soft-bristle scrub brush. A toothbrush works well for small crevices. Avoid using anything too abrasive like steel wool. Steel wool can scratch the coil’s surface. It can also leave behind metal fragments. These fragments might cause issues when the coil heats up.
Microfiber cloths are excellent for wiping and drying. They absorb a lot of water and leave surfaces streak-free. Old towels are also good for protecting your workspace. A vacuum cleaner with a brush attachment can help remove loose crumbs. You might also consider a plastic scraper for carefully lifting burnt-on bits. Remember to be gentle with your tools. You want to clean, not damage, your stove coils. A clean stove top, including the drip pans, contributes to overall kitchen hygiene. You can find more tips on how to clean your stove top and other parts of your kitchen in our guide on how to clean electric stove top.
Step-by-Step Guide to Cleaning Electric Stove Coils
Cleaning electric stove coils might seem daunting, but it’s a straightforward process. I follow these steps every few months to keep my kitchen pristine. Taking it one step at a time makes the job much easier. Proper technique ensures both effectiveness and safety.
Safety First: Unplug and Cool Down
Before you touch anything, always prioritize safety. The most crucial step is to unplug your electric stove from the power outlet. This prevents any accidental electrical shocks. If your stove is hardwired, turn off the circuit breaker that supplies power to the stove.
Next, ensure the stove coils are completely cool. Hot coils can cause severe burns. They also make cleaning products evaporate too quickly. Let the stove sit for at least 30 minutes to an hour after use. This ensures all parts are cool to the touch. Neglecting this step is a common cleaning mistake.
Initial Loose Debris Removal
Once the stove is safe, start by removing the coils. Gently lift each coil. They usually unplug from a receptacle on the stove top. Set them aside carefully. Then, lift out the drip pans underneath each coil. These are often the dirtiest parts.
Use a soft brush or a dry cloth to wipe away loose crumbs and food particles. A hand vacuum with a brush attachment can also be helpful. This initial step removes the easiest debris. It prepares the surfaces for deeper cleaning. Be thorough but gentle to avoid scratching.
Deep Cleaning Methods
Now for the main cleaning. Your coils and drip pans will likely have stubborn, burnt-on residue.
Baking Soda Paste Method for Coils
For the coils themselves, avoid submerging them in water. Water can damage the electrical connections. Instead, make a paste with baking soda and a little water. Mix about half a cup of baking soda with a few tablespoons of water. Adjust until it forms a thick paste.
Spread this paste generously over the dirty areas of the coils. Let it sit for 15-30 minutes. The baking soda will help loosen the grime. After soaking, gently scrub the coils with a soft-bristle brush or old toothbrush. Wipe away the paste and loosened dirt with a damp cloth. Make sure to remove all paste residue.
Soaking Drip Pans
Drip pans can be soaked. Fill a sink or a basin with warm, soapy water. Add a cup of white vinegar for extra cleaning power. Place the drip pans into the mixture. Let them soak for at least an hour, or even overnight for very stubborn stains. This helps to break down grease and burnt-on food.
After soaking, scrub the drip pans with a sponge or a non-abrasive brush. You might need some elbow grease for truly stuck-on bits. For extra tough spots, you can apply a baking soda paste directly to the drip pan and scrub. Cleaning these drip pans thoroughly makes a huge difference in your stove’s overall appearance. You can find more detailed tips on how to clean stove drip pans in our dedicated guide.
Rinsing and Drying
After scrubbing, rinse the drip pans thoroughly under warm running water. Make sure no soap or residue remains. For the coils, wipe them down carefully with a clean, damp cloth. Do not run them under water. The key is to ensure all cleaning agents are gone.
Next, it is crucial to dry everything completely. Use a clean, dry microfiber cloth. You can also let them air dry for several hours. This prevents rust and electrical issues. Never reassemble or plug in your stove until every part is bone dry. This final step is vital for safety and proper function. A properly cleaned and dried stove coil contributes to a much cleaner cooking experience, just as keeping your electric stove top clean improves the entire look of your kitchen.
Addressing Stubborn Stains and Burnt-On Residue
Sometimes, stove coils have really tough stains. These come from years of spills and forgotten splatters. Regular cleaning methods might not be enough. Do not worry, there are stronger approaches. I have faced many burnt-on messes. I have found certain tricks work wonders.
Always remember patience is key. Stubborn stains rarely come off instantly. Give your cleaning agents time to work. Rushing can lead to damage.
Using Specialized Cleaners
For heavy-duty grime, you might need a stronger cleaner. Look for non-abrasive oven or stove top cleaners. Make sure they are safe for metal surfaces. Always read the product label carefully. Follow the manufacturer’s instructions for application.
Apply the cleaner to a damp cloth. Then, wipe it onto the stained areas of the coils and drip pans. Let it sit for the recommended time. This could be 5-10 minutes. Afterwards, gently scrub with a soft brush. Rinse thoroughly to remove all chemical residue. Using specialized cleaners can be very effective.
Vinegar and Baking Soda Power
The combination of vinegar and baking soda is a powerful natural alternative. This duo creates a fizzing reaction. This reaction helps lift stubborn residue. First, sprinkle baking soda generously over the burnt areas. Make sure the stain is covered well.
Next, spray white vinegar directly onto the baking soda. Watch it fizz and bubble. This is the chemical reaction at work. Let it sit for at least 15-30 minutes, or even longer for very tough stains. The longer it sits, the more it breaks down the grime. Afterwards, scrub with a nylon brush or sponge. This method is effective for many types of stubborn stove top marks. You can use similar methods to tackle general grease around your cooking area. Learn more about how to clean greasy stove.
Gentle Scrubbing Techniques
Aggressive scrubbing can damage your stove coils. This is true even with the strongest cleaners. Always use gentle, circular motions. A plastic scraper can help lift very thick, burnt-on bits. Be extremely careful not to scratch the coil. Avoid metal scrubbers or abrasive pads.
For crevices and tight spots, a toothbrush is invaluable. It lets you apply pressure precisely. Repeat the cleaning process if needed. Multiple applications with gentle scrubbing are better than one harsh attempt. Sometimes, a second or third treatment makes all the difference. Patience and proper technique will restore your coils without damage. These gentle methods are also useful for other stubborn stains, like how to clean burnt milk from stove or even how to get rid of general burn marks off stove.
Cleaning Drip Pans and Underneath the Coils
The stove coils are only one part of the equation. The drip pans and the area directly underneath them often collect the most grime. These parts are designed to catch spills. This makes them crucial for deep cleaning. I always make sure these areas get special attention.
Ignoring the drip pans means leaving a lot of burnt food and grease behind. This can lead to lingering odors and even smoke during cooking. A thorough cleaning of these areas ensures a truly sparkling and efficient stove.
Importance of Drip Pans
Drip pans serve a very practical purpose. They sit directly under each heating coil. Their job is to catch drips, spills, and crumbs. Without them, all that debris would fall directly into the stove’s interior. This could cause electrical hazards or attract pests.
Over time, these pans accumulate layers of baked-on food and grease. This reduces their ability to reflect heat. Clean drip pans actually help your coils heat more efficiently. They also make your stove top look much tidier. Replacing extremely damaged or rusted drip pans is sometimes necessary. However, most can be restored with a good cleaning.
Cleaning Methods for Drip Pans
Drip pans are usually removable and made of metal. This makes them easier to clean than the coils themselves.
- Soaking is Key: For heavily soiled drip pans, soaking is the best first step. Fill your sink with very hot water. Add a generous amount of dish soap. You can also add half a cup of baking soda or white vinegar for extra power. Submerge the drip pans completely. Let them soak for several hours, or even overnight. This softens the baked-on grime.
- Scrubbing: After soaking, use a non-abrasive scrub brush or a sturdy sponge. Start scrubbing the loosened grime. For very stubborn spots, a paste of baking soda and a little water can be applied directly. Let it sit, then scrub again.
- Dishwasher (Check First): Some modern drip pans are dishwasher safe. Check your stove’s manual to confirm. If they are, run them through a heavy-duty cycle. This can save you a lot of scrubbing. Always ensure they are completely dry before putting them back.
- Rinsing and Drying: Rinse the drip pans thoroughly under warm water. Ensure all soap and residue are gone. Dry them completely with a clean cloth or air dry them. Moisture can lead to rust.
Detailed instructions for cleaning stove drip pans are available in our guide on how to clean stove drip pans.
Accessing and Cleaning Underneath
Once the coils and drip pans are removed, you can access the stove top surface underneath. This area often collects crumbs, dust, and dried spills. This hidden dirt can harbor bacteria. It also contributes to general kitchen odors.
- Vacuum Loose Debris: Use a vacuum cleaner with a hose attachment. Carefully vacuum up any loose crumbs or debris in the recessed areas. Get into the corners and around the electrical receptacles.
- Wipe Down the Surface: Dampen a cloth with warm, soapy water. Wipe down the entire surface of the stove top underneath where the coils sit. For tougher spots, use a baking soda paste. Gently scrub with a soft brush.
- Clean Electrical Receptacles: Be very careful around the electrical receptacles. Do not spray water directly into them. Use a dry cloth or a cotton swab to clean around them. Ensure they are dry before putting coils back.
- Clean the Stove Top: While you’re at it, give the visible parts of your stove top a good cleaning. This includes the area around the burners and control knobs. You can use mild dish soap and water. For white stove tops, you might consider specific cleaning methods for how to clean white stove top. This ensures your entire stove looks fresh and clean.
Preventing Future Buildup and Maintaining Clean Coils
Cleaning stove coils can be a big job. The best way to make it easier is to prevent heavy buildup in the first place. Regular maintenance makes all the difference. I have learned that a little effort often saves a lot of work later. Keeping your coils clean extends their lifespan and keeps your kitchen looking good.
Preventative measures involve simple habits. They reduce the amount of food and grease that bakes onto the coils. This also means less scrubbing for you down the line. Consistent care is the secret to a consistently clean stove.
Regular Wiping
The simplest form of maintenance is regular wiping. After each cooking session, allow your stove coils to cool completely. Then, use a damp cloth to wipe down the coils and drip pans. This removes fresh spills before they bake on. It prevents them from becoming stubborn stains.
This quick wipe-down takes only a minute or two. It prevents layers of grease and food from accumulating. Make this a habit. It is like washing dishes immediately after a meal. Small efforts lead to big results.
Immediate Spill Cleanup
Accidents happen in the kitchen. Pasta water boils over, or soup splatters. When a spill occurs, clean it up as soon as it is safe to do so. Turn off the burner. Let the coil cool down enough to handle. Then, wipe up the spill immediately.
The longer a spill sits on a hot coil, the harder it will be to remove. The heat bakes it onto the surface. Prompt cleanup reduces the chances of permanent stains. It also prevents smoke and odors during subsequent cooking. This vigilance is key to preventing tough coil grime.
Using Proper Cookware
The type of cookware you use can also affect coil cleanliness. Flat-bottomed pans sit flush on the coils. This allows for even heat distribution. It also minimizes spills around the edges. Avoid warped or uneven pans. These can rock and cause spills.
Ensure your pots and pans are the right size for the coil. Using a small pan on a large coil can lead to more splatters onto the exposed coil area. Using lids on pots and pans also helps contain splashes. This simple practice keeps your cooking area cleaner. Consider also cleaning other stove components, such as your stove fan filters, for overall stove cleanliness.
When to Replace Coils
Despite your best cleaning efforts, stove coils do not last forever. Over time, they can become pitted or corroded. They might also stop heating evenly. If a coil is heavily damaged or no longer works correctly, cleaning won’t fix it. It is time for a replacement.
Replacing a stove coil is usually straightforward. You can buy replacement coils online or at appliance parts stores. Ensure you get the correct model for your stove. A new coil will provide optimal heating. It also ensures safety. Replacing worn-out parts is part of good appliance maintenance. This is true for other stove accessories too, like how to clean stove burner rings (for gas stoves).
Common Coil Cleaning Mistakes to Avoid
Cleaning stove coils effectively means knowing what not to do. Some common mistakes can damage your coils or even create safety hazards. I have learned these lessons over time. Avoiding these pitfalls will ensure your cleaning efforts are successful and safe.
Being aware of these mistakes helps protect your appliance. It also keeps you safe. Follow these tips to prevent damage and ensure a sparkling, functional stove.
Using Abrasive Scrapers
It is tempting to use metal scrapers or steel wool on stubborn, burnt-on residue. Do not do it. Abrasive tools can scratch the coil’s surface. These scratches can lead to corrosion. They also create rough spots where food can stick more easily in the future.
Scratches can also damage the protective coating on some coils. This reduces their efficiency and lifespan. Stick to plastic scrapers, nylon brushes, or old toothbrushes. These are much gentler but still effective. Patience with soaking and gentle scrubbing is always better than harsh abrasion.
Submerging Coils in Water
This is a big no-no. Electric stove coils contain electrical connections at their base. Submerging the entire coil in water can damage these connections. It can cause short circuits. It can also lead to rust inside the coil.
Water damage can make the coil stop working. It can also create a fire hazard when you plug it back in. Always wipe down coils with a damp cloth instead. Only the drip pans should be soaked or rinsed directly with water. This distinction is crucial for safety.
Not Unplugging the Stove
This mistake is highly dangerous. Forgetting to unplug your stove before cleaning can lead to severe electric shock. Even if the burners are off, the stove is still connected to power. You are working with electrical components.
Always, always disconnect the power first. Unplug the stove from the wall outlet. If you cannot reach the plug, turn off the circuit breaker for the stove. This step takes only a moment. It could save your life. Do not skip this vital safety precaution. This rule applies to any cleaning task involving electrical appliances, from your electric stove top to other kitchen devices.
Overlooking Drip Pans
Some people focus only on the coils and forget the drip pans. This is a common oversight. Drip pans catch most of the spills and burnt food. If you clean the coils but leave the drip pans dirty, your stove will still look grimy. It will also smell bad when heated.
Dirty drip pans can smoke during cooking. They also reduce the stove’s efficiency by absorbing heat instead of reflecting it. Always remove and thoroughly clean your drip pans. Give them a good soak and scrub. You will notice a big difference in the overall cleanliness and performance of your stove. A clean drip pan is as important as a clean coil. Many cleaning tasks around the house, like cleaning glass stove tops with vinegar, rely on paying attention to all the components.
FAQ Section
How often should stove coils be cleaned?
You should clean stove coils and drip pans thoroughly every 1-3 months. This depends on how often you cook. For light users, quarterly cleaning might suffice. For daily cooks, aim for monthly deep cleaning. Wipe up small spills immediately after they cool. This regular attention prevents tough buildup.
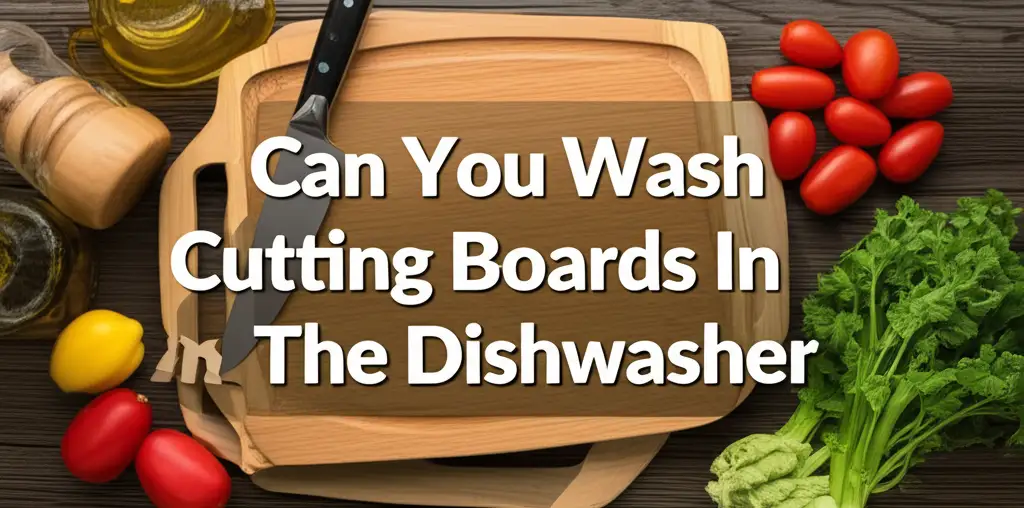
Can I put stove coils in the dishwasher?
No, you should never put stove coils in the dishwasher. Water can damage the electrical connections inside the coils. This can lead to malfunction or even a fire hazard. Only the removable drip pans are sometimes dishwasher-safe. Always check your stove’s manual for specific instructions.
What if my coils are still dirty after cleaning?
If coils remain dirty after your initial cleaning, try a stronger method. Apply a thicker baking soda paste and let it sit longer, perhaps for several hours or overnight. You can also use a specialized non-abrasive stove cleaner. Repeat the scrubbing and rinsing process gently. Extremely old or damaged coils might need replacement.
How do I know if my stove coil needs replacing?
Your stove coil may need replacing if it no longer heats evenly, or has visible damage. Signs include severe pitting, corrosion, or large cracks. If the coil does not glow red when turned on, it is likely faulty. A broken coil will not heat up at all. Replacing it ensures proper cooking and safety.
Can I clean gas stove burners like electric coils?
No, gas stove burners are different from electric coils. Gas burners have burner caps and grates. These parts can typically be soaked in soapy water or cleaned with baking soda paste. You do not have to worry about electrical connections with gas burners. Always consult your specific gas stove’s manual for cleaning instructions.
Is it safe to use oven cleaner on stove coils?
Most manufacturers do not recommend using standard oven cleaner directly on electric stove coils. Oven cleaners contain strong chemicals that can damage the coil’s protective coating. This can affect its performance and lifespan. Stick to gentler cleaning agents like baking soda, vinegar, or specific stove top cleaners designed for coils.
Conclusion
Cleaning your stove coils is a simple yet impactful home maintenance task. We have covered why it is important, what you need, and how to do it safely. You learned to unplug the stove, remove loose debris, and deep clean with baking soda and vinegar. Remember to always dry everything completely before reassembling.
Regular cleaning helps your stove work better and last longer. It also makes your kitchen safer and more inviting. Do not let burnt-on food diminish your cooking experience. Taking a little time to care for your stove coils makes a big difference. Start your stove coil cleaning project today. You will love the fresh, efficient results in your kitchen.
- stove cleaning
- coil maintenance
- electric stove
- kitchen hygiene
- deep cleaning

Todd Martin
Senior Writer
With over 15 years of experience in home renovation and design, I started HEG to share what I’ve learned with homeowners who want to create spaces that are both beautiful and functional. I’ve always believed in a hands-on approach, and over the years, I’ve picked up practical solutions that actually work. Through HEG, I aim to make home improvement more approachable, sharing real tips that help you create a home you truly love.