· Todd Martin · Kitchen Cleaning · 20 min read
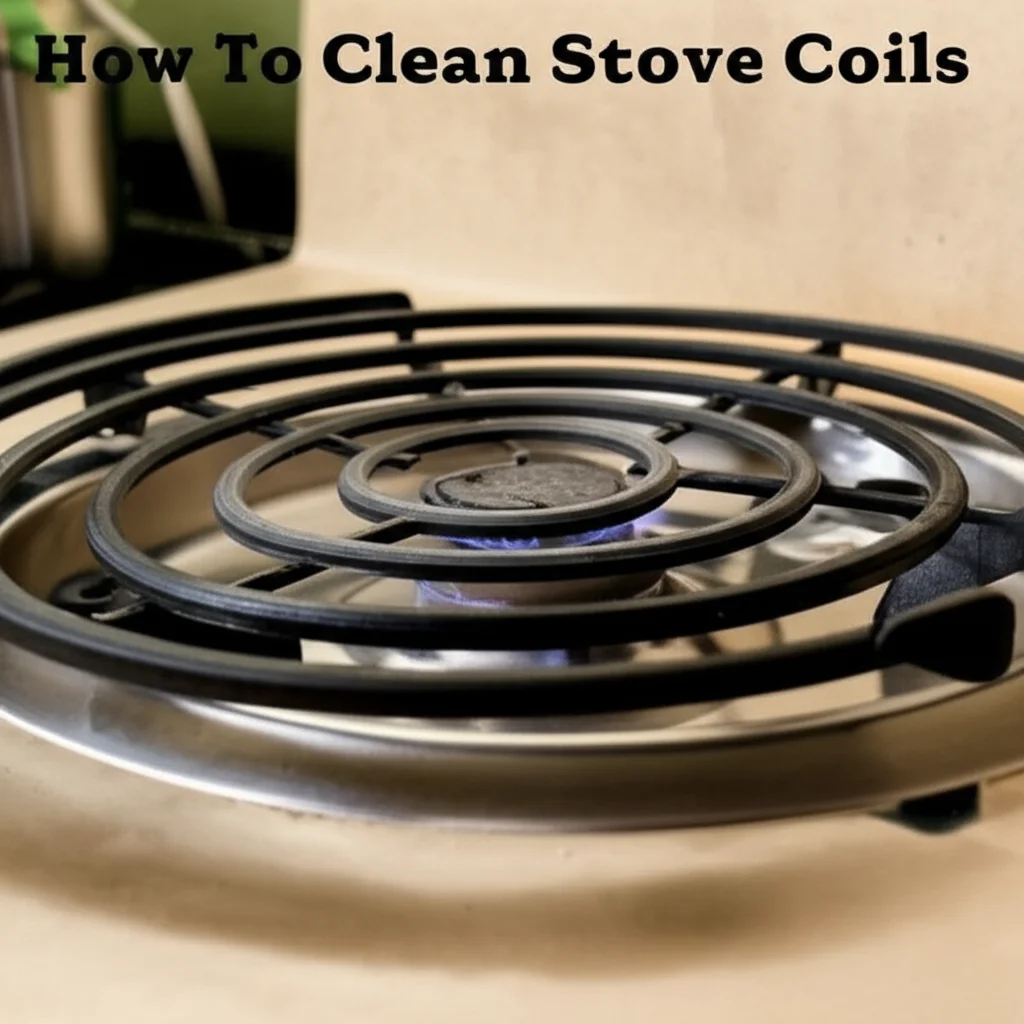
How To Clean Gas Stove Grates Cast Iron

How to Clean Gas Stove Grates Cast Iron: Your Essential Guide
Is your gas stove looking a bit tired? Are the cast iron grates covered in grease, food spills, or even rust? We all face this challenge. Cooking creates messes, and our stove grates bear the brunt of it. Cleaning these heavy, often neglected, pieces can seem like a big job.
But do not worry. This guide will walk you through the process. You will learn how to clean gas stove grates made of cast iron effectively. I will share simple, actionable steps to restore their shine and function. We will cover daily care, deep cleaning methods, and how to protect them from future damage. Get ready to make your kitchen sparkle.
Takeaway
Keeping your cast iron gas stove grates clean ensures their longevity and your kitchen’s hygiene. Here are the key takeaways:
- Regular cleaning prevents stubborn buildup.
- Gentle methods often work best for light messes.
- Baking soda, vinegar, and dish soap are powerful allies.
- Proper re-seasoning protects cast iron after deep cleaning.
- Avoid harsh chemicals and dishwashers to preserve the grates.
To clean gas stove grates made of cast iron, first remove loose debris. Then, use a paste of baking soda and water or a dish soap soak to break down grime. For tough spots, gentle scrubbing with a non-abrasive brush helps. Rinse, dry completely, and re-season for protection.
Understanding Your Cast Iron Gas Stove Grates
Cast iron grates are common on gas stoves. They are heavy and durable. This material holds heat well, helping to cook food evenly. However, cast iron is also porous. This means it can absorb spills and grease. Over time, these absorbed elements can become burnt-on. This creates a hard, black layer of grime.
Proper care is important for these grates. Neglecting them can lead to several problems. Burnt-on food reduces heat transfer. It can also make your stove look unsightly. Rust is another common issue. Cast iron rusts easily when exposed to moisture without a protective layer.
A well-maintained grate lasts longer. It also performs better. Regular cleaning removes harmful substances. It helps keep the grates seasoned. Seasoning creates a non-stick, protective surface. It also prevents rust. Understanding your grates helps you clean them right. Many people wonder about general cast iron stove grate care; for broader advice, you can always check out tips on how to clean cast iron stove grates.
The goal is to preserve the grate’s surface. We want to remove dirt without stripping the seasoning. Harsh chemicals or abrasive tools can damage cast iron. They can remove the protective layer. Once this layer is gone, the grate becomes more prone to rust. It also loses its non-stick qualities. I always try to use the gentlest method first. This approach protects my grates. It saves me time in the long run.
Gathering Your Cleaning Arsenal
Before you start cleaning, gather all your supplies. Having everything ready makes the process smoother. You will need a few common household items. Most of these are likely already in your pantry. Using the right tools protects your grates. It also ensures an effective clean.
First, you need protective gear. Gloves are essential. They protect your hands from grease and cleaning agents. I prefer sturdy rubber gloves. They offer a good grip. Next, you need a safe place to work. A large sink or a plastic tub works well. You will soak the grates, so make sure the space is big enough. Line the tub with old towels to prevent scratches.
For cleaning agents, consider natural options first. Dish soap is a degreasing powerhouse. Baking soda is a gentle abrasive and deodorizer. White vinegar helps break down grime and calcium deposits. These three are my go-to items. They are safe for cast iron. They are also gentle on the environment.
You will also need various scrubbing tools. A stiff nylon brush is ideal. It can dislodge tough grime without scratching. An old toothbrush helps reach small crevices. Non-abrasive scrub pads are also useful. Avoid steel wool or metal brushes. They can strip the seasoning and cause rust. I once used a steel brush on a pan, and it was a mistake. The pan rusted quickly.
Finally, have plenty of paper towels or clean rags ready. You will use them for wiping and drying. A soft cloth is good for applying oil during seasoning. Having a dedicated space for cleaning makes it less messy. It helps me focus on the task. Gathering my tools beforehand saves me time and effort. It ensures I have everything I need to clean my gas stove grates properly.
Daily Wipe-Down: The First Line of Defense
Regular cleaning is key to keeping your cast iron gas stove grates in good shape. Think of it as a quick touch-up. This simple step prevents major buildup. It saves you from needing intense deep cleaning later. I make it a habit to do this after cooking. It only takes a few minutes.
First, make sure the grates are cool. Hot grates can cause burns. They can also make cleaning agents less effective. Once cool, carefully remove them from the stove. This allows you to access all surfaces. It also makes it easier to clean the stovetop itself.
Use a soft cloth or paper towel. Wipe away any loose food particles or fresh spills. For light grease, a damp cloth with a small amount of dish soap works wonders. Dish soap is excellent at cutting through grease. I find that a quick wipe immediately after cooking handles most fresh messes.
Rinse the cloth often. This prevents spreading grime around. After wiping, dry the grates completely. Moisture is cast iron’s enemy. Even small water droplets can lead to rust spots. I use a clean, dry cloth for this step. Sometimes, I even place them back on the stove and turn a burner on low for a minute. This ensures any remaining moisture evaporates.
This daily wipe-down is a preventative measure. It stops food from hardening onto the grate. It also maintains the existing seasoning. This means your deep cleaning sessions will be less frequent. They will also be less intense. A little effort each day goes a long way. It keeps your gas stove grates looking new and performing well. I personally notice a huge difference when I stick to this routine. My grates stay much cleaner, and rust is never an issue.
Deep Cleaning Methods for Stubborn Grime
Sometimes, daily wipe-downs are not enough. Burnt-on food and grease can become tough. When this happens, it is time for a deep clean. There are several effective methods. Choose the one that best suits the level of grime. Always work in a well-ventilated area, especially with stronger cleaners. For serious messes, knowing how to clean stuck-on cast iron can provide more detailed help.
The Soaking Method with Dish Soap and Hot Water
This is often my first choice for stubborn but not extreme grime. It is gentle yet effective.
- Remove and Cool: Take the grates off the stove. Let them cool completely.
- Prepare Soak: Fill a large sink or plastic tub with very hot water. Add a generous amount of dish soap. Use soap that is good at cutting grease.
- Soak: Submerge the cast iron grates in the soapy water. Let them soak for at least 30 minutes. For heavy grime, leave them overnight. The hot water and soap work together. They loosen the stuck-on food and grease.
- Scrub: After soaking, use a stiff nylon brush or a non-abrasive scrub pad. Gently scrub the grates. Focus on areas with burnt-on residue. You will find that most of the grime comes off easily.
- Rinse and Dry: Rinse the grates thoroughly with clean water. Make sure no soap residue remains. Dry them immediately and completely. This prevents rust.
Baking Soda Paste and Vinegar
This method uses the power of a chemical reaction. It is great for cutting through tough, greasy buildup.
- Remove and Cool: Ensure the grates are cool and off the stove.
- Create Paste: Mix baking soda with a small amount of water. Make a thick paste. It should be like toothpaste.
- Apply Paste: Spread the baking soda paste generously over the dirty areas of the grates. Pay extra attention to the thickest grime.
- Spray with Vinegar: Fill a spray bottle with white vinegar. Spray the vinegar directly onto the baking soda paste. It will fizz. This reaction helps lift the grime.
- Let Sit: Let the mixture sit for at least 20-30 minutes. For very stubborn grime, leave it for a few hours or overnight.
- Scrub: Use a nylon brush or non-abrasive scrubber to scrub away the grime. The paste and fizzing action will have softened it. For extremely tough, burnt-on residue, I often refer to dedicated guides on how to clean burnt cast iron.
- Rinse and Dry: Rinse thoroughly to remove all residue. Dry completely right away.
Oven Cleaner Method (Use with Caution)
This is a powerful option for very severe buildup. Use this method as a last resort. Oven cleaner contains strong chemicals. It can strip seasoning and is harsh on skin and lungs.
- Protect Yourself: Wear heavy-duty rubber gloves and eye protection. Work in a very well-ventilated area, preferably outdoors.
- Lay Down Protection: Lay old newspapers or a large plastic sheet on the ground. Place the grates on top.
- Apply Cleaner: Spray oven cleaner evenly over the grates. Follow the product instructions for application and waiting time.
- Wait: Let the cleaner sit for the recommended time. This could be anywhere from 30 minutes to several hours. The cleaner works to dissolve the grease and carbon buildup.
- Scrub and Rinse: Using a stiff nylon brush, scrub off the loosened grime. Be very careful. Rinse the grates thoroughly with plenty of water. Keep rinsing until all cleaner residue is gone.
- Dry and Re-Season: Dry the grates immediately and completely. This method will strip the seasoning. You must re-season the grates after using oven cleaner. (More on re-seasoning below.)
What About Dishwashers? (A Common Mistake)
A common question is whether you can clean gas stove grates in a dishwasher. The answer is generally no for cast iron grates. Dishwashers use harsh detergents and high heat. These can strip the seasoning from cast iron. This leaves the grates vulnerable to rust. It also makes them sticky and less effective. So, while it might seem convenient, avoid putting cast iron grates in the dishwasher. If you’re curious about this common query, you can learn more about how to clean gas stove grates in dishwasher and why it’s usually not recommended for cast iron.
Deep cleaning takes effort, but it is worth it. Your grates will look better and perform better. Always remember to re-season after any deep cleaning. This protects your hard work.
Tackling Rust on Cast Iron Grates
Rust is a common problem for cast iron. It happens when moisture comes into contact with the bare metal. Even a little water left on the grates can start the process. If your gas stove grates show orange or reddish spots, it is rust. Do not worry; rust is usually treatable. The key is to remove it and then protect the grates. For more general advice on dealing with this issue, you can explore guides on how to clean rust from cast iron.
First, assess the rust. If it is light surface rust, you can often scrub it away. For more severe rust, you might need a bit more effort. Always start with the least abrasive method. This protects the grate’s surface.
Method 1: Baking Soda Paste for Light Rust
This method is gentle and effective for minor rust spots.
- Prepare Grates: Ensure the grates are cool and dry.
- Make Paste: Mix baking soda with a little water to form a thick paste. The consistency should be like pancake batter.
- Apply and Wait: Apply the paste generously to the rusted areas. Let it sit for at least an hour. For heavier rust, leave it overnight. The baking soda helps to lift the rust.
- Scrub: Use a stiff nylon brush, an old toothbrush, or a fine steel wool pad (use very gently for rust, only if necessary, and sparingly). Scrub the rusted areas. The rust should start to come off.
- Rinse and Dry: Rinse the grates thoroughly with warm water. Dry them immediately and completely. I often use paper towels and then let them air dry for a bit longer.
Method 2: Vinegar Soak for Moderate Rust
Vinegar’s acidity makes it good for dissolving rust. This method works well for more widespread rust.
- Prepare Solution: Fill a large plastic tub or bucket with equal parts white vinegar and water.
- Submerge Grates: Place the rusted cast iron grates into the vinegar solution. Make sure they are fully submerged.
- Soak Time: Let the grates soak. For light rust, 30 minutes to an hour might be enough. For moderate rust, you can soak them for a few hours. Do NOT leave them for too long. Overnight soaking can damage the cast iron itself. Keep an eye on them.
- Check and Scrub: After soaking, remove the grates. Use a stiff nylon brush or a non-abrasive scrubber. Scrub away the loosened rust. You may need to use a little elbow grease.
- Rinse and Dry: Rinse the grates thoroughly with clean water. This removes all vinegar residue. Dry them completely and immediately. You cannot over-dry cast iron after a vinegar soak.
Method 3: Potato and Salt for Targeted Rust (Niche but Effective)
This is an old trick. It is good for small, isolated rust spots.
- Cut Potato: Cut a potato in half.
- Add Salt: Sprinkle a generous amount of coarse salt onto the cut surface of the potato. The salt acts as a gentle abrasive.
- Rub Rust: Rub the potato, salt-side down, over the rusted area. The oxalic acid in the potato combined with the salt helps break down the rust.
- Repeat if Needed: Continue rubbing until the rust disappears. You might need to cut off the used part of the potato and add more salt.
- Rinse and Dry: Rinse the grate with water and dry it completely.
After any rust removal, your cast iron grates will likely have lost some or all of their seasoning. This is normal. It is important to re-season them right away. This protects the newly exposed metal. It prevents new rust from forming. Skipping this step means the rust will come back quickly. I always make sure to re-season. It is the final step in truly conquering rust.
The Art of Re-Seasoning Cast Iron Grates
After deep cleaning or rust removal, your cast iron gas stove grates will need re-seasoning. This is not just an optional step. It is crucial. Seasoning creates a non-stick surface. It also protects the metal from rust and corrosion. Think of it as painting a car. You clean it, then you protect the paint. For cast iron, seasoning is that protective layer. It is a simple process, but it requires patience and proper technique. Many of the principles used for grates are similar to those for other cast iron items; for instance, tips for re-seasoning often overlap with advice on how to clean cast iron skillet.
Why Re-Season?
When you deep clean cast iron, especially with harsh chemicals or acidic solutions like vinegar, you strip away the layer of polymerized oil. This layer is called seasoning. Without it, the bare cast iron is exposed. Exposed cast iron is highly reactive. It will rust quickly, even with slight moisture. Re-seasoning rebuilds this protective barrier. It also makes your grates naturally non-stick, which helps with future cleaning. A well-seasoned grate looks sleek and black. It feels smooth, not rough.
Step-by-Step Re-Seasoning Process
- Ensure Grates Are Bone Dry: This is the most critical step. Any moisture will prevent proper seasoning and can cause rust. After cleaning, you can place the grates in a warm oven (around 200°F or 93°C) for 15-20 minutes. This ensures every bit of moisture evaporates. Let them cool slightly before proceeding.
- Choose Your Oil: Select a high smoke point oil. Good choices include:
- Flaxseed oil (often considered the best for a durable seasoning, but can be expensive)
- Grapeseed oil
- Vegetable oil
- Canola oil
- Shortening (like Crisco) Avoid olive oil or butter, as they have low smoke points and will turn sticky. I usually use grapeseed oil.
- Apply a VERY Thin Layer of Oil: Pour a small amount of oil onto a paper towel or a clean, lint-free cloth. Wipe down every surface of the cast iron grate. Cover the top, bottom, and sides. The key is “very thin.” Think of it as buffing, not coating. You want to wipe off any excess oil. If you leave too much oil, it will become sticky and gummy. This is a common mistake. I always try to wipe it until it looks dry.
- Bake the Grates (Oven Method - Recommended):
- Preheat your oven to 450-500°F (232-260°C).
- Place a sheet of aluminum foil or an old baking sheet on the bottom rack of your oven. This will catch any oil drips.
- Place the grates upside down directly on the oven racks. This helps the oil drain evenly.
- Bake for one hour. During this time, the oil will polymerize, bonding to the cast iron. You might notice a bit of smoke; this is normal. Ensure good ventilation.
- After one hour, turn off the oven. Let the grates cool down inside the oven completely. Do not open the oven door. This slow cooling helps the seasoning set.
- Repeat for Best Results: For a really durable seasoning, repeat steps 3 and 4 multiple times (3-5 times is ideal). Each layer adds to the protective coating. I usually do at least two or three layers. It builds up over time.
Maintaining the Seasoning
Once your grates are seasoned, maintain them by drying them completely after every wash. Avoid harsh soaps for daily cleaning. A quick wipe with a damp cloth and immediate drying is usually enough. Over time, regular cooking will also contribute to and strengthen the seasoning layer. A well-seasoned grate is easier to clean and resists rust. It is truly the heart of cast iron care.
Maintaining Your Grates for Long-Lasting Shine
Maintaining your cast iron gas stove grates is an ongoing process. It extends their lifespan. It also keeps your stove looking great. You have already learned about daily cleaning and re-seasoning. Now, let us talk about other tips for long-term care. These simple habits make a big difference. They prevent common problems like rust and stubborn buildup. They also make your cooking experience more enjoyable.
Regular Checks and Quick Fixes
Make it a habit to inspect your grates regularly. Look for any signs of rust or excessive buildup. Catching problems early makes them easier to fix. If you see a small rust spot, address it right away. Use the baking soda paste method. Do not let rust spread. For a more comprehensive approach to keeping your entire cooking area clean, consider looking into tips for how to clean gas range.
Wipe spills as soon as the grates cool. This prevents food from hardening. Fresh spills are always easier to clean than dried ones. This simple act reduces your deep cleaning efforts. It also prevents stains from setting into the seasoning.
The Role of Proper Drying
I cannot stress this enough: always dry your cast iron grates completely. After washing, use a clean towel to hand-dry them. Then, place them back on the stove. Turn a burner on low for a minute or two under each grate. This ensures any remaining moisture evaporates. This step is a powerful rust preventative. Many people neglect it, leading to frustrating rust issues. Moisture is the number one enemy of cast iron.
Avoid Harsh Chemicals
As discussed, steer clear of abrasive cleaners or steel wool. These products strip the seasoning. They leave the cast iron exposed. This makes it vulnerable to rust. Stick to dish soap, baking soda, and vinegar for most cleaning tasks. Even for overall cooktop cleaning, gentler methods are often preferred; you can find more details on how to clean cooktop grates for various materials.
Re-Season as Needed
If your grates start to look dull or food sticks more often, they might need re-seasoning. Heavy use can wear down the seasoning over time. Any deep cleaning will require re-seasoning. Think of it as conditioning your hair. It needs regular care to stay healthy. A well-seasoned grate is easier to clean. It also protects your investment.
Proper Storage (If Removing Grates)
Some people remove grates for cleaning their entire stove top or for storage. If you store your grates, ensure they are clean and completely dry. Store them in a dry place. Avoid humid areas. Storing them neatly on the stove is often the best option for daily use.
By following these maintenance tips, your cast iron gas stove grates will stay in excellent condition for years. They will look good. They will also perform reliably. These habits become second nature over time. They save you effort and money in the long run.
FAQ Section
Q1: How often should I clean my cast iron gas stove grates? You should wipe down your cast iron gas stove grates after every use for light spills and grease. This prevents buildup. Deep cleaning is needed less often. Aim for a deep clean every few weeks or months. It depends on how much you cook and how messy your cooking gets. Regular daily maintenance reduces the need for frequent deep cleaning sessions.
Q2: Can I put my cast iron grates in the dishwasher? No, you should not put cast iron grates in the dishwasher. Dishwasher detergents are too harsh. They will strip the seasoning off the cast iron. This leaves the grates unprotected. They will then rust easily. Always hand wash and dry cast iron grates to preserve their seasoning.
Q3: What should I do if my cast iron grates start to rust? If your cast iron grates show rust, you can clean it with a baking soda paste or a vinegar soak. Mix baking soda with water to make a paste, apply it to the rust, let it sit, then scrub. For heavier rust, soak the grates in a 50/50 vinegar and water solution for a short time. Always re-season the grates immediately after removing rust.
Q4: How do I re-season my cast iron stove grates? To re-season cast iron grates, first ensure they are completely dry. Apply a very thin, even layer of a high smoke point oil (like grapeseed or flaxseed oil) to all surfaces. Wipe off any excess. Bake the grates upside down in an oven at 450-500°F (232-260°C) for one hour. Let them cool in the oven. Repeat this process 3-5 times for a durable seasoning.
Q5: Can I use steel wool or abrasive scrubbers on cast iron grates? No, avoid using steel wool or highly abrasive scrubbers on cast iron grates for general cleaning. These tools can scratch the surface. They also strip away the crucial seasoning layer. This makes the grates prone to rust. Stick to nylon brushes, non-abrasive pads, or old toothbrushes for scrubbing.
Q6: Why do my cast iron grates feel sticky after cleaning? If your cast iron grates feel sticky after cleaning, it means too much oil was left on them during the re-seasoning process. The excess oil turned gummy instead of polymerizing. To fix this, you can try to re-bake the grates at 450-500°F for an hour. If the stickiness persists, you may need to clean the grates again and re-season with an even thinner layer of oil.
Conclusion
Keeping your gas stove grates made of cast iron clean is simpler than it seems. It requires consistent effort, but the payoff is big. You get a clean, functional kitchen. You also extend the life of your valuable grates. We have covered everything from daily cleaning to deep dives. We tackled stubborn burnt-on food. We also faced the challenge of rust head-on.
Remember the power of simple tools. Dish soap, baking soda, and a good brush are your best friends. The most important step after any deep clean is always re-seasoning. This protects your cast iron. It ensures they stay non-stick and rust-free. Regular drying is also crucial. It is the best defense against corrosion.
By following these steps, your cast iron gas stove grates will look great. They will perform well for years to come. Take pride in your kitchen. A clean stove makes cooking more enjoyable. Start today. Give your cast iron grates the care they deserve. Your sparkling kitchen awaits.
- cast iron cleaning
- gas stove grates
- stove maintenance
- kitchen cleaning tips
- deep cleaning

Todd Martin
Senior Writer
With over 15 years of experience in home renovation and design, I started HEG to share what I’ve learned with homeowners who want to create spaces that are both beautiful and functional. I’ve always believed in a hands-on approach, and over the years, I’ve picked up practical solutions that actually work. Through HEG, I aim to make home improvement more approachable, sharing real tips that help you create a home you truly love.