· Todd Martin · Personal Care Tools · 19 min read
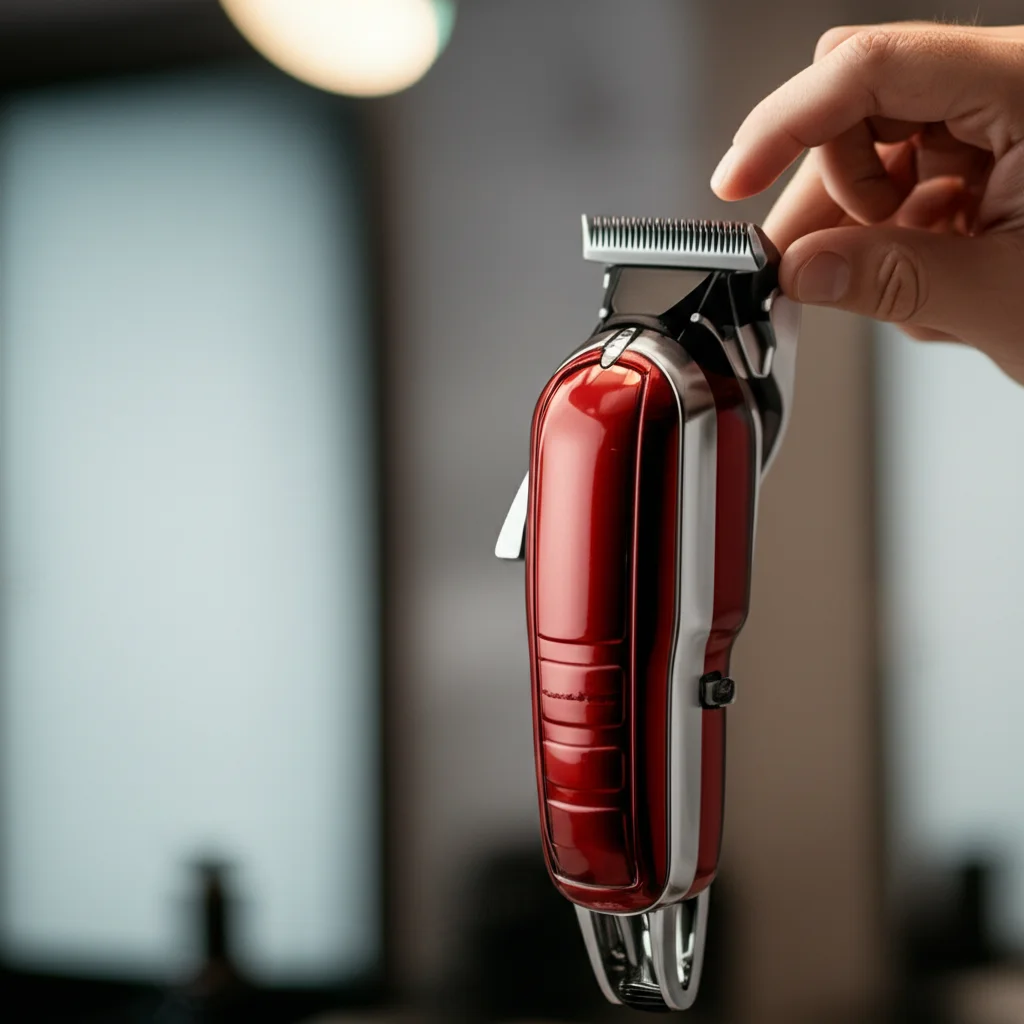
How To Clean Wahl Clippers
Clean Wahl Clippers: Essential Care for Peak Performance
You probably rely on your Wahl clippers for crisp haircuts and precise grooming. These tools are fantastic, but like any precision instrument, they need regular care. Ignoring clipper cleaning can lead to dull blades, poor cuts, and even skin irritation. Dirty clippers gather hair, skin cells, and oil. This buildup makes the motor work harder, shortens the clipper’s life, and can spread germs. Learning how to clean Wahl clippers properly is simple and crucial for getting great results every time.
In this guide, I will share steps to keep your Wahl clippers in top condition. We will cover everything from quick daily cleaning to thorough deep cleaning procedures. You will learn about the right tools to use, how to oil your blades, and how to store your clippers for longevity. By following these easy tips, you ensure your clippers perform like new for years.
Takeaway
- Clean Wahl clippers after every use to remove hair debris and apply oil.
- Perform a deep clean regularly to remove stubborn buildup and sanitize blades.
- Use proper clipper oil to lubricate blades and prevent rust.
- Store clippers in a dry, safe place to protect them from damage and dirt.
- Regular cleaning extends clipper lifespan and ensures hygienic cuts.
To clean Wahl clippers, first brush away loose hair, then use a disinfectant spray on the blades. After this, apply a few drops of clipper oil to the blade teeth and turn the clippers on briefly. This routine removes debris, sanitizes, and lubricates the blades, keeping them sharp and ready for the next use.
Why Cleaning Wahl Clippers Matters for Every Cut
Taking care of your Wahl clippers is not just about keeping them shiny. It is about ensuring performance and safety. When you consistently clean your clippers, you make sure they cut smoothly and accurately. This practice also prevents unsanitary conditions. Unclean clippers can cause skin problems.
Regular maintenance extends the life of your valuable tool. It saves you money in the long run. Let me explain why this simple habit makes a big difference.
Hygiene and Health Benefits
Clippers touch skin and hair directly. Hair, dead skin cells, and oil build up quickly on blades and inside the clipper housing. This creates a breeding ground for bacteria and fungi. Using dirty clippers can lead to skin irritations, infections, or ingrown hairs. This is especially true if multiple people use the clippers.
Regular cleaning removes these harmful microbes. Disinfecting blades is a key step in this process. It helps protect both you and anyone else using the clippers. Think of it as a small act of self-care. It prevents unwanted health issues.
Maintaining Cutting Performance
Dirty blades are dull blades. Hair and debris caught between the cutting teeth make the blades drag and pull at hair instead of cutting it cleanly. This results in an uneven haircut and discomfort. You might notice your clippers feeling sluggish or struggling to cut through thicker hair. This often means they need a good cleaning.
Clean blades glide effortlessly. They cut hair with precision and ease. Proper lubrication, part of the cleaning routine, also ensures the blades move freely. This smooth operation gives you a professional-looking cut every time. It also prevents frustration during your grooming session.
Extending Clipper Lifespan
Dirt, hair, and lack of oil can wear down your clipper’s internal parts quickly. The motor has to work harder to push dirty, unlubricated blades. This causes the motor to overheat and eventually burn out. Rust can also form on uncleaned or wet blades, damaging them beyond repair.
A clean clipper is a happy clipper. Regular maintenance reduces friction and wear on the blades and motor. It prevents rust and corrosion. By investing a few minutes in cleaning, you significantly extend the life of your Wahl clippers. This keeps your grooming tool working efficiently for many years. To learn more about general clipper care, check out our guide on how to clean hair clippers.
Essential Tools and Supplies for Cleaning Wahl Clippers
Before you start cleaning your Wahl clippers, gather the right supplies. Having everything ready makes the process quick and efficient. You do not need many items, but the right ones make a big difference. These tools help you remove hair, sanitize, and lubricate your clippers effectively.
Having a dedicated cleaning kit ensures you are always ready for maintenance. Let me walk you through the essential items.
Basic Cleaning Kit
You likely have some of these items at home already. These are the absolute necessities for routine clipper cleaning. They help get rid of most of the hair and debris. Always make sure these tools are clean themselves before you use them.
- Small Cleaning Brush: Most Wahl clippers come with a small brush. This is perfect for sweeping loose hair from the blades and housing. If you lost yours, an old toothbrush or a stiff-bristled paintbrush works well.
- Soft Cloth or Paper Towels: You will need these to wipe down the clipper body and blades. A microfiber cloth is good for catching fine debris. Paper towels are handy for absorbing oil or disinfectant.
- Clipper Oil: This is critical. Wahl clippers require specific clipper oil. It lubricates the blades, reduces friction, and prevents rust. Do not use household oils like cooking oil, as they can gum up the blades.
- Disinfectant Spray or Solution: A professional clipper disinfectant spray is best. Alternatively, you can use rubbing alcohol (isopropyl alcohol) in a spray bottle. This kills bacteria and germs on the blades.
Advanced Cleaning Agents
For deeper cleaning or specific issues, you might need a few extra items. These are not for every-use cleaning but come in handy for thorough maintenance. They help break down stubborn grime and fully sanitize. Consider adding these to your cleaning arsenal.
- Screwdriver (Small Phillips or Flathead): Some Wahl clipper models allow you to remove the blade set for deep cleaning. A small screwdriver helps you detach and reattach the blades safely. Check your clipper’s manual for specific instructions.
- Canned Air: This is great for blowing out fine hairs and dust from inside the motor housing. It can reach areas your brush cannot. Use it carefully and from a distance to avoid damaging sensitive components.
- Blade Wash/Clipper Cleaner Solution: These specialized solutions are designed to quickly clean, disinfect, and lubricate blades. You can often dip the running blades directly into the solution. This is a quick and effective way to clean and refresh your blades. They are especially useful for busy barbers or regular home users.
With these tools in hand, you are well-equipped to keep your Wahl clippers in prime condition.
Daily Routine: How to Clean Wahl Clippers After Each Use
Cleaning your Wahl clippers after every use is the most important step for their longevity and performance. This quick routine prevents hair buildup and ensures the blades stay sharp and hygienic. It only takes a few minutes, but it makes a huge difference. I follow these steps religiously after every haircut.
This routine is simple. It makes your clippers ready for the next use.
Clearing Hair Debris
The first thing to do is remove all the loose hair from the clipper blades and housing. Hair is the most common culprit for slowing down your clippers. It can get packed into the blade mechanism. This causes drag and can even damage the motor over time.
- Unplug the Clippers: Always unplug your corded clippers before cleaning. For cordless models, turn them off. This prevents accidental activation and ensures your safety.
- Brush Away Loose Hair: Use the small cleaning brush that came with your Wahl clippers. Brush the blade teeth in different directions to dislodge all trapped hairs. Pay attention to the area between the stationary blade and the cutting blade. Also, brush the clipper body, especially around the blade attachment point.
- Tap Gently: Hold the clippers upside down and gently tap them against a hard surface (like a countertop or trash can). This helps dislodge any remaining hidden hairs from the blade area and inside the housing.
Disinfecting Blades
Once the hair is gone, the next step is to sanitize the blades. This kills bacteria and ensures your clippers are hygienic for the next cut. This is vital, especially if you share your clippers. It is also good practice even for personal use.
- Spray with Disinfectant: Hold the clipper blades facing down. Spray a professional clipper disinfectant directly onto the blades. Ensure the spray covers all the teeth and the flat surface of the blades. Alternatively, you can use rubbing alcohol (isopropyl alcohol) in a spray bottle.
- Let It Sit (If Required): Some disinfectants require a specific contact time to be effective. Check the product label for instructions. If using rubbing alcohol, it evaporates quickly.
- Wipe Blades Clean: Use a clean, soft cloth or paper towel to wipe down the blades thoroughly. Remove any residue from the disinfectant. Make sure the blades are dry before proceeding. Never let the blades air dry with disinfectant on them, as it can cause corrosion.
Oiling for Smooth Operation
Oiling is a vital step in daily cleaning. It lubricates the blades, reduces friction, and prevents rust. Dry blades cause excessive heat, wear, and pulling of hair. Using the right oil makes your clippers run smoothly and extends their life.
- Apply Clipper Oil: With the clippers unplugged or turned off, apply 2-3 drops of Wahl clipper oil across the top of the cutting blades. Distribute the drops evenly. Place one drop on each corner of the blade, and one in the center.
- Turn Clippers On Briefly: Plug in (or turn on) your clippers. Let them run for about 10-15 seconds. This allows the oil to spread evenly between the top and bottom blades. You might see a fine line of oil on the cutting edge. This indicates good distribution.
- Wipe Excess Oil: Turn off the clippers. Use a clean, dry cloth to wipe away any excess oil from the outside of the blades and clipper body. Too much oil can attract more hair and dust.
Following these steps after every single use ensures your Wahl clippers are always clean, sharp, and ready for your next grooming task. This routine also applies to specialized grooming tools. You can apply similar cleaning methods when you learn how to clean barber clippers.
Deep Cleaning Wahl Clippers: When and How to Disassemble
While daily cleaning keeps your Wahl clippers running well, a deep clean is necessary periodically. Over time, stubborn hair, product residue, and oils can build up deep within the blade set and even inside the clipper housing. This hidden grime can lead to performance issues that a simple brush and oiling cannot fix. Deep cleaning restores your clippers to their best condition.
I typically perform a deep clean every few months, or more often if I use my clippers frequently.
Identifying When Deep Cleaning is Needed
How do you know it is time for a deep clean? Your clippers will often tell you. Look for these signs:
- Reduced Cutting Performance: Even after daily cleaning and oiling, the clippers still pull, snag, or leave uneven patches. This indicates deep-seated debris.
- Increased Noise or Vibration: If your clippers become louder than usual or vibrate excessively, it suggests friction from hidden buildup. The motor might also sound strained.
- Visible Grime Under Blades: You might see compacted hair or gunk when you look closely under the stationary blade. This is hard to reach with just a brush.
- Overheating: Clippers that get unusually hot during use, even after oiling, often have internal friction caused by accumulated dirt.
- Unpleasant Odor: A faint musty or stale smell can indicate bacterial growth from trapped moisture and organic matter.
Step-by-Step Blade Removal
Most Wahl clippers allow for blade removal. This makes deep cleaning possible. Always refer to your specific Wahl clipper manual for exact instructions, as models can differ.
- Unplug and Prepare: First, unplug your clippers from power. Place a towel or paper towels on your workspace. This catches any small parts and keeps your area clean.
- Locate Blade Screws: On most Wahl clippers, you will see two small screws holding the blade set in place. They are usually Phillips head screws.
- Loosen Screws: Use a small Phillips head screwdriver to loosen both screws. Do not remove them completely yet. Just loosen them enough so that the blades can be adjusted or removed.
- Remove Blades (Carefully): Gently slide the top cutting blade forward and off the stationary bottom blade. Be careful not to lose any small springs or washers that might be underneath. Some models may have a hinged blade assembly that just flips open. Lift the entire blade set away from the clipper body. Keep the parts together to avoid mixing them up.
Thorough Component Cleaning
With the blades removed, you can access areas that are normally hidden. This is where the real deep cleaning happens. This step removes even the most stubborn buildup.
- Clean Underneath Blades: Use your cleaning brush to sweep away any hair or debris from the area where the blades attach to the clipper body. This area often collects a lot of gunk. You can also use canned air to blow out fine particles here.
- Clean Both Blade Parts: Use your cleaning brush to scrub both the cutting blade and the stationary blade thoroughly. Pay extra attention to the teeth and the grooves. If there is stubborn residue, you can use a small amount of mild soap and water on the blades only, then rinse and dry them immediately and completely. Make sure they are perfectly dry before reassembly. Alternatively, a specialized blade wash or a cotton swab dipped in rubbing alcohol can clean tight spots.
- Sanitize Blades: Once clean and dry, spray both blade pieces with a clipper disinfectant. Let it sit for the recommended time, then wipe dry with a clean cloth.
- Reassemble Blades: Carefully align the top cutting blade over the stationary bottom blade. Make sure the small adjusting lever (if present) is correctly positioned. Place the blade set back onto the clipper body. Gently tighten the two screws, making sure the blades are aligned properly. The top blade should be slightly behind the bottom blade’s teeth to prevent cutting skin. If you are unsure about proper alignment, refer to your Wahl clipper manual. Correct alignment is important for both safety and cutting performance. For more general advice on maintaining these tools, read about how to maintain hair clippers.
Oiling Wahl Clippers: The Key to Longevity and Efficiency
Oiling your Wahl clippers is just as important as cleaning them. It is the lifeblood of your clipper’s motor and blades. Without proper lubrication, even the cleanest clippers will perform poorly. They can wear out quickly. Think of it like changing the oil in your car; it keeps everything running smoothly.
I cannot stress enough how vital this step is. It ensures a sharp cut every time.
Why Oiling is Crucial
Oiling serves several critical functions for your clippers:
- Reduces Friction and Heat: When clipper blades move rapidly, they create friction. This friction generates heat. Oil creates a thin barrier between the two moving blades. This reduces friction significantly. Less friction means less heat buildup.
- Prevents Rust and Corrosion: Clipper blades are often made of steel. Steel can rust when exposed to moisture. Clipper oil forms a protective layer on the metal. This barrier repels moisture and prevents rust. Rust makes blades dull and rough.
- Ensures Smooth Operation: Lubricated blades glide effortlessly against each other. This results in a smooth, quiet cut without pulling or snagging hair. It makes the cutting experience more comfortable for the person receiving the haircut.
- Extends Motor Life: With less friction on the blades, the clipper motor does not have to work as hard. This reduces strain on the motor. It prevents premature wear and burnout. A well-oiled clipper runs more efficiently and lasts longer.
Choosing the Right Oil
Not all oils are suitable for clippers. Using the wrong type of oil can damage your blades, attract dirt, or even be unsafe.
- Wahl Clipper Oil: The best choice is always the oil specifically designed for clippers, like the Wahl Clipper Oil that usually comes with your device. This oil is light, non-toxic, and formulated to work effectively with clipper mechanisms.
- Mineral Oil: In a pinch, a pure, light mineral oil can be used. However, avoid heavy mineral oils or those with added fragrances or additives.
- Avoid Household Oils: Never use cooking oils (like olive or vegetable oil), WD-40, motor oil, or hair products. These oils are too thick, can gum up the blades, attract lint and hair, or contain chemicals harmful to your clippers or skin. They can also become rancid.
Proper Oiling Technique
Correct application of oil is key to its effectiveness. Follow these simple steps for optimal lubrication:
- Clean Blades First: Always oil clean blades. Apply oil after you have brushed away hair and disinfected the blades. Oil applied to dirty blades will simply trap the dirt.
- Apply Drops: With the clipper blades facing downwards, apply 2-3 drops of clipper oil across the top of the cutting blades. Place one drop on each of the outer corners of the blade and one drop in the center. Some barbers also put a drop on the heel of the blade on each side.
- Turn Clippers On: Plug in your corded clippers or turn on your cordless ones. Let them run for about 10-15 seconds. This allows the oil to spread evenly between the top and bottom blades, covering all moving parts. You should see a thin film of oil covering the blade surface.
- Wipe Excess: Turn off the clippers. Use a clean, dry cloth or paper towel to wipe off any excess oil from the outside of the blades and the clipper body. Too much oil can attract more hair and dust, leading to new buildup. A light film is all you need.
Make oiling a part of your routine after every use, or at least after every few uses. This ensures your Wahl clippers stay in prime condition and deliver consistent, smooth cuts. This attention to detail applies to all your grooming tools. Regular oiling helps you learn how to better care for your barber clippers over time. You will always have a powerful tool ready.
Sanitizing and Storing Wahl Clippers Properly
Beyond cleaning and oiling, sanitization and proper storage are crucial for clipper hygiene and longevity. Sanitizing ensures your clippers are free from harmful bacteria, which is especially important if you share them or use them professionally. Correct storage protects your investment from damage and environmental factors. I always make sure these steps are part of my overall clipper care.
These practices ensure your clippers remain safe and functional for years.
Effective Sanitization Methods
Sanitization kills germs that cleaning alone might miss. It is a vital step for hygienic grooming.
- Clipper Disinfectant Spray: The easiest and most effective method is using a professional-grade clipper disinfectant spray. These sprays are formulated to kill bacteria, viruses, and fungi on contact.
- Application: After brushing off hair, spray the disinfectant liberally onto the clipper blades. Ensure complete coverage.
- Dwell Time: Follow the product’s instructions for the recommended “dwell time” – how long the liquid needs to stay on the surface to be effective. This is usually 10 minutes.
- Wipe Dry: After the dwell time, wipe the blades thoroughly with a clean, dry cloth. Never let disinfectant air dry on blades, as some solutions can be corrosive over time.
- Rubbing Alcohol (Isopropyl Alcohol): For a quick sanitization, rubbing alcohol (70% or 90%) can be effective.
- Application: Spray or wipe rubbing alcohol directly onto the blades.
- Evaporation: Alcohol evaporates quickly, so it does not leave residue. It also helps dry the blades completely, which prevents rust.
- Note: While good for quick surface sanitization, professional disinfectants often offer broader protection against a wider range of pathogens. Alcohol might not be effective against all types of viruses or spores.
Remember, always sanitize your clippers after each use, especially before and after cutting someone else’s hair. This prevents cross-contamination and maintains a safe grooming environment.
Best Practices for Storage
How you store your Wahl clippers affects their lifespan and readiness for use. Improper storage can lead to damage, dust accumulation, or even rust.
- Clean and Dry Before Storing: Always ensure your clippers are thoroughly cleaned, disinfected, and completely dry before putting them away. Storing wet clippers is a primary cause of rust.
- Original Case or Dedicated Pouch: If your Wahl clippers came with a hard case or a soft pouch, use it. These cases provide protection against dust, dirt, and accidental bumps or drops. They also keep your clipper accessories (guards, oil, brush) organized.
- Cool, Dry Place: Store your clippers in a cool, dry environment. Avoid storing them in bathrooms where humidity levels are high. Humidity promotes rust formation. A drawer in your bedroom or a dedicated grooming cabinet is ideal.
- Protect the Cord: If your clippers are corded, coil the cord loosely. Do not wrap it too tightly around the clipper body, as this can damage the internal wiring over time. Use a cord wrap or Velcro strap to keep it neat.
- Avoid Extreme Temperatures: Do not leave clippers in direct sunlight, in a hot car, or near extreme heat sources. Extreme temperatures can affect the motor and battery life (for cordless models).
By following these sanitization and storage tips, you ensure your Wahl clippers remain hygienic, protected, and ready to deliver excellent cuts for many years. Proper care helps preserve all your barber tools. It’s similar to caring for other devices, as you would when caring for your barber clippers.
Troubleshooting Common Cleaning-Related Clipper Issues
Even with regular cleaning, you might sometimes encounter issues with your Wahl clippers. Many common problems stem from incomplete cleaning or improper maintenance. Do not worry; most of these issues are easy to fix once you know the cause. I have dealt with these situations many times myself.
Let’s look at some frequent problems and their solutions.
Dull Blades After Cleaning
You have cleaned your clippers, but they still do not cut sharply. They might pull hair instead of cutting it cleanly. This can be frustrating, but it usually points to a few specific issues.
- Issue: Blades are not sharp, or they are misaligned.
- Cause:
- Incorrect Blade Alignment: After deep cleaning or reassembly, the blades might not be perfectly aligned. If the top cutting blade extends too far beyond the bottom stationary blade, it will pull hair
- Wahl clippers
- clipper cleaning
- hair clipper maintenance
- blade care
- personal grooming
- hygiene
- barber tools

Todd Martin
Senior Writer
With over 15 years of experience in home renovation and design, I started HEG to share what I’ve learned with homeowners who want to create spaces that are both beautiful and functional. I’ve always believed in a hands-on approach, and over the years, I’ve picked up practical solutions that actually work. Through HEG, I aim to make home improvement more approachable, sharing real tips that help you create a home you truly love.