· Davia Murnell · Home Maintenance · 18 min read
How To Clean Window Fan
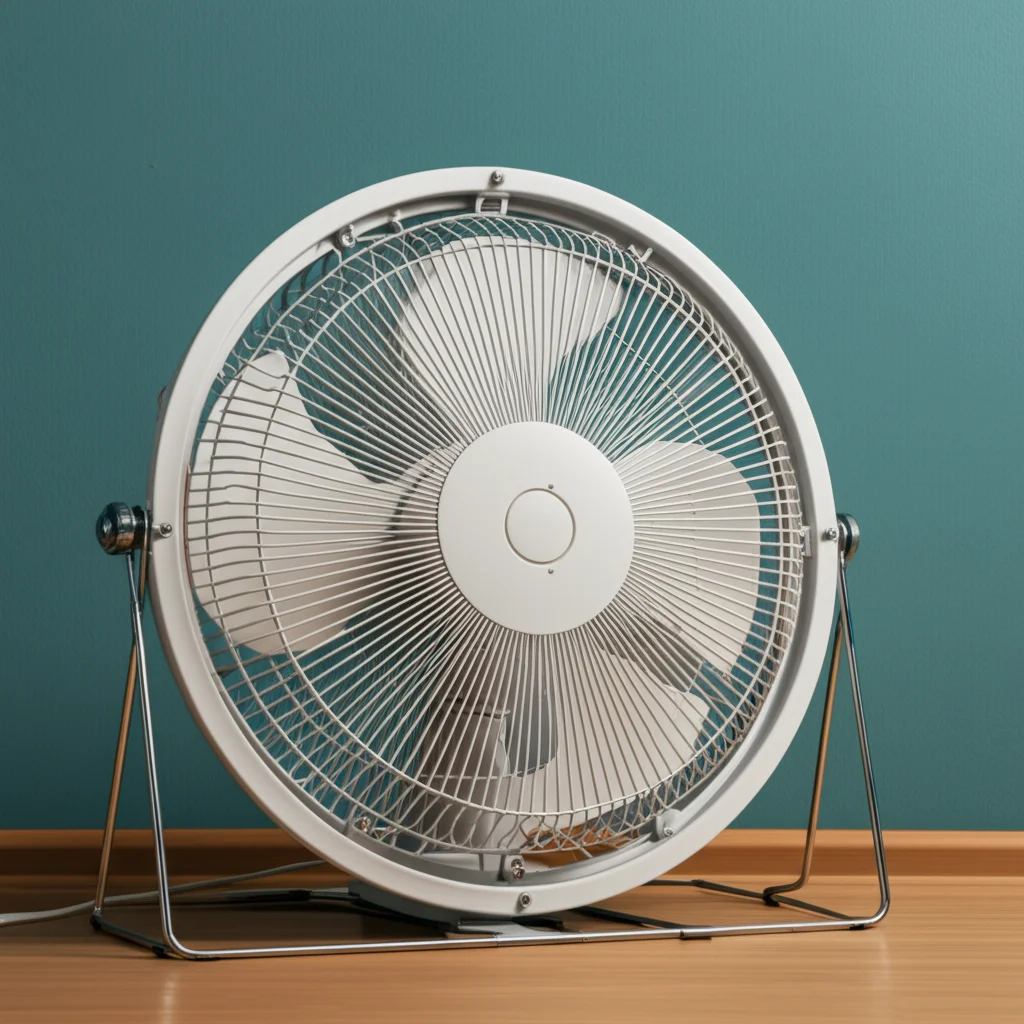
Clean Your Window Fan: A Simple Guide to Better Air
Is your window fan struggling to move air? Does it look caked in dust and grime? A dirty window fan does not work well. It can also spread dust and allergens throughout your home. Knowing how to clean a window fan is crucial for efficiency and air quality. This guide provides step-by-step instructions. We will cover everything from basic dusting to a deep clean. You will learn what tools to use and how to handle different fan types. Get ready to breathe easier with a sparkling clean fan. Keeping your fan clean helps it perform better. It also makes your home a healthier place. Let’s get started on bringing your window fan back to life.
Takeaway:
- Regularly clean your window fan for better performance and air quality.
- Always unplug the fan before starting any cleaning process.
- Use appropriate tools and gentle cleaners to avoid damage.
- Address dust, stubborn grime, and potential mold for a healthier environment.
- Allow all parts to dry completely before reassembling and using the fan.
To clean a window fan, first unplug it and disassemble any removable parts like the grille. Use a vacuum or brush to remove loose dust. Then, wipe blades and housing with a damp cloth and mild cleaner. For stubborn grime, use a stronger solution. Let all parts dry completely before reassembling and plugging it back in.
Why Clean Your Window Fan? Benefits of a Clean Unit
A clean window fan offers many advantages beyond just a nice look. First, it greatly improves air quality. Over time, window fans collect a lot of dust, pollen, and pet dander from the air they pull in. When the fan runs, it can blow these particles around your room. This makes your indoor air dirty. Cleaning the fan removes these trapped allergens. This results in cleaner, fresher air for you to breathe. A clean fan helps people with allergies or asthma feel better.
Second, a clean fan works more efficiently. Dust build-up on fan blades and motor parts makes the fan work harder. It reduces the fan’s ability to move air. This extra effort can also use more electricity. By cleaning the blades, the fan can spin freely. It moves air more easily and uses less power. This can save you money on your energy bills.
Third, cleaning helps extend your fan’s lifespan. Dust and debris can clog the motor. This causes it to overheat. Overheating can damage the fan’s internal components. Regular cleaning prevents this problem. It keeps the motor running cool and smooth. This means your fan will last longer. You will not need to replace it as often. Think of it as preventative care for your appliance.
Finally, a clean fan operates more quietly. Grime on the blades can create imbalance. This leads to wobbling and strange noises. Loose dust can also rub against moving parts. This adds to the noise. Cleaning removes these sources of irritation. Your fan will run smoothly and quietly. You will enjoy a peaceful home. This is important for rest or concentration. Removing dust from any fan type is a good practice for these reasons. You can learn more about general fan cleaning here.
Gathering Your Tools: What You Need for Fan Cleaning
Before you start cleaning your window fan, gather all the necessary supplies. Having everything ready makes the process smoother. You will save time and avoid interruptions. Most of these items are common household cleaning tools. You probably have many of them already.
First, you will need a vacuum cleaner with a brush attachment. This helps remove loose dust quickly. A soft-bristled brush or an old toothbrush is also useful. These are good for reaching tight spots and dislodging stubborn dirt. Next, prepare some cleaning cloths or microfiber towels. You will need a few: one for wet cleaning and one for drying.
For cleaning solutions, start with mild dish soap and warm water. This mixture is effective for general dirt and grime. For more stubborn stains or mold, you might need white vinegar or a gentle all-purpose cleaner. I often use a mix of equal parts water and white vinegar. This works well for many surfaces, including window areas. You can see how vinegar helps clean various parts of your home by checking out articles like how to clean window sills or how to clean glass with vinegar.
You should also have a screwdriver set handy. Many window fans have grilles held by screws. You might need to remove them for a thorough cleaning. A small bucket or basin for mixing cleaning solutions is also helpful. Finally, consider wearing gloves to protect your hands from dirt and cleaning agents. Having the right tools makes the job much easier and safer.
Safety First: Essential Precautions Before You Start
Safety is the most important step before you begin cleaning your window fan. Ignoring safety can lead to electric shock or injury. Always make sure the fan is completely safe before touching any parts. I always start by double-checking this vital step. It only takes a second and can prevent serious accidents.
First, and most critically, unplug the window fan from the electrical outlet. This cuts off all power to the unit. Do not just turn the fan off with its switch. The switch only controls the fan’s operation, not the power supply to the unit itself. Pull the plug firmly from the wall socket. This ensures no electricity can reach the fan while you are working on it.
After unplugging, wait a few moments for the blades to completely stop spinning. Even after power is cut, momentum can keep them moving for a short time. Touching moving blades can cause serious injury. Be patient and let them come to a full stop.
If your fan has a battery backup or a remote power source, disconnect that too. Some advanced fans might have these features. Always consult your fan’s user manual if you are unsure about any power sources. The manual will provide specific safety warnings and disassembly instructions for your model. Reading the manual is a smart move. It can tell you how to safely remove parts without causing damage. Similar safety steps are vital when cleaning other window appliances, like learning how to clean a window AC unit. Ensuring power is off prevents accidental starts. It also protects you from electrical hazards. Never try to clean a fan while it is still plugged in.
Step-by-Step Guide: Cleaning a Standard Window Fan
Cleaning your window fan involves a few simple steps. Following them in order helps ensure a thorough job. I find breaking it down makes the task less daunting. We will focus on a standard twin or single fan that fits into your window opening.
Removing the Fan from the Window
First, carefully remove the fan from your window opening. Window fans often have expandable side panels. Retract these panels inward. Gently lift the fan out of the window frame. Place it on a stable, flat surface like a workbench or old towel on the floor. This provides a safe area to work. Make sure you have good lighting to see all the dust and grime. You can also clean the window sill now if you wish.
Disassembling the Grille
Most window fans have a front grille that protects the blades. You need to remove this grille to access the blades. Look for screws around the edges of the grille. They are usually small Phillips-head screws. Use your screwdriver to carefully remove them. Keep the screws in a small cup or bowl so you do not lose them. Once the screws are out, gently pull the grille away from the fan body. Some grilles might snap off or twist; check your manual if unsure.
Cleaning the Grille and Housing
Now, clean the detached grille. It often collects a lot of dust and dirt. You can wash plastic grilles with warm, soapy water in a sink or bathtub. Use a soft brush or sponge to scrub away grime. For metal grilles, wipe them down with a damp cloth and mild cleaner. Use a vacuum with a brush attachment to remove loose dust from the fan’s main housing. Pay attention to vents and crevices. Then, wipe the exterior of the fan housing with a damp cloth. This cleans the outer surface.
Cleaning the Fan Blades
This is where much of the dust sits. Use your vacuum’s brush attachment to suck up loose dust from the blades. For sticky dirt or grime, mix mild dish soap with warm water. Dip a cloth into the soapy water. Wring it out well so it is only damp, not dripping. Carefully wipe each fan blade. Start from the center and move outwards. You might need to rotate the blades by hand to clean all sides. For stubborn areas, an old toothbrush can help scrub the blade surfaces. Remember to clean any visible parts of the motor housing carefully too. This process is similar to how you would clean dust off a fan. If your fan has a removable filter, clean or replace it now. This is like cleaning a window AC unit filter.
Drying and Reassembly
Once all parts are clean, let them air dry completely. This is very important. Moisture can damage electrical components. You can also use a clean, dry cloth to speed up the drying process. Once everything is bone dry, carefully reattach the front grille. Line up the screw holes and put the screws back in. Do not overtighten the screws. Finally, place the fan back into your window opening. Plug it in and test it. You should notice improved airflow and less noise.
Dealing with Stubborn Grime and Mold on Your Window Fan
Sometimes, a simple soap and water clean is not enough. Window fans are exposed to outdoor elements. This can lead to stubborn grime, grease, or even mold growth. These require more targeted cleaning solutions. Dealing with these issues correctly helps maintain fan performance. It also ensures a healthy home environment.
Tackling Stubborn Grime and Grease
Window fans, especially those in kitchens or high-traffic areas, can accumulate greasy film. This grime attracts and holds dust, making it harder to clean. For greasy buildup, a degreasing dish soap works well. Mix a few drops of dish soap with warm water. Apply this solution to the affected areas with a cloth or sponge. Let it sit for a few minutes to break down the grease. Then, scrub gently with a brush. Rinse the cloth and wipe away the residue. Repeat if necessary. For very tough grease stains, you might consider specific degreasing sprays. Always follow product instructions and wear gloves. You can find more tips on cleaning different types of grease stains here.
Removing Mold and Mildew
Mold and mildew are common problems, especially in humid climates or if the fan is exposed to rain. Mold appears as black, green, or fuzzy spots. It can cause health issues, so addressing it quickly is important. My preferred method for mold is a white vinegar solution. Mix equal parts white vinegar and water in a spray bottle. Spray the moldy areas thoroughly. Let the solution sit for at least 15-30 minutes. Vinegar is a natural disinfectant and mold killer. After soaking, scrub the mold away with a brush or old toothbrush. Wipe the area clean with a damp cloth. Then, dry it completely.
For severe mold, or if vinegar doesn’t work, you can use a diluted bleach solution (1 part bleach to 10 parts water). Never mix bleach with vinegar or other cleaners, as this creates toxic fumes. Apply the bleach solution carefully to the mold. Let it sit for 10 minutes, then scrub and rinse. Always ensure good ventilation when using bleach. Be mindful of the fan’s material. Bleach can sometimes discolor plastics. For more details on using vinegar for mold, check out how to clean mold with vinegar. Always ensure the fan is completely dry before reassembly to prevent mold recurrence.
Cleaning Different Types of Window Fans: Twin vs. Single vs. Reversible
While the basic steps for cleaning a window fan remain similar, slight variations exist based on the fan’s design. Understanding these differences can help you clean more effectively. Most window fans fall into a few common categories: single-fan, twin-fan, and reversible models. Each has its own small considerations.
Single Window Fans
A single window fan is the simplest type. It usually has one large fan blade assembly. Cleaning it follows the general steps outlined above. Remove the front grille, clean the single blade, and wipe down the housing. Because there is only one large fan, accessing the blade is usually straightforward. Sometimes, the motor housing might be more exposed on one side, allowing for easier dusting of internal components. Ensure you clean the entire surface of the single large blade thoroughly.
Twin Window Fans
Twin window fans feature two smaller fan units side-by-side. These are very popular for fitting into various window sizes. Cleaning two sets of blades means double the work, but the process is identical for each. You will typically remove one large front grille that covers both fans. Then, clean each set of blades individually. Pay attention to the space between the two fans; dust loves to settle there. Twin fans may have a central control panel that also needs wiping down. Ensure all vents around both motors are clear of dust.
Reversible Window Fans
Reversible window fans are designed to pull air in or push it out. They achieve this by reversing the motor direction. Cleaning these fans is essentially the same as single or twin fans. The key difference is often in their construction. Reversible fans might have more complex controls or a slightly more robust housing to accommodate the reversing motor. When cleaning, make sure to clean both the “front” and “back” sides of the blades, as air passes over both surfaces during operation. The internal wiring for reversible functions is usually enclosed, so you do not need to worry about it during cleaning. Just focus on the visible blades and grilles. These specific fan types might have minor design differences, but the core fan cleaning principles always apply: unplug, disassemble, clean, dry, and reassemble.
Maintaining Your Window Fan: Tips for Long-Term Cleanliness
Cleaning your window fan thoroughly is a great start. However, regular maintenance is key to keeping it clean and efficient. These simple habits prevent heavy dirt buildup. They also ensure your fan continues to serve you well. I find a little effort often saves a lot of work later.
First, regular dusting is crucial. Do not wait for the fan to look visibly dirty. Once a week, or every other week, give your fan a quick wipe-down. Use a microfiber cloth or a duster to wipe down the exterior of the fan and the grilles. A vacuum cleaner with a brush attachment can quickly remove light dust from the grilles without disassembly. This quick clean stops dust from embedding itself deep into the fan’s components. This general practice is helpful for any fan, even a ceiling fan without a ladder.
Second, consider using a fan cover when the fan is not in use. During off-seasons, or even overnight, a simple fan cover can protect it from accumulating dust. You can buy specific fan covers or use an old pillowcase. Covering the fan keeps dust, pet hair, and other debris from settling on the blades and inside the housing. This greatly reduces the amount of deep cleaning needed.
Third, store your window fan properly during the colder months. When you take the fan out of the window for winter, give it a thorough deep clean first. Once it’s completely dry, place it in a storage bag or box. Store it in a dry, clean place like a closet or attic. Avoid damp basements, as moisture can lead to mold or rust. Proper storage ensures it remains clean and ready for use next spring.
Fourth, pay attention to your home’s overall cleanliness. A clean environment means less dust for your fan to pull in. Regularly vacuum your floors and dust surfaces. This reduces airborne particles. Changing your home’s air filters regularly also helps. These actions work together to keep both your home and your window fan cleaner.
Lastly, inspect your fan periodically. Even with regular dusting, check for any unusual noises or reduced airflow. These might signal deeper issues or trapped debris. A quick inspection can catch problems early. It prevents them from becoming major cleaning challenges or repairs. Consistent care makes your window fan a reliable part of your home’s comfort system.
When to Consider Professional Help or Replace Your Window Fan
While most window fan cleaning can be done at home, there are times when professional help or even replacement is the best option. Recognizing these situations saves you time, effort, and potentially prevents further damage or safety risks. I always advise caution when electrical components are involved.
First, consider calling a professional if you notice electrical issues after cleaning. If the fan sparks, smells like burning plastic, or simply does not turn on, stop using it immediately. These are signs of internal electrical problems. Do not try to fix these yourself unless you are a qualified electrician. An expert can diagnose the issue safely. Attempting electrical repairs without proper knowledge is dangerous.
Second, if your fan has severe mold growth that you cannot remove. Sometimes, mold can penetrate deep into the fan’s motor housing or saturate materials that are hard to clean. If the mold persists after several cleaning attempts, or if you suspect it’s affecting internal parts, a professional cleaner might have stronger tools or solutions. However, in many cases, severe mold can be a sign that the fan needs to be replaced entirely, especially if it affects the motor or other non-cleanable components. Mold, especially in appliances like a window air conditioner, can be a health hazard.
Third, if the fan is physically damaged. If fan blades are bent, cracked, or if the motor casing is severely broken, it might be beyond simple cleaning. Broken parts can cause imbalance, leading to noise or further damage. They can also create safety hazards. Replacing a severely damaged fan is often more cost-effective than trying to repair it. Spare parts for older or less common models can be hard to find.
Finally, consider replacement if the fan is very old and inefficient. Older fans may not move air as effectively as newer models. They might also consume more energy. Even after cleaning, an old fan might not provide the desired airflow or operate quietly. If your cleaned fan still struggles or makes excessive noise, it might be time for an upgrade. New window fans offer better features and energy efficiency. Making a choice to replace helps you get better comfort and save energy in the long run.
Frequently Asked Questions
How often should I clean my window fan?
You should clean your window fan at least once every season it is in use. For example, clean it at the beginning of summer. If you use it daily or live in a dusty area, clean it more often. A light dusting every 1-2 weeks is also helpful. Deep cleaning is best done before storage and at the start of heavy use.
Can I put my window fan parts in the dishwasher?
Most window fan parts are not safe for dishwasher cleaning. The high heat and harsh detergents in dishwashers can warp plastic grilles and damage delicate electronic components or motor parts. It is always best to hand wash removable parts with mild soap and water. This prevents damage and ensures proper function.
What if my window fan blades are not removable?
Many window fans have non-removable blades. If you cannot remove the blades, use a vacuum cleaner with a brush attachment to remove loose dust. Then, use a damp cloth or a long-handled brush (like a bottle brush) to reach through the grilles and wipe the blades. A can of compressed air can also help blow dust from tight spots.
Can I use strong chemicals to clean my window fan?
Avoid using harsh chemicals, abrasive cleaners, or solvents on your window fan. These can damage the plastic, paint, or internal components. Stick to mild dish soap and water. For tough grime or mold, white vinegar is usually safe and effective. Always test a small, hidden area first if using a new cleaner.
How do I prevent mold from growing on my window fan?
To prevent mold, ensure your window fan and the surrounding area are always dry after use or exposure to humidity. Wipe down the fan if it gets wet from rain. Use a vinegar solution for regular cleaning, as vinegar inhibits mold growth. Store the fan in a dry place during off-season months. Proper ventilation in your room also helps reduce humidity.
What if my fan smells bad after cleaning?
A lingering smell after cleaning might mean mold or mildew was not fully removed. It could also be dust trapped deep within the motor housing. Try another deep clean focusing on any damp or musty areas. Ensure the fan dries completely. If the smell persists, especially a burning smell, stop using the fan and consider professional inspection or replacement.
Conclusion
Keeping your window fan clean is a simple but important task. A clean fan moves air better and uses less energy. It also helps improve the air quality inside your home. We have covered everything from gathering your tools to tackling stubborn grime. Remember to always prioritize safety by unplugging the fan first. Follow the step-by-step cleaning process for the best results.
Regular maintenance and timely deep cleaning will ensure your window fan serves you well for many years. You will breathe easier and enjoy a quieter, more efficient appliance. Do not let dust and dirt compromise your home’s comfort. Take action today to clean your window fan. Enjoy the fresh air and improved performance it brings.
- window fan cleaning
- fan maintenance
- dust removal
- home cleaning
- air quality

Davia Murnell
Room Cleaning Expert
Before joining HEG, I spent over a decade running my own window cleaning business, where I perfected streak-free techniques and learned the ins and outs of specialty glass care. Now, I bring that expertise to a broader mission—helping homeowners maintain sparkling windows and beautiful outdoor spaces. From skylights and sliding doors to patio glass and outdoor furniture, I believe every surface deserves attention and care. I share practical tips and proven methods that make even the toughest cleaning jobs feel manageable. Whether you're battling pollen on the porch or smudges on high windows, I’m here to help you see your home in a whole new light—literally.