· Todd Martin · Home Maintenance · 21 min read
How To Clean Honeywell Fan
How to Clean Your Honeywell Fan for Peak Performance
Is your Honeywell fan pushing more dust than cool air? Over time, fans collect an alarming amount of dust, pet hair, and airborne particles. This buildup makes your fan work harder, reduces airflow, and can even affect indoor air quality. I know how frustrating it is when your fan just isn’t performing like it used to.
Regular cleaning is not just about aesthetics; it is crucial for your fan’s efficiency and longevity. A well-maintained fan moves air quietly and effectively. In this comprehensive guide, I will show you exactly how to clean your Honeywell fan, covering various models and ensuring you restore it to its optimal condition. We will explore essential safety steps, detailed cleaning procedures for different fan types, and tips for ongoing maintenance.
Takeaway: Restore Your Fan’s Freshness
- Always unplug your Honeywell fan before starting any cleaning.
- Disassemble removable parts carefully, following your fan’s manual.
- Use a vacuum cleaner or soft brush to remove loose dust.
- Wash grilles and blades with mild soap and water if safe for the material.
- Ensure all components are completely dry before reassembling.
- Regular cleaning prevents dust buildup and improves performance.
To clean a Honeywell fan, first unplug it for safety. Depending on the model, you will remove the front grille, fan blade, and possibly the rear grille. Use a vacuum, soft cloth, or mild soapy water to clean dusty parts. Allow all washed components to dry completely before reassembling the fan, restoring its efficient airflow and improving air quality.
Why Cleaning Your Honeywell Fan Matters (and What You Need)
A fan often sits in a corner, quietly doing its job, until one day you notice it is louder, weaker, or even smells a bit dusty. This is because fans are magnets for dust, pet dander, and other allergens floating in the air. Over time, these particles accumulate on the blades and grilles, forming a thick layer. This layer restricts airflow, forcing the motor to work harder.
When your fan motor works harder, it uses more electricity. It also creates more noise and can even overheat, shortening the fan’s lifespan. Furthermore, a dirty fan can recirculate dust and allergens into your living space, impacting air quality. Cleaning your fan regularly is a simple act that yields significant benefits. It ensures optimal air circulation, maintains energy efficiency, and contributes to a healthier indoor environment. Just like you clean other appliances to keep them running well, a fan needs attention too. If you are curious about keeping your home truly dust-free, you might also be interested in how to clean dust off fan, which offers broader tips.
Before we start, gather your tools. Having everything ready makes the cleaning process smooth and efficient. You probably have most of these items around your house already.
Here is a list of the essential supplies:
- Screwdriver: Often needed for removing grilles or protective cages. Check your fan model’s requirements.
- Vacuum cleaner with brush attachment: Excellent for removing loose dust and debris.
- Microfiber cloths: Soft and effective for wiping down surfaces without scratching.
- Mild dish soap: For washing grilles and blades.
- Warm water: For rinsing.
- Soft-bristle brush or old toothbrush: Useful for reaching tight spots and scrubbing stubborn grime.
- Compressed air (optional): Great for blowing dust out of hard-to-reach motor areas, but use with caution.
- Safety glasses/mask (optional but recommended): To protect from flying dust, especially when using compressed air.
- Dry towel: For drying parts thoroughly.
Having these items ready will help you tackle any type of Honeywell fan, from a small table unit to a tall tower model.
Safety First: Essential Precautions Before You Begin
Before you even think about touching your Honeywell fan with a cleaning cloth, safety must be your top priority. Working with electrical appliances, even when unplugged, requires careful attention. I always make sure to follow these steps myself to avoid any accidents. This ensures a smooth and safe cleaning process for both you and your appliance.
The most critical step is always to unplug the fan from the power outlet. This seems obvious, but it is easy to forget in a hurry. Unplugging the fan eliminates any risk of electric shock or the fan accidentally turning on while your hands are inside. You do not want to risk serious injury, so make sure the power cord is completely disconnected before proceeding.
Next, it is important to consult your Honeywell fan’s user manual. Each fan model can have unique disassembly instructions. Some fans might have specific clips or screws, while others might twist apart. The manual provides precise guidance on how to safely take your fan apart without causing damage. Ignoring the manual can lead to broken clips or stripped screws, making reassembly difficult or even impossible. Different fan types, such as a Honeywell QuietSet Tower Fan, have specific access points for cleaning. Understanding your specific model is key.
Another crucial safety measure involves allowing all washed components to dry completely. Water and electricity do not mix. If you wash grilles or blades with water, ensure they are absolutely bone dry before putting the fan back together and plugging it in. Residual moisture can cause electrical shorts, damage the motor, or even create a fire hazard. I usually let parts air dry for several hours, or even overnight, just to be safe. You can also use a dry towel to speed up the process.
Finally, avoid using harsh chemicals or abrasive cleaners. These can damage the plastic, metal, or finish of your fan. Stick to mild dish soap and water for cleaning. Also, be careful not to spray any liquids directly into the motor housing or electrical components. These areas should only be cleaned with a vacuum or compressed air. Protecting the internal parts is important for the fan’s long-term health. Taking these simple precautions will protect you and keep your Honeywell fan working well for years to come.
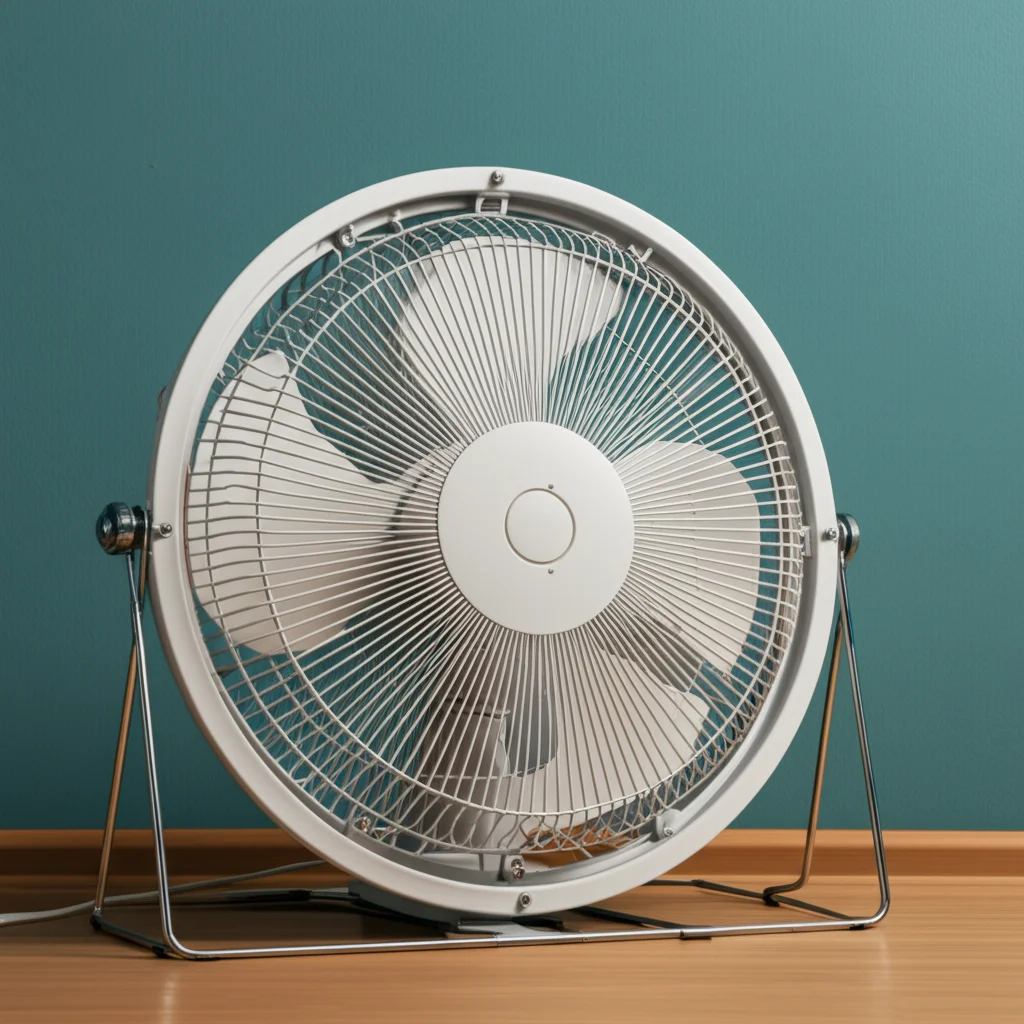
Cleaning Basic Honeywell Pedestal & Table Fans (Step-by-Step)
Cleaning a standard Honeywell pedestal or table fan is a straightforward process once you understand the disassembly. These models typically have a front grille, a fan blade, and a rear grille. I find that breaking it down into clear steps makes it much less daunting. This method works for many common fan designs.
Disassembly Process
- Unplug the Fan: As mentioned, this is the first and most important step. Make sure the fan is completely disconnected from power.
- Remove the Front Grille: Most Honeywell fans have clips, screws, or a locking ring holding the front grille in place. Look for small tabs around the edge of the grille that you can pry open with a flathead screwdriver or your fingers. Some models may have a single screw at the bottom or top of the grille. Unscrew it if present. Once released, the front grille should come off easily.
- Remove the Blade Cap/Nut: After the front grille is off, you will see the fan blade secured by a cap or a nut. This often twists off counter-clockwise. Some caps might be labeled “LOOSEN” with an arrow. Carefully twist it off.
- Remove the Fan Blade: Once the cap is removed, the fan blade usually slides straight off the motor shaft. It might be a little snug, but it should not require excessive force. Be gentle to avoid bending the blades.
- Remove the Rear Grille (if applicable): On some models, the rear grille (the one closest to the motor) can also be removed. This usually involves unscrewing a few screws around its perimeter. Removing it provides better access to the motor housing for dusting.
Cleaning the Components
Now that your fan is in pieces, it is time to get rid of all that accumulated gunk. This is where you will see just how much dust your fan has been collecting. I like to start with the grilles and blades, as they often hold the most visible dust.
- Grilles and Blades: These are often the dirtiest parts. You can wash them thoroughly in a sink with warm water and a few drops of mild dish soap. Use a soft cloth or sponge to wipe away dust and grime. For stubborn dirt in tight grille spaces, a soft-bristle brush or an old toothbrush works wonders. Rinse them well under running water to remove all soap residue. If you’ve ever cleaned a box fan, the process for the grilles and blades is very similar.
- Motor Housing and Shaft: This area should never be submerged in water. Use your vacuum cleaner with a brush attachment to gently vacuum up any dust from the motor housing, around the shaft, and within the vents. For very tight spots, a can of compressed air can blow dust out, but hold the can upright and use short bursts to avoid moisture buildup. Be careful not to let the fan blades spin freely when using compressed air.
- Fan Base/Body: Wipe down the fan base and stand with a damp microfiber cloth. You can use a very mild all-purpose cleaner if needed, but ensure it is safe for plastic. Dry it immediately with a separate dry cloth.
Reassembly Tips
Once all parts are spotless and completely dry, it is time to put your fan back together. This is usually the reverse of disassembly.
- Reattach the Rear Grille: If you removed it, align the rear grille with the screw holes on the motor housing and secure it with its screws.
- Reattach the Fan Blade: Slide the fan blade back onto the motor shaft, ensuring it is seated firmly. It should only fit one way, so do not force it.
- Secure the Blade Cap/Nut: Screw the blade cap or nut back onto the shaft, twisting it clockwise until it is snug. Do not overtighten.
- Reattach the Front Grille: Align the front grille with the clips or screw holes on the fan body. Snap the clips back into place or reinsert the screw(s). Make sure the grille is secure and does not rattle.
- Plug In and Test: Once everything is securely reassembled and dry, plug your Honeywell fan back in and test it. It should run much more smoothly and quietly, pushing a noticeably stronger airflow. Enjoy your cleaner, more efficient fan!
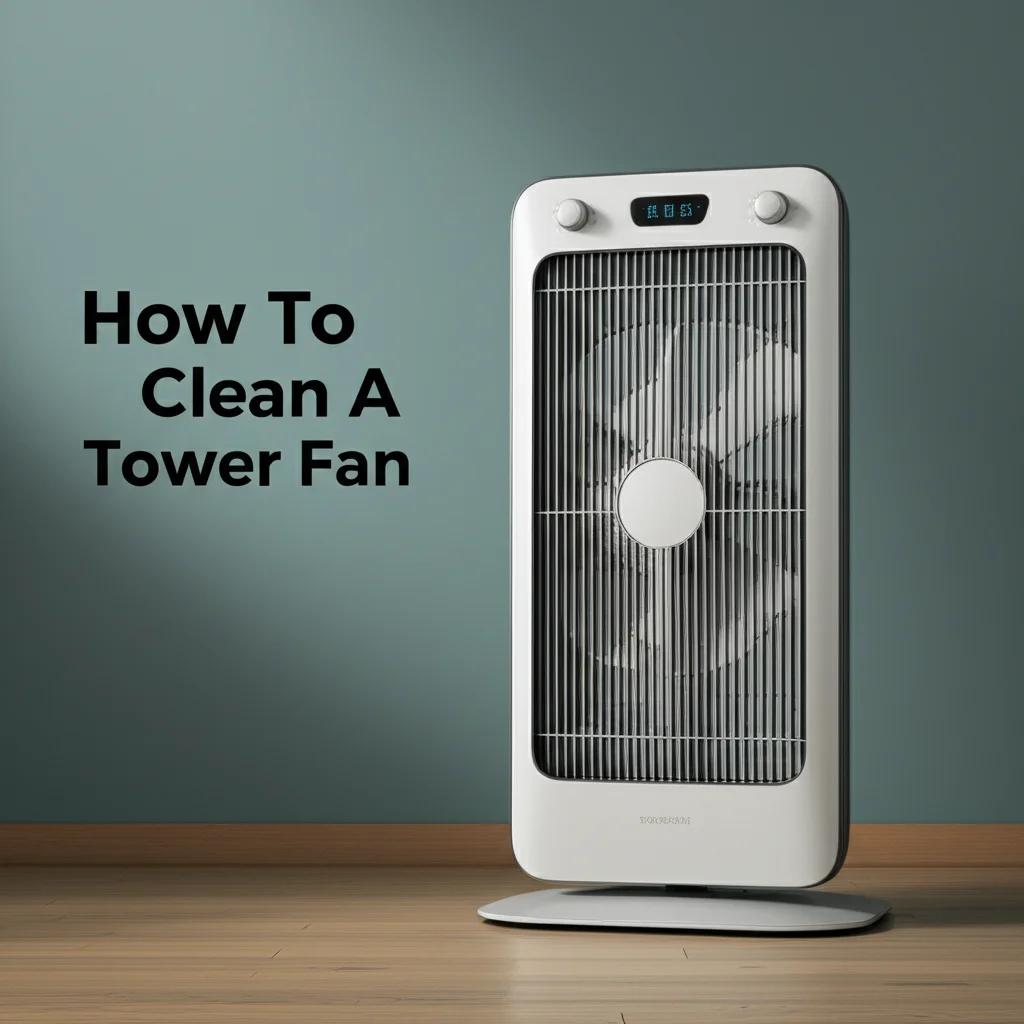
Cleaning Honeywell Tower Fans (QuietSet and Other Models)
Honeywell tower fans, like the popular QuietSet series, present a different challenge compared to traditional pedestal fans. Their enclosed design means you cannot easily remove blades for washing. However, this does not mean they cannot be thoroughly cleaned. I have found that a targeted approach works best for these sleek, vertical units. The key is to focus on accessible surfaces and use tools that can reach into the fan’s core without full disassembly.
Tower fans typically circulate air using a vertical impeller, which is a cylindrical blade assembly. This impeller is hidden behind a protective grille, making direct access difficult. Therefore, your cleaning strategy will rely heavily on external cleaning and powerful suction.
Here is how you can effectively clean your Honeywell tower fan:
- Unplug the Fan: Always, always start by unplugging the fan from the power outlet. This prevents any accidental activation during cleaning.
- External Wipe-Down: Begin by wiping down the entire exterior of the tower fan with a damp microfiber cloth. Dust, smudges, and fingerprints accumulate on the casing. For slightly stubborn marks, you can use a very mild, all-purpose cleaner applied to the cloth, not directly to the fan. Make sure to wipe dry immediately.
- Vacuum the Vents: The most critical step for tower fans is to vacuum the intake and exhaust vents. These are the slotted areas where air enters and exits the fan. Use your vacuum cleaner’s brush attachment or crevice tool. Go over every vent slot thoroughly, ensuring you pull out as much visible dust and debris as possible. Rotate the fan to access all sides. This directly impacts how well the fan pulls and pushes air. For Honeywell QuietSet Tower Fan models, pay close attention to the rear intake vents where dust tends to accumulate heavily.
- Use Compressed Air (Carefully): For dust lodged deeper inside the vents that the vacuum cannot reach, a can of compressed air can be very effective. Insert the nozzle into the vent slots and use short bursts of air. This will blow dust out of the fan. Be sure to do this in a well-ventilated area, or even outdoors, as it will create a cloud of dust. Hold the can upright to prevent propellant from spraying onto internal components. Do not spray directly into the motor housing.
- Clean the Base: Wipe down the fan’s base thoroughly. Dust often settles here, and on the control panel. Use a dry or slightly damp cloth for the control panel to avoid damaging electronics.
- Handle Internal Dust (If Accessible): Some Honeywell tower fans might have a removable rear cover or a small access panel that allows for limited internal cleaning. If your manual indicates such access, you can remove it (after unplugging!) and use the vacuum or compressed air to clean any visible dust from the impeller blades or internal components. However, never attempt to force open a panel that is not designed for user access. Many tower fans are sealed units. If you are also interested in cleaning other types of tower fans, the principles here are very similar to how to clean a Holmes tower fan.
By regularly performing these steps, especially vacuuming the vents, you will significantly improve your Honeywell tower fan’s performance and help maintain good indoor air quality.
Deep Cleaning and Tackling Stubborn Grime
Sometimes, a simple wipe-down is not enough. Over time, especially in humid environments or homes with pets and smokers, a sticky film can develop on fan components. This film attracts and holds dust, making it much harder to remove. When your Honeywell fan’s performance is noticeably diminished despite regular cleaning, it might be time for a deep clean. I have faced sticky fan blades myself, and a targeted approach makes all the difference.
Deep cleaning involves using mild cleaning solutions to dissolve stubborn grime. Here is how to tackle it:
- Disassemble Thoroughly: For pedestal or table fans, ensure you have fully disassembled the fan, separating the grilles and blades from the motor unit. This allows you to soak or scrub these parts effectively. For tower fans, you will focus on external deep cleaning, particularly on the vent areas.
- Prepare a Cleaning Solution:
- Mild Soap and Water: For most general grime, a solution of warm water and a few drops of mild dish soap (like Dawn) is highly effective. Fill a basin or sink with this solution.
- Vinegar Solution (for light mildew/odor): If you notice a musty smell or light mildew, a solution of equal parts white vinegar and water can be useful. Vinegar is a natural disinfectant and deodorizer. However, do not use vinegar on metal parts that might corrode or leave residue. Always test on an inconspicuous area first.
- Mild Degreaser (for sticky grease): In kitchen environments, fans can accumulate a sticky, greasy film. For this, a very mild, non-abrasive degreaser designed for household use can be applied. Always read the product label to ensure it is safe for plastic and metal, and never spray directly onto electrical components. Apply it to a cloth first. This is similar to strategies used when learning how to clean kitchen exhaust fan grease, where stubborn oily residues are common.
- Soak (for Removable Parts): Submerge the disassembled grilles and blades (only plastic or easily washable metal parts) into your chosen cleaning solution. Let them soak for 15-30 minutes. This helps loosen stubborn dirt and grime, making scrubbing much easier.
- Scrub Stubborn Areas: After soaking, use a soft-bristle brush, an old toothbrush, or a non-abrasive sponge to scrub away any remaining grime. Pay extra attention to the leading edges of the fan blades and the narrow slots of the grilles where dust often clings.
- Rinse Thoroughly: This step is crucial. Rinse all cleaned parts under cool, running water. Ensure all soap or cleaning solution residue is completely removed. Any residue can attract dust faster or leave streaks.
- Dry Completely: Lay all parts out on a clean, dry towel. Allow them to air dry completely for several hours, or even overnight, before reassembly. You can also use a dry cloth to gently pat them dry to speed up the process. Even a tiny bit of moisture can cause issues when the fan is plugged back in. This step prevents mold growth and electrical hazards. If you have concerns about mold on plastic components, understanding how to clean mold off plastic can provide additional insights.
- Clean Motor Housing (No Water): For the motor housing, use a slightly damp cloth to wipe the exterior, but avoid letting any water get inside. Use compressed air or a vacuum cleaner with a brush attachment to remove dust from vents and internal components.
By performing a deep clean when necessary, you can extend the life of your Honeywell fan and ensure it continues to provide powerful, clean airflow.
Regular Maintenance for Prolonged Fan Life
Cleaning your Honeywell fan just once a year is not enough for optimal performance and longevity. Regular, lighter maintenance between deep cleans makes a significant difference. Think of it like taking care of your car; you do not just wait for a major breakdown. Consistent, simple care prevents major issues and keeps everything running smoothly. I always find that a little effort often saves a lot of trouble later on.
The frequency of cleaning depends on several factors in your home environment. If you have pets, live in a dusty area, or use your fan heavily, you will need to clean it more often.
Here is a general guideline for maintenance:
- Weekly Quick Dusting: For all fan types, a quick wipe-down of the exterior casing and grilles with a microfiber cloth helps prevent heavy dust buildup. This is especially true for tower fans where dust can visibly accumulate on the surface.
- Monthly Light Cleaning: For pedestal and table fans, use a vacuum cleaner with a brush attachment to quickly vacuum the grilles (front and back) without disassembly. For tower fans, give the intake and exhaust vents a thorough vacuuming. This removes surface dust before it can pack tightly onto the blades. This quick dust removal is key to maintaining consistent airflow. If you are interested in broader tips for keeping your home dust-free, learn more about how to clean dust off fan.
- Quarterly Intermediate Cleaning: Every three months, consider a slightly more involved clean. For pedestal fans, this might mean removing the front grille and blade for a quick wipe-down, but not necessarily a full wash. For tower fans, this is the time to use compressed air to blast out deeper dust from the vents after vacuuming.
- Bi-annual or Annual Deep Clean: Perform the full disassembly and washing procedure (for pedestal/table fans) or the thorough internal vacuuming/compressed air cleaning (for tower fans) at least once or twice a year, depending on usage. This ensures every nook and cranny is free of grime.
Beyond just cleaning, there are other maintenance practices that help prolong your fan’s life:
- Proper Storage: When you are not using your fan for an extended period, especially during colder months, store it properly. Cover it with a dust bag or an old sheet. This prevents dust from settling inside the fan during its downtime, making the next cleaning much easier.
- Listen for Unusual Noises: Pay attention to your fan while it is running. Any new squeaks, rattles, or grinding noises could indicate a problem. Sometimes, it is just an unbalanced blade due to uneven dust buildup, which cleaning can fix. Other times, it might be a motor issue that requires professional attention.
- Check for Overheating: If your fan feels excessively hot to the touch, especially around the motor housing, it could be a sign of restricted airflow due to dust buildup or an internal motor problem. Unplug it immediately and clean it. If the problem persists, stop using it.
- Keep Vents Clear: Ensure the fan’s intake and exhaust vents are not blocked by furniture, curtains, or other objects. This allows for optimal airflow and prevents the motor from overheating.
By incorporating these regular maintenance habits, your Honeywell fan will run more efficiently, provide better air circulation, and serve you reliably for many years.
Troubleshooting Common Cleaning-Related Issues
Even after a thorough cleaning, sometimes unexpected issues can arise. It can be frustrating when you put in the effort to clean your Honeywell fan, only for it not to work as expected. I have encountered a few of these problems myself, and usually, the solution is simpler than it seems. Most issues after cleaning are related to reassembly or residual moisture.
Here are some common problems you might face and how to troubleshoot them:
- Fan Not Turning On After Cleaning: This is perhaps the most common and alarming issue.
- Check Power Connection: First, ensure the fan is securely plugged into a working outlet. Try plugging in another small appliance to confirm the outlet has power.
- Improper Reassembly: The most frequent cause is that components were not put back together correctly. Check that all grilles are securely attached, and any safety switches (often integrated into the grilles) are engaged. Some fans have a safety mechanism that prevents operation if the grilles are not properly locked into place. Go back through the reassembly steps carefully, referring to your manual if necessary.
- Residual Moisture: Even a tiny bit of water inside the motor housing or on electrical connections can prevent the fan from working. If you washed parts, did you let them dry completely? Unplug the fan, disassemble it again, and let all components air dry for an extended period (24-48 hours) in a warm, dry place. A dehumidifier nearby can help.
- Fan Still Noisy or Rattling After Cleaning: You cleaned it, but it still sounds off.
- Unbalanced Blade: If the blade was removed, it might not be perfectly seated on the motor shaft. Re-seat it. Uneven dust removal can also cause imbalance, though less common after a deep clean.
- Loose Grille: Check that the front and rear grilles are firmly attached and that all screws or clips are tightened. A loose grille can vibrate and create noise.
- Internal Component Dislodged: During cleaning or reassembly, a small internal component might have shifted. If the noise is coming from the motor area and is persistent, it could indicate a more serious internal issue, but this is rare directly after a cleaning unless excessive force was used.
- Fan Still Smells Dusty/Musty After Cleaning: You cleaned it, but an odor remains.
- Trapped Moisture: A musty smell almost always points to moisture trapped somewhere that has led to mold or mildew growth, especially if components were not completely dry before reassembly. Disassemble again, ensure thorough drying, and apply a mild vinegar solution (50/50 vinegar and water) to plastic parts, rinsing thoroughly and drying completely.
- Persistent Dust: Some deeply embedded dust or pet dander might still be present in the motor housing or difficult-to-reach crevices. Use compressed air and vacuum attachments more aggressively in these areas, always avoiding direct spray into the motor.
- Odor Source Not Fan: Sometimes the smell is not from the fan itself but from the air it is pulling in from its surroundings. Check for musty carpets, drapes, or other sources in the room.
- Reduced Airflow Despite Cleaning: If the fan still feels weak.
- Incomplete Dust Removal: There might still be significant dust on the impeller blades (especially in tower fans) or internal components that were not fully reached. Revisit the vacuuming and compressed air steps, focusing on all vents and internal accessible areas.
- Motor Issue: In rare cases, the reduced airflow could indicate a motor that is starting to fail, which cleaning will not resolve. If the fan is old and has been struggling for a while, it might be time to consider replacement.
By systematically going through these troubleshooting steps, you can usually identify and fix issues that arise after cleaning your Honeywell fan, ensuring it operates smoothly and efficiently.
Frequently Asked Questions (FAQ)
Q1: How often should I clean my Honeywell fan? A1: The frequency depends on usage and environment. For light use in a clean home, clean thoroughly every 3-6 months. For heavy use, homes with pets, or dusty areas, aim for a thorough cleaning every 1-2 months, with weekly exterior dusting. Regular light cleaning prevents heavy buildup.
Q2: Can I wash fan blades in the dishwasher? A2: No, I do not recommend washing fan blades or grilles in a dishwasher. The high heat and harsh detergents can warp plastic components, fade colors, or damage finishes. Hand washing with mild soap and warm water is always the safest and most effective method.
Q3: What if my Honeywell fan doesn’t come apart? A3: Many tower fans or compact models are not designed for full user disassembly. For these fans, focus on external cleaning. Use a vacuum cleaner with a brush or crevice attachment to thoroughly clean all intake and exhaust vents. Compressed air can also help dislodge dust from hard-to-reach internal areas.
Q4: Is it safe to use water on fan parts? A4: Yes, it is safe to use water on plastic grilles and fan blades that are completely detached from the electrical components. However, it is crucial to ensure these parts are absolutely, 100% dry before reassembling the fan and plugging it back in. Never let water near the motor or electrical wiring.
Q5: How can I prevent dust buildup on my fan? A5: You can minimize dust buildup by regularly dusting your fan’s exterior and grilles. Using air purifiers in your home can reduce airborne dust. Placing the fan in an area with less direct airflow from open windows or high-traffic areas can also help.
- Honeywell fan cleaning
- fan maintenance
- dust removal
- home cleaning tips
- appliance care
- indoor air quality

Todd Martin
Senior Writer
With over 15 years of experience in home renovation and design, I started HEG to share what I’ve learned with homeowners who want to create spaces that are both beautiful and functional. I’ve always believed in a hands-on approach, and over the years, I’ve picked up practical solutions that actually work. Through HEG, I aim to make home improvement more approachable, sharing real tips that help you create a home you truly love.