· Todd Martin · Kitchen Maintenance · 20 min read
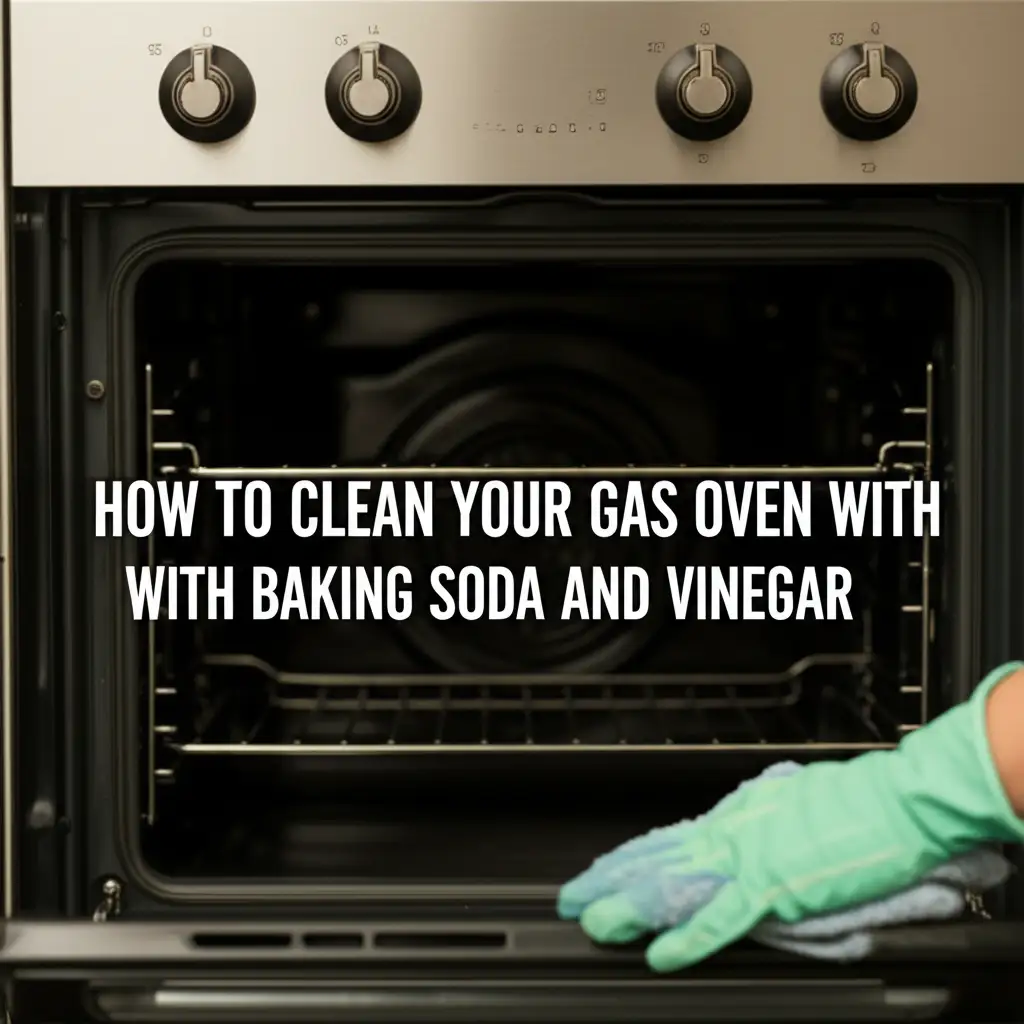
How To Clean Your Gas Oven With Baking Soda And Vinegar
Effortlessly Clean Your Gas Oven with Baking Soda and Vinegar
Keeping a gas oven clean feels like a big task. Food spills and grease splatters build up over time. This makes the oven less efficient and can even cause smoke. You might think harsh chemicals are the only way to get it truly clean. However, I have found a simple, natural solution. You can effectively clean your gas oven with baking soda and vinegar. This method is safe, non-toxic, and works wonders on tough grime.
This comprehensive guide shows you how to tackle even the dirtiest gas oven. We will cover the benefits of natural cleaners, the supplies you need, and a step-by-step cleaning process. I will also share tips for cleaning racks, troubleshooting common issues, and maintaining your oven’s sparkle. Get ready to transform your greasy oven into a sparkling clean appliance using common pantry items.
Takeaway:
- Baking soda and vinegar offer a safe, non-toxic, and effective way to clean your gas oven.
- The method involves applying a baking soda paste, allowing it to sit, then using vinegar to activate and wipe away grime.
- Regular maintenance helps keep your gas oven clean and extends its life.
To clean your gas oven, mix baking soda with water to form a thick paste. Apply this paste inside the oven, covering greasy areas, and let it sit for at least 12 hours. Spray with white vinegar, which reacts with the baking soda to loosen grime. Then, wipe clean with a damp cloth for a sparkling, chemical-free finish.
Why Choose Baking Soda and Vinegar for Oven Cleaning?
Many people want safe options for cleaning their homes. Baking soda and vinegar are popular choices for household tasks. These natural products offer great cleaning power without harsh fumes. When you clean your gas oven with baking soda and vinegar, you avoid strong chemical smells. This is a big plus, especially in the kitchen where food is prepared. Chemical oven cleaners often contain harsh ingredients. These ingredients can irritate skin, eyes, and airways. Some people worry about chemical residues remaining in the oven. This is a valid concern for cooking surfaces.
Baking soda is a mild abrasive. It helps scrub away stuck-on food and grease. It also acts as a deodorizer. This means it removes unpleasant smells from your oven. Vinegar is an acid. When it mixes with baking soda, it creates a fizzing reaction. This reaction helps lift and loosen grime. This combination makes it easier to wipe away baked-on spills. Using these common ingredients is also cost-effective. You likely already have them in your pantry. This saves you a trip to the store for specialized cleaning products. It also saves you money. Choosing natural cleaners is a good step for a healthier home. Many sources recommend this method. For more general insights into this powerful duo, you can explore how to clean with vinegar and baking soda.
These natural ingredients break down grease effectively. Baking soda absorbs oils and food particles. Vinegar cuts through greasy residue. Together, they create a powerful cleaning action. They lift stains from oven surfaces without scratching. This natural approach is especially good for gas ovens. It prevents accidental damage to their specialized components. Gas ovens have pilot lights or igniters. Strong chemicals can sometimes harm these parts. Using baking soda and vinegar removes this risk. It keeps your oven safe and functional for longer.
Essential Supplies for Your Gas Oven Cleaning Project
Before you begin to clean your gas oven with baking soda and vinegar, gather all necessary supplies. Having everything ready makes the cleaning process smooth. You do not want to stop in the middle to search for an item. Preparation saves time and effort. I always make a list and check it twice. This ensures I have every tool at hand.
Here is a list of what you will need:
- Baking Soda: A large box, or even two, is often needed. You use a lot for making the cleaning paste.
- White Vinegar: Keep a spray bottle filled with pure white vinegar. This is for the final cleaning step.
- Warm Water: You will need water to mix with the baking soda.
- Rubber Gloves: Protect your hands from grime.
- Non-Scratch Scrubber or Sponge: For scrubbing away loosened dirt. Microfiber cloths also work well.
- Spray Bottle: For applying the vinegar.
- Damp Cloths or Microfiber Towels: For wiping down surfaces.
- Small Bowl or Container: For mixing the baking soda paste.
- Spatula or Silicone Scraper: To help spread the paste and scrape off dried bits.
- Newspaper or Old Towels: To protect your floor from drips.
- Bucket (optional): For soaking oven racks.
It is wise to wear old clothes. Cleaning can get messy. Lay down newspaper or old towels on the floor. This protects your kitchen floor from spills. Make sure your kitchen is well-ventilated. Open a window if possible. Even though baking soda and vinegar are natural, fresh air is always a good idea. Having these supplies ready saves you from scrambling during the process. It ensures you have a focused cleaning experience.
Step-by-Step Guide to Preparing Your Gas Oven
Proper preparation is the first step when you clean your gas oven with baking soda and vinegar. This initial stage makes the actual cleaning much easier. It also protects other parts of your kitchen. Do not skip these important steps. Taking a few extra minutes now saves a lot of hassle later.
Follow these simple steps to prepare your oven:
- Ensure the Oven is Cold: Always start with a completely cold oven. Never attempt to clean a hot oven. This prevents burns and also allows the cleaning agents to work effectively.
- Turn Off the Gas Supply: For safety, locate your oven’s gas shut-off valve. Turn it to the “off” position. This prevents any accidental gas leaks during cleaning. If you are unsure how to do this, consult your oven’s manual or a qualified professional. Safety comes first.
- Remove All Oven Racks and Other Contents: Take out everything inside your oven. This includes oven racks, pizza stones, and any foil or baking sheets. You will clean these separately. Removing them provides full access to the oven’s interior surfaces. For a detailed guide on cleaning these, especially the metal ones, consider checking out how to clean gas oven grates.
- Remove Any Large Loose Debris: Use a spatula or scraper to remove any large food crumbs or burnt pieces. These are loose and do not need the baking soda treatment. You can sweep them into a dustpan or wipe them away with a damp paper towel.
- Protect Your Floor: Lay down old newspapers or towels underneath and around your oven. This catches any drips or spills during the cleaning process. It saves your kitchen floor from getting dirty.
- Quick Initial Wipe-Down: Give the interior of your oven a quick wipe with a damp cloth. This removes any surface dust or loose particles. This helps the baking soda paste adhere better to the greasy surfaces.
Once these steps are complete, your gas oven is ready for the application of the baking soda paste. This preparation sets the stage for a thorough and effective deep clean.
Applying the Baking Soda Paste for Deep Cleaning
The baking soda paste is the core of this natural oven cleaning method. It works by breaking down stubborn grease and baked-on food. This step requires patience, but the results are worth it. Learning to clean your gas oven with baking soda and vinegar relies heavily on this application. I have used this method many times. It works every time.
Here is how to create and apply the powerful baking soda paste:
- Mix the Baking Soda Paste: In your small bowl, pour about half a cup of baking soda. Slowly add warm water, a tablespoon at a time, mixing continuously. You want to achieve a thick, spreadable paste. It should resemble the consistency of toothpaste. If it is too watery, add more baking soda. If it is too thick, add a tiny bit more water. The exact amount of water varies.
- Apply the Paste Generously: Put on your rubber gloves. Scoop out generous amounts of the paste with your hands or a silicone spatula. Spread the paste evenly over all the greasy and dirty surfaces inside your gas oven. Pay special attention to areas with heavy grease buildup and baked-on spills. You do not need to apply it to the heating elements. Avoid getting paste into any pilot light openings or gas vents.
- Target Tough Spots: For particularly stubborn, burnt-on spots, apply an extra thick layer of paste. Gently rub it in a little with your fingers. The mild abrasive quality of baking soda begins working instantly.
- Let It Sit: The Waiting Game: This is the most crucial part. The baking soda needs time to break down the grime. For best results, let the paste sit for a minimum of 12 hours. Overnight is ideal. The longer it sits, the more effective it will be at loosening tough, baked-on messes. I usually apply it before bed and let it work its magic overnight.
- Address the Oven Door: Do not forget the inside of the oven door. Apply a layer of paste to the greasy glass and frame. This ensures a uniform clean for the entire oven interior.
Once the paste is applied, simply walk away. Let the baking soda do the heavy lifting. The waiting period allows the baking soda to thoroughly penetrate and soften the baked-on food and grease. This makes the next step of wiping and rinsing much easier. For more methods on how baking soda helps in oven cleaning, you might find more information on how to clean oven with baking soda.
The Vinegar Rinse: Activating and Wiping Away Grime
After the baking soda paste has had ample time to work its magic, the next step involves the vinegar. This is where the real action happens. The vinegar reacts with the baking soda, creating a powerful fizzing action that lifts and loosens the grime. This stage is key when you clean your gas oven with baking soda and vinegar. It is also quite satisfying to watch.
Here is how to perform the vinegar rinse and wipe-down:
- Prepare Your Vinegar Spray: Fill a spray bottle with plain white vinegar. Do not dilute it. The full strength of the vinegar is needed for the chemical reaction.
- Spray the Baked Soda: After the 12-hour (or overnight) wait, you will notice the baking soda paste looks dry and perhaps a little discolored. Liberally spray the vinegar over all the areas where you applied the baking soda paste. As the vinegar hits the baking soda, it will fizz and bubble. This effervescent reaction is what helps to loosen and lift the baked-on grease and food particles.
- Let the Fizzing Happen: Allow the vinegar and baking soda to react for about 10-15 minutes. The fizzing action will subside as the reaction completes. This short wait time ensures the grime is thoroughly loosened.
- Wipe Away the Grime: Put on your rubber gloves again. Use a damp cloth or non-scratch sponge to start wiping away the baking soda residue. You will find that the grime now comes off much more easily. Wipe from the top down, rinsing your cloth frequently in a bucket of clean water.
- Address Stubborn Spots: For any persistent spots, re-spray with vinegar and gently scrub with your non-scratch scrubber. Avoid harsh metal scrubbers that can scratch your oven’s surface. You can also reapply a small amount of baking soda paste to stubborn areas, spray with vinegar, and let it sit for another 30 minutes before wiping.
- Final Rinse: Once all the baking soda and grime are removed, take a fresh, clean, damp cloth and wipe down the entire interior of the oven. This removes any last traces of residue. Continue wiping until the oven surfaces feel smooth and clean. The goal is to leave no baking soda or vinegar residue behind.
This systematic approach ensures that your oven is not just seemingly clean, but truly free of stubborn grime and odors.
Cleaning Oven Racks and Other Removable Parts
While the baking soda paste works its magic inside your gas oven, you can focus on cleaning the removable parts. This includes oven racks, and any other removable elements. Cleaning these separately ensures they are just as sparkling as the oven interior. This step is crucial for a complete oven cleaning when you clean your gas oven with baking soda and vinegar. I often tackle these at the same time as the oven’s main clean.
Here is an effective method for cleaning your oven racks:
- Soaking Method for Oven Racks:
- Choose a Soaking Spot: Find a large basin, bathtub (line it with an old towel to prevent scratches), or a laundry tub. I often use my bathtub.
- Add Hot Water: Fill the basin or tub with very hot water.
- Add Cleaning Agents: Pour in about half a cup of dish soap and half a cup of white vinegar. The dish soap helps cut through grease, and the vinegar adds to the cleaning power.
- Submerge Racks: Carefully place the oven racks into the hot, soapy water. Make sure they are fully submerged.
- Let Them Soak: Let the racks soak for at least 2-4 hours, or even overnight if they are very greasy. The longer they soak, the easier the grime will come off.
- Scrubbing and Rinsing:
- Remove and Scrub: After soaking, remove the racks from the water. Use a stiff brush (not metal, to avoid scratching) or a non-scratch scrubber. The baked-on food and grease should now be softened and easy to scrub away.
- Rinse Thoroughly: Rinse the racks under running water until all soap residue and grime are gone.
- Cleaning Other Removable Parts:
- For smaller items like burner caps or grates (if removable), you can soak them in a separate bowl with warm, soapy water and a splash of vinegar.
- Scrub them with a sponge or brush.
- Rinse them well and dry thoroughly.
Once all parts are clean, dry them completely with a clean cloth before returning them to the oven. This prevents rust and water spots. Cleaning these parts separately makes the entire oven look brand new. It completes the thorough cleaning process. If you want more details on cleaning the inside of a gas oven, you can explore guides like how to clean a gas oven inside.
Post-Cleaning Tips for a Sparkling Gas Oven
After you clean your gas oven with baking soda and vinegar, the job is not quite done. A few final touches ensure your oven truly sparkles. These steps add to the visual appeal and also help with maintenance. I always take these extra moments. It makes a big difference in the overall look.
Here are some post-cleaning tips to make your gas oven shine:
- Wipe Down the Exterior: Do not forget the outside of your oven. Use a clean, damp cloth to wipe down the exterior surfaces. This includes the oven door handle, control panel, and sides. For stainless steel, follow the grain of the steel. A little bit of vinegar spray on a cloth can help remove fingerprints and smudges.
- Clean the Oven Door Glass (Inside and Out):
- Interior Glass: If you have not already, use a clean damp cloth to wipe down the inside of the oven door glass. If there’s any residual haze from the baking soda, a quick spray of vinegar and a wipe will clear it.
- Exterior Glass: For the outside of the oven door glass, use a glass cleaner or a mixture of equal parts white vinegar and water in a spray bottle. Spray, then wipe clean with a microfiber cloth for a streak-free shine.
- Polish Stainless Steel Surfaces: If your gas oven has stainless steel panels, polish them. Use a dedicated stainless steel cleaner or a small amount of olive oil on a microfiber cloth. Apply a tiny amount of oil, wipe with the grain, then buff with a clean, dry cloth. This restores shine and helps resist fingerprints.
- Reassemble Oven Parts: Once all components are completely dry, carefully place the oven racks back inside. Ensure they are correctly seated. Check that any other removable parts are also put back in their proper place.
- Turn Gas Supply Back On: Carefully turn the gas shut-off valve back to the “on” position. Double-check that it is fully open.
- First Use Post-Clean: When you use your oven for the first time after cleaning, you might notice a slight smell. This is normal. It is just any residual cleaning agents burning off. Run the oven at a low temperature (around 250-300°F) for about 15-30 minutes with the kitchen well-ventilated. This helps air it out.
Following these steps ensures your gas oven looks its best. It completes the natural cleaning process. For a broader perspective on maintaining your appliance, you might find general tips on how to clean gas oven helpful.
Troubleshooting Common Gas Oven Cleaning Challenges
Even with the best natural methods, you might face some challenges. It is good to know how to handle them. This section addresses common issues you might encounter when you clean your gas oven with baking soda and vinegar. These tips help you achieve the best possible clean.
Here are solutions for common cleaning problems:
- Stubborn Baked-On Spills:
- Reapply Paste: If a spot did not come clean, reapply a thick layer of baking soda paste directly to that area.
- Longer Wait Time: Let it sit for an extended period, perhaps another 6-12 hours.
- Gentle Scrape: After the second application and soak, use a plastic scraper or a dull knife to gently lift the softened grime. Be careful not to scratch the surface.
- Repeat Vinegar: Spray generously with vinegar and wipe.
- Persistent Odors After Cleaning:
- Ventilation: Ensure your kitchen is well-ventilated. Run the oven at a low temperature (200-250°F) for 15-30 minutes with the oven door slightly ajar and windows open.
- Charcoal or Lemon: Place a bowl of activated charcoal or sliced lemons in the cooled oven overnight. This helps absorb any lingering smells.
- Another Vinegar Wipe: A final wipe-down with a cloth dampened with pure white vinegar can also help neutralize odors.
- Hazy or Streaky Oven Door Glass:
- More Wiping: Sometimes, it simply needs more thorough wiping. Use a clean, dry microfiber cloth.
- Vinegar Spray: Spray white vinegar directly onto the glass. Wipe immediately with a fresh, dry microfiber cloth until streak-free. The vinegar cuts through any remaining residue.
- Paper Towels: For a final buff, clean paper towels can absorb residue and reduce streaks.
- Rust Spots on Racks or Interior:
- Prevention: Dry racks thoroughly after cleaning to prevent rust.
- Light Rust: For minor rust, make a paste of baking soda and a little lemon juice. Apply, let sit, then scrub with a stiff brush.
- Protection: After cleaning and drying, you can lightly rub cooking oil on your oven racks. This helps prevent future rust.
- Difficulty Removing Gas Burner Parts:
- Consult Manual: Always refer to your oven’s user manual for specific instructions on removing gas burner caps, grates, and other parts. Some parts are not meant to be removed.
- Gentle Force: If removable, use gentle, firm pressure. Do not force parts.
- Professional Help: If unsure, consider calling a professional for advice or assistance to avoid damage.
These solutions help overcome typical cleaning challenges. They ensure your gas oven gets the best possible cleaning outcome.
Maintaining Your Clean Gas Oven: Best Practices
Cleaning your gas oven with baking soda and vinegar is effective. However, regular maintenance keeps it looking good longer. It also makes future deep cleans much easier. A few simple habits can prevent significant grime buildup. I believe in prevention. It saves time and effort in the long run.
Here are some best practices for maintaining your clean gas oven:
- Wipe Spills Immediately: This is the golden rule. As soon as food spills or splatters occur, wait for the oven to cool down. Then, wipe them up with a damp cloth. Fresh spills are much easier to remove than baked-on ones. This simple act can prevent major cleaning sessions.
- Use Oven Liners: Place a silicone oven liner or aluminum foil on the bottom rack. This catches drips and spills before they reach the oven floor. It makes cleanup incredibly simple. Just remove the liner and clean it, or replace the foil. Always ensure the liner does not block any vents or openings in a gas oven.
- Regular Spot Cleaning: Do not wait for a full-blown deep clean. Every week or two, give your oven a quick look-over. If you see any small, stubborn spots, address them.
- Baking Soda Paste: A small amount of baking soda paste applied to a spot for 30 minutes can work wonders.
- Vinegar Spray: A quick spray of vinegar and a wipe can handle minor grease.
- Clean Oven Racks Periodically: Even if the oven interior is not heavily soiled, regularly clean your oven racks. They often accumulate grease and food residue. A quick soak in hot, soapy water helps keep them from getting too bad.
- Use Baking Sheets Under Dishes: When baking casseroles or anything that might bubble over, place a baking sheet underneath. This acts as a secondary barrier. It catches any overflow and protects the oven floor.
- Schedule Deep Cleans: Even with regular maintenance, schedule a deep clean using the baking soda and vinegar method every 3-6 months. This prevents grime from becoming too overwhelming. The frequency depends on how often you use your oven and what you cook.
- Address Sticky Buttons and Handles: These can get grimy quickly. Use a damp cloth with a tiny bit of dish soap or a vinegar solution to wipe down control knobs and handles regularly.
By adopting these maintenance habits, your gas oven will stay cleaner for longer. This reduces the need for intense scrubbing. It keeps your cooking space fresh and hygienic.
Frequently Asked Questions About Cleaning Your Gas Oven
Here are answers to common questions about how to clean your gas oven with baking soda and vinegar.
Is it safe to use baking soda and vinegar on a gas oven?
Yes, it is very safe. Baking soda and vinegar are non-toxic. They do not produce harmful fumes. This method avoids harsh chemicals often found in commercial oven cleaners. It is a safer choice for your home and family.
How often should I clean my gas oven?
The frequency depends on usage. For light use, clean it every 3-6 months. If you cook often or have frequent spills, a deep clean every 1-3 months is better. Regular spot cleaning helps extend the time between deep cleans.
Can I use this method on a self-cleaning oven?
While generally safe, this method is usually not needed for self-cleaning ovens. The self-cleaning cycle uses high heat to burn off food. If you prefer a chemical-free alternative, you can use baking soda and vinegar on cold oven surfaces, but avoid damaging the self-cleaning coating.
What if the stains do not come off completely?
Some very old or heavily baked-on stains might require multiple applications. Reapply the baking soda paste to the stubborn spots. Let it sit longer, up to 24 hours. Use a plastic scraper gently to lift the softened grime before wiping. Patience is key.
Does the oven need to be cold for cleaning?
Yes, always clean a completely cold oven. Applying baking soda or vinegar to a hot oven can cause burns. It also reduces the effectiveness of the cleaning agents. A cold surface allows the paste to work properly.
Will baking soda and vinegar damage my oven?
No, baking soda and vinegar are mild and will not damage most oven surfaces. They are non-abrasive enough not to scratch finishes. This natural method is gentle on your appliance. It is a safe alternative to harsh chemical cleaners.
Conclusion: Enjoying Your Naturally Clean Gas Oven
Learning how to clean your gas oven with baking soda and vinegar is a game-changer. This natural method proves that you do not need harsh chemicals for a spotless kitchen. It is a safe, cost-effective, and surprisingly powerful way to tackle even the toughest oven grime. I have used it for years, and it consistently delivers impressive results.
By following the simple steps outlined in this guide—from preparation to application, rinsing, and crucial post-cleaning care—you can transform your greasy oven. You will remove baked-on food, eliminate unpleasant odors, and restore your appliance’s shine. Remember, consistent maintenance helps prolong that clean look. Embrace these natural cleaning solutions. Enjoy the satisfaction of a sparkling clean gas oven without the chemical fumes. Your kitchen will feel fresher, and your cooking will be more enjoyable. Start your oven cleaning project today and experience the power of baking soda and vinegar for yourself.
- oven cleaning
- natural cleaning
- baking soda vinegar
- gas oven maintenance
- DIY cleaning

Todd Martin
Senior Writer
With over 15 years of experience in home renovation and design, I started HEG to share what I’ve learned with homeowners who want to create spaces that are both beautiful and functional. I’ve always believed in a hands-on approach, and over the years, I’ve picked up practical solutions that actually work. Through HEG, I aim to make home improvement more approachable, sharing real tips that help you create a home you truly love.