· Todd Martin · Kitchen Appliances · 21 min read
How To Cook Chicken In Power Xl Air Fryer Grill
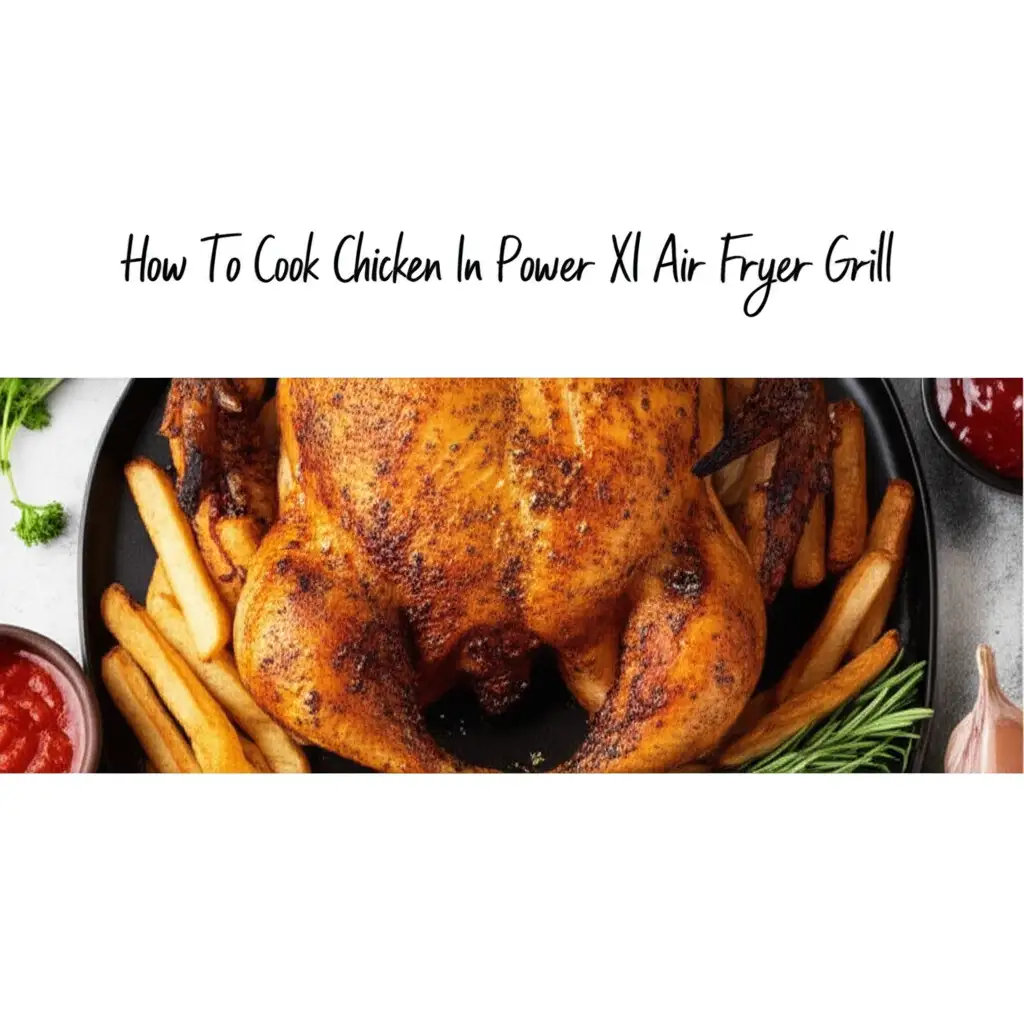
Unlock Flavor: Cooking Chicken in Your Power XL Air Fryer Grill
Cooking chicken is a staple for many homes. We want it juicy inside and perfectly crisp outside. The Power XL Air Fryer Grill is a game-changer for achieving this balance. This appliance combines the benefits of air frying with the char of grilling. It makes preparing delicious chicken simple and efficient. This guide will show you how to cook chicken in your Power XL Air Fryer Grill. We will cover preparation, specific cooking techniques, and essential tips. Get ready to enjoy perfectly cooked chicken, whether it is breasts, thighs, or a whole bird.
Takeaway
- Preheat your Power XL Air Fryer Grill for even cooking.
- Pat chicken dry and season well for crispy results.
- Cook chicken at recommended temperatures and times for its cut.
- Use a meat thermometer to ensure chicken reaches 165°F (74°C).
- Clean your grill basket regularly for best performance.
The Power XL Air Fryer Grill cooks chicken quickly and evenly. It uses circulating hot air for crispiness and a grill plate for char marks. This creates delicious and healthy chicken dishes with less oil.
Understanding Your Power XL Air Fryer Grill
The Power XL Air Fryer Grill is a versatile kitchen appliance. It offers both air frying and grilling capabilities. Knowing how your specific model works helps you cook chicken better. Different models might have different features or capacities.
This appliance uses Rapid Air Technology for air frying. Hot air circulates around the food at high speeds. This cooks food from all directions, creating a crispy exterior. The grill plate adds direct heat, giving you those desired grill marks and smoky flavor. Using the Power XL Air Fryer Grill effectively means understanding these functions. It is key to achieving great chicken.
Key Features and Modes
Your Power XL Air Fryer Grill has multiple cooking modes. The air fry mode is great for crispy textures. The grill mode delivers charred flavor. Some models also include bake, roast, or dehydrate settings. Always choose the right mode for your chicken recipe. I often switch between air fry and grill. This helps achieve both crispiness and char.
The grill plate gets very hot. It creates real grill marks and adds flavor. The air fryer basket allows air to circulate around all sides of your food. This helps cook food evenly. You can use both features together for optimal results. For example, air fry first then finish on the grill plate.
Power XL Grill Specifics
Every Power XL Air Fryer Grill model has specific instructions. Check your user manual for precise temperature ranges. It also lists recommended cooking times. Some models have pre-programmed settings for common foods like chicken. These can be a good starting point. I always refer to my manual for new recipes.
The size of your appliance also matters. A larger capacity unit can cook more chicken at once. This saves time if you are cooking for a family. Understand your model’s unique features. This ensures you use it to its full potential for cooking chicken.
Preparing Your Chicken for Optimal Results
Proper chicken preparation is crucial. It ensures tasty, tender, and safe meals. Cleaning, seasoning, and marinating make a big difference. They affect both flavor and texture. Taking these steps sets you up for cooking success.
Cleaning and Trimming Chicken
Always start by properly cleaning your chicken. Remove any excess fat or skin. Pat the chicken thoroughly dry with paper towels. Excess moisture can prevent browning and crispiness. A dry surface helps achieve that beautiful golden crust. I learned this the hard way, and it makes all the difference. For more detailed guidance, you can refer to articles like how to clean a chicken or how to clean a whole chicken.
Trimming also helps with even cooking. Remove any loose bits that might burn quickly. For chicken breasts, consider pounding them to an even thickness. This ensures they cook uniformly. Uneven thickness can lead to dry spots or undercooked areas.
Marinades, Brines, and Rubs
Marinating adds flavor and moisture to chicken. A good marinade can also tenderize the meat. Aim for at least 30 minutes of marinating time. Overnight marinating provides the best flavor penetration. Use a non-reactive dish for marinating.
- Marinades: Combine oil, acid (like lemon juice or vinegar), herbs, and spices.
- Brines: A salt water solution that helps chicken retain moisture. Brining is excellent for juicy chicken.
- Rubs: Dry spice mixtures applied directly to the chicken. Rubs create a flavorful crust.
Apply your chosen marinade or rub generously. Ensure all surfaces are covered. This helps distribute flavor throughout the chicken. Do not over-season with salt if your rub or marinade already contains a lot of it.
Seasoning and Oiling Chicken
Even if you use a marinade, add a light seasoning just before cooking. This can be simple salt and pepper. I often add a pinch of garlic powder or paprika too. This extra layer of seasoning enhances the overall taste. It also helps with crust formation.
Lightly oiling the chicken prevents sticking. It also promotes crispiness. Use a high smoke point oil, like avocado oil or grapeseed oil. A light spray is usually enough. You do not need much oil in an air fryer. The Power XL Air Fryer Grill is designed for minimal oil use. This makes for healthier meals.
Preheating and Setting Up Your Power XL Grill
Preheating is a critical step for cooking chicken. It ensures consistent temperatures and even cooking. Skipping this step can lead to food sticking. It also results in unevenly cooked chicken. Taking a few minutes to preheat makes a big difference.
Importance of Preheating
Preheating your Power XL Air Fryer Grill is like preheating a traditional oven. It brings the cooking surface and internal temperature to the desired level. This allows for immediate searing when the chicken goes in. Searing locks in juices and creates a better texture. Cold surfaces can cause food to stick. They also delay the cooking process. For more information, you can read about how to know when Power XL Air Fryer is preheated.
I always preheat for at least 5-10 minutes. This ensures the grill plate is hot enough. It also makes sure the air frying element is ready. Your appliance might have a preheat indicator. Wait for it to signal readiness. This guarantees you start cooking at the ideal temperature.
Temperature Settings for Chicken
Chicken needs specific temperatures for proper cooking. Most chicken recipes call for temperatures between 360°F (182°C) and 400°F (204°C). The exact temperature depends on the chicken cut. Thicker cuts may need lower temperatures for longer times. This ensures they cook through without burning the outside. Thinner cuts benefit from higher heat for a shorter duration.
I typically start chicken pieces at 375°F (190°C) for air frying. For grilling, I use the grill setting, which is usually around 400-450°F (204-232°C). Always adjust based on your specific Power XL model. Some models have preset chicken buttons. These presets are a good starting point for beginners.
Using the Right Accessories
Your Power XL Air Fryer Grill comes with various accessories. The air fry basket is best for uniform crisping. The grill plate is perfect for char marks. Some models include a rotisserie spit or skewers. Choose the accessory that fits your chicken cut and cooking method.
- Air Fry Basket: Ideal for chicken wings, nuggets, and smaller pieces. It allows 360-degree air circulation.
- Grill Plate: Best for chicken breasts, thighs, or drumsticks you want to grill. It adds flavor and grill marks.
- Rotisserie Spit: For cooking a whole chicken evenly. Ensure your model supports this feature.
Do not overcrowd the basket or grill plate. This is important for even cooking. Overcrowding reduces air circulation. It makes the chicken steam instead of crisp. Cook in batches if necessary. You can also explore if you can put an aluminum pan in an air fryer Power XL for certain types of cooking.
Cooking Chicken Pieces: Wings, Thighs, Breasts
Cooking different chicken pieces requires different approaches. Each cut has unique thickness and fat content. Understanding these differences helps you cook them perfectly. The Power XL Air Fryer Grill excels at cooking all chicken cuts.
Air Frying Chicken Wings
Chicken wings are a favorite in the air fryer. They come out incredibly crispy. I usually cook them at 380°F (193°C) for about 20-25 minutes. Flip them halfway through cooking. This ensures even crispiness on all sides.
Make sure wings are in a single layer. Do not overcrowd the basket. If you have many wings, cook them in batches. This allows hot air to circulate properly. Season your wings well before cooking. A light coat of oil also helps achieve extra crispiness. For specific timings, you might find guidance on how long to cook chicken wings in a Hamilton Beach air fryer, which can be adapted.
Grilling Chicken Thighs
Chicken thighs are forgiving due to their higher fat content. They stay juicy and flavorful. I often use the grill plate for thighs. Preheat the grill to 400°F (204°C). Place skin-side down first for good char marks. Cook for about 8-10 minutes per side.
The total cooking time for thighs is typically 20-25 minutes. This depends on their size and thickness. Always check the internal temperature. It should reach 165°F (74°C). The Power XL Air Fryer Grill gives thighs a delicious crisp skin. The meat stays tender inside.
Cooking Chicken Breasts
Chicken breasts are lean and can dry out easily. Proper technique is key for juicy results. I recommend pounding thicker breasts to an even thickness. This helps them cook uniformly. Cook chicken breasts at 375°F (190°C).
Place breasts on the grill plate or in the air fryer basket. Cook for 15-20 minutes. Flip them halfway through. The exact time depends on breast size. Always use a meat thermometer. Ensure the internal temperature reaches 165°F (74°C). A little oil and good seasoning make them flavorful.
Grilling Whole Chicken and Larger Cuts
Cooking a whole chicken or larger cuts in your Power XL Air Fryer Grill is possible. It requires a bit more planning. The rotisserie function is ideal for whole birds. Larger cuts like spatchcocked chicken also work well. These methods ensure even cooking and a beautiful finish.
Rotisserie Whole Chicken
Many Power XL Air Fryer Grill models include a rotisserie spit. This feature is perfect for cooking a whole chicken. It rotates the chicken slowly, ensuring even cooking. The skin crisps beautifully on all sides. First, prepare your chicken by tying its legs and wings. This prevents them from flopping during rotation.
Season the chicken thoroughly. Slide it onto the rotisserie spit. Cook at around 375°F (190°C) to 400°F (204°C). Cooking time varies greatly depending on the chicken’s weight. A 3-pound chicken might take 45-60 minutes. A 4-5 pound chicken could take 60-90 minutes. Always check the internal temperature in the thickest part of the thigh. It must reach 165°F (74°C).
Spatchcocked Chicken Method
Spatchcocking means removing the backbone of the chicken. This flattens the bird. A flattened chicken cooks faster and more evenly. It also fits better in the Power XL Air Fryer Grill. This method creates more surface area for crispy skin.
To spatchcock, place the chicken breast-side down. Use strong kitchen shears to cut along both sides of the backbone. Remove the backbone. Then, flip the chicken over and press down on the breastbone to flatten it. Season well. Cook at 375°F (190°C) for 40-60 minutes. Flip halfway through. The skin will get very crispy. Again, use a thermometer to confirm doneness.
Large Bone-In Cuts
For large bone-in cuts like split chicken breasts or turkey thighs, follow similar principles. Lower temperatures for longer cooking times work best. This allows heat to penetrate to the bone without drying out the meat. You might use a temperature of 350°F (175°C). Cooking times could range from 30-45 minutes.
Always ensure good air circulation. Do not overlap pieces. Flip them regularly to ensure even cooking and browning. Bone-in cuts often have more flavor. They also tend to stay juicier. The Power XL Air Fryer Grill handles these cuts well. It delivers delicious results.
Achieving Perfect Crispy Skin and Juiciness
Everyone wants crispy chicken skin and juicy meat. The Power XL Air Fryer Grill is excellent at this. It combines high heat and circulating air. This method creates incredible texture. Following a few simple tips can elevate your chicken dishes.
Tips for Crispy Skin
Achieving super crispy skin is a top goal for many. My first tip is always to pat the chicken skin very dry. Moisture is the enemy of crispiness. Use paper towels generously. This removes surface water. Second, use a light coat of high-smoke-point oil. Avocado oil or grapeseed oil work well. This helps conduct heat and promotes browning.
Do not overcrowd the cooking basket or grill plate. Give each piece of chicken space. This allows hot air to circulate freely around the skin. If pieces are too close, they will steam instead of crisp. Cook at a higher temperature, around 380-400°F (193-204°C). This rapid heat helps the skin render its fat and crisp up quickly. Finally, flipping halfway through cooking exposes all sides to the hot air. This ensures even crisping.
Preventing Dryness and Ensuring Juiciness
No one likes dry chicken. To keep your chicken juicy, avoid overcooking it. This is the most important rule. A meat thermometer is your best friend. Chicken is done when it reaches an internal temperature of 165°F (74°C). Pull it out of the Power XL Air Fryer Grill as soon as it hits this mark. Every degree past this point makes it drier.
Consider brining your chicken before cooking. A simple salt and sugar brine can work wonders. Brining helps the chicken retain moisture during cooking. Marinades also contribute to juiciness. They add flavor and a barrier against moisture loss. Using bone-in, skin-on chicken also helps. The bone and fat keep the meat moist. Cook skin-side down first on the grill plate. This renders fat into the meat.
The Importance of Resting Meat
Resting chicken after cooking is crucial. It allows the juices to redistribute throughout the meat. If you cut into chicken immediately, juices will flow out. This makes the meat dry. Resting locks in all that delicious moisture.
I always transfer the cooked chicken to a cutting board. Cover it loosely with foil. Let it rest for at least 5-10 minutes. Larger cuts like a whole chicken need 10-15 minutes. This simple step makes a huge difference. You will notice the chicken is much juicier and more flavorful. Do not skip this step for perfect results.
Post-Cooking: Resting, Slicing, and Cleaning
Cooking chicken is only part of the process. What you do after cooking matters just as much. Resting the meat ensures juiciness. Proper slicing makes for a better eating experience. And thorough cleaning maintains your Power XL Air Fryer Grill.
Resting Your Chicken
Once your chicken reaches the safe internal temperature of 165°F (74°C), remove it from the Power XL Air Fryer Grill. Transfer it to a clean cutting board or plate. I always cover it loosely with aluminum foil. This keeps it warm. Resting allows the muscle fibers to relax. It lets the juices redistribute throughout the meat. This makes the chicken more tender and moist.
For smaller pieces like breasts or thighs, 5-7 minutes of resting is usually enough. A whole chicken needs 10-15 minutes. Resist the urge to cut into it right away. This simple step prevents dry chicken. It ensures every bite is flavorful and juicy.
Slicing and Serving
Slicing chicken correctly also enhances the eating experience. Always slice against the grain of the meat. This shortens the muscle fibers. It makes the chicken more tender and easier to chew. For chicken breasts, you will see the grain running lengthwise. Slice across these lines.
Arrange your perfectly cooked chicken on a platter. Serve it immediately with your favorite sides. The crispy skin and juicy interior will be a highlight. The Power XL Air Fryer Grill makes this easy to achieve. I love seeing the grill marks on my chicken.
Cleaning Your Power XL Air Fryer Grill
Cleaning your Power XL Air Fryer Grill after each use is essential. It prevents food buildup and maintains efficiency. Allow the grill plate and basket to cool down completely. Most components are non-stick and easy to clean. Many parts are also dishwasher safe. Always check your manual first.
- Remove large food particles: Scrape off any stuck-on bits with a non-abrasive scrubber.
- Wash with warm, soapy water: Use a sponge or soft brush. Avoid abrasive cleaners or steel wool.
- For stubborn grease: Soak the parts in hot soapy water for a few minutes. You can also refer to guides like how to clean grease from air fryer.
- Wipe down the unit: Use a damp cloth to clean the exterior.
Regular cleaning extends the life of your appliance. It also ensures sanitary cooking. Keeping your Power XL Air Fryer Grill clean makes every cooking experience better. You can find general tips on how to clean air fryer or how to clean a Ninja air fryer which apply to most air fryers, including the Power XL.
Troubleshooting Common Chicken Cooking Issues
Even experienced cooks run into problems sometimes. With the Power XL Air Fryer Grill, some common issues can arise. Knowing how to troubleshoot these problems saves your meal. I have faced these myself and learned from them.
Chicken Is Not Crispy Enough
If your chicken skin is not crispy, moisture is likely the culprit. Ensure you thoroughly pat the chicken dry before cooking. Any surface water will prevent browning and crisping. Also, avoid overcrowding the basket or grill plate. Too much chicken limits air circulation. The chicken will steam instead of air fry or grill. Cook in smaller batches if necessary.
Another reason could be insufficient cooking time or temperature. Ensure your Power XL Air Fryer Grill is fully preheated. Try increasing the temperature by 10-20 degrees for the last 5-10 minutes of cooking. This can help crisp up the skin. A light spray of oil on the skin before cooking also helps.
Chicken Is Dry or Overcooked
Dry chicken means it cooked too long. The number one tool to prevent this is a meat thermometer. Cook chicken until it reaches 165°F (74°C) internal temperature. Pull it out immediately when it hits this mark. Do not rely solely on visual cues or time. Different chicken pieces vary in size.
Another cause of dry chicken is cooking at too high a temperature for too long. If the outside browns quickly but the inside is still raw, reduce the temperature. Increase the cooking time slightly. Brining or marinating chicken can also help. These steps lock in moisture. Finally, always let the chicken rest after cooking. This allows juices to redistribute.
Uneven Cooking or Browning
Uneven cooking often results from uneven heat distribution or overcrowding. Always preheat your Power XL Air Fryer Grill fully. This ensures the entire cooking surface is hot. Arrange chicken in a single layer. Do not overlap pieces. Give each piece enough space for air to circulate.
Flipping chicken halfway through cooking is crucial. This exposes all sides to the heat. For chicken wings or nuggets, shaking the basket periodically helps. For grilled chicken, rotate the pieces. Check your appliance’s hotspots. Some air fryers have areas that cook faster. Adjust placement as needed for uniform results.
Chicken Sticking to the Grill Plate
Chicken sticking to the grill plate is frustrating. This usually happens if the plate is not hot enough or not properly oiled. Always preheat the grill plate thoroughly. It needs to be very hot to sear the chicken. A hot surface helps create a crust that releases easily.
Lightly oil the chicken itself or the grill plate before placing food. A thin layer of high-smoke-point oil creates a non-stick barrier. Do not move the chicken immediately after placing it down. Let it cook for a few minutes. It will release naturally when a crust forms. If it still sticks, it might need another minute or two to develop that crust. Also, ensure your grill plate is clean. Residue can cause sticking.
Advanced Chicken Cooking Techniques
Once you master the basics, you can try advanced techniques. These methods add more flavor and variety to your chicken dishes. Your Power XL Air Fryer Grill supports many creative cooking styles. They help you explore new recipes.
Stuffed Chicken Breasts
Stuffed chicken breasts are impressive and delicious. You can fill them with cheese, herbs, spinach, or mushrooms. First, create a pocket in the chicken breast. Be careful not to cut all the way through. Fill the pocket with your desired mixture. Secure it with toothpicks if needed.
Cook stuffed chicken breasts in your Power XL Air Fryer Grill at around 375°F (190°C). Cooking time will be longer than plain breasts, perhaps 20-30 minutes. The exact time depends on the stuffing and breast thickness. Always check the internal temperature. It should reach 165°F (74°C) in the thickest part of the chicken. This technique yields a complete, flavorful meal in one go.
Chicken Skewers (Kebabs)
Chicken skewers are perfect for the Power XL Air Fryer Grill’s grill function. Cut chicken into uniform 1-inch pieces. Marinate them for extra flavor. Thread the chicken onto skewers, alternating with vegetables if desired. Bell peppers, onions, and zucchini work well. If using wooden skewers, soak them in water for 30 minutes first. This prevents burning.
Place skewers on the grill plate. Cook at 400°F (204°C) for 15-20 minutes. Turn them every 5 minutes. This ensures even cooking and grill marks on all sides. Skewers are great for portion control. They are also fun to eat. The Power XL Air Fryer Grill gives them a nice char.
Glazing Chicken
Glazing adds a final burst of flavor and a beautiful sheen. Apply glazes during the last few minutes of cooking. This prevents them from burning. Common glazes include BBQ sauce, honey-garlic sauce, or teriyaki. I brush the glaze onto the chicken in the last 5-10 minutes.
Brush a thin layer of glaze onto the chicken. Return it to the Power XL Air Fryer Grill. Cook for a few more minutes. The glaze will caramelize. Repeat this process once or twice more for a thicker coating. Be careful not to let the glaze burn. Sweet glazes can burn quickly. This technique makes your chicken dishes look and taste restaurant-quality.
FAQ Section
Q1: Can I cook frozen chicken in the Power XL Air Fryer Grill?
Yes, you can cook frozen chicken in your Power XL Air Fryer Grill. It will take longer than cooking thawed chicken. Increase the cooking time by about 50% or more. Always check the internal temperature with a meat thermometer. Ensure it reaches 165°F (74°C) before serving. You may need to flip or separate pieces more frequently.
Q2: What temperature should I set for chicken breasts?
For bone-in or boneless chicken breasts, a good starting temperature is 375°F (190°C). Cooking time usually ranges from 15-25 minutes, depending on thickness. Always use a meat thermometer to ensure the internal temperature reaches 165°F (74°C). Pounding chicken breasts to an even thickness helps ensure uniform cooking.
Q3: How do I get crispy skin on chicken thighs?
To get crispy skin on chicken thighs, first pat them very dry with paper towels. Lightly brush or spray with a high-smoke-point oil. Preheat your Power XL Air Fryer Grill to 400°F (204°C). Place the thighs skin-side down on the grill plate. Cook until the skin is golden brown and crispy, then flip.
Q4: Do I need to flip the chicken when cooking in the Power XL Air Fryer Grill?
Yes, it is highly recommended to flip the chicken halfway through cooking. This ensures even browning and crispiness on all sides. It also helps the chicken cook through uniformly. For smaller pieces like wings, shaking the basket a few times can achieve the same effect.
Q5: How long does it take to cook a whole chicken?
The cooking time for a whole chicken in your Power XL Air Fryer Grill depends on its size. A 3-pound chicken might take 45-60 minutes, while a 4-5 pound chicken could take 60-90 minutes. Cook at 375-400°F (190-204°C). Always use a meat thermometer in the thickest part of the thigh, ensuring it reaches 165°F (74°C).
Q6: Can I use aluminum foil in my Power XL Air Fryer Grill?
You can generally use aluminum foil in your Power XL Air Fryer Grill, but with caution. Avoid covering the entire basket or grill plate, as this can block airflow. Leave gaps for circulation. Do not let foil touch the heating element. It is best used for specific tasks like catching drips or wrapping certain foods. Check your appliance manual for specific guidelines.
Conclusion
Mastering how to cook chicken in your Power XL Air Fryer Grill opens up a world of delicious possibilities. You can achieve perfectly crispy skin and incredibly juicy meat. This versatile appliance makes cooking chicken simple and enjoyable. We covered everything from preparing your chicken to mastering different cuts. You now have the knowledge to troubleshoot common issues and even explore advanced techniques.
Remember the key steps: proper preparation, accurate temperature settings, and mindful cooking times. Always use a meat thermometer for safety and perfect doneness. Don’t forget to let your chicken rest for maximum juiciness. Your Power XL Air Fryer Grill is a powerful tool.
- Power XL Air Fryer Grill
- air fryer chicken recipes
- chicken cooking guide
- healthy chicken
- crispy chicken
- air frying tips
- grill chicken

Todd Martin
Senior Writer
With over 15 years of experience in home renovation and design, I started HEG to share what I’ve learned with homeowners who want to create spaces that are both beautiful and functional. I’ve always believed in a hands-on approach, and over the years, I’ve picked up practical solutions that actually work. Through HEG, I aim to make home improvement more approachable, sharing real tips that help you create a home you truly love.