
· Todd Martin · Home Maintenance · 22 min read
How To Fix A Lift Chair
Fix Your Lift Chair: Simple Solutions
Lift chairs offer great comfort and independence. Many people rely on them daily. When a lift chair stops working, it causes immediate concern. You might wonder if you need a costly replacement. The good news is that many common issues are fixable at home. This guide will help you understand how to fix a lift chair. We cover common problems and their solutions. You will learn basic troubleshooting steps. We also explain how to handle power, motor, and remote control issues. My aim is to help you restore your lift chair to full function, saving you time and money.
Takeaway
- Check Power: Always confirm the chair receives power.
- Inspect Remote: Test or replace the remote control.
- Listen for Motor: Identify unusual motor sounds or lack of activity.
- Examine Wiring: Look for loose or damaged cords.
- Lubricate Moving Parts: Address squeaks and stiffness.
To fix a lift chair, first check its power source and connections. Then, test the remote control for function. Listen for motor sounds to diagnose mechanical issues. Inspect all visible wiring for damage or looseness. Many problems have simple solutions.
Understanding Your Lift Chair’s Components
Before you begin repairs, know the parts of your lift chair. This helps you identify the problem area faster. A typical lift chair has several key components. Each part plays an important role in its operation. Understanding these elements simplifies troubleshooting.
Lift chairs generally use an electric motor system. This system moves the chair from a seated position to a lifted, standing position. It also reclines the chair for comfort. The main components work together to provide smooth movement. Knowing what each part does will guide your repair efforts.
The Power Source and Cords
Every electric lift chair needs power to operate. This power comes from a wall outlet. A power cord connects the chair to the outlet. This cord often has a transformer box in the middle. The transformer changes the wall voltage for the chair’s motor.
- Wall Outlet: Ensure the outlet works by plugging in another device.
- Power Cord: Check for cuts, kinks, or damage along the entire length.
- Transformer: This box can get hot. Make sure it is not too hot. Also, check its indicator light. A solid light means power is flowing.
Sometimes, the simplest issue is a disconnected power cord. Make sure the cord is fully plugged into both the wall and the chair. Also, check if a surge protector is in use. A tripped surge protector can stop power flow. Reset it if needed.
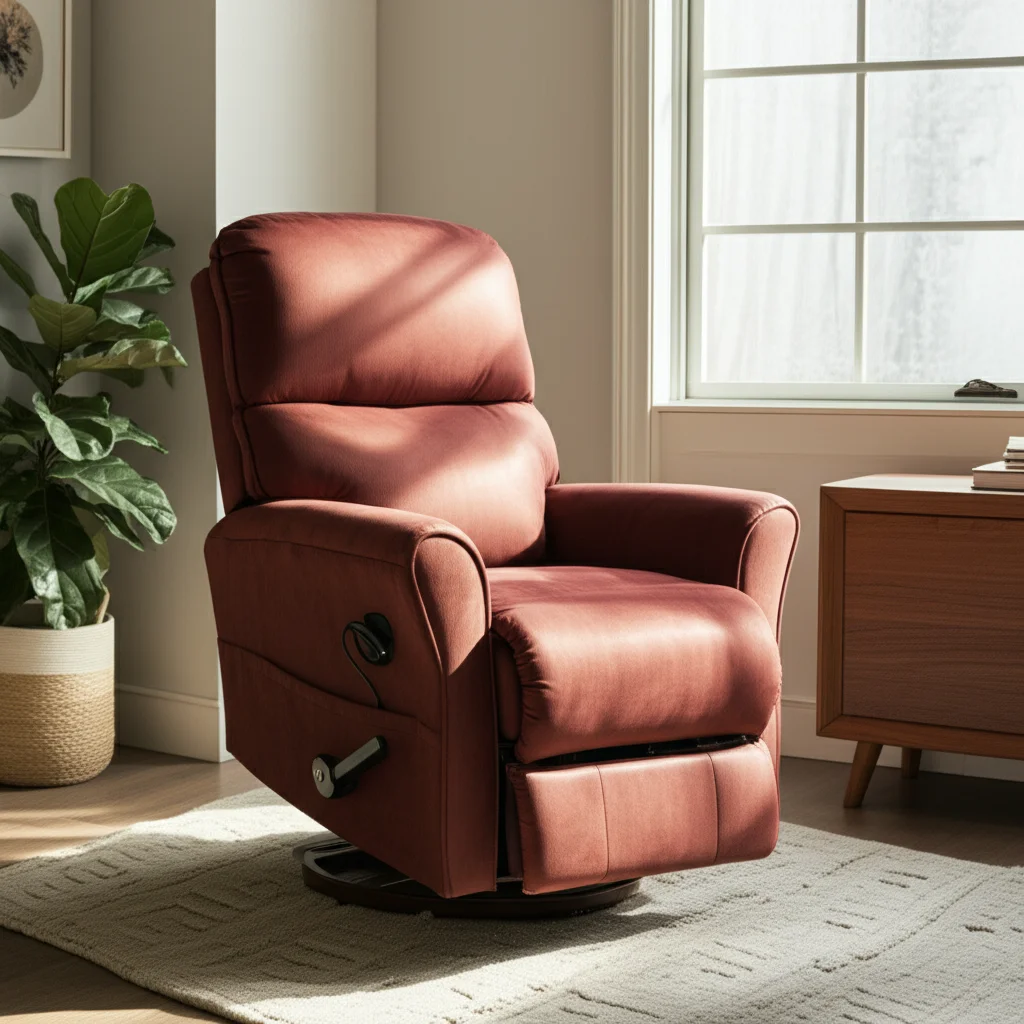
The Hand Control (Remote)
The hand control, or remote, is your interface with the chair. It sends signals to the motor. If the chair does not move, the remote is often the first place to check. Remotes can suffer from wear and tear.
- Buttons: Are the buttons sticking or broken?
- Cable: Is the cable connecting the remote to the chair damaged?
- Connection Point: Is the remote cable securely plugged into the chair?
Many remote issues are easy to fix. The cable might be loose or damaged. If you suspect the remote is the problem, you may need to order a replacement. For more tips on remote issues with similar chairs, you might find this guide helpful: how to fix massage chair remote.
The Motor and Actuator
The motor is the heart of your lift chair. It powers the lifting and reclining functions. The actuator is a part connected to the motor. It converts the motor’s rotary motion into linear motion. This linear motion pushes and pulls the chair’s frame.
- Sounds: Listen for grinding, clicking, or no sound at all.
- Movement: Does the motor attempt to move but fails?
- Connections: Check the wiring connected to the motor.
A faulty motor or actuator can stop all chair movement. Sometimes, the motor simply becomes disconnected. Other times, the motor itself fails. This is a more complex repair. You might need a professional or a new motor.
The Lift Mechanism and Frame
The lift mechanism is the metal frame under the seat. It supports the chair’s weight. It also allows the chair to rise and recline. This mechanism moves using the motor and actuator. Issues here often involve bending or seizing.
- Obstructions: Look for objects caught in the mechanism.
- Bent Parts: Check for bent metal bars or levers.
- Lubrication: Dry or rusted parts can cause stiffness or noise.
The mechanism needs clear space to move. Objects like blankets or toys can get stuck. Also, over time, joints can become stiff. Proper lubrication can often solve squeaking or sticking issues. If the frame itself is bent, it might require a professional to straighten or replace parts. Maintaining the structure of chairs is key for longevity, similar to how one might tend to a recliner chair back.
Troubleshooting Common Power Problems
Power issues are the most frequent cause of a non-working lift chair. Start your repair process here. Many times, the fix is simple. Do not assume the worst immediately. A systematic approach saves time and effort.
Always ensure safety first when dealing with electricity. Unplug the chair before inspecting connections. This prevents accidental shocks. Your safety is important during any repair.
No Power to the Chair
If your lift chair shows no signs of life, begin by checking the power supply. This is the simplest fix. People often overlook basic power checks. I always start here myself.
- Wall Outlet: Plug a lamp or small appliance into the same outlet. If it does not work, the outlet has no power. Check your home’s circuit breaker. A tripped breaker will cut power to the outlet.
- Power Cord Connection: Ensure the chair’s power cord is fully inserted into the wall outlet. Also, check the connection where the cord plugs into the chair. Sometimes, these connections loosen over time.
- Transformer Check: The transformer is usually a black box on the power cord. It often has a green or red indicator light. If the light is off, the transformer may be faulty, or it is not receiving power. Try unplugging it from the chair and the wall for a minute. Then plug it back in firmly.
A common issue is a loose connection at the transformer itself. Some transformers have a two-part connection. Make sure both parts are securely together. If the transformer light remains off, you might need a new transformer.
Intermittent Power Issues
Sometimes, the chair works on and off. This suggests a loose connection rather than a complete failure. Intermittent power is frustrating. It points to a connection that is making and breaking contact.
- Wiggle Test: With the chair plugged in, gently wiggle the power cord at the wall outlet. Do the same at the chair connection point. If the chair flickers or starts, you have found a loose connection.
- Damaged Cord: Look for visible damage on the power cord. Cuts or frayed wires can cause intermittent power. If you find damage, replace the cord. Do not attempt to tape or repair a damaged power cord. This can be a fire hazard.
- Surge Protector/Extension Cord: If you use a surge protector or extension cord, remove it. Plug the chair directly into a wall outlet. Sometimes, these accessories fail or have loose internal wiring. This causes inconsistent power flow.
These checks cover most power-related problems. Fixing a power issue is often the quickest way to get your lift chair working again.
Diagnosing Remote Control Problems
The remote control, or hand control, is how you tell the chair what to do. If the chair is getting power but not moving, the remote is a prime suspect. I have seen many people overlook this simple component. A faulty remote can make you think the whole chair is broken.
Test the remote carefully. Many problems with the chair stem from this small device. Replacing the remote is usually easier and cheaper than other repairs.
Remote Not Responding
If pressing buttons on the remote does nothing, it could be a simple issue. Sometimes, the remote cable itself is the culprit. We can often fix this without buying a new part.
- Check Connections: Ensure the remote’s cable is firmly plugged into the chair. This connection point is usually under the chair or on the side. Unplug it and plug it back in. Make sure it clicks into place.
- Inspect Cable Damage: Look closely at the remote cable. Are there any visible cuts, kinks, or pinches? A damaged cable cannot send signals. If you find damage, the cable needs replacement.
- Test Other Functions: If your remote has multiple buttons (e.g., up, down, recline, lift), try all of them. If some buttons work and others do not, the remote itself might be failing internally.
Sometimes, the remote’s internal circuit board fails. If you have checked connections and cable, a new remote might be necessary. Many lift chair manufacturers sell replacement remotes. Look for the model number on your chair or old remote.
Chair Moving on Its Own or Inconsistently
A chair moving by itself is a safety concern. This often points to a faulty remote or a short in its wiring. It can be startling and dangerous. Address this problem right away.
- Button Sticking: Check if any buttons on the remote are stuck in the pressed position. Sometimes, crumbs or debris get under the buttons. Clean around the buttons carefully.
- Internal Short: A damaged remote cable or internal fault can send false signals. This causes unintended movement. If gentle wiggling of the remote cable causes the chair to move, the cable likely has an internal short.
- Water Damage: If the remote got wet, its internal circuits could be damaged. Water can cause erratic behavior. In such cases, replacing the remote is the best solution.
Always unplug the chair immediately if it moves unexpectedly. This prevents injury. A new remote is a small investment for peace of mind and safety. Replacing a remote is similar to troubleshooting other power-controlled devices, like considering how to fix a massage chair remote if it misbehaves.
Addressing Motor and Actuator Issues
Once you confirm power and remote are working, the motor or actuator might be the problem. These parts are responsible for the chair’s movement. They are more complex than simple power cords. Issues here require closer inspection.
Do not attempt to open the motor housing unless you are trained. It contains powerful electrical components. Focus on external checks and listen for sounds.
Motor Not Engaging
If you hear no sound from the motor when pressing the remote, it is not getting signals or is completely dead. This is a common issue that prevents the chair from moving.
- Check Motor Connections: Look under the chair for the motor. Several wires connect to it. Ensure all connections are secure. They can vibrate loose over time.
- Listen for Hum: Plug in the chair and press a button on the remote. Place your hand gently on the motor. Do you feel a faint hum or vibration? A hum means the motor is receiving power but cannot turn. This suggests a mechanical bind or internal motor failure.
- Overheat Protection: Some motors have thermal overload protection. If the motor was overworked, it might have shut down. Unplug the chair for 30 minutes to an hour. Then, plug it back in and try again. This allows the motor to cool down and reset.
If the motor hums but does not move, it could be seized. If there’s no sound or hum, and connections are good, the motor might be dead. This usually requires a replacement motor and actuator assembly. This is often an expensive part.
Motor Grinding or Straining
Unusual noises from the motor indicate a problem. Grinding, whirring, or straining sounds point to mechanical resistance. This means the motor is working hard but cannot move the chair smoothly.
- Obstructions in Mechanism: Unplug the chair. Look under the chair for any objects caught in the lift mechanism. Blankets, pet toys, or even loose wires can jam the gears. Clear any obstructions.
- Bent Frame Components: Inspect the metal frame of the lift mechanism. Are any bars bent or twisted? A bent component can create friction and prevent smooth movement. Gently try to straighten minor bends. Major bends may require professional help.
- Lack of Lubrication: The pivot points and moving parts of the mechanism require lubrication. If these parts are dry, they can cause grinding noises and resistance. Apply a silicone-based lubricant to all moving joints and pivot points. Work the chair through its range of motion if possible (manually or with gentle remote presses) to spread the lubricant.
- Actuator Rod Bent: The actuator rod extends and retracts. If this rod is bent, it will cause grinding as the motor tries to move it. A bent actuator rod usually means you need a new actuator.
Addressing these issues can save your motor. Allowing it to continue grinding can lead to complete failure. Sometimes, the problem lies not in the motor itself but in the chair’s springs or other structural elements.
Fixing Mechanical Mechanism Problems
Beyond electrical and motor issues, the chair’s physical mechanism can cause problems. This involves the metal frame, hinges, and moving parts. These issues often result in squeaking, sticking, or incomplete movement. I focus on safety first when dealing with the heavy frame. Always unplug the chair before manual inspection.
Squeaking and Sticking Mechanism
Noisy and jerky movements usually mean the mechanism needs attention. Ignoring these signs can lead to bigger problems down the line. Proper maintenance keeps the chair running smoothly.
- Lubrication: The most common cause of squeaking and sticking is a lack of lubrication. The many pivot points and joints on the lift mechanism need grease or oil. Use a silicone spray lubricant or white lithium grease. Apply it to all moving parts where metal meets metal. Cycle the chair gently after applying to work the lubricant in.
- Tighten Loose Bolts: Over time, bolts and screws holding the mechanism together can loosen. This creates play and causes noise. Using appropriate wrenches or screwdrivers, tighten any loose fasteners you find. Do not overtighten, as this can strip threads or damage components.
- Clear Debris: Sometimes, small pieces of fabric, pet hair, or other debris can get caught in the mechanism. This prevents smooth movement. With the chair unplugged, carefully inspect all moving parts. Remove any foreign objects.
Regular lubrication and checking for loose parts can prevent many mechanical issues. A well-maintained mechanism lasts longer and operates quietly.
Chair Not Lifting or Reclining Fully
If the chair does not complete its full range of motion, the mechanism might be binding. This could also be a weak motor or an electronic issue. We focus here on mechanical causes.
- Obstructions: Check thoroughly for anything physically blocking the mechanism’s movement. Blankets, carpet edges, or power cords can get trapped. Move the chair away from walls if it’s a “wall hugger” type; sometimes, they need more clearance than expected. If you’re curious about different types of chairs, you might want to learn about the best wall hugger power lift chair.
- Bent Linkage Rods: Inspect the metal rods that connect the motor/actuator to the chair’s frame. If any are bent, they will restrict movement. Minor bends can sometimes be straightened carefully with pliers. Major bends often require part replacement.
- Damaged Spring(s): Some lift chairs use springs as part of their counterbalance or support system. If a spring is broken or stretched, it can affect the chair’s ability to lift or recline fully. Look for broken or disconnected springs. Replacing springs can be tricky but is often possible. This is similar to repairing springs in other types of seating: how to fix springs in a chair.
- Actuator Alignment: The actuator pushes and pulls the mechanism. If it is misaligned or has a bent attachment point, it cannot perform its full stroke. This may require professional adjustment or parts.
Always observe the mechanism as it tries to move. This helps pinpoint where the binding or resistance occurs. Slow, careful observation reveals many clues.
Advanced Troubleshooting and When to Call a Professional
Some lift chair problems go beyond basic fixes. These might involve internal motor issues or complex circuit board failures. Knowing when to call a professional saves you frustration and potential damage. My experience tells me that complex electrical issues are best left to experts.
However, a few more advanced checks are possible before you call for help. These checks require a bit more comfort with tools and electrical systems. Always prioritize safety.
Testing the Power Supply Unit (PSU)
The Power Supply Unit (PSU) or transformer box converts wall power. If its indicator light is off, but the wall outlet works, the PSU might be dead. You can test it if you have a multimeter.
- Safety First: Unplug the chair from the wall.
- Check Output Voltage: The PSU often has an output voltage rating printed on it (e.g., 24V DC). Set your multimeter to measure DC voltage. Place the probes on the output pins of the PSU connector that plugs into the chair. If you do not get a reading close to the rated voltage, the PSU is likely bad.
- Check Input Fuse: Some PSUs have a small internal fuse. This is less common but worth noting. If accessible, check for a blown fuse. However, often the entire unit is sealed.
If the PSU fails this test, replacing it is necessary. You can usually order a direct replacement from the chair’s manufacturer or a parts supplier.
Inspecting Internal Wiring
Underneath the chair, various wires connect the remote, motor, and power supply. Sometimes, these wires get pinched, frayed, or disconnected from their terminals.
- Unplug the Chair: This is critical.
- Visual Inspection: Carefully trace all wires. Look for any wires that are cut, abraded, or pulled loose from their connectors. Pay close attention to areas where wires might rub against the metal frame.
- Secure Connections: Press firmly on all wire connectors to ensure they are fully seated. Wires can vibrate loose over time.
- Zip Ties: If wires are dangling or rubbing, use zip ties to secure them to the chair frame in a safe path. Ensure they do not interfere with moving parts.
A professional will perform these steps with more specialized tools and knowledge. But a visual check by you can sometimes reveal a simple, hidden problem.
When to Call a Professional
It is time to call a professional lift chair repair technician if:
- Motor Failure: The motor hums but does not move, or there is no hum despite power. Replacing a motor is complex.
- Circuit Board Issues: If your chair has an advanced control box or circuit board that you suspect is faulty, these are not user-serviceable.
- Bent Frame: If the main metal frame or critical linkage rods are severely bent, special tools and expertise are needed to straighten or replace them safely.
- Warranty: If your chair is still under warranty, attempts at DIY repair might void it. Check your warranty terms first.
- Safety Concerns: If you feel unsafe working on the chair, or if the chair moves erratically, call a professional. Safety always comes first.
- Lack of Tools/Knowledge: If you lack the necessary tools (like a multimeter) or confidence to perform the repairs safely, do not force it.
Professional repair services have specialized diagnostic equipment. They also have access to genuine replacement parts. This ensures the chair is repaired correctly and safely.
Maintaining Your Lift Chair for Longevity
Preventive maintenance extends the life of your lift chair. Regular care avoids many common problems. A little effort now saves significant repair costs later. I find that most mechanical failures result from neglected maintenance.
Keeping your chair in good condition ensures it remains a reliable aid. This also improves user safety. Simple steps make a big difference.
Regular Cleaning and Inspection
Keeping the chair clean is more than just aesthetics. Dirt and debris can interfere with mechanical parts.
- Vacuuming: Regularly vacuum the chair, especially under and around the seat cushions. Pay attention to areas where the fabric meets the mechanism. Dust, crumbs, and pet hair can get into moving parts.
- Wiping Down: Wipe down visible parts of the frame and remote. This prevents grime buildup.
- Visual Inspection: Every few months, unplug the chair and visually inspect the entire mechanism. Look for loose bolts, frayed wires, or anything caught in the moving parts. Catching these early prevents major issues.
A clean chair is less likely to develop mechanical binds or electrical shorts from debris.
Lubrication Schedule
Moving metal parts need lubrication to reduce friction and wear. This prevents squeaking and sticking. It also protects the motor from overworking.
- Type of Lubricant: Use a silicone-based spray lubricant or white lithium grease. Avoid oil-based lubricants that can attract dirt.
- Application: Apply lubricant to all pivot points, hinge pins, and any metal-on-metal contact points in the lift mechanism. You will find many such points under the chair.
- Frequency: Lubricate every 6-12 months, depending on how often the chair is used. Heavy use means more frequent lubrication.
After lubricating, cycle the chair through its full range of motion a few times. This helps distribute the lubricant evenly.
Protecting Cords and Remote
Damaged cords and remotes are common failure points. Protecting them extends their life.
- Cable Management: Use zip ties or cable clips to secure loose wires under the chair. Ensure cables are not pinched by the frame or run over by the wheels (if applicable).
- Avoid Tripping Hazards: Position the chair’s power cord so it is not a tripping hazard. This also prevents accidental damage to the cord.
- Remote Care: Keep the remote in a safe place when not in use. Avoid dropping it or spilling liquids on it. If it has a designated pocket on the chair, use it.
Careful handling of cords and the remote prevents many frustrating issues. These small habits preserve your chair’s functionality.
Ensuring Safety During Repair
Working on any electrical appliance carries risks. Lift chairs involve electrical components and heavy mechanical parts. Your safety must be the top priority. Following safety guidelines protects you from injury and prevents further damage to the chair. I always preach safety first.
Never rush repairs. Take your time and ensure each step is done correctly and safely.
Disconnect Power Before Any Manual Work
This is the most crucial safety rule. Before you touch any internal components, before you inspect the mechanism, always unplug the chair from the wall outlet.
- Prevents Shock: Disconnecting power eliminates the risk of electrical shock.
- Prevents Accidental Movement: It stops the chair from moving unexpectedly if a button is accidentally pressed or if there is an internal short. This protects your hands and body from being caught in the mechanism.
- Unplug Completely: Do not rely on just turning off a power switch. Pull the plug from the wall.
This simple step can prevent serious injury.
Use the Right Tools and Proper Lighting
Having the correct tools makes the job easier and safer. Using the wrong tools can strip screws, damage parts, or cause injury.
- Screwdrivers: Have a set of Phillips and flathead screwdrivers.
- Wrenches/Sockets: For tightening bolts on the mechanism.
- Multimeter: Useful for testing electrical components, if you are comfortable using one.
- Gloves: Protect your hands from sharp edges on the metal frame.
- Flashlight/Work Light: Good lighting is essential for seeing under the chair and inspecting small components and wiring. You cannot fix what you cannot see clearly.
Proper tools and lighting enhance your ability to perform the repair effectively and safely.
Be Aware of Pinch Points and Moving Parts
The lift chair mechanism contains many pinch points. These are areas where moving parts can trap fingers or clothing.
- Observe Movement: If you need to test the chair while it is plugged in (e.g., to confirm a fix), keep your hands clear of the mechanism.
- Manual Movement: When manually manipulating the chair parts (with power disconnected), move them slowly and carefully. Always be aware of where your hands are relative to the moving joints.
- Chair Weight: Remember the chair is heavy. If you need to tilt it, get assistance. Do not try to lift or move it by yourself if it is too heavy.
By being mindful of these dangers, you can safely work on your lift chair. Prioritizing safety ensures that your repair efforts lead to a working chair, not an injury.
Frequently Asked Questions
What are the most common reasons a lift chair stops working?
The most common reasons are power supply issues, such as a disconnected plug or a faulty transformer. Remote control problems, like damaged cables or non-responsive buttons, are also frequent. Mechanical jams due to obstructions or lack of lubrication can also stop a chair from moving.
Can I fix a lift chair myself, or do I need a professional?
Many common lift chair problems are fixable at home. Power cord issues, remote cable problems, and lubrication needs are often simple DIY repairs. However, complex electrical faults, internal motor failures, or severely bent frame components typically require a professional technician.
How do I check if my lift chair motor is bad?
First, check if the chair has power and the remote works. Then, listen for a hum from the motor when you press a remote button. A hum without movement suggests a mechanical bind or a seized motor. No sound at all, even with power to the motor, indicates a dead motor.
What kind of lubricant should I use for my lift chair mechanism?
Use a silicone-based spray lubricant or white lithium grease. These types of lubricants are excellent for metal-on-metal moving parts. Avoid using petroleum-based oils, as they can attract dust and grime, which can make the problem worse over time.
My lift chair makes a grinding noise. What does that mean?
A grinding noise usually means there is resistance in the lift mechanism. This could be due to something caught in the moving parts, bent metal components, or a severe lack of lubrication. It could also indicate that the motor or actuator is straining and potentially failing.
How often should I perform maintenance on my lift chair?
Perform a visual inspection and clean the chair regularly. Lubricate the moving parts of the lift mechanism every 6 to 12 months, depending on how frequently the chair is used. Consistent, simple maintenance can prevent many common issues and extend the chair’s lifespan.
Conclusion
Learning how to fix a lift chair empowers you to address common issues. We covered checking power, troubleshooting remote controls, and diagnosing motor and mechanical problems. Many lift chair malfunctions have simple solutions. My aim was to equip you with the knowledge to perform these repairs confidently.
Remember to prioritize safety. Always disconnect power before touching internal parts. Regular maintenance also helps prevent future issues. Keeping your lift chair clean and lubricated extends its life. If a problem seems too complex, or if you feel unsafe, call a professional. Fixing your lift chair can save money and restore your independence. For more home essential guides and repair tips, explore our website.
- lift chair repair
- power recliner fix
- mobility aid troubleshooting

Todd Martin
Senior Writer
With over 15 years of experience in home renovation and design, I started HEG to share what I’ve learned with homeowners who want to create spaces that are both beautiful and functional. I’ve always believed in a hands-on approach, and over the years, I’ve picked up practical solutions that actually work. Through HEG, I aim to make home improvement more approachable, sharing real tips that help you create a home you truly love.


