· Todd Martin · Home Improvement · 21 min read
How To Fix Craftsman Air Compressor Pressure Switch
Fix Your Craftsman Air Compressor Pressure Switch
Has your reliable Craftsman air compressor started acting strangely? Perhaps it runs constantly, or it struggles to build pressure, leaving your projects on hold. Many times, the core of these problems lies with the pressure switch. This small, vital component controls when your compressor starts and stops, ensuring it operates safely and efficiently.
I know how frustrating it is when your tools fail. A faulty pressure switch can halt your work, whether you are inflating tires, powering air tools, or painting. This guide helps you diagnose and fix common pressure switch issues on your Craftsman air compressor. We will cover symptoms, troubleshooting steps, and repair methods. You can restore your compressor to full working order and get back to your tasks.
Takeaway
- Identify Symptoms: Recognize signs like constant running, failure to start, or not building pressure.
- Prioritize Safety: Always disconnect power and drain air before starting any work.
- Troubleshoot Systematically: Check electrical connections, the unloader valve, and pressure settings.
- Replace if Necessary: Understand when a replacement is needed and how to perform it safely.
- Perform Regular Maintenance: Ensure your pressure switch and compressor last longer with proper care.
To fix a Craftsman air compressor pressure switch, you must first identify common symptoms like continuous running or failure to start. Then, follow safety protocols, check electrical connections, inspect the unloader valve, and replace the switch if necessary. This process restores proper automatic operation.
Understanding Your Craftsman Air Compressor Pressure Switch
Your Craftsman air compressor relies on a crucial component: the pressure switch. This device acts as the brain of your compressor’s on-off cycle. It monitors the air pressure inside the tank. When the pressure drops below a set minimum, the switch activates the motor. This allows the compressor to fill the tank with air.
Once the tank reaches a maximum pressure, the switch automatically cuts power to the motor. This prevents over-pressurization and potential damage. This constant monitoring and control system ensures your compressor runs efficiently and safely. Without a properly functioning pressure switch, your compressor would either run continuously or fail to start when needed.
Many Craftsman models feature a pressure switch integrated with the unloader valve. The unloader valve releases air from the pump head when the compressor shuts off. This reduces the starting load on the motor. A problem with the pressure switch often affects the unloader valve’s operation. This leads to various performance issues. Learning how this switch works helps you pinpoint problems quickly.
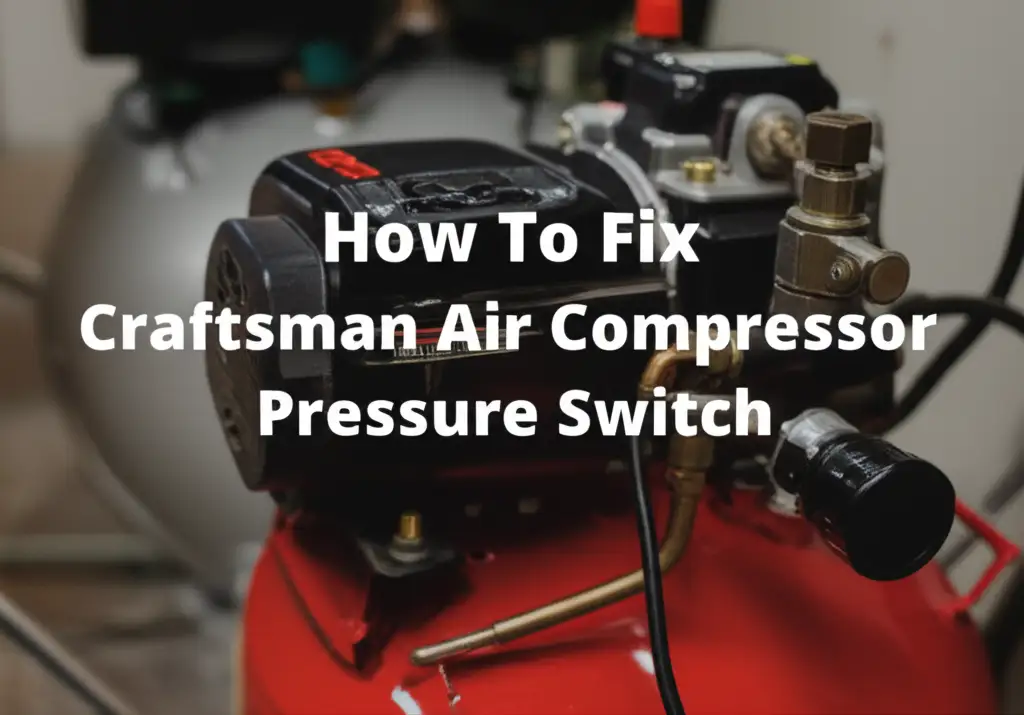
The pressure switch is usually a black box mounted on the manifold or directly to the tank. It has electrical wires connecting it to the motor and power supply. It also has a small tube or port connecting it to the air tank. This port allows it to sense the internal tank pressure. Keep these connections in mind when you start troubleshooting.
Common Symptoms of a Faulty Pressure Switch
Recognizing the signs of a failing pressure switch is your first step. Your Craftsman air compressor will often exhibit clear indicators. Understanding these symptoms helps you diagnose the problem accurately. This prevents unnecessary repairs or replacements of other components.
One common symptom is the compressor running continuously without shutting off. This happens even when the tank reaches its maximum pressure. The pressure switch is failing to sense the high pressure or to cut power to the motor. This continuous operation wastes energy and can lead to motor burnout. This situation requires immediate attention.
Another frequent issue is the compressor failing to start at all. You might plug it in and hear nothing, or the motor might hum but not engage. This suggests the pressure switch is not sending the signal to start the motor. This can happen if the switch is stuck open or if its internal contacts are corroded. Sometimes, your Craftsman air compressor may not turn on due to other electrical issues, but the pressure switch is a prime suspect. Find out more about why your Craftsman air compressor won’t turn on.
You might also notice your compressor struggling to build or maintain pressure. It runs, but the tank pressure gauge barely moves or drops quickly. While other factors like air leaks or a worn pump can cause this, a faulty pressure switch might not be calibrated correctly. It could also have an internal leak preventing proper pressure sensing. Sometimes, your Craftsman air compressor may not build pressure due to other issues. Understand why your Craftsman air compressor won’t build pressure.
Finally, an early shutdown or frequent cycling can point to a pressure switch issue. The compressor starts, runs for a short time, then shuts off before reaching full pressure. It might then restart quickly. This rapid cycling puts stress on the motor and electrical components. It indicates the switch might be reading pressure incorrectly or has worn internal parts.
Safety First: Preparing for Pressure Switch Repair
Before you touch any part of your Craftsman air compressor for repair, safety must be your top priority. Air compressors operate with high pressure and electricity, which can be dangerous. Taking the correct precautions protects you from injury and prevents further damage to your equipment. Never skip these essential safety steps.
First and foremost, disconnect the compressor from its power source. Unplug the power cord from the wall outlet completely. If your compressor is hardwired, turn off the circuit breaker that supplies power to it. Do not rely on just turning the compressor’s power switch to the “off” position. This ensures no electrical current reaches the unit while you work.
Next, you must relieve all air pressure from the tank. Locate the drain valve at the bottom of the air tank. Open it slowly to allow all compressed air to escape. You will hear a hissing sound as the air releases. Wait until the sound stops and the pressure gauge reads zero PSI. This step prevents the tank from suddenly decompressing or accidentally engaging the compressor during repairs.
After draining the air, you should close the drain valve. This prepares the tank for eventual re-pressurization during testing. Also, ensure the pressure regulator is set to its lowest setting. This minimizes initial load on the system when you eventually power it back on. This simple step helps maintain control during the repair process.
Wear appropriate personal protective equipment (PPE). Safety glasses are crucial to protect your eyes from any debris or unexpected air bursts. Gloves can protect your hands from sharp edges or grease. Working in a well-lit and ventilated area is also wise. Keep children and pets away from your workspace to avoid accidents. By following these safety measures, you create a secure environment for your repair work.
Troubleshooting Your Craftsman Pressure Switch: A Step-by-Step Guide
Once safety precautions are in place, you can begin troubleshooting your Craftsman air compressor pressure switch. A systematic approach helps pinpoint the exact problem. This guide helps you identify if the issue truly lies with the pressure switch or another connected component. Follow these steps carefully.
Start by visually inspecting the pressure switch and its surroundings. Look for obvious signs of damage, such as burnt wires, cracked housing, or loose connections. Sometimes, a simple visual check reveals the problem immediately. Dust, debris, or moisture can also interfere with the switch’s operation. Clean any visible dirt around the switch and its connections.
Next, check the electrical connections. The pressure switch connects to the motor, the power supply, and sometimes a separate overload protector. Ensure all wires are firmly attached to their terminals. Tug gently on each wire to confirm it is not loose. Loose connections can lead to intermittent operation or complete failure. This step is crucial for electrical components.
You will also need to inspect the unloader valve, if integrated with your pressure switch. The unloader valve releases air from the compressor head when the motor shuts off. This makes it easier for the motor to restart. If the unloader valve is stuck open, air will continuously leak, and the compressor will not build pressure. If it’s stuck closed, the motor may struggle to restart, often humming or tripping the breaker. A thorough check of this valve is important.
Finally, verify the pressure settings on the switch. Some pressure switches have adjustable cut-in and cut-out pressure settings. Ensure these settings match your compressor’s specifications. Incorrect settings can cause the compressor to run too long or too short. Consult your Craftsman compressor’s user manual for the correct pressure ranges. Adjusting these settings can sometimes resolve pressure-related issues.
Inspecting Electrical Connections and Wiring
Electrical connections are vital for your Craftsman air compressor’s operation. A problem here can easily mimic a faulty pressure switch. I always recommend a thorough inspection of the wiring. This ensures everything is secure and free from damage. This step can save you from replacing a perfectly good pressure switch.
Begin by carefully examining the wires leading to and from the pressure switch. Look for any signs of fraying, cuts, or burnt insulation. Rodents sometimes chew through wires, or they can become pinched. Damaged wiring prevents proper electrical flow. This leads to the switch not receiving or sending signals correctly.
Next, check the terminals where the wires connect to the pressure switch. These terminals should be clean and tight. Loose connections can generate heat, causing resistance and unreliable operation. Use a screwdriver to gently tighten any screws holding the wires in place. Corroded terminals can also impede conductivity. If you see corrosion, carefully clean it with fine-grit sandpaper or a wire brush.
Pay attention to the main power cord as well. Trace it from the wall outlet to the compressor. Look for any damage along its length. A damaged power cord can cause intermittent power issues or prevent the compressor from turning on at all. Sometimes, the problem is simpler than a faulty pressure switch. Discover more reasons why your Craftsman air compressor might not be working.
You should also check the motor’s thermal overload protector, if present. This small button or switch trips if the motor overheats. A tripped overload protector will prevent the compressor from starting. It might be mistaken for a pressure switch failure. If it’s tripped, push it to reset it. If it trips repeatedly, there might be a larger electrical issue or motor problem that causes your Craftsman air compressor to keep tripping the breaker. Learn why your Craftsman air compressor keeps tripping the breaker.
Use a multimeter if you are comfortable with electrical testing. You can test for continuity across the pressure switch terminals (when the compressor is off and fully depressurized). When the switch is depressed (simulating low pressure), there should be continuity across the motor contacts. When released (simulating high pressure), continuity should break. This test confirms if the switch’s internal contacts are working correctly. Remember to consult your compressor’s wiring diagram for accurate testing points.
Checking the Unloader Valve and Diaphragm
The unloader valve is a crucial component often integrated with or connected to the pressure switch. Its proper function is essential for your Craftsman air compressor to start smoothly. If this valve fails, your compressor motor will struggle, hum, or even refuse to start. I always inspect this component thoroughly when troubleshooting pressure switch issues.
The unloader valve’s primary job is to release the air pressure from the line between the pump head and the check valve when the compressor shuts off. This “unloads” the pump, making it easier for the motor to restart without having to push against existing pressure. You often hear a brief hiss of air after the compressor shuts down; that’s the unloader valve doing its job.
If the unloader valve is stuck open, air will continuously leak from the pump head. Your compressor will run but will never build up full pressure in the tank. You might hear a constant hiss from the valve. This indicates it is not sealing properly. This problem mimics a situation where the compressor fails to build pressure.
Conversely, if the unloader valve is stuck closed, air remains in the pump head and discharge line. When the compressor tries to restart, the motor has to overcome this residual pressure. This puts an immense strain on the motor. It can cause the motor to hum, trip a circuit breaker, or fail to start altogether. This issue often makes you think the pressure switch itself is faulty.
Inspect the small copper or plastic tube that runs from the check valve or discharge line to the unloader port on the pressure switch. This tube might be clogged or cracked. A blockage prevents the unloader from sensing pressure changes, leading to improper operation. A crack will cause an air leak, preventing proper unloading or pressure build-up.
The diaphragm inside the pressure switch (or sometimes the unloader valve itself) is also critical. This flexible membrane responds to pressure changes. If the diaphragm is cracked, stiff, or otherwise damaged, it cannot accurately transmit pressure readings to the switch contacts. This results in erratic operation or complete failure. While replacing the diaphragm alone is sometimes possible, often the entire pressure switch assembly is replaced to ensure full functionality.
Replacing Your Craftsman Air Compressor Pressure Switch
When troubleshooting confirms your Craftsman air compressor’s pressure switch is indeed faulty, replacement is the next step. This is a common repair. With the right tools and careful attention, you can do it yourself. Always ensure the compressor is unplugged and depressurized before starting.
First, you need to purchase a new pressure switch. Ensure it is a direct replacement for your Craftsman model. Check the part number on your existing switch or consult your compressor’s manual. The new switch must have the correct pressure settings (cut-in and cut-out PSI) and electrical configurations. Using an incorrect switch can damage your compressor or be a safety hazard.
Carefully disconnect all wires from the old pressure switch. Take a photo of the wiring setup before you start. This serves as a reference when connecting the new switch. Labeling the wires can also prevent confusion. Use needle-nose pliers or a small screwdriver for this task, depending on the terminal type. Remember which wire goes to the motor, which to power, and which to the unloader valve.
Next, disconnect any air lines or tubes attached to the pressure switch. This typically includes the small unloader tube and possibly a larger tube connecting it to the tank manifold. Use a wrench or pliers as needed. Be gentle; these connections can be brittle, especially if they are old. You do not want to damage other parts of your compressor during removal.
Now, unmount the old pressure switch from its location. It is usually held in place by bolts or a threaded pipe fitting. Remove these fasteners. You might need a pipe wrench for threaded connections. If the switch is threaded onto the manifold, turn it counter-clockwise to remove it. Clean the mounting area before installing the new switch.
Install the new pressure switch in reverse order. Thread it onto the manifold, ensuring a tight seal. Apply thread sealant tape (Teflon tape) to pipe threads to prevent air leaks. Reconnect all air lines and tubes securely. Finally, reconnect the electrical wires to the correct terminals on the new switch. Refer to your photo or labels to ensure accuracy. Double-check all connections for tightness.
Testing and Calibration After Repair
Once you have replaced the pressure switch on your Craftsman air compressor, testing is essential. This step confirms the repair was successful. It also allows you to make any final adjustments if your new switch has adjustable settings. Do not skip this crucial phase.
Before turning on the power, double-check all your connections. Ensure all wires are firmly attached and that no tools or debris are left inside the compressor housing. Confirm the drain valve is closed. This prevents air from escaping during the test. Your safety check should be complete before re-energizing the unit.
Plug your Craftsman air compressor back into its power source. Turn the main power switch to the “on” position. Observe the compressor carefully. It should start running and begin to build pressure. Listen for any unusual noises or air leaks. The pressure gauge should steadily climb.
Watch the pressure gauge closely. The compressor should run until it reaches its maximum cut-out pressure. At this point, the pressure switch should click, and the motor should shut off. You should also hear a brief hiss of air from the unloader valve as it releases pressure from the pump head. This indicates the switch is functioning correctly and the unloader valve is working.
After the compressor shuts off, let the pressure drop slightly. You can do this by using an air tool or opening a small valve. The compressor should automatically restart when the pressure drops below the cut-in setting. This confirms the pressure switch is properly sensing low pressure and engaging the motor. This automatic cycle confirms successful repair.
If your new pressure switch has adjustable cut-in and cut-out settings, you can calibrate them now. Use a screwdriver to adjust the setting screws according to your compressor’s manual or your preferred operating range. Make small adjustments and re-test each time until you achieve the desired performance. Always consult your compressor’s manual for recommended pressure ranges. This ensures optimal and safe operation.
Preventative Maintenance for Your Pressure Switch
Keeping your Craftsman air compressor’s pressure switch in good condition extends its life. Preventative maintenance is simpler than extensive repairs. I always suggest a few easy practices to ensure your compressor runs smoothly for years. These steps help avoid unexpected breakdowns.
First, regularly clean around the pressure switch. Dust, dirt, and debris can accumulate on the switch’s external parts and connections. This grime can lead to poor electrical contact or even block the movement of internal components. Use a soft brush or compressed air to keep the area clear. Make sure the compressor is unplugged before cleaning.
Next, periodically check the electrical connections to the pressure switch. Over time, vibrations can loosen wires, or corrosion can build up on terminals. With the compressor unplugged, gently inspect all wire connections for tightness and cleanliness. Tighten any loose screws. If you see corrosion, carefully clean it with a wire brush or electrical contact cleaner. This simple check prevents many common electrical issues.
Ensure the compressor is used within its specified operating conditions. Constantly running the compressor beyond its duty cycle or in extreme temperatures can put undue stress on the pressure switch. This leads to premature wear. Allow the compressor to cool down if it runs for extended periods. This practice helps preserve all internal components.
Check for air leaks around the pressure switch and its associated tubing. Even tiny leaks can cause the compressor to cycle more frequently. This constant cycling wears out the pressure switch faster. Listen for hissing sounds or use soapy water to identify bubbles around connections. Tighten fittings or apply new thread sealant if you find leaks. Maintaining a sealed system helps the pressure switch do its job effectively.
Finally, regular general maintenance of your Craftsman air compressor benefits the pressure switch indirectly. This includes draining the air tank regularly to prevent rust and moisture buildup. This buildup can affect components like the check valve and unloader valve, which directly interact with the pressure switch. Understand how to keep your air compressor tank clean. A well-maintained compressor reduces stress on all its parts, including the pressure switch.
What if My Craftsman Air Compressor Is Not Working at All?
If your Craftsman air compressor shows no signs of life, it can be frustrating. The pressure switch is one possible culprit, but several other factors can cause a complete shutdown. Understanding these possibilities helps you troubleshoot effectively. I often find that the simplest solutions are overlooked first.
Begin by checking the power supply. Is the compressor plugged into a live outlet? Test the outlet with another device. Sometimes, a tripped circuit breaker or a blown fuse at your electrical panel is the reason. Reset the breaker or replace the fuse. Ensure the power cord itself is not damaged. A frayed or cut cord can prevent any power from reaching the compressor.
Next, inspect the compressor’s main power switch. Sometimes, the switch itself can fail internally. Try wiggling it gently to see if it makes a connection. If the switch feels loose or does not click positively, it might need replacement. This is a common wear point on many tools.
The motor’s thermal overload protector is another common cause for a compressor not starting. This small button, usually red or black, protects the motor from overheating. If the motor gets too hot, this protector trips and cuts power. Allow the compressor to cool down for 20-30 minutes, then press the reset button. If it trips again quickly, the motor might have a deeper issue.
Consider the possibility of a seized pump or motor. If you hear a hum but no movement, the motor might be trying to turn but cannot. This can happen if the pump oil is low or if internal parts are seized due to rust or damage. Check the oil level in your Craftsman air compressor. This is a more serious issue requiring professional help or extensive repair.
Finally, while the pressure switch is key for automatic operation, a complete lack of power might bypass it. If the switch’s contacts are permanently open, it prevents the compressor from starting. A multimeter can confirm if power is reaching the switch and if it’s allowing power to pass through to the motor. For broader troubleshooting steps when your portable air compressor is not working, read more here.
FAQ Section
How do I know if my Craftsman air compressor pressure switch is bad?
Your Craftsman air compressor pressure switch might be bad if the compressor runs continuously without shutting off, even at max pressure. Another sign is if it fails to start when pressure drops. You might also notice it constantly cycling on and off too frequently. An audible air leak near the switch or the unloader valve could also indicate an issue.
Can I adjust the pressure on my Craftsman air compressor pressure switch?
Some Craftsman air compressor pressure switches allow for adjustment of the cut-in and cut-out pressure settings. Look for small screws on the switch body, often labeled. Consult your specific Craftsman compressor manual before attempting adjustments. Make small changes, then test the compressor’s cycling to ensure proper operation.
What causes an air compressor pressure switch to fail?
Several factors can cause an air compressor pressure switch to fail. Common causes include electrical arcing and corrosion on internal contacts from frequent use. Dirt, moisture, or debris entering the switch can also cause problems. A damaged or worn diaphragm inside the switch prevents proper pressure sensing. Over time, mechanical wear on moving parts is normal.
Is it hard to replace a Craftsman air compressor pressure switch?
Replacing a Craftsman air compressor pressure switch is a manageable DIY task for most homeowners. It involves disconnecting wires and air lines, then unmounting and re-mounting the new switch. Proper labeling of wires and careful handling of connections makes the process smoother. Always remember to unplug the compressor and drain all air pressure first.
What is the unloader valve’s role in the pressure switch?
The unloader valve, often integrated with or connected to the pressure switch, releases trapped air pressure from the compressor’s pump head when the motor stops. This “unloads” the pump, allowing the motor to restart easily without fighting against residual pressure. If it’s faulty, the motor might struggle to start or run continuously.
Can a bad pressure switch cause my compressor to trip a breaker?
Yes, a bad pressure switch can cause your air compressor to trip a breaker. If the pressure switch’s contacts stick closed, the motor might run continuously, overheating and drawing excessive current. If the unloader valve fails to release head pressure, the motor might overload during startup, also causing the breaker to trip due to excessive amperage draw.
Conclusion
A well-functioning pressure switch is the heart of your Craftsman air compressor’s automatic operation. When it malfunctions, your entire workflow can grind to a halt. By understanding the common symptoms, prioritizing safety, and systematically troubleshooting each component, you empower yourself to resolve most pressure switch issues. Whether it is a simple connection fix or a complete replacement, these steps give you control.
I hope this guide has provided you with the clear, actionable information needed to fix your Craftsman air compressor pressure switch. Remember, regular maintenance helps prevent many of these problems from occurring in the first place. Keeping your compressor clean, checking connections, and draining the tank are small steps that yield big returns in longevity and reliability. With these insights, you can confidently tackle your compressor’s repair and ensure it serves your projects faithfully for years to come. Do not let a small part sideline your big plans; take action today and restore your compressor’s full power.
- Craftsman compressor repair
- air compressor troubleshooting
- pressure switch replacement
- compressor maintenance
- DIY air compressor fix

Todd Martin
Senior Writer
With over 15 years of experience in home renovation and design, I started HEG to share what I’ve learned with homeowners who want to create spaces that are both beautiful and functional. I’ve always believed in a hands-on approach, and over the years, I’ve picked up practical solutions that actually work. Through HEG, I aim to make home improvement more approachable, sharing real tips that help you create a home you truly love.