· Todd Martin · Lawn Care & Tool Repair · 18 min read
How To Fix Leaf Blower That Wont Start
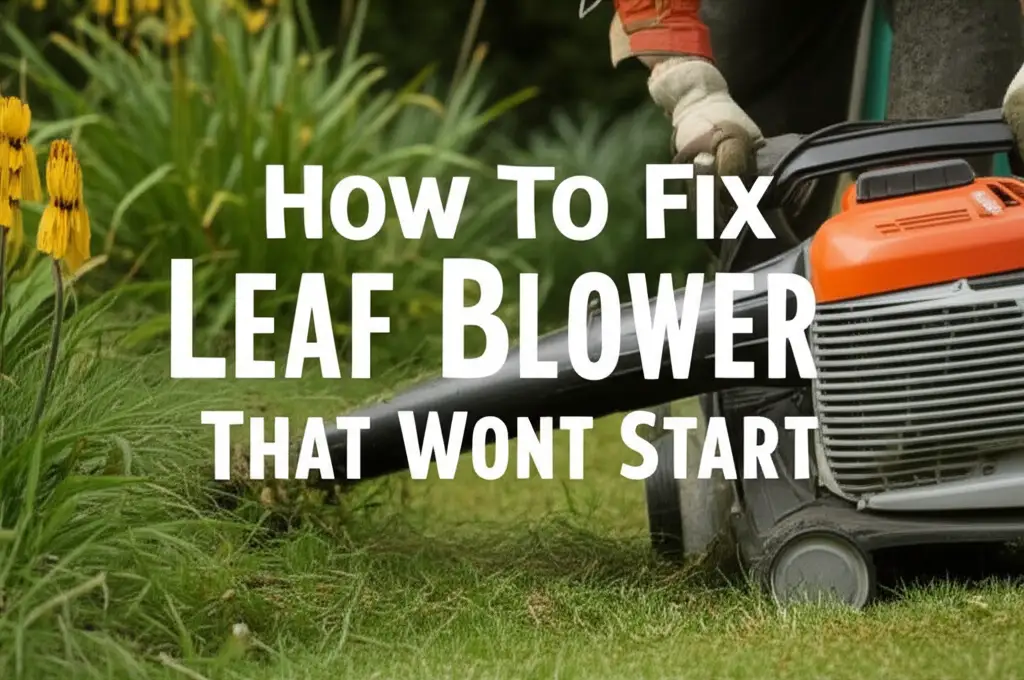
Troubleshoot and Fix Your Leaf Blower When It Won’t Start
There is nothing more frustrating than pulling the cord on your leaf blower and getting no response. You might feel ready to give up on your cleanup tasks. A leaf blower that won’t start can derail your yard work plans instantly. Many common issues cause this problem, and most are fixable with basic tools and some patience.
This guide helps you identify why your leaf blower isn’t starting. We cover everything from fuel issues to electrical components. You will find step-by-step instructions for diagnosing and resolving these problems. Our goal is to get your equipment running smoothly again, so you can tackle those fallen leaves with confidence. Let’s get your leaf blower roaring back to life.
Takeaway:
- Check the fuel system first: Ensure fresh, properly mixed fuel, and clear filters.
- Inspect the spark plug: A dirty or faulty plug is a common no-start cause.
- Clean or replace the air filter: Blocked air flow prevents proper combustion.
- Address carburetor issues: Clogs are frequent, especially with old fuel.
- Verify ignition components: Test the kill switch and recoil starter.
- Perform regular maintenance: Prevent future starting problems with consistent care.
To fix a leaf blower that won’t start, begin by checking for fresh fuel and a clean air filter. Next, inspect the spark plug for fouling or damage and test for spark. If these are fine, clean or rebuild the carburetor, ensuring fuel lines are clear. Finally, verify the kill switch and recoil starter function correctly.
Essential First Steps: Initial Checks for a Non-Starting Leaf Blower
When your leaf blower refuses to spring into action, the first steps involve basic, yet critical, checks. These initial inspections help rule out simple issues. They save you time before diving into more complex diagnostics. It is like checking for a pulse before starting major surgery.
My own experience tells me that most problems stem from something basic. Often, a quick glance reveals the culprit. These checks are simple enough for anyone to perform, even if you are not a seasoned mechanic. Always start with the easiest fixes before moving to more involved repairs.
Fuel System Diagnosis: Checking Levels and Quality
The most common reason a leaf blower won’t start is bad fuel. Small engines are sensitive to fuel quality. Old or improperly mixed fuel can cause significant problems. Always use fresh, high-octane gasoline, especially if your leaf blower uses a two-stroke engine.
Inspect the fuel in the tank. If it looks cloudy, smells stale, or has separated, drain it. Replace it with fresh fuel mixed according to your manufacturer’s specifications. Using stale fuel can clog fuel lines and carburetors, leading to various running issues. This simple step often resolves the problem immediately. Remember, proper fuel is the lifeblood of your engine.
Inspecting the Fuel Filter and Lines
A clogged fuel filter prevents fuel from reaching the carburetor. The engine will not start without a steady fuel supply. The fuel filter often sits inside the fuel tank, attached to a fuel line. Use a small hook or wire to retrieve it.
Examine the filter for debris or discoloration. If it looks dirty or brittle, replace it. While you are there, check the fuel lines for cracks or kinks. Cracked lines can draw air into the system, causing issues like the engine running only with the choke on or why your leaf blower turns off when you give it gas. Replace any damaged lines to ensure a consistent fuel flow to the engine. A clear fuel path is vital for reliable starting.
Spark Plug Inspection and Replacement: Ensuring Ignition
A healthy spark plug is essential for any gas-powered engine to start. It creates the spark that ignites the air-fuel mixture. A dirty, fouled, or damaged spark plug will prevent your leaf blower from starting. Checking this component is a straightforward step in troubleshooting.
I always begin my diagnostic process by looking at the spark plug. It offers a quick visual cue about the engine’s health. You can easily access it on most leaf blower models. Make sure you use the correct spark plug for your specific leaf blower model.
Accessing and Removing the Spark Plug
First, locate the spark plug on your leaf blower’s engine. It usually has a rubber boot or wire connected to it. Carefully pull off the boot to expose the spark plug. Use a spark plug wrench to loosen the plug.
Turn the wrench counter-clockwise to remove the plug. Be gentle to avoid stripping the threads. Once loose, you can usually unscrew it by hand. Set the spark plug aside in a clean, safe place for inspection.
Cleaning and Testing the Spark Plug
Once removed, inspect the spark plug’s tip. Look for any carbon buildup, oil residue, or damage to the electrode. A black, oily tip indicates incomplete combustion or an overly rich fuel mixture. A white or burnt-looking tip suggests a lean mixture or overheating. Use a wire brush or fine sandpaper to clean off any deposits.
To test for spark, reattach the spark plug boot to the plug. Hold the metal body of the plug against a bare metal part of the engine block. Ensure you hold only the rubber boot, not the metal plug itself. Pull the starter rope rapidly while observing the gap for a blue-white spark. No spark indicates a problem with the plug, ignition coil, or kill switch. If you see a weak or orange spark, the plug is likely failing.
Replacing the Spark Plug
If your spark plug is fouled, damaged, or fails the spark test, replace it. A new spark plug is an inexpensive part that can often resolve starting issues immediately. Ensure you purchase the correct replacement plug for your leaf blower model. Always refer to your owner’s manual for the exact specifications.
Before installing the new plug, check the gap between the electrodes. Use a spark plug gapping tool to ensure it matches the manufacturer’s recommended setting. Carefully thread the new plug into the engine by hand to avoid cross-threading. Once it is finger-tight, use a spark plug wrench to tighten it an additional quarter turn. Do not overtighten, as this can damage the engine head. A fresh spark plug provides reliable ignition, allowing your engine to fire up consistently.
Air Filter and Carburetor Troubles: Breathing and Fuel Delivery
Just as humans need clear airways to breathe, an engine needs a clean air filter for proper combustion. A clogged air filter starves the engine of oxygen. This leads to a rich fuel mixture and makes starting difficult or impossible. The carburetor, on the other hand, mixes the fuel and air. It is a precise instrument. Any small obstruction in the carburetor can prevent your leaf blower from starting.
My experience shows that these two components are frequently responsible for frustrating no-start scenarios. They often go hand-in-hand. Addressing both can resolve many performance issues, including why your leaf blower won’t run at full speed. Proper air and fuel delivery are foundational to engine operation.
Cleaning or Replacing the Air Filter
Locate the air filter housing, usually on the side of the engine. Open the cover and remove the air filter. Most leaf blowers use a foam or paper filter. Inspect it for dirt, dust, and debris buildup. If the filter is merely dusty, you can clean it.
For foam filters, wash them with warm soapy water, rinse thoroughly, and let them dry completely. You can also lightly oil them with engine oil after cleaning. For paper filters, tap them gently against a hard surface to dislodge loose debris. If the filter is heavily soiled, torn, or saturated with oil, replace it. A clean air filter ensures your engine gets the oxygen it needs to start and run efficiently.
Addressing a Clogged Carburetor
A clogged carburetor is a very common reason for a leaf blower not to start. Old fuel, especially if it contains ethanol, can leave gummy deposits inside the carburetor’s tiny passages. These clogs prevent fuel from flowing correctly. You might notice issues like your leaf blower not staying running or only running with the choke on.
To address this, you can try adding a fuel stabilizer and carburetor cleaner to the fuel tank. This sometimes dissolves minor clogs over time. For more stubborn clogs, you will need to remove and clean the carburetor. This involves disassembling it, spraying carburetor cleaner into all the small jets and passages, and often replacing gaskets. Alternatively, a carburetor rebuild kit can provide all the necessary replacement parts. If you are not comfortable with carburetor disassembly, professional help might be best.
Ignition System and Kill Switch Checks: Electrical Pathways
Beyond fuel and spark, the ignition system plays a crucial role in starting your leaf blower. This system includes the ignition coil, which generates the high voltage for the spark plug, and the kill switch, which grounds the ignition to stop the engine. A malfunction in either of these can prevent your leaf blower from firing up. It is like having a perfectly good light bulb but no electricity reaching it.
I have seen many people overlook these components during troubleshooting. They are less obvious than a dirty spark plug. However, a faulty kill switch or ignition coil can be the sole reason your leaf blower stays silent. Checking them is a logical next step in our diagnostic process.
Testing the Kill Switch
The kill switch is a safety feature designed to immediately shut off the engine. If this switch is faulty or stuck in the “off” position, it will prevent any spark from occurring. Even if the switch appears to be in the “on” position, internal corrosion or damage can cause it to remain grounded. This will make it impossible for the engine to start.
To test the kill switch, first ensure it is in the “run” or “on” position. If your leaf blower still won’t start, you can try disconnecting the kill switch wire from the ignition coil. Be careful when doing this, as the engine will not be able to turn off with the switch in this state. If the engine then starts, the kill switch is defective and needs replacement. This simple bypass test confirms if the switch is the root of the problem.
Checking the Ignition Coil
The ignition coil transforms the low voltage from the engine’s flywheel into the high voltage needed for the spark plug. If the ignition coil is faulty, it will not produce sufficient spark. This means the engine will fail to ignite the fuel-air mixture. Signs of a failing ignition coil include an intermittent spark, a weak orange spark, or no spark at all, even with a new spark plug.
Testing an ignition coil typically requires a multimeter and specific resistance values from your leaf blower’s service manual. This can be a more advanced diagnostic step. You would measure the resistance across the primary and secondary windings of the coil. If the readings do not match the manufacturer’s specifications, the coil is likely bad. Replacing an ignition coil usually involves removing the flywheel and can be more complex than other repairs. If you suspect a bad coil and are not comfortable with the procedure, professional service is advisable.
Recoil Starter and Compression Issues: The Engine’s Mechanics
Beyond fuel and spark, the physical mechanics of your leaf blower engine are vital for starting. The recoil starter assembly allows you to pull the engine over, initiating the combustion cycle. Without a functional pull cord, you cannot even attempt to start the engine. Additionally, proper compression is fundamental. Compression is the engine’s ability to create pressure within the cylinder. If the engine cannot build enough compression, it cannot generate the power needed to start.
I always tell people not to overlook these mechanical aspects. A frayed cord or a sticky recoil can be incredibly frustrating. Compression issues, while less common for a simple no-start, indicate a more severe internal problem. Understanding these can help you decide whether to DIY or seek professional help.
Inspecting the Pull Cord and Recoil Assembly
The pull cord is the first point of contact when trying to start your leaf blower. A frayed, broken, or stuck pull cord means you cannot crank the engine. Begin by inspecting the cord for any visible damage. If it is frayed, replace it immediately to prevent it from snapping during use. This is a common and easy fix.
Next, check the recoil assembly itself. Sometimes, the internal spring or pawls can seize or break. This prevents the cord from retracting or engaging the flywheel. To check, remove the recoil starter assembly cover. Inspect the spring for breaks and ensure the pawls move freely. You can often clean and lubricate these parts to restore function. If the spring is broken or the entire assembly is damaged, a complete replacement is usually the best course of action. A smooth-operating recoil ensures you can get the engine spinning.
Basic Compression Check and What It Means
Compression is critical for a leaf blower engine to start and run. It refers to the engine’s ability to compress the air-fuel mixture within the cylinder. Without sufficient compression, the spark cannot effectively ignite the mixture, and the engine will not start. You can perform a basic “finger over the spark plug hole” test. Remove the spark plug and place your thumb firmly over the spark plug hole.
Pull the starter rope slowly. You should feel a strong vacuum and then pressure pushing your thumb off the hole. If you feel very little or no resistance, your engine has low compression. Low compression can indicate worn piston rings, a damaged cylinder, or a faulty head gasket. While you cannot easily fix these at home, this test tells you if the problem is internal. If compression is poor, it often signals that professional repair or engine replacement is necessary. This step helps avoid unnecessary repairs on other components.
Advanced Troubleshooting and Maintenance Tips: Beyond Basic Fixes
Once you have covered the common culprits like fuel, spark, air, and compression, you might still face a leaf blower that won’t start. This is where advanced troubleshooting comes in. It requires a bit more detail and observation. We can look at other less obvious components that impact starting. Think of it as digging deeper into the engine’s hidden pathways.
I have found that small, overlooked details can be the most frustrating. They often lead to hours of head-scratching. Regular maintenance is key to preventing these advanced issues from arising. Prevention is always better than cure, especially with small engines.
Fuel Line and Primer Bulb Inspection
Sometimes, fuel delivery issues are not with the filter or carburetor, but the lines themselves. Over time, fuel lines can become brittle, crack, or get blocked internally. Visually inspect all fuel lines running from the tank to the carburetor and back. Look for any visible cracks, kinks, or signs of dry rot. Even a small crack can allow air to enter the fuel system, preventing proper fuel flow to the engine.
The primer bulb, if your leaf blower has one, is also crucial. It draws fuel from the tank to the carburetor. If the primer bulb is cracked, torn, or does not draw fuel when pressed, it needs replacement. To test it, pump the bulb and observe if fuel visibly moves through the clear fuel lines. If not, check for cracks in the bulb or the lines connected to it. Replacing faulty fuel lines and a primer bulb ensures a consistent and uninterrupted fuel supply, which is critical for starting.
Seasonal Storage and Preventative Measures
Proper storage is paramount to preventing future starting problems. When you store your leaf blower for extended periods, especially over winter, old fuel can gum up the carburetor. This is a primary cause of no-start issues. Always run the engine until it is out of fuel or use a fuel stabilizer before storage. A fuel stabilizer prevents ethanol separation and gumming.
Clean the air filter after each season of heavy use. Also, check the spark plug annually and replace it if needed. Lubricate moving parts and ensure all fasteners are tight. By performing these preventative measures, you drastically reduce the chances of your leaf blower refusing to start next season. Consistent maintenance means less frustration and more reliable operation. This helps prevent problems like your leaf blower not blowing hard due to engine issues.
When to Seek Professional Help for Your Leaf Blower
While many leaf blower starting issues are fixable at home, some problems require professional expertise. Knowing when to call in an expert saves you time, money, and potential frustration. It is like knowing when a minor cut needs a bandage versus when it needs stitches. Trying to fix something beyond your skill level can lead to more damage or costly repairs.
My rule of thumb is simple: if you have tried the common fixes and are still stuck, it is time for a professional. They have specialized tools and training. This allows them to diagnose and repair issues that are too complex for the average homeowner. Do not hesitate to seek help when the problem is persistent.
Diagnosing Persistent or Complex Issues
You have checked the fuel, spark plug, air filter, and carburetor. You have tested the kill switch and recoil starter. Still, your leaf blower won’t start. This is a clear sign that the issue might be more complex. Persistent no-start problems can stem from internal engine damage. This includes issues like worn piston rings, damaged valves, or a crankshaft problem. These repairs often require specialized tools and in-depth engine knowledge.
A professional small engine mechanic can perform detailed diagnostic tests. They can check compression accurately with a gauge. They can also inspect internal components that are difficult to access for the average user. Their expertise quickly identifies issues that are beyond basic DIY troubleshooting. They can also address why your leaf blower keeps shutting off or why it’s not running at full speed.
Cost-Benefit Analysis of Repair vs. Replacement
Before committing to a professional repair, consider the age and condition of your leaf blower. Also, evaluate the estimated repair cost. Sometimes, the cost of repairing a severely damaged engine can approach or exceed the price of a new unit. For very old or heavily used leaf blowers, replacement might be the more economical choice.
A professional mechanic can provide an accurate repair estimate. Use this estimate to weigh the pros and cons of repair versus purchasing a new leaf blower. For newer, high-quality models, repair is often the sensible option. For older, entry-level models, a new unit often makes more financial sense. This decision helps ensure you get the best value for your money.
FAQ Section
Why is my leaf blower getting no spark?
No spark usually points to a few culprits. Check the spark plug first; it might be fouled or damaged. Ensure the spark plug wire is securely connected. Next, inspect the kill switch; it could be stuck in the “off” position. Finally, a faulty ignition coil can prevent spark, requiring replacement.
What causes a leaf blower to not start?
A leaf blower typically won’t start due to fuel issues, spark plug problems, or a clogged air filter/carburetor. Old or improper fuel mix is a common cause. A dirty or faulty spark plug prevents ignition. A blocked air filter or gummed-up carburetor also starves the engine.
How do you test a leaf blower carburetor?
Testing a carburetor often involves visual inspection and understanding fuel flow. Look for leaks or external damage. Check if the primer bulb draws fuel. If the engine only runs with the choke on or stalls, it suggests a clogged carburetor. For precise testing, you would disassemble and inspect jets for blockages.
Can old gas stop a leaf blower?
Yes, old gas is a frequent cause of leaf blower starting problems. Gasoline degrades over time, especially ethanol-blended fuels. It leaves gummy deposits that clog tiny carburetor passages and fuel filters. Always use fresh fuel, ideally with a stabilizer, or drain the tank for long-term storage.
How do you prime a leaf blower that won’t start?
To prime a non-starting leaf blower, locate the primer bulb, usually a small rubber bubble. Press it repeatedly until it fills with fuel, or you see fuel flowing through the clear lines. This action manually draws fuel from the tank to the carburetor, helping the engine get enough fuel to attempt ignition.
What causes a leaf blower to start but then die immediately?
If your leaf blower starts then dies, it often indicates a fuel delivery issue. The engine gets enough fuel to briefly fire but not enough to sustain operation. Common causes include a clogged fuel filter, a partially blocked carburetor jet, or a weak fuel pump/primer bulb not supplying continuous fuel.
Conclusion
Getting your leaf blower to start again does not have to be a nightmare. We have explored the most common reasons why a leaf blower won’t start. We have also provided clear steps to diagnose and fix these issues. From ensuring you have fresh fuel and a clean spark plug to tackling a clogged carburetor or a faulty kill switch, you now have a comprehensive guide. These troubleshooting steps empower you to tackle many problems yourself.
Regular maintenance is your best defense against future starting woes. Always use fresh, stabilized fuel. Keep your air filter clean. Inspect your spark plug periodically. By taking these proactive steps, you extend the life of your leaf blower. You also ensure it is ready to go when you need it most. Do not let a non-starting leaf blower ruin your day. Use these tips to bring your essential yard tool back to life. Get out there and clear those leaves with confidence!
- leaf blower repair
- small engine troubleshooting
- outdoor power equipment
- garden tools maintenance
- fix a non-starting leaf blower
- engine won't start

Todd Martin
Senior Writer
With over 15 years of experience in home renovation and design, I started HEG to share what I’ve learned with homeowners who want to create spaces that are both beautiful and functional. I’ve always believed in a hands-on approach, and over the years, I’ve picked up practical solutions that actually work. Through HEG, I aim to make home improvement more approachable, sharing real tips that help you create a home you truly love.