· Todd Martin · Home Improvement, Woodworking · 19 min read
How To Flatten A Table Top

Flatten Your Table Top: A Comprehensive Guide
Has your favorite table developed an annoying warp or cup? It is a common problem. An uneven surface makes a table less functional and less appealing. Drinks might tip, and projects become difficult. Many of us have faced this issue. I certainly have had tables that just weren’t flat. The good news is you can fix it. You can learn how to flatten a table top yourself. This guide will help you. We will cover why tables warp. We will discuss the tools you need. Then, we will walk through different methods to get your table flat again. Finally, we will talk about how to keep it flat. Get ready to restore your furniture.
Takeaway:
- Identify the type of warp your table top has, such as a cup, bow, or twist.
- Gather the necessary tools for the method you choose to flatten the surface.
- Apply controlled moisture, pressure, or use mechanical removal techniques carefully.
- Protect your table by proper sealing and controlling its environment to prevent future warping.
To flatten a table top, first identify the warp type, like cupping or bowing. You can use methods such as controlled moisture application combined with clamping for minor issues. For more significant warps, mechanical removal using hand planes, a router sled, or sanding is effective. Ensure the table dries properly and apply a protective finish to prevent future warps.
Understanding Why Table Tops Warp
You might wonder why your table top suddenly isn’t flat. Wood is a natural material. It reacts to its environment. This reaction often leads to warping. Knowing the cause helps you prevent future problems. It also guides your repair method. I have seen many table tops go from perfectly flat to noticeably uneven.
Wood’s Natural Movement
Wood is hygroscopic. This means it absorbs and releases moisture from the air. As wood gains moisture, it swells. As it loses moisture, it shrinks. Different parts of a wood board can gain or lose moisture at different rates. This differential movement causes internal stress. This stress makes the wood bend or twist. It is a completely natural process.
Moisture Imbalance
An uneven moisture content within the wood is a primary cause of warping. If one side of a table top gets more humidity than the other, it will absorb more moisture. For example, a table top might be sealed on top but left unfinished underneath. The unfinished underside absorbs moisture more readily. The sealed top resists it. This difference causes the wood to cup towards the drier side.
Uneven Finishing
Finishing products, like varnish or polyurethane, seal the wood. They control how quickly moisture enters or leaves the wood. If you only apply finish to one side of the table top, or apply it unevenly, it creates an imbalance. The unfinished side remains exposed to environmental changes. The finished side is protected. This protection difference contributes to warping. Ensure all surfaces get a proper seal.
Construction Flaws
Sometimes, the way a table top is built contributes to warping. Wide solid wood panels are more prone to movement. If cross-grain construction methods are used without allowing for wood movement, stress builds up. This stress can lead to cracks or severe warping over time. Proper joinery and design minimize these risks. Builders must consider wood’s natural tendencies.
Essential Tools for Flattening a Table Top
Before you start any flattening project, you need the right tools. Having the correct equipment makes the job easier. It also ensures you get the best results. I always make a checklist before I begin. This prevents mid-project trips to the store.
Measuring and Marking Tools
Accurate measurements are crucial for flattening. You need to identify the high and low spots.
- Long Straight Edge: A long, reliable straight edge is your primary tool. It helps you find high spots. Lay it across the table in different directions. Look for gaps under the straight edge.
- Winding Sticks: These are two perfectly straight, parallel pieces of wood. You place one at each end of the table. They help you detect twist in a board. If the tops of the sticks are not parallel, you have a twist.
- Pencil or Chalk: You will use these to mark the high spots. Marking helps you know where to remove material.
- Moisture Meter: This tool tells you the wood’s moisture content. It is very helpful for the moisture and clamping method. It confirms if the wood is dry enough after treatment.
Hand Tools for Material Removal
For traditional flattening, hand planes are excellent. They offer control and precision.
- Scrub Plane: This plane has a curved iron. It removes a lot of material quickly. It is good for rough flattening.
- Jointer Plane: A long plane used to create a flat, straight surface. It bridges high and low spots. It smooths out the work from the scrub plane.
- Smoothing Plane: This plane takes very thin shavings. It refines the surface for a smooth finish. It removes plane marks.
- Block Plane: Useful for smaller areas or chamfering edges. While not strictly for flattening, it is a versatile tool.
- Cabinet Scraper: This tool helps achieve a super smooth surface. It removes fine imperfections left by planes.
Power Tools for Precision
Power tools can speed up the flattening process, especially for large tables or severe warps.
- Router: A powerful router is key for a router sled setup. It removes material uniformly.
- Router Bit: You need a large, flat-bottomed router bit. A spoil board surfacing bit works well. It ensures an even cut across the surface.
- Orbital Sander: After mechanical flattening, you will need to sand the surface smooth. An orbital sander speeds up this process. It helps remove tool marks.
- Belt Sander: For more aggressive sanding after routing or planing, a belt sander can be useful. Use it carefully to avoid creating new dips.
Having these tools ready makes the flattening process manageable. It helps you achieve a professional result.
Preparing Your Table Top for Flattening
Proper preparation is key to any successful project. Flattening a table top is no different. You cannot just jump in with tools. Taking the time to prepare correctly will save you headaches later. It ensures your efforts lead to a truly flat surface.
Cleaning and Dismantling
First, you must prepare the surface. You need to remove anything that might get in your way. This includes dirt, grime, and any attached hardware.
- Clean the Surface Thoroughly: Start by cleaning the entire table top. Use a damp cloth to wipe away dust and debris. For stubborn grime or sticky residue, you might need a mild wood cleaner. A clean surface helps you see the warp clearly. It also prevents dirt from scratching the wood during flattening. For more details on keeping your wood surfaces pristine, consider reading our guide on how to clean a wood table. You can also find tips on how to clean wooden table for general care.
- Remove All Hardware: Take off any legs, aprons, or other components attached to the table top. You want the table top completely separate. This allows you to work on it from all angles. It also prevents damage to other parts of the table. Store these parts safely.
Accurate Warp Assessment
Now, you need to understand the type and severity of the warp. Different warps require different approaches.
- Identify the Type of Warp:
- Cupping: The board is curved across its width, like a shallow bowl. The edges are higher or lower than the center.
- Bowing: The board is curved along its length. It bows up or down from end to end.
- Twisting: The board is distorted like a propeller. This is the most challenging warp to fix.
- Use a Straight Edge: Place your long straight edge across the table top. Do this in several directions: lengthwise, crosswise, and diagonally. Look for gaps between the straight edge and the table surface. These gaps show you the low spots.
- Use Winding Sticks: For twists, winding sticks are essential. Place one stick at each end of the table top. Look down the length of the board. If the tops of the sticks are not parallel, the board is twisted. Note which corners are high or low.
Marking High Points
After assessing the warp, you need to mark the areas you will remove material from. This guides your flattening process.
- Scribble Method: Lightly scribble pencil marks over the entire surface of the table top. This is a common and effective method. As you remove material, the pencil marks will disappear from the high spots first. This visually confirms where you need to keep working.
- Draw Lines: For deeper warps, you can draw lines across the high spots. Use your straight edge to identify these areas. Mark them clearly. This gives you a clear target for material removal.
Preparing your table top properly ensures you tackle the warp effectively. It lays the groundwork for a successful flattening process.
The Moisture and Clamping Method: Gentle Correction
This method is often the first choice for minor to moderate warps, especially cupping. It is less aggressive than removing material. It works by reintroducing moisture to the dry side of the wood. Then, it uses pressure to hold the wood flat as it dries evenly. I have used this technique successfully on several cupped table tops. It requires patience but can yield excellent results.
Applying Controlled Moisture
The goal is to increase the moisture content on the concave (dry) side of the warp. The concave side is the one that dips inward.
- Identify the Dry Side: For a cupped board, the concave side is the one that dried out more. This is the side that needs moisture.
- Protect the Other Side: Place plastic sheeting or a waterproof tarp on your workbench. Lay the table top on this plastic, concave side up. This protects the convex (outer) side from moisture.
- Dampen Cloths: Get several towels or thick cloths wet. Wring them out so they are damp, not dripping. You want moisture, not standing water.
- Cover the Concave Surface: Lay the damp cloths directly onto the concave surface of the table top. Cover the entire warped area.
- Seal with Plastic: Place another layer of plastic sheeting over the damp cloths. Tape the edges down to create a sealed environment. This keeps the moisture contained. It allows the wood to absorb it slowly.
- Monitor Moisture: Leave the cloths and plastic in place for several hours or overnight. Check the moisture content with a moisture meter periodically. You want the moisture to equalize. Do not over-saturate the wood.
Strategic Clamping Techniques
Once the wood has absorbed enough moisture, it becomes more pliable. This is when you apply pressure to force it back into a flat shape.
- Prepare Your Clamps: You will need several strong clamps, such as pipe clamps or bar clamps. Make sure they are long enough to span the table top.
- Use Cauls: Cauls are straight pieces of wood or metal. They distribute the clamping pressure evenly. Place cauls across the table top, perpendicular to the grain, over the warped area. Use wax paper under the cauls to prevent sticking if the wood is still damp.
- Apply Pressure Gradually: Begin tightening the clamps slowly and evenly. Work your way along the table. Do not overtighten one clamp before moving to the next. You want gentle, consistent pressure.
- Check for Flatness: Periodically check the table top with your straight edge as you tighten. Continue until the table top is flat.
- Keep Clamped: Leave the table top clamped for an extended period. This allows the wood to dry slowly in its new flat position.
Slow Drying and Monitoring
The drying process is critical for the success of this method. If the wood dries too quickly, it might warp again.
- Maintain Stable Environment: Keep the clamped table top in a room with stable temperature and humidity. Avoid direct sunlight or sudden changes in climate.
- Allow Ample Time: The drying time depends on the wood type and the initial warp. It can take days, or even weeks, for the wood to fully stabilize. Patience is key.
- Monitor Moisture Content: Use your moisture meter to track the wood’s moisture content. Wait until it reaches equilibrium with the ambient air. This indicates it is stable.
- Remove Clamps Gradually: Once the moisture content is stable, you can carefully remove the clamps. Do this slowly. Check the table for flatness as you remove them. If it springs back, you might need to re-moisten and re-clamp.
This gentle method can save a table top without significant material removal. For added protection and to manage moisture, learning how to waterproof a wood table can be beneficial in the long run.
Using Hand Planes to Flatten a Table Top: Traditional Woodworking
For more significant warps, or when the moisture method is not enough, hand planes offer a precise solution. This method involves carefully removing wood from the high spots until the surface is flat. It is a rewarding process. It connects you with traditional woodworking skills. I find it very satisfying to see shavings peel off as the surface becomes level.
Mastering Winding Sticks
Before you start planing, you must identify the exact high points, especially for twisted boards. Winding sticks are indispensable for this.
- Setup: Place your table top on a stable workbench. Ensure it does not rock. Set one winding stick at each end of the table top.
- Eyeline Alignment: Kneel down or stand so your eye is level with the top edge of the closer winding stick. Look across to the far winding stick.
- Detecting Twist: If the tops of the two sticks are not parallel, your table has a twist. One corner will appear higher or lower than the others.
- Marking: Use a pencil to mark the high corners or areas that need material removed. This gives you a visual guide as you plane. The goal is to make the winding sticks appear perfectly parallel.
Aggressive Material Removal (Scrub/Jointer)
Once marked, you start removing the bulk of the material. This is where a scrub plane or a jointer plane comes in.
- Start with the Highest Spots: Focus on the areas you marked. With a scrub plane, take diagonal passes across the grain. This removes material quickly. Work only on the high spots.
- Use the Jointer Plane for Flatness: After using a scrub plane, switch to a jointer plane. The long sole of this plane helps bridge low spots. It planes down the high spots until the surface is generally flat. Take long, consistent strokes.
- Checking Progress: Frequently use your winding sticks and a straight edge. Place the straight edge in various directions. This helps you monitor your progress. Keep marking high spots and removing material. You want to see the pencil marks disappear evenly.
- Listen to the Plane: A properly tuned plane will cut smoothly. It will make consistent shavings. Adjust your plane’s depth of cut as needed. Start with a heavier cut for roughing. Move to lighter cuts as you get closer to flat.
Refinining the Surface (Smoothing)
After getting the table top mostly flat with the jointer plane, you need to refine the surface. This prepares it for sanding and finishing.
- Switch to a Smoothing Plane: This plane is designed for fine finishing cuts. It has a shorter sole and a very sharp, finely set blade.
- Plane with the Grain: Make light, overlapping passes with the smoothing plane. Work along the grain of the wood. This removes the marks left by the coarser planes. It also creates a very smooth surface.
- Scraper Use: For an even finer finish, use a cabinet scraper. A sharp scraper can remove the faintest plane marks. It leaves a silky smooth surface ready for minimal sanding.
- Final Straight Edge Check: Do a final check with your straight edge and winding sticks. Ensure the surface is truly flat. There should be no gaps or rocking when the straight edge is placed anywhere on the table.
Flattening with hand planes requires practice. However, the control you gain is unmatched. It creates a truly beautiful and flat surface.
Flattening with a Router Sled: Precision Power Tool Method
For those with larger table tops or severe warps, a router sled offers a powerful and precise method. This technique uses a router mounted in a special jig. It planes the surface perfectly flat. It is like having a giant planer for your table top. This method is excellent for achieving a professional finish. I have found it incredibly effective for wide slabs.
Building Your Router Sled
You will need to construct a jig or “sled” for your router. This sled rides on rails, guiding the router across the table top.
- Base Board: Get a flat, rigid piece of plywood or MDF. It should be wide enough for your router to sit on. It should be long enough to span the table’s width.
- Router Mount: Cut a hole in the center of the base board. This hole should fit your router’s base plate. Attach your router securely to the sled. Ensure the router bit extends through the hole.
- Rails: You need two straight, sturdy pieces of material for rails. They can be aluminum extrusions, straight pieces of hardwood, or metal tubes. These rails must be longer than your table top’s length. They should also be thick enough to elevate the router bit above the highest point of your warped table.
- Support for Rails: Create a stable base for your table top. This base will hold the rails parallel and level. Use clamps or screws to secure the rails to this base. Ensure the rails are perfectly parallel to each other and perfectly flat. This is critical for an accurate cut.
Setting Up for Precision Passes
Proper setup ensures the router sled removes material evenly. Precision is key.
- Secure the Table Top: Place your warped table top on a sturdy workbench. Shim it as needed so it does not rock. It should be stable.
- Elevate the Table (if needed): If your rails are not tall enough to clear the highest point of the warp, you may need to elevate the table top. Place shims or blocks under the table top. Ensure the entire surface is below the cutting path of the router bit.
- Level the Rails: Use a spirit level to ensure your rails are perfectly level. Also, ensure they are perfectly parallel to each other. Any deviation will result in an uneven surface. Clamp the rails firmly in place.
- Adjust Router Bit Depth: Set your router bit to take a very shallow cut. You want to remove only a small amount of material with each pass. Start with the highest point of the warp. The bit should just skim this point on the first pass.
Router Bit Selection and Technique
Choosing the right bit and using proper technique ensures a smooth, flat surface.
- Spoilboard Surfacing Bit: This is the best bit for the job. It is a large diameter, flat-bottomed bit. It creates a wide, flat cut. This minimizes passes and provides a cleaner finish.
- Direction of Pass: Push or pull the router sled evenly across the rails. Work from one end of the table to the other. Overlap each pass by about 50% of the bit’s diameter. This ensures complete coverage.
- Shallow Cuts: Always take shallow cuts. Do not try to remove too much material at once. Deep cuts can strain your router. They can also tear out wood or leave an uneven surface. Take multiple passes.
- Dust Collection: Router sleds generate a lot of dust. Use a shop vacuum attached to your router or frequently vacuum the surface. Keeping the area clear helps you see your progress. It also keeps dust out of your lungs.
- Check Progress: After a few passes, clean the surface. Use a straight edge to check for flatness. Continue routing until the entire surface is flat. All high spots should be removed.
This method is powerful. It allows you to flatten large, unruly table tops with precision. It is an investment in time to build the sled, but it pays off with a perfectly flat surface.
Finishing and Protecting Your Flattened Table Top: Long-Term Stability
Congratulations! You have successfully flattened your table top. Now, you must finish the job. This involves sanding, applying a protective finish, and understanding how to prevent future warping. These steps are crucial. They ensure your hard work lasts. They also make your table look beautiful. I always emphasize these final steps. They seal the deal.
Sanding for a Smooth Finish
After flattening with planes or a router, your table top will not be perfectly smooth. It will have tool marks. Sanding removes these marks and prepares the wood for finishing.
- Start with Coarse Grit: Begin with a coarser grit sandpaper. If you used hand planes, start with 80-grit. If you used a router sled, you might start with 100-grit or 120-grit. The goal is to remove the tool marks quickly.
- Progress Through Grits: Work your way through progressively finer grits. A common progression is 80-grit, then 120-grit, then 180-grit, and finally 220-grit. Do not skip grits. Skipping leaves deeper scratches that finer grits cannot remove.
- Clean Between Grits: After each grit, thoroughly clean the table top. Use a shop vacuum and a tack cloth. This removes dust. Dust can cause scratches if left on the surface.
- Check for Imperfections: As you sand, constantly check the surface. Look for any remaining tool marks or imperfections. Good lighting helps reveal them.
Applying Protective Finishes
A protective finish is essential. It guards against moisture changes, spills, and wear. It also enhances the wood’s natural beauty.
- Choose Your Finish:
- Oil Finishes (e.g., Tung Oil, Linseed Oil): These penetrate the wood. They provide a natural look and feel. They are easy to repair but offer less protection against spills.
- Polyurethane (Oil-Based or Water-Based): This forms a durable film on the surface. It offers excellent protection against moisture and scratches. Water-based polyurethanes dry faster and have less odor.
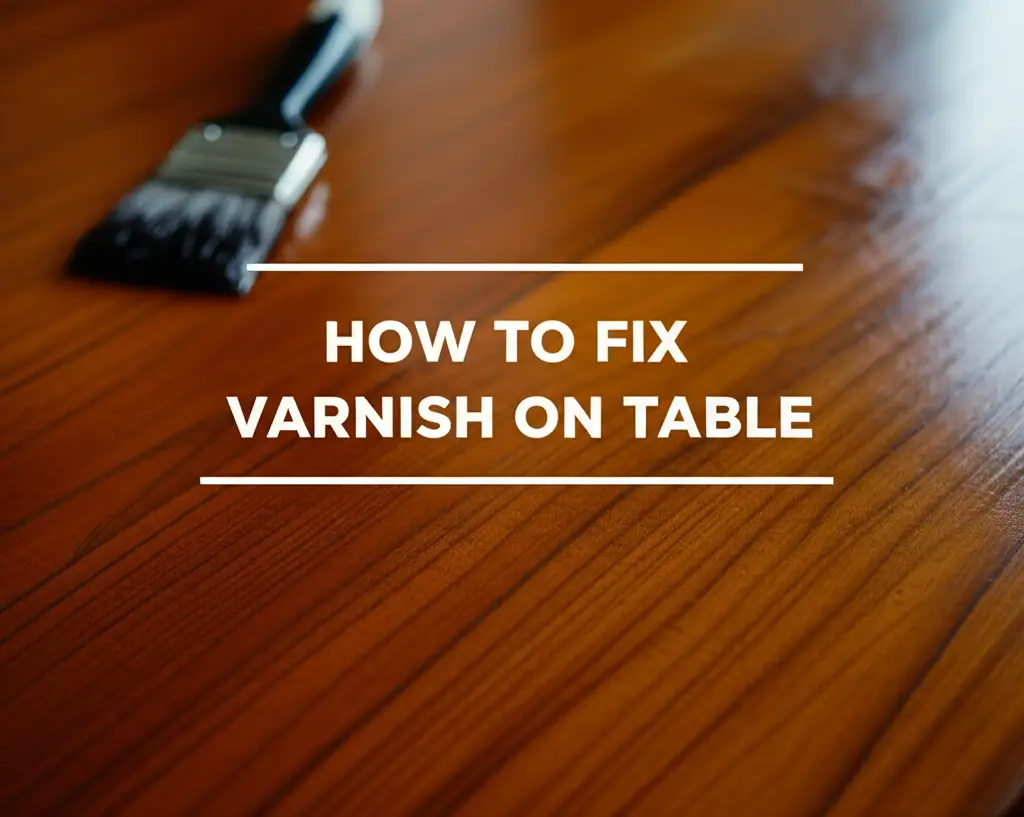
- Varnish: A very durable and protective finish. It is often used for tabletops that see heavy use.
- Lacquer: Dries very fast. It provides a hard, clear finish. It is often sprayed on.
- Apply Evenly: Follow the manufacturer’s instructions for your chosen finish. Apply thin, even coats. Use a high-quality brush, roller, or sprayer.
- Allow Drying Time: Let each coat dry completely before applying the next. Lightly sand between coats with a fine grit (e.g., 320-grit) for better adhesion and a smoother final finish.
- Multiple Coats: Most finishes require multiple coats for proper protection. Three to five coats are typical for a table top.
- Full Cure: The finish needs time to fully cure, not just dry to the touch. This can take days or even weeks. Avoid heavy use during this period. To learn more about safeguarding your wood, check out our article on how to protect wood table top. For care after finishing, you might find tips on how to clean finished wood table useful.
Preventing Future Warps
Maintaining a flat table top means preventing future warps. This involves controlling the wood’s environment.
- Balance Moisture: Ensure both sides of the table top are sealed. This balances moisture absorption and release. If one side is exposed, it can lead to re-warping.
- Control Humidity: Maintain stable humidity levels in the room where the table lives. Extreme fluctuations cause wood movement. A humidifier or dehumidifier can help.
- Avoid Direct Heat/Sunlight: Do not place the table directly next
- Table Flattening
- Warped Wood Repair
- Woodworking Tips
- Furniture Restoration
- Table Top Repair
- DIY Wood Flattening

Todd Martin
Senior Writer
With over 15 years of experience in home renovation and design, I started HEG to share what I’ve learned with homeowners who want to create spaces that are both beautiful and functional. I’ve always believed in a hands-on approach, and over the years, I’ve picked up practical solutions that actually work. Through HEG, I aim to make home improvement more approachable, sharing real tips that help you create a home you truly love.