· Todd Martin · Home Decor, Interior Design · 15 min read
How To Hang Pictures Above Sofa

Hang Pictures Above Your Sofa Like a Pro
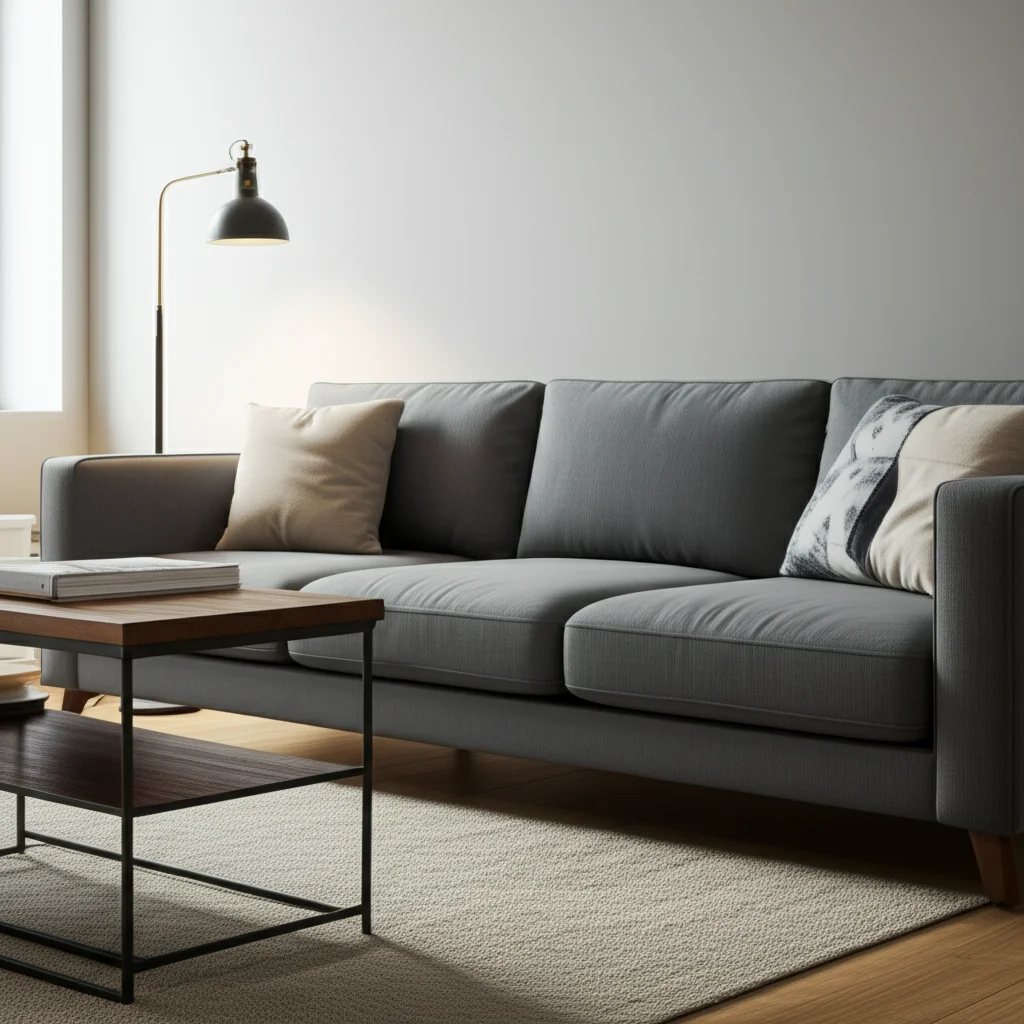
Imagine walking into your living room. Your sofa anchors the space, offering comfort and style. But what about the wall above it? Often, this prime spot feels empty or holds art that just doesn’t quite fit. Hanging pictures above your sofa can transform your living area. It adds personality and completes the room’s look.
This guide helps you master the art of hanging pictures above your sofa. We cover everything from planning your layout to choosing the right tools. You will learn how to select the perfect art size and arrange multiple pieces effectively. Get ready to turn that blank wall into a beautiful focal point. I will share simple steps and smart tips to make your living room truly shine.
Takeaway: Your Sofa’s Wall Art Checklist
- Measure your sofa and the wall space.
- Choose art that is 2/3 the width of your sofa.
- Plan your layout on the floor first.
- Hang artwork 6-12 inches above the sofa back.
- Ensure the center of your art or arrangement is at eye level.
- Use proper hanging hardware for stability.
The Direct Answer: Hanging Pictures Above Your Sofa
To hang pictures above a sofa, position the artwork 6 to 12 inches above the top of the sofa back. Center the art horizontally over the sofa. For optimal scale, the width of the art or arrangement should be roughly two-thirds the width of the sofa itself. This creates a balanced and visually appealing focal point.
Why Wall Art Matters Above Your Sofa
The wall above your sofa is a key area in your living room. It draws immediate attention. Art placed here can define the room’s style and mood. It acts as a focal point, grounding your seating area.
Empty walls can make a room feel unfinished. Adding art brings warmth and character. It reflects your personal taste and can tie together different elements of your decor. A well-chosen piece creates visual interest. It invites people to relax and enjoy the space. Thinking about how to decorate around your sofa area makes a big difference. You can also decorate a sofa table against a wall to enhance the overall look of the space.
When I first decorated my living room, the sofa looked great. But the wall above it felt stark. Adding a large canvas completely changed the room’s feel. It instantly made the space feel more inviting and complete. Wall art truly transforms your house into a home. It adds depth and a sense of purpose to the wall.
Essential Planning for Picture Placement
Planning is crucial for successful picture hanging. You avoid mistakes when you plan. This saves time and prevents unnecessary holes in your wall. Proper planning ensures your art looks its best above your sofa.
Understanding Scale and Proportion
Scale refers to the size of your art in relation to your sofa and the wall. Proportion is how parts of your art relate to each other. For art above a sofa, a common guideline is that the art piece or collection should be about two-thirds the width of the sofa. This proportion creates balance. It prevents the art from looking too small or too overwhelming.
Consider the height of your ceiling as well. Taller ceilings can handle larger pieces. Standard ceiling heights often work best with art that is not excessively tall. Visual balance makes the room feel harmonious. You want the art to complement, not compete with, the sofa.
Considering Sofa Width
Measure your sofa’s total width first. If your sofa is 90 inches wide, your art should be roughly 60 inches wide. This could be one large piece or a collection of smaller ones. Write this measurement down. It is your guide for selecting or arranging art.
Also, think about the space above the sofa. There should be enough vertical space for the art to breathe. Typically, hanging the bottom of the art 6-12 inches above the sofa’s backrest is ideal. This height keeps the art connected to the sofa. It also prevents people from bumping their heads on it when sitting down. Taking these measurements ensures your art fits perfectly.
Choosing Your Art and Arrangement Styles
Selecting the right art and arrangement style brings your vision to life. The choice depends on your personal taste and the room’s overall aesthetic. There are several popular ways to hang art above a sofa. Each creates a distinct look.
Single Statement Piece
A single, large artwork creates a powerful impact. It simplifies the decor and offers a clear focal point. This approach works well for bold, colorful pieces or serene landscapes. The art itself becomes the star of the wall.
When choosing a single piece, ensure its size follows the two-thirds rule for your sofa’s width. A large piece provides visual weight. It ties the sofa and the wall together seamlessly. This style is perfect for those who prefer minimalism or want one standout item.
Curated Gallery Wall
A gallery wall combines multiple pieces of art, photos, and even mirrors. This style adds depth and personality. You can mix different frames, sizes, and subjects. The key is to create a cohesive look.
Arrange your pieces on the floor first. This allows you to experiment with layouts. Keep about 2-3 inches of space between frames. This maintains a sense of unity. A gallery wall is a great way to display a collection of treasured items.
Symmetrical Grid
A symmetrical grid involves hanging identically sized and framed pieces in a neat pattern. This creates a formal and orderly look. It brings a sense of calm and precision to the room. Use an even number of pieces for a balanced feel.
For example, hang two rows of three identical frames. Make sure the spacing between frames is consistent. A level and a ruler are your best friends here. This style works well with minimalist or traditional decor.
Asymmetrical Flow
An asymmetrical flow arrangement is more organic. It uses various sizes and shapes of art. The goal is to achieve balance without strict symmetry. This style feels dynamic and modern. It allows for creative expression.
Start with a central piece. Then, build around it with smaller pieces. Ensure the overall visual weight feels balanced. Avoid making one side too heavy. This approach is more forgiving. It allows you to add pieces over time.
Tools and Techniques for a Perfect Hang
Having the right tools makes all the difference. It ensures your pictures hang straight and securely. Proper techniques prevent damage to your walls and art. I always gather everything before starting. This saves trips back and forth.
Gathering Your Supplies
Before you start hanging, collect these essential items:
- Tape Measure: For precise width and height measurements.
- Pencil: To mark your hanging points clearly.
- Painter’s Tape or Kraft Paper: To create a template for gallery walls.
- Level: A small or medium-sized level is critical for straight hanging.
- Stud Finder: To locate wall studs for heavy items.
- Hammer: For nails or small picture hanging hooks.
- Drill and Drill Bits: Needed for wall anchors or screws.
- Wall Anchors/Molly Bolts: For hanging heavier art into drywall without studs.
- Picture Hanging Hooks/Wire: Choose based on the weight of your art.
- Command Strips (Optional): For lighter art or damage-free hanging.
Having these tools ready simplifies the entire process. You avoid pausing mid-project to search for an item.
Precise Measuring and Marking
Accurate measurements prevent crooked art. First, measure the width of your sofa. Then, determine the ideal width for your art arrangement (about two-thirds of the sofa’s width). Mark the center point of your sofa on the wall with a light pencil line. This line will guide your horizontal placement.
For vertical placement, aim to hang the bottom of your art 6 to 12 inches above the sofa back. The center of your entire art arrangement should ideally be at eye level (around 57-60 inches from the floor). Use your level to ensure your pencil marks are perfectly straight. If hanging a gallery wall, cut out paper templates of your frames. Tape them to the wall first. This lets you visualize and adjust before making holes.
Hanging Methods for Different Weights
The weight of your art dictates the hanging method. Different hangers support different loads. Choose the right hardware to keep your art secure. You do not want it falling off the wall.
- Lightweight Art (under 5 lbs): Small picture nails or adhesive command strips work well. Command strips offer a damage-free hanging solution if you are renting or prefer not to use nails.
- Medium-Weight Art (5-20 lbs): Standard picture hooks with one or two nails are suitable. These hooks are angled for better grip.
- Heavy Art (over 20 lbs): For heavier pieces, you need more robust solutions. Use a stud finder to locate wall studs. Screwing directly into a stud provides the strongest hold. If no stud is available, use drywall anchors or toggle bolts. These expand behind the drywall to create a secure mount. For large, heavy items, similar principles apply as when you hang a heavy porch swing bed or even hang cabinets on metal studs. Always check the weight rating on your chosen hardware.
Step-by-Step Guide to Hanging Your Art
Hanging your art becomes simple with a clear process. Follow these steps for a perfectly placed display. My first time hanging art above a sofa was stressful. Now, with a plan, it’s easy.
- Measure and Plan: Start by measuring your sofa’s width. Decide if you want a single piece or a gallery wall. For a gallery wall, arrange your frames on the floor first. Take a photo of your preferred layout. This serves as your blueprint.
- Mark the Wall’s Center: Find the exact center point of your sofa. Measure the distance from the floor to where you want the bottom edge of your art to be (6-12 inches above the sofa). Use a pencil to mark the overall center of your chosen art arrangement on the wall. Remember, the eye-level rule (57-60 inches from the floor) for the center of the artwork still applies.
- Create Templates (for gallery walls): If you are hanging multiple pieces, cut paper templates the exact size of each frame. Tape these templates to the wall using painter’s tape. This allows you to adjust the spacing and arrangement visually. Stand back and check the balance. Make sure the entire arrangement is centered over the sofa.
- Mark Hanging Points: With templates in place, mark where the actual hanger will go on each template. This depends on whether your frame has a wire, D-rings, or sawtooth hangers. Measure from the top of your frame to the hanging point on the back. Transfer this measurement onto your template on the wall.
- Install Hardware: Remove the paper templates. Install your chosen picture hanging hardware at the marked points. Use appropriate nails, screws, or wall anchors based on your art’s weight. If using anchors, pre-drill a pilot hole. This ensures a clean installation.
- Hang Your Art: Carefully hang each piece onto its hardware. Use a level to ensure each picture is perfectly straight. Make small adjustments as needed. Stand back often to check the overall alignment.
- Final Touches: Once everything is hung, remove any visible pencil marks with an eraser. Admire your newly transformed wall. You did a great job making your living room more stylish.
Avoiding Common Picture Hanging Mistakes
Even with careful planning, mistakes can happen. Knowing common errors helps you avoid them. I made a few of these myself when I first started decorating. Learning from them saved me time and frustration later.
- Hanging Art Too High: This is perhaps the most frequent mistake. When art is hung too high, it disconnects from the furniture below it. It makes the wall feel unbalanced. Always aim to keep the bottom edge of your art 6-12 inches above the sofa’s back. This creates a visual connection.
- Choosing Art That Is Too Small: An art piece that is too small for the space above a large sofa looks lost. It fails to create a focal point. Always remember the two-thirds rule for width. Larger art helps balance the visual weight of the sofa.
- Ignoring Overall Scale: Not just the width, but the overall height and visual weight of the art matters. A very tall, narrow piece above a wide sofa might look awkward. Think about the entire wall and how the art fills that space.
- Improper Centering: Art that is off-center above the sofa immediately stands out. Use your tape measure and pencil to find the sofa’s exact midpoint. Center your art or art arrangement precisely over this mark.
- Skipping the Template Step: For gallery walls, skipping paper templates is a recipe for disaster. It is very hard to eyeball multiple frames correctly. Templates let you fine-tune the layout before making any holes. They are a lifesaver.
- Using Insufficient Hardware: Hanging heavy art with small nails is dangerous. The art can fall, damaging both the piece and your wall. Always match your hanging hardware to the weight of your artwork. A stud finder is essential for heavy pieces.
- Forgetting the Level: A crooked picture is distracting. Always use a level to ensure your art is straight. Even slight angles are noticeable. Take the time to level each piece.
Enhancing Your Sofa Area with Art
Hanging pictures above your sofa does more than fill a blank space. It enhances the entire sofa area. Art integrates into your overall living room design. It helps create a cohesive and inviting atmosphere.
Consider the color palette of your art. Does it complement your sofa and other furnishings? Art can introduce accent colors or reinforce existing ones. A piece with vibrant blues could tie into blue throw pillows on your sofa. This creates a harmonious look. Similarly, selecting a rug that complements your sofa and art arrangement, and knowing how to place a rug under a sofa, can greatly improve your room’s aesthetic.
Think about lighting. Directional lighting can highlight your artwork, making it stand out. A picture light mounted above the frame draws attention to the piece. It adds a sophisticated touch. My own living room feels so much richer since I added a small track light above my main painting.
Finally, do not forget accessories. Throw pillows and blankets on the sofa can echo themes or colors from your art. A nearby plant or a decorative object on a side table can complement the art. All these elements work together. They create a complete and personalized living space. Your chosen art piece helps anchor these design choices.
FAQ Section
Q1: How high should pictures be hung above a sofa?
Hang pictures 6 to 12 inches above the sofa’s backrest. This height ensures the art connects visually with the sofa. It also prevents people from bumping their heads when sitting. The center of the art or arrangement should ideally be at eye level, around 57 to 60 inches from the floor.
Q2: What size art is best for above a sofa?
For optimal scale, the width of your art piece or collective arrangement should be approximately two-thirds the width of your sofa. For example, if your sofa is 90 inches wide, your art should span about 60 inches. This proportion ensures the art does not look too small or too large.
Q3: Can I hang multiple pictures above my sofa?
Yes, a gallery wall with multiple pictures is a popular choice. Arrange your frames on the floor first to plan the layout. Maintain consistent spacing, typically 2-3 inches, between frames. This creates a cohesive look and allows you to display a collection of various pieces.
Q4: How do I center a picture above my sofa?
First, find the exact horizontal midpoint of your sofa. Then, measure the width of your picture or gallery wall arrangement. Divide that width by two. Mark your wall at the sofa’s midpoint. Then, measure half the art’s width to the left and half to the right from this center mark.
Q5: What if my sofa is very long?
For very long sofas, a single large piece of art that spans two-thirds of the sofa’s width works well. Alternatively, create an extended gallery wall. Ensure the entire arrangement maintains the two-thirds width rule. This prevents the art from appearing dwarfed by the sofa’s length.
Q6: Do I need a stud to hang art above a sofa?
You only need a stud if your artwork is very heavy (over 20 pounds). For lighter pieces, simple picture nails or hooks into drywall are sufficient. For medium to heavy art without a stud, use appropriate drywall anchors or toggle bolts. Always check the weight rating of your chosen hardware.
Conclusion
Hanging pictures above your sofa is a simple yet impactful way to elevate your living room. By understanding scale, planning your layout, and using the right tools, you can transform a blank wall into a stunning focal point. Remember the key principles: measure your sofa, aim for two-thirds width coverage, and hang art 6-12 inches above the sofa’s back. These steps ensure your artwork looks balanced and intentional.
Now, you have the knowledge to confidently hang pictures above your sofa. You can create a space that feels personal and complete. Experiment with different styles, from a single statement piece to a dynamic gallery wall. Your living room deserves art that reflects your style and enhances its comfort. Go ahead, choose your art, and start hanging. Make your home feel truly finished and inviting.
- picture hanging
- sofa decor
- wall art
- living room design
- gallery wall
- home improvement

Todd Martin
Senior Writer
With over 15 years of experience in home renovation and design, I started HEG to share what I’ve learned with homeowners who want to create spaces that are both beautiful and functional. I’ve always believed in a hands-on approach, and over the years, I’ve picked up practical solutions that actually work. Through HEG, I aim to make home improvement more approachable, sharing real tips that help you create a home you truly love.