· Todd Martin · Home Improvement · 18 min read
How To Hide Shelf Brackets

Master the Art: How To Hide Shelf Brackets for a Seamless Look
Do you ever look at your shelves and wish the brackets just… disappeared? Many of us want clean, minimalist lines in our homes. Visible shelf brackets can disrupt this aesthetic. They can make a beautiful shelf look cluttered or unfinished. I know the feeling; a perfect shelf with an eyesore of a bracket underneath just isn’t quite right.
We aim for seamless storage and display solutions. Achieving this often means making hardware vanish. This guide helps you achieve that polished, built-in look. We will explore various methods, from simple camouflage to complete concealment. You will learn about different shelving types and creative DIY approaches. Let’s make your shelves look like they float on air.
Takeaway
- Choose floating shelves or recessed bracket systems for invisible support.
- Camouflage existing brackets with paint, fabric, or decorative elements.
- Build custom covers or valances to conceal traditional hardware.
- Integrate brackets into your design by matching colors or using decorative styles.
- Prioritize proper installation and weight capacity for all hidden shelving.
To hide shelf brackets, you can select shelving systems with integrated or concealed supports, such as floating shelves or built-in units. For existing brackets, paint them to match the wall or shelf, or cover them with decorative elements like trim, fabric, or custom-built enclosures.
Understanding Why Hiding Brackets Matters for Aesthetics
Visible shelf brackets often detract from a room’s overall design. They can break up clean lines and create visual clutter. For instance, in a modern home, exposed metal brackets might clash with a minimalist aesthetic. This issue becomes more noticeable with open shelving. My goal is to create a cohesive look.
Hiding shelf brackets improves the perceived value of your shelves. They look more expensive and custom-made. It also allows the items on the shelf to be the main focus. Without distracting hardware, your decor truly shines. This subtle change makes a big difference. It elevates the entire room’s appearance.
The Problem with Visible Brackets
Visible brackets can be functional but not always beautiful. They often come in standard colors and designs. These designs may not match your unique style. I have seen many homes where strong, utilitarian brackets spoil an otherwise elegant space. They draw the eye away from the carefully chosen items.
Furthermore, visible brackets can limit your decorating options. You have to work around them. Hiding them gives you more freedom. You can arrange items without considering the bracket placement. This flexibility allows for more creative displays. It helps create a truly personal space.
Choosing the Right Shelving System for Hidden Brackets
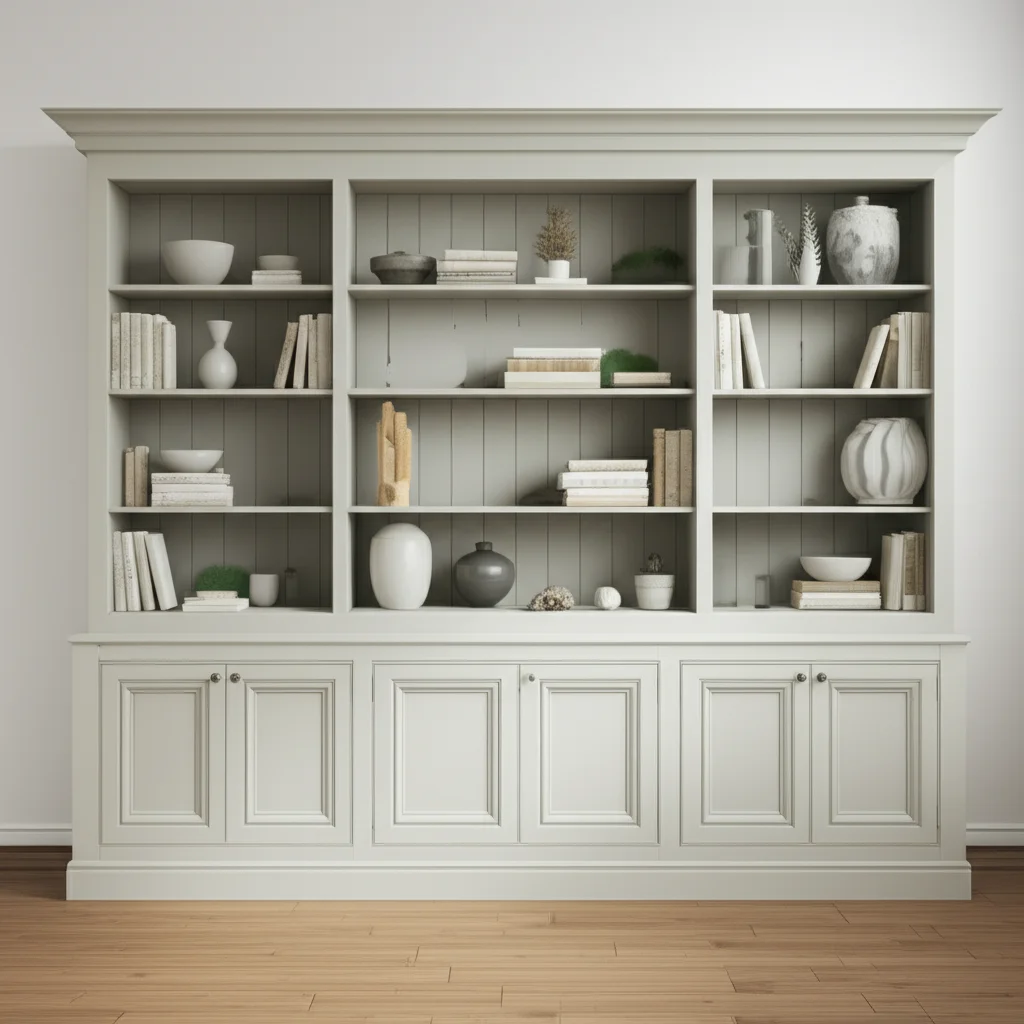
The simplest way to hide shelf brackets is to choose a shelving system designed for it. Floating shelves are the most common solution. They use internal or recessed mounting hardware. This hardware is completely hidden once the shelf is in place. I always recommend these for a truly seamless look.
Built-in shelves also offer a great way to conceal supports. These shelves are often integrated directly into wall recesses. The supports are part of the wall structure. They are never seen. Custom cabinetry or alcove shelving can achieve this effect. This option provides a very polished finish. It looks like the shelves are part of the house itself. You can find more ideas on building shelves that integrate into your space by exploring how to make a pantry shelf.
Types of Shelving Systems
- Floating Shelves: These shelves attach to the wall using concealed metal rods or plates. The shelf itself slides over these supports. The result is a clean, unsupported look. Installation requires careful measurement and often specific tools.
- Built-in Shelves: These are constructed directly into wall cavities or custom-designed cabinets. The structural supports are internal. They are part of the framework. This method offers the most integrated appearance. It requires more advanced carpentry skills.
- Recessed Brackets: Some systems use brackets that fit into grooves on the back of the shelf. These brackets are less visible from the front. They offer a compromise between floating shelves and traditional ones. These are good for heavier loads.
- Cabinet-Integrated Shelving: When adding shelves inside existing cabinets, the side panels often act as supports. You can also use small, invisible pins. This method keeps the interior neat. Learn more about how to make the most of your existing structures with tips on how to add extra shelf in cabinet.
Consider the weight capacity when choosing a hidden bracket system. Floating shelves have limits. Built-in shelves typically hold more weight. Always check product specifications. This ensures safety and durability.
Clever Concealment Techniques for Existing Brackets
What if you already have shelves with visible brackets? Don’t worry; you can still make them disappear. One effective method is painting the brackets. Match the bracket color to the wall color. This helps them blend in. For example, white brackets on a white wall become almost invisible. I find this simple trick very effective.
You can also match the bracket color to the shelf itself. This creates a monochromatic look. The bracket becomes an extension of the shelf. It is still visible but less distracting. A dark bracket under a dark wood shelf looks cohesive. This technique works well when you cannot hide the bracket completely.
Practical Camouflage Ideas
- Paint Matching:
- Wall Match: Use the exact same paint as your wall. Apply multiple thin coats for a smooth finish. This makes the bracket visually recede.
- Shelf Match: Paint the bracket the same color as the shelf material. This creates a unified appearance. Use paint suitable for the bracket material (metal, wood).
- Fabric Wrapping:
- Adhesive Fabric: Wrap the brackets with fabric that matches your wall or decor. Use strong fabric adhesive. This adds texture and softens the look.
- Removable Covers: Create small fabric sleeves. Slide them over the brackets. You can change these with your seasonal decor.
- Decorative Trim or Molding:
- Wood Trim: Attach decorative wood trim directly to the bracket. Paint it to match the shelf or wall. This transforms the bracket into an architectural feature.
- Molding Pieces: Use small pieces of crown molding or baseboard. Cut them to fit around the bracket. This creates a more substantial, built-in appearance.
- Artwork or Objects:
- Strategic Placement: Arrange books or decor items to partially or fully cover the brackets. Tall vases or stacks of books work well.
- Hanging Decor: Drape fabric or hang small decorative items from the front of the shelf. This can obscure the view of the brackets.
These techniques are great for rentals or when a full renovation is not possible. They offer quick and affordable solutions. I always look for simple ways to improve a space. These methods definitely deliver on that promise.
DIY Solutions for Disguising Shelf Supports
For those who enjoy a bit of DIY, you can build custom covers. A simple wooden box or frame can enclose the bracket. This box then blends with the shelf or wall. For example, you can create a U-shaped wooden channel. This channel slides over the bracket. It turns an ordinary bracket into a sleek support.
Another approach involves extending the shelf material. Imagine a shelf where the front edge drops down. This “valance” hides the bracket underneath. You can use thin plywood or a matching wood piece. Attach it to the front underside of the shelf. This creates a clean, solid look. It is an effective way to hide shelf brackets.
Step-by-Step DIY Bracket Concealment
- Building a Wooden Sleeve:
- Measure: Measure the length, width, and height of your existing bracket.
- Cut Wood: Cut three pieces of thin wood or MDF. One for the top, two for the sides.
- Assemble: Glue and nail the pieces to form a U-shape. This will slide over the bracket.
- Finish: Paint or stain the sleeve to match your shelf. Slide it over the bracket after installation.
- Creating a Shelf Valance:
- Measure: Determine the desired drop length for your valance. This needs to cover the bracket fully.
- Cut Material: Cut a piece of wood or MDF to the length of your shelf and the determined drop length.
- Attach: Securely attach the valance to the front underside of your shelf. Use wood glue and small screws or finishing nails.
- Blend: Fill any screw holes. Paint or stain the valance to match the shelf. This makes it look like part of the original design.
- Using Decorative Box Covers:
- Find or Build: Source small decorative boxes or build them from craft wood.
- Adapt: Cut out the back of the box to fit around the bracket.
- Mount: Secure the box over the bracket. This can be glued or screwed into the shelf itself.
- Decorate: These boxes can be painted, decoupaged, or adorned. They become part of your shelf styling.
These DIY methods give you full control over the final look. They are often more cost-effective than buying new shelving systems. With a little effort, you can transform your shelves. Remember to also think about how to hide other common household eyesores, such as how to hide screw holes in cabinets for a consistent clean look throughout your home.
Integrating Brackets into Your Design Scheme
Sometimes, hiding brackets completely is not feasible or desired. In these cases, make them a deliberate design element. Choose brackets that complement your decor style. For example, use industrial pipe brackets for a rustic or industrial look. Or select ornate, decorative brackets for a traditional or maximalist space. My advice is to embrace them.
Color coordination is key here. Paint the brackets a contrasting color for a bold statement. Or choose a metallic finish that ties into other metal accents in the room. This turns a functional item into a feature. It can add character to your shelves. This approach can be very effective in open spaces. It makes the brackets part of the story.
Making Brackets Part of the Decor
- Match Material: Select brackets made from the same material as your shelf (e.g., matching wood). This creates a harmonious flow.
- Contrasting Colors: Paint brackets a vibrant color that pops against the wall and shelf. This creates a focal point.
- Unique Designs: Seek out brackets with interesting shapes or patterns. These can become sculptural elements.
- Accessorize Around Them: Use plants or small sculptures that interact with the bracket design. This softens their appearance.
- Metallic Accents: Choose brass, copper, or black iron brackets. They can match other hardware in the room. This creates a cohesive metallic theme.
Consider the room’s overall theme. Do you have a farmhouse kitchen? Rustic iron brackets might fit perfectly. A modern living room? Sleek, minimalist metal brackets could work. By making brackets part of the design, you turn a potential eyesore into an asset. This is especially true if you’re looking for ways to decorate a shelf in the kitchen where utility often meets style.
Advanced Techniques for a Truly Seamless Look
For the ultimate hidden shelf look, consider advanced installation methods. Recessed shelving involves cutting into the drywall. The shelf itself sits flush with the wall surface. This technique completely integrates the shelf into the wall. It offers the cleanest possible appearance. This is often seen in high-end designs. It requires professional installation or advanced DIY skills.
Another advanced technique is using hidden track systems. These systems involve a metal track mounted directly to wall studs. The shelves then attach to this track with special clips. The track and clips are entirely concealed by the shelves. This allows for adjustable shelf heights without visible hardware. It’s a versatile solution for flexible storage. Consider how professional shelving is installed, like when you install a shelf between two cabinets, to understand the precision needed.
Complex Concealment Methods
- Drywall Cut-Ins:
- Locate Studs: Identify and mark wall studs.
- Cut Opening: Carefully cut out a section of drywall between studs.
- Frame Opening: Build a sturdy wooden frame inside the wall cavity. This forms the shelf recess.
- Install Shelf: Secure the shelf directly to the internal frame. Finish the drywall around it. This method provides maximum concealment.
- Hidden Track Systems:
- Mount Track: Install a heavy-duty metal track directly to wall studs. Ensure it is level and secure.
- Attach Brackets/Clips: Slide or snap special brackets or clips onto the track. These will support the shelves.
- Install Shelves: Place the shelves onto these hidden supports. They should lock into place. This system allows for easy shelf adjustment.
- Structural Shelf Integration:
- New Construction/Renovation: Plan for shelves during the framing stage of a build.
- Embedded Supports: Embed steel plates or rods directly into the wall framing.
- Finish Walls: Drywall and paint around these supports.
- Attach Shelves: Secure shelves to the embedded supports. This creates a truly invisible mounting point.
These advanced methods require careful planning and execution. They offer superior aesthetics and durability. If you are undertaking a major renovation, these options are worth exploring. They create a truly high-end finish. The investment pays off in a perfectly seamless look.
Maintenance and Considerations for Hidden Shelf Brackets
While hidden shelf brackets offer a sleek look, they come with specific considerations. Weight capacity is paramount. Floating shelves, especially, have limitations. Always check the manufacturer’s maximum weight recommendations. Overloading can lead to shelf failure. This could damage your items and your wall. I always advise caution here.
Maintenance for hidden systems is minimal. However, proper installation is critical. Ensure the anchors are rated for your wall type (drywall, plaster, concrete). Use a stud finder to mount into studs whenever possible. This provides the strongest support. Loose or improperly installed hidden shelves are dangerous. It is better to over-engineer than to risk collapse.
Important Practicalities
- Weight Capacity:
- Manufacturer Specs: Always adhere to the weight limits provided by the manufacturer. These are crucial for safety.
- Distribution: Distribute weight evenly across the shelf. Avoid placing heavy items at one end.
- Type of Items: Consider the density of items. Books are heavy. Decor items are lighter.
- Installation Precision:
- Leveling: Use a spirit level during installation. A crooked hidden shelf is very noticeable.
- Stud Mounting: Whenever possible, mount hidden brackets directly into wall studs. This offers superior strength.
- Proper Anchors: If stud mounting is not possible, use heavy-duty toggle or molly bolts. Do not rely on simple drywall anchors for significant weight.
- DIY vs. Professional: For complex installations, consider hiring a professional. This ensures safety and a perfect finish.
- Material Compatibility:
- Shelf Material: Ensure your shelf material can accommodate the hidden bracket system. Solid wood is ideal for floating shelves. Particle board may not hold up.
- Wall Material: Different wall materials require different mounting hardware. Understand what your wall is made of.
- Future Access:
- Maintenance: Consider if you will need access to the hidden brackets in the future. Some systems allow for easier removal than others.
- Repairs: If a bracket needs repair, how will you access it? Built-in systems may require drywall repair.
Careful planning and execution are essential for hidden shelf brackets. They create a beautiful effect. However, safety and stability must always come first. Think about the long-term use of your shelves. This will help you choose the best hiding method.
Innovative Ways to Integrate Hidden Shelves in Your Home
Hidden shelves are not just for basic storage. They can be design features themselves. Think about installing hidden shelving in unexpected places. A shallow floating shelf along the top of a door frame can display small curios. Or, a hidden shelf behind a sliding panel can conceal a media center. This adds an element of surprise to your home.
Consider using hidden shelves to highlight specific areas. A series of floating shelves in a narrow hallway can create a gallery effect. The absence of visible supports makes the artwork appear to float. In a bathroom, hidden shelves above the toilet can provide sleek storage for towels. These shelves are both functional and visually appealing. You can even consider how to make vertical shelf dividers to organize these hidden shelves.
Creative Applications for Concealed Shelving
- Reading Nooks: Install floating shelves within a built-in bench or an alcove. This creates a cozy, clutter-free reading space.
- Entryway Organizers: Use hidden shelves for keys, mail, or small bags near the front door. This keeps the entryway tidy without visible clutter.
- Bedroom Displays: Mount floating shelves above a bed or dresser for displaying art or personal items. The seamless look promotes a calm atmosphere.
- Kitchen Solutions: Integrate hidden shelves into kitchen islands or backsplash areas. This provides practical storage for spices or small appliances. For inspiration, think about how you might decorate a corner shelf in such a space.
- Media Centers: Build recessed shelving around a television. This conceals media components and wires. It gives a sleek, minimalist entertainment area.
- Bathroom Storage: Install floating shelves in shower niches or above the toilet. This offers elegant storage for toiletries and towels.
- Home Office Efficiency: Use hidden shelving for books, files, or office supplies. This keeps your workspace organized and professional.
By thinking beyond traditional shelving, you can unlock new design possibilities. Hidden shelves offer a unique way to add storage and display space. They enhance the overall aesthetic of any room. Their seamless appearance makes them a versatile choice. It creates a truly sophisticated interior.
Maximizing Space with Hidden Shelf Brackets
Hidden shelf brackets are also excellent for small spaces. In a tiny apartment, every inch counts. Floating shelves maximize vertical space without adding visual bulk. They make a room feel larger and more open. This is because the eye isn’t distracted by clunky supports. I find them indispensable in compact areas.
Consider using hidden shelves in awkward nooks or corners. A custom-cut floating shelf can fit perfectly. It turns unused space into valuable storage. This is particularly useful in bathrooms or hallways. The clean lines of hidden shelves adapt well to unique architectural features. They offer tailored solutions for challenging areas.
Space-Saving Strategies
- Corner Solutions:
- Install floating corner shelves. These utilize often-wasted corner space.
- Design shelves that wrap around a corner seamlessly, without visible interruption.
- Narrow Passages:
- Mount shallow floating shelves in hallways or between doorways. They provide display space without obstructing movement.
- Use them for small decorative items or framed photos.
- Above Doorways/Windows:
- Install a long, narrow floating shelf above a doorway or window frame. This utilizes high, often overlooked, space.
- Ideal for displaying lightweight collectibles or greenery.
- Alcoves and Recesses:
- Fit floating or built-in shelves into wall alcoves. This turns a simple recess into a functional display area.
- The shelves become an integral part of the wall, enhancing the built-in feel.
- Small Kitchens:
- Replace upper cabinets with open floating shelves. This makes a small kitchen feel much larger and brighter.
- Display attractive dishware or frequently used items.
- Bedside Alternatives:
- Use small floating shelves as bedside tables in cramped bedrooms. They offer a surface for a lamp and a book without taking up floor space.
- This keeps the bedroom feeling open and airy.
Maximizing space with hidden shelves is about smart design. It combines functionality with sleek aesthetics. By eliminating visual clutter, you create an illusion of more space. This makes your home feel more expansive and inviting.
FAQ Section
Q: Are floating shelves strong enough for heavy items? A: Floating shelves vary in strength based on installation and materials. When properly installed into wall studs with high-quality hardware, some can hold significant weight. However, always check the manufacturer’s specifications. For very heavy items like large book collections, consider built-in or more traditional shelving systems where supports are fully integrated into the wall structure.
Q: Can I install hidden shelf brackets myself, or do I need a professional? A: Many hidden shelf bracket systems are designed for DIY installation. Floating shelves often come with clear instructions. However, precision is key. If you are uncomfortable with measuring, leveling, or finding studs, a professional ensures a secure and perfectly straight installation. For complex recessed or custom built-in solutions, a professional carpenter is recommended.
Q: What are the best materials for shelves with hidden brackets? A: Solid wood is an excellent choice for shelves with hidden brackets. It is durable and can be securely mounted to internal supports. MDF or high-quality plywood can also work, especially for lighter loads. Avoid particle board for floating shelves, as it may not hold screws or internal rods effectively over time.
Q: How do I maintain shelves with hidden brackets? A: Maintenance for shelves with hidden brackets is simple. Regularly dust and clean the shelf surface as you would any other furniture. Periodically check for any signs of loosening or instability. If the shelf seems wobbly, re-tighten screws or consult an expert. Avoid overloading the shelves beyond their stated weight capacity to prevent damage.
Q: Can I add hidden brackets to existing shelves? A: Adding hidden brackets to existing shelves depends on the shelf’s construction. If the shelf is solid wood and thick enough, you might be able to retrofit internal support rods. However, it is often more practical to camouflage existing visible brackets or replace the shelves with a system designed for hidden supports, like floating shelves.
Q: Do hidden shelf brackets work on all wall types? A: Hidden shelf brackets can work on most wall types, but the installation method varies. On drywall, you must mount into studs for strength or use heavy-duty anchors. Concrete or brick walls require specific masonry anchors and drilling techniques. Plaster walls can be tricky and may require professional advice or careful use of specialized anchors.
Conclusion
Transforming your shelves from merely functional to truly beautiful starts with understanding how to hide shelf brackets. We have explored everything from sleek floating shelves to creative DIY camouflage techniques. Whether you choose to invest in a custom built-in solution or simply paint your existing supports, the goal is clear: create a seamless, elegant look that enhances your home.
The journey to perfectly hidden shelf brackets is achievable. It empowers you to design spaces that feel thoughtful and uncluttered. I encourage you to apply these ideas to your own home. Experiment with different styles and find what best suits your aesthetic. For more home improvement tips and design inspiration, keep exploring our guides at Home Essentials Guide. A beautiful, organized home is within your reach.
- shelf brackets
- floating shelves
- home decor
- DIY shelving
- interior design
- hidden hardware
- seamless design

Todd Martin
Senior Writer
With over 15 years of experience in home renovation and design, I started HEG to share what I’ve learned with homeowners who want to create spaces that are both beautiful and functional. I’ve always believed in a hands-on approach, and over the years, I’ve picked up practical solutions that actually work. Through HEG, I aim to make home improvement more approachable, sharing real tips that help you create a home you truly love.