· Todd Martin · Home Improvement · 18 min read
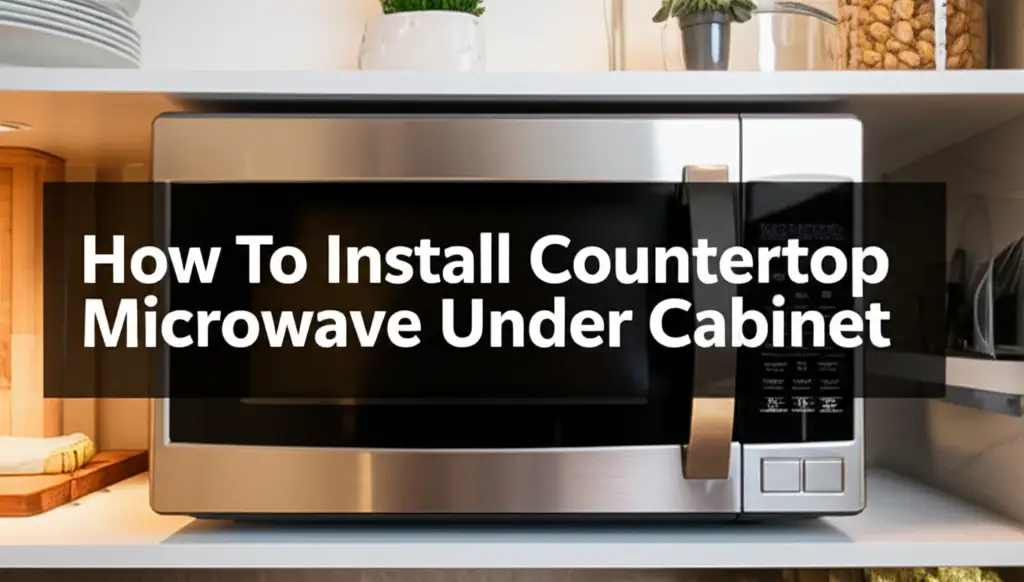
How To Install Countertop Microwave Under Cabinet
Installing Your Countertop Microwave Under Cabinet Safely
Do you dream of a kitchen free from clutter? Countertop appliances, while useful, often take up valuable space. The microwave is a prime example, often occupying a large footprint on your limited counter area. I know the feeling of wishing for more room to chop vegetables or simply to spread out.
That’s why many homeowners look for ways to free up this space. One popular solution is to install a countertop microwave under a cabinet. This might sound tricky, but with the right approach, it is a rewarding DIY project. This guide shows you how to properly install your countertop microwave under a cabinet. We will cover everything from assessing your space to the final steps.
Takeaway
- Assess Compatibility: Ensure your microwave and cabinet are suitable for under-cabinet mounting.
- Gather Tools: Collect all necessary tools and safety gear before starting.
- Plan Wiring: Confirm power access and consider professional electrical help if needed.
- Reinforce Cabinet: Strengthen the cabinet base to support the microwave’s weight.
- Ensure Ventilation: Leave ample space for air circulation around the microwave.
To install a countertop microwave under a cabinet, you typically need a specialized mounting kit designed for this purpose, as standard countertop models lack built-in mounting points. This process often involves measuring, reinforcing the cabinet, securing the bracket, and ensuring proper ventilation and power access, providing a space-efficient kitchen solution.
Understanding Countertop Microwave Under Cabinet Installation
Placing a microwave under a cabinet is a smart way to save counter space. This setup gives your kitchen a cleaner, more organized look. It also makes your workflow more efficient, as you have more room for food prep. I find this approach very helpful in smaller kitchens.
It is important to understand the differences between microwave types. Not all microwaves are designed for under-cabinet use. Standard countertop models sit on a flat surface. They do not have built-in mounting features. Over-the-range microwaves, by contrast, are made to mount above a stove. They often include ventilation systems. Built-in microwaves slide into a custom cabinet opening. They need a trim kit for a finished look.
A countertop microwave can function under a cabinet. However, it requires a special mounting kit. This kit provides the necessary support and attachment points. Without it, the microwave cannot be securely installed. Using the wrong microwave type in this way can create safety issues. For instance, you cannot just use a built-in microwave as a countertop model without thinking about its design. You can learn more about if you can use a built-in microwave as countertop if you are considering other options.
When considering if you can use a countertop microwave as a built-in unit, it is crucial to understand the limitations. A countertop microwave is not typically designed to function as a built-in unit. They lack the necessary ventilation systems and mounting hardware for this purpose. You can explore more about if you can use a countertop microwave as built-in for a deeper dive. Similarly, an over-the-range microwave serves a different purpose entirely. It is designed to vent cooking fumes. Trying to use an over-the-range microwave as countertop is not recommended due to design differences.
Preparing Your Space and Microwave for Installation
Before you begin any installation, careful preparation is key. I always start by clearing the area completely. Remove everything from the countertop and inside the cabinet above. This gives you a clean and safe workspace. A clear area helps you move freely and see clearly.
Next, you must take precise measurements. Measure the height, width, and depth of your microwave. Then, measure the exact space under your cabinet. Pay attention to the cabinet’s interior dimensions. You need to ensure enough clearance around the microwave for ventilation. Most manufacturers recommend a few inches of space on the sides, top, and back. Failing to allow proper airflow can cause the microwave to overheat. Overheating shortens the microwave’s lifespan.
Consider the weight of your microwave. Microwaves can be heavy, especially larger models. Your cabinet must support this weight. Inspect the cabinet for any signs of weakness. Look for loose joints or sagging shelves. You might need to add extra support or reinforcement. This could involve adding a sturdy plywood base inside the cabinet or securing it to wall studs. This ensures the cabinet will not sag or fail over time. Proper support prevents future problems and ensures safety.
Finally, think about power access. Your microwave needs a dedicated electrical outlet. This outlet should be located inside the cabinet above or very close by. It needs to be a grounded 3-prong outlet. If you do not have an outlet, you must install one. This job should be done by a qualified electrician. Never use extension cords for microwaves. Extension cords are a fire hazard. They do not provide enough power and can overheat easily.
Essential Tools and Materials for a Smooth Setup
Having the right tools makes any DIY project easier. For installing a countertop microwave under a cabinet, you will need several basic items. I always gather everything before I start working. This saves time and frustration during the project. Make sure your tools are in good working order.
Here is a list of essential tools and materials:
- Measuring Tape: For precise measurements of your microwave and cabinet space. Accuracy is crucial for a perfect fit.
- Pencil: To mark drilling points and outlines. A clear mark helps guide your drilling.
- Drill and Drill Bits: You will need bits suitable for wood. Select sizes that match your mounting kit screws.
- Screwdriver Set: Both Phillips and flathead screwdrivers are usually needed. Ensure they fit your screws well.
- Level: To ensure your mounting bracket and microwave are perfectly straight. A crooked installation looks bad and can be unstable.
- Stud Finder: To locate wall studs behind your cabinet. Anchoring into studs provides maximum support.
- Safety Glasses: Protect your eyes from sawdust and debris. Safety is always first.
- Gloves: Protect your hands while working.
- Microwave Mounting Kit: This is essential. It includes brackets, templates, and hardware designed for under-cabinet installation. Ensure it matches your microwave’s size and weight. Some universal kits are available, but a model-specific one is best.
- Wood Screws (if needed): Longer or stronger screws might be necessary if your cabinet material is thick or for added reinforcement.
- Plywood or Wood Scraps (if reinforcing): To add structural support inside the cabinet.
You may also want to have a utility knife for opening packages. A small vacuum or shop vac is useful for cleaning up dust. Having these items ready saves you from stopping mid-project. Remember, using the correct tools ensures a secure and lasting installation.
Step-by-Step Guide to Installing Your Microwave
Now comes the actual installation process. Follow these steps carefully to ensure a safe and secure fit for your countertop microwave under the cabinet. I recommend reading through all steps before you begin. This gives you a clear picture of the entire process. Take your time with each step for the best results.
Step 1: Unpack and Review Instructions
Begin by unpacking your microwave and the mounting kit. Lay out all components. Read through the mounting kit’s instructions thoroughly. Each kit may have specific requirements or templates. Understand the steps before you start drilling or cutting. Identify all the parts included in the kit.
Step 2: Prepare the Cabinet for Mounting
You might need to reinforce the cabinet base. If the cabinet feels flimsy, cut a piece of plywood to fit inside its bottom. This adds strength and distributes the microwave’s weight evenly. Secure the plywood to the cabinet base using wood screws. Make sure these screws go into the cabinet frame. Consider how to attach wood countertop to cabinet principles for secure fastening methods if you are adding a significant wooden reinforcement.
Locate the studs behind the cabinet using your stud finder. Mark their positions on the inside of the cabinet. These marks will help you align your mounting bracket for maximum support. This step is crucial for heavy microwaves.
Step 3: Mark and Drill Pilot Holes
Refer to your mounting kit template. Tape the template to the underside of the cabinet where the microwave will be. Use a level to ensure it is straight. Mark the drilling points clearly with your pencil. These marks show where the mounting screws will go.
Using your drill, create pilot holes at each marked point. Choose a drill bit slightly smaller than your mounting screws. This prevents wood splitting. Drill slowly and carefully.
Step 4: Install the Mounting Brackets
Align the mounting bracket(s) with your pilot holes. Secure the brackets to the underside of the cabinet using the screws provided in the kit. If possible, drive screws into the cabinet studs for extra strength. Tighten all screws firmly. Check that the brackets are stable and do not wobble.
Some kits might include a rear support bar. If so, attach it to the wall studs using appropriate fasteners. This bar provides additional stability for the microwave. Always double-check that everything is level before proceeding.
Step 5: Route the Power Cord
Before placing the microwave, ensure the power cord can reach the outlet. If the outlet is inside the cabinet, you might need to drill a small hole. This hole allows the cord to pass through the cabinet base. Make the hole just large enough for the plug to fit. Smooth any rough edges around the hole to prevent cord damage.
If the outlet is in an adjacent cabinet, ensure the cord can safely reach. Avoid pinching the cord. Do not run the cord through areas where it could be cut or damaged.
Step 6: Lift and Secure the Microwave
This step often requires two people due to the microwave’s weight. Carefully lift the microwave. Align its top with the installed mounting brackets. Slide the microwave into place according to your kit’s instructions. Some kits have hooks that engage with slots on the microwave. Others might have a rail system.
Once aligned, push the microwave firmly upwards until it locks into place. Secure the microwave using the remaining screws or fasteners from the kit. These typically go through the top of the microwave and into the brackets. Ensure all fasteners are tight. The microwave should feel very secure and not move.
Step 7: Final Checks and Ventilation
Plug the microwave into the dedicated outlet. Test it to ensure it powers on and functions correctly. Open and close the door a few times. Check that the microwave is level and stable.
Finally, ensure proper ventilation. Confirm there are clear air gaps around the microwave as recommended by the manufacturer. This allows heat to escape. Good ventilation prevents overheating and extends the life of your appliance. A clean cabinet also helps with airflow; it’s a good time to make sure you know how to clean your cabinet properly.
Important Considerations for Safety and Longevity
Installing a microwave under a cabinet is a valuable home improvement. However, safety must always be your top priority. Overlooking certain details can lead to hazards or damage. I want to share some critical considerations to ensure your installation is both safe and long-lasting. Paying attention to these points will give you peace of mind.
Electrical Safety First
Always prioritize electrical safety. A microwave draws a significant amount of power. It needs a dedicated circuit and a grounded outlet. If your current setup does not have one, hire a licensed electrician to install it. Never use extension cords. Extension cords are not designed for the high wattage of microwaves. They can overheat, leading to fires or appliance damage. Check your home’s electrical panel. Make sure the circuit can handle the microwave’s load. Overloading a circuit causes breakers to trip or can even damage wiring.
Adequate Ventilation is Non-Negotiable
Microwaves generate heat during operation. They need space to dissipate this heat effectively. Insufficient ventilation is a common mistake. It can cause your microwave to overheat. Overheating shortens the appliance’s lifespan. It can also pose a fire risk. Always follow the manufacturer’s recommendations for clearance. This usually means several inches of space on the top, sides, and back. Do not block the microwave’s vents. Ensure air can circulate freely around the unit.
Cabinet Material and Reinforcement
Not all cabinets are created equal. Particle board or thin plywood cabinets may not be strong enough. They might sag or break over time under the microwave’s weight. Inspect your cabinet carefully before installation. If it feels weak, add reinforcement. You can install a sturdy piece of plywood to the cabinet base. Secure it to the cabinet frame and, ideally, to wall studs. This distributes the weight and adds stability. This step is crucial for preventing future structural issues.
Choosing the Right Microwave
While this article focuses on using a countertop microwave, it is worth noting alternatives. Built-in microwaves are specifically designed for cabinet integration. They often come with trim kits for a seamless look. Over-the-range microwaves include ventilation. If you are starting fresh, consider these options. They might offer a cleaner aesthetic or better performance. For those curious about the best options, you can research what is the best countertop microwave you can buy to make an informed choice. Installing a built-in microwave in a cabinet is a different process that might suit your needs better.
Regular Maintenance and Inspection
After installation, perform regular checks. Periodically inspect the mounting screws. Make sure they are still tight. Check for any signs of sagging or movement in the cabinet. Clean the microwave and the surrounding cabinet area regularly. Dust and grease buildup can impede ventilation. Proper maintenance ensures the long-term safety and performance of your under-cabinet microwave. My routine includes a quick check every few months.
Troubleshooting Common Installation Issues
Even with careful planning, sometimes issues arise during installation. Do not get discouraged if you encounter a problem. Most common issues have simple solutions. I have dealt with many installation challenges over the years. Knowing what to look for can save you time and frustration.
Microwave Not Level
If your microwave appears crooked, the mounting bracket might not be level. Use your spirit level to check the bracket again. If it is off, you will need to loosen the screws. Adjust the bracket until it is perfectly level. Then re-tighten the screws securely. Sometimes, the cabinet itself might be slightly uneven. In this case, you can use thin shims between the bracket and the cabinet to level it. Always use a level throughout the process.
Sagging Cabinet or Weak Support
A sagging cabinet indicates insufficient support. This is a serious safety concern. You need to immediately address it. First, remove the microwave. Inspect the cabinet for damage or weakness. Reinforce the cabinet more thoroughly. Add a thicker piece of plywood to the bottom. Ensure the reinforcement is screwed into wall studs, if possible. You might need to add L-brackets inside the cabinet corners for extra stability. Do not remount the microwave until the cabinet is strong and stable. This step is crucial for preventing accidents.
Microwave Doesn’t Fit or Has Insufficient Clearance
If your microwave is too snug, or there is not enough room for ventilation, re-measure everything. Compare your measurements to the microwave’s dimensions. Check the manufacturer’s recommended clearances. If the space is too small, you may need to reconsider. Can you use a smaller microwave model? Or perhaps find a different location? Never force a microwave into a space that is too tight. Lack of proper ventilation will cause overheating and damage the appliance.
Electrical Issues After Installation
If the microwave does not turn on, first check the outlet. Plug in another small appliance to see if the outlet has power. Check your circuit breaker. It might have tripped. If the outlet has power and the breaker is fine, the issue might be with the microwave itself. You could also have a wiring issue. If you installed the outlet yourself, double-check all connections. If you are unsure about electrical work, always call a licensed electrician. Do not attempt complex electrical repairs yourself.
Screws Not Holding or Stripped Holes
If screws are not holding, the pilot holes might be too large. Or the wood might be stripped. For stripped holes, remove the screw. Insert a wooden dowel or a golf tee into the hole with wood glue. Let it dry completely. Then, re-drill a new pilot hole and insert the screw. You can also use longer, slightly thicker screws. Ensure you are screwing into solid wood, not just thin cabinet panels. Using a stud finder helps identify solid framing.
By being prepared for these common issues, you can handle unexpected problems calmly. Proper troubleshooting ensures your microwave installation is successful and safe.
Maintaining Your Under-Cabinet Microwave Setup
Once your countertop microwave is successfully installed under the cabinet, a little ongoing care will ensure its longevity and continued safe operation. Maintenance is not just about cleaning. It is about periodically checking the stability of the installation. I always make sure to include these checks in my home maintenance routine.
First, keep the area around the microwave clean. Dust and grease can build up in small spaces. This buildup can block air vents. Blocked vents restrict airflow. Restricted airflow leads to overheating. Use a soft cloth and mild cleaner to wipe down the microwave’s exterior and the surrounding cabinet surfaces. Make sure to get into any crevices where dust might accumulate. This helps maintain proper ventilation and keeps your kitchen looking tidy.
Second, periodically check the mounting hardware. Over time, screws can loosen due to vibrations or changes in temperature and humidity. Every few months, gently try to wiggle the microwave. If you detect any movement, carefully tighten all visible mounting screws. Do not overtighten, as this can strip the wood. Just ensure they are snug and secure. This simple check can prevent the microwave from becoming unstable.
Third, ensure the power cord remains in good condition. Look for any signs of fraying, cuts, or kinks. A damaged cord is a serious fire hazard. If you find any damage, replace the cord immediately. This might require professional help or replacing the microwave if the cord is not detachable. Never use a damaged cord. Always ensure the cord is not pinched by the cabinet or other objects.
Finally, continue to observe the microwave’s performance. Listen for unusual noises during operation. Check for any hot spots on the cabinet or microwave. If you notice strange odors, excessive heat, or changes in performance, investigate immediately. These could be signs of an internal issue or inadequate ventilation. Addressing problems early can prevent bigger issues down the line. A well-maintained under-cabinet microwave will serve your kitchen efficiently for many years.
FAQ Section
Can any countertop microwave be installed under a cabinet?
No, not every countertop microwave can be installed under a cabinet without modification. Standard countertop models lack the necessary mounting points. You need a specialized mounting kit designed to secure a countertop microwave. This kit provides the brackets and hardware needed for a safe and stable installation under the cabinet.
Do I need a special mounting kit for a countertop microwave?
Yes, a special mounting kit is essential. Countertop microwaves are not built with integrated mounting hardware. These kits usually include sturdy brackets, screws, and sometimes a template. They are designed to safely secure the microwave to the underside of your cabinet. Never attempt to install a countertop microwave without a proper kit.
How much clearance does an under-cabinet microwave need?
The required clearance varies by microwave model. Generally, most manufacturers recommend at least 1-3 inches of space on the top, sides, and back. This ensures proper air circulation and prevents overheating. Always check your microwave’s specific instruction manual for exact clearance requirements.
Can I install an under-cabinet microwave myself?
Yes, installing a countertop microwave under a cabinet is a common DIY project. It requires basic carpentry skills and tools. However, if you need to install a new electrical outlet, always hire a licensed electrician. Safety is paramount, especially when dealing with electricity.
How do I reinforce a cabinet for a microwave?
To reinforce a cabinet, you can add a sturdy piece of plywood to the bottom of the cabinet. Cut the plywood to fit snugly. Secure it to the cabinet frame using wood screws. For heavier microwaves, try to drive screws into wall studs behind the cabinet for maximum support. This prevents sagging over time.
What are the benefits of installing a microwave under a cabinet?
Installing a microwave under a cabinet frees up valuable counter space, making your kitchen feel larger and less cluttered. It also gives your kitchen a more streamlined and organized appearance. This setup improves workflow and provides a dedicated, accessible spot for your appliance.
Conclusion
Installing a countertop microwave under a cabinet is a smart way to maximize your kitchen space. I have seen firsthand how much difference this small change can make. It transforms a cluttered countertop into a functional workspace. By following the steps outlined in this guide, you can achieve a secure and aesthetically pleasing installation. Remember to prioritize safety throughout the entire process.
Start by carefully assessing your space and microwave. Gather all the necessary tools and materials before you begin. Take precise measurements, reinforce your cabinet as needed, and always ensure proper electrical setup. The step-by-step instructions will guide you through marking, drilling, and securing the microwave. Do not forget the critical importance of good ventilation for the appliance’s longevity.
This DIY project offers great rewards. You gain a more organized kitchen and enjoy the convenience of a dedicated microwave spot. With attention to detail and adherence to safety guidelines, you can successfully install your countertop microwave under cabinet. Enjoy your newly freed-up counter space and a more efficient kitchen.
- Countertop Microwave Installation
- Under Cabinet Microwave
- Kitchen Space Saving

Todd Martin
Senior Writer
With over 15 years of experience in home renovation and design, I started HEG to share what I’ve learned with homeowners who want to create spaces that are both beautiful and functional. I’ve always believed in a hands-on approach, and over the years, I’ve picked up practical solutions that actually work. Through HEG, I aim to make home improvement more approachable, sharing real tips that help you create a home you truly love.