· Todd Martin · Home Improvement · 19 min read
How To Install Portable Air Conditioner Vent With Crank Windows
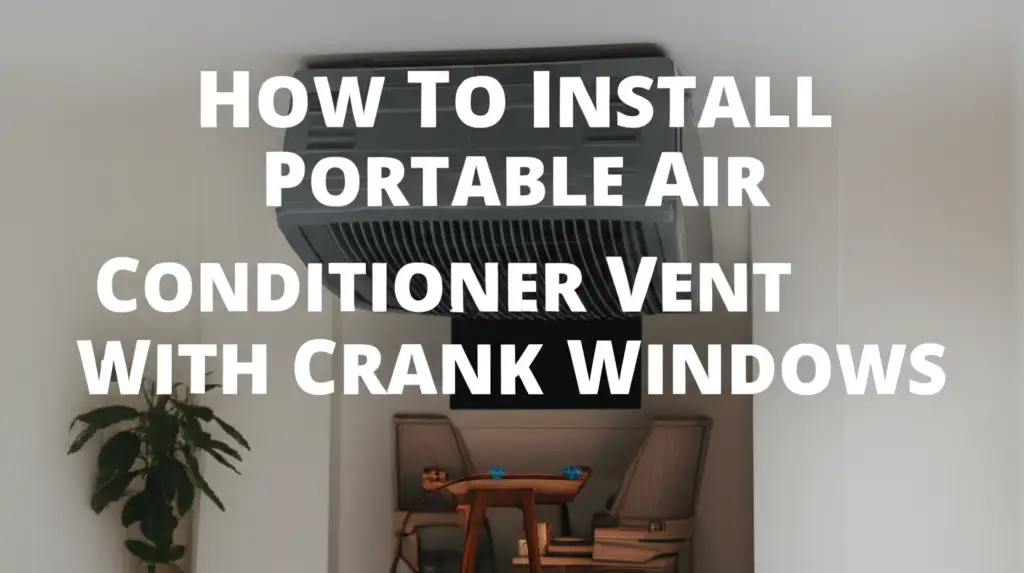
Install Portable Air Conditioner Vent with Crank Windows
Summer heat arrives quickly. Staying cool at home becomes a top priority. Many homes have portable air conditioners for spot cooling. They offer flexibility and power. However, venting a portable air conditioner often means dealing with a window. If you have crank windows, also known as casement or awning windows, the standard vent kits do not fit. This creates a common challenge for homeowners.
I remember my first summer with crank windows and a new portable AC. I quickly found the included kit useless. This guide helps you install a portable air conditioner vent with crank windows. We will explore simple, effective DIY methods. We will cover necessary tools, material choices, and clear steps. You will learn to create a secure, energy-efficient setup. Get ready to enjoy a cool home.
Takeaway:
- Custom solutions are essential for venting portable ACs through crank windows.
- Proper measurement and material selection ensure a tight, efficient seal.
- DIY methods using plexiglass, foam board, or wood offer practical options.
- Effective sealing prevents heat re-entry and maximizes cooling performance.
- Regular maintenance of your AC and vent setup ensures long-term comfort.
A portable air conditioner vent requires a custom panel to fit crank windows. You must measure the window opening precisely. Then, cut a rigid material like plexiglass or foam board to size. Cut a hole in this panel for the vent hose. Finally, install the panel in the window and seal all gaps. This creates a secure and efficient exhaust path.
Understanding Crank Windows and Portable AC Needs
Crank windows present a unique challenge for portable air conditioner venting. These windows do not slide up and down. Instead, they open outwards on hinges. Casement windows pivot from the side. Awning windows pivot from the top. This outward opening mechanism means standard AC window kits will not work. Standard kits are designed for vertical or horizontal sliding windows. They rely on the sash moving within a frame.
A portable air conditioner functions by drawing in warm room air. It cools this air and then exhausts the hot air outside. The exhaust hose carries this hot air away. This process requires a sealed opening to the outside. Without a proper seal, hot air will re-enter the room. This makes your air conditioner work harder. It also wastes energy and money. My first attempt at just propping the window open was a disaster. The room never cooled.
The standard window kit typically includes a plastic panel. This panel slides or extends to fit common window widths or heights. It has a pre-cut hole for the exhaust hose. Crank windows do not have this sliding motion. Their opening shape also differs. The opening often forms a parallelogram or a triangle when partially open. This makes a flat, rectangular panel difficult to fit. A custom solution is always necessary here. We must create a new panel that conforms to the unique shape of your crank window.
This custom panel needs to fit snugly into the open space of your crank window. It must then provide a secure point for the portable AC exhaust hose. The material needs to be sturdy enough to hold the hose. It must also block out warm outside air. Air leaks reduce your air conditioner’s efficiency significantly. My goal was always to create a solution that maximized cooling and minimized energy waste. This understanding forms the foundation for any successful installation.
Essential Tools and Materials for a Secure Setup
Proper preparation starts with gathering the right tools and materials. Having everything ready saves time and frustration. I always lay out my items before beginning any project. This ensures I do not stop halfway through to find a missing tool. Your material choices will depend on your budget and desired appearance. They also depend on how temporary or permanent you want the solution to be.
Here is a list of essential items you will need:
- Measuring Tape: Accurate measurements are crucial. A metal tape measure gives the best precision. You need to measure the exact opening of your crank window.
- Pencil or Marker: For marking cuts on your chosen panel material. Dark marks are easy to see.
- Utility Knife or Saw: The type depends on your chosen material.
- A heavy-duty utility knife works well for foam board.
- A jigsaw or circular saw is needed for plywood or MDF.
- A scoring tool or specialized cutter works best for plexiglass.
- Drill (with appropriate bits): Useful for cutting a starting hole for a jigsaw. Also for attaching the panel if using screws.
- Sandpaper (optional): To smooth rough edges on wood or plexiglass. This makes the panel look better.
- Sealant Materials: These are vital for blocking air leaks.
- Weatherstripping: Foam or rubber strips with adhesive backing. Apply them around the edges of your custom panel. This creates a compressible seal.
- Foam Tape: Similar to weatherstripping. Useful for smaller gaps.
- Caulk Gun and Caulk (silicone or acrylic): For sealing larger gaps. This creates a more permanent, airtight seal. Choose clear caulk for a less noticeable finish.
- Duct Tape or HVAC Tape: For temporary sealing. Also good for securing the exhaust hose connection.
- Rigid Panel Material: This forms the main barrier.
- Plexiglass (Acrylic Sheet): Clear, durable, allows light through. It looks professional. You can buy it at hardware stores.
- Rigid Foam Insulation Board: Lightweight, easy to cut, excellent insulation properties. It is very affordable.
- Plywood or MDF: Sturdy, durable, can be painted. This offers a more robust solution.
- Portable AC Window Vent Kit Adapter: Your portable AC came with an adapter. This piece connects the hose to a flat surface. You will need this part.
- Screws, Bolts, or Strong Adhesive Velcro: For securing the panel in place. Velcro allows easy removal. Screws offer a more secure, semi-permanent attachment.
Always prioritize safety during this project. Wear safety glasses when cutting. Use gloves if working with sharp materials. Ensure your work area is well-lit and clear. Having the right tools makes the job much safer and more efficient.
Measuring and Preparing Your Window Opening
Accurate measurements are the foundation of a successful vent installation. A poorly measured panel will lead to gaps. These gaps cause air leaks. Air leaks reduce your AC’s efficiency. They also allow warm air back into your cool room. I always measure twice, cut once. This old saying holds true for DIY projects.
First, fully open your crank window. Measure the exact dimensions of the open space. This means measuring the height and width of the opening. Do not measure the window frame itself. Measure the actual gap created when the window is open. You will measure the widest points. Also, measure the tallest points. Crank windows often have an irregular shape when open. Make sure your panel can cover this entire space.
Consider the window’s crank mechanism. Your custom panel must fit around it. It should not obstruct the window’s operation. If the crank extends far, you might need to notch your panel. Account for any uneven surfaces or existing weatherstripping. Your panel must sit flush.
Next, clean the window frame where the panel will sit. Dust, dirt, or old adhesive can prevent a good seal. Use a damp cloth to wipe down the surfaces. Let them dry completely. A clean surface ensures better adhesion for weatherstripping or caulk. This step is simple but very important.
Decide if your solution will be temporary or semi-permanent. A temporary setup allows you to remove the panel easily. This is good if you only use the AC for a few weeks each year. Velcro or simple compression fits work well for temporary use. A semi-permanent solution uses screws or caulk. This offers a more robust seal. It is better for long-term use during the entire summer. My own setup leans towards semi-permanent. I wanted no air leaks at all.
Finally, think about the placement of the vent hole. The hole needs to align with your portable AC’s exhaust hose. The hose should be as straight and short as possible. Bends and long runs reduce cooling efficiency. Mark the center of your panel. Then measure your AC’s hose adapter to determine the hole size. This preparation ensures your panel fits perfectly. It also ensures your AC vents effectively.
Creating a Custom Window Panel for Crank Windows
The core of this project is creating a custom panel. This panel will fill the open space of your crank window. It provides a secure place for your portable AC’s exhaust hose. I have tried several materials. Each has its pros and cons. Choose the material that best fits your needs and skills.
Option 1: Plexiglass Panel for Clear Views
Plexiglass, also known as acrylic sheet, offers a clear solution. It lets light into the room. It also looks very professional. This makes it a popular choice.
- Measure and Mark: Use your precise window opening measurements. Transfer these dimensions onto the plexiglass sheet. Use a fine-tip marker. Remember to account for the exact shape of your crank window opening.
- Cut the Plexiglass: Score the plexiglass with a utility knife or a specialized plexiglass cutter. Make multiple passes along the marked line. Apply firm, even pressure. Once deeply scored, you can snap the sheet along the line. For complex shapes or thick plexiglass, a jigsaw with a fine-tooth blade works best. Go slowly to prevent cracking.
- Cut the Vent Hole: Place your portable AC vent adapter on the plexiglass. Trace its outline. Use a drill to create a pilot hole inside the traced area. Then, use a jigsaw to cut out the circular or oval shape. Smooth the edges with sandpaper if needed.
- Finishing: Apply weatherstripping or foam tape around the edges of the plexiglass. This creates a seal when installed. You can also drill small holes in the panel corners. Use screws to secure it to the window frame.
Plexiglass is durable and reusable. It can be more expensive. Cutting it requires care to prevent cracks.
Option 2: Rigid Foam Board for Easy DIY
Rigid foam insulation board is an excellent budget-friendly choice. It is lightweight and easy to cut. It also offers good insulation.
- Measure and Mark: Transfer your window opening dimensions to the foam board. Use a marker. Foam board is forgiving, but accuracy helps.
- Cut the Foam Board: A sharp utility knife works perfectly here. Score the line deeply. Then cut through the board in multiple passes. You can also use a straightedge for cleaner cuts.
- Cut the Vent Hole: Place your AC adapter on the foam board. Trace its shape. Use the utility knife to cut out the hole. You might need to press firmly.
- Finishing: Apply foam tape or weatherstripping around the edges. This creates a good seal. The foam board can be held in place by compression. You can also use strong adhesive Velcro strips. This allows for easy removal.
Foam board is very easy to work with. It provides good insulation. However, it is not as durable as plexiglass or wood. It may need replacement after a few seasons.
Option 3: Plywood or MDF for Sturdy Support
Plywood or MDF provides a very sturdy and durable panel. This is a good option for a long-term, semi-permanent setup.
- Measure and Mark: Measure your window opening precisely. Mark the dimensions on the plywood or MDF. Use a pencil.
- Cut the Wood: Use a jigsaw or circular saw to cut the wood to shape. A straightedge helps with straight cuts.
- Cut the Vent Hole: Trace the AC adapter on the wood. Use a drill to create a pilot hole. Then, use a jigsaw to cut out the hole.
- Finishing: Sand all cut edges smooth. You can paint or seal the wood to protect it from moisture. Apply weatherstripping or foam tape around the edges for sealing. Secure the panel using screws into the window frame. Make sure screws are not too long to avoid damaging the wall or exterior.
Wood is very strong and customizable. It is heavier than other options. It also requires more tools and effort to cut. Regardless of your material choice, the goal is a tight, secure fit. This ensures your how to clean vent remains clear and functional. A well-fitted panel is crucial for efficient cooling.
Sealing and Insulating for Optimal Cooling Performance
A perfectly cut panel is only half the battle. Proper sealing and insulation are just as important. They ensure your portable air conditioner runs efficiently. Without a good seal, warm outside air will leak into your room. This makes your AC work harder. It also wastes energy and money. I learned this the hard way with my first flimsy setup.
Here are key steps for effective sealing and insulation:
- Use Weatherstripping Generously: Apply self-adhesive foam or rubber weatherstripping around all edges of your custom panel. Place it where the panel meets the window frame. Ensure the weatherstripping compresses slightly when the panel is in place. This creates an airtight seal. You can also apply it to the window frame itself if needed.
- Seal Gaps with Caulk or Foam Tape: Inspect for any remaining gaps after placing the panel. Small gaps can occur where the window frame is uneven. Use a caulk gun to apply a thin bead of silicone caulk along these gaps. Clear silicone caulk is often best for a neat finish. For temporary solutions, use removable painter’s tape or foam tape instead of caulk. Foam tape is excellent for filling irregular spaces.
- Address the Window Itself: Even with a custom panel, the crank window itself might not seal perfectly. Check the existing seals on your window. If they are old or cracked, replace them. Apply more weatherstripping to the window sash. This prevents air leakage around the window’s own frame.
- Insulate the Panel Material: If you used plexiglass or wood, consider adding a layer of insulation. You can attach a thin sheet of rigid foam insulation to the inner side of your panel. This further reduces heat transfer. Foam board panels already provide good insulation.
- Minimize Hose Length and Bends: While not directly sealing, the hose setup affects efficiency. Keep the exhaust hose as short as possible. Avoid sharp bends or kinks. A long, twisted hose increases back pressure. This reduces the AC’s cooling capacity. Straight, short runs allow hot air to exit quickly.
- Check for Drafts: After installation, perform a simple draft test. Light an incense stick or a candle. Move it around the edges of your panel and window. If the smoke or flame flickers, you have a leak. Identify the source and seal it. This simple test confirms your efforts.
Effective sealing makes a big difference. It prevents hot air from undermining your AC’s efforts. It keeps the cool air inside. This translates into lower electricity bills and a much more comfortable living space. Proper sealing also helps prevent issues like your why does my portable air conditioner keep filling up with water from being more frequent if humidity is getting in. Your portable AC will perform at its peak efficiency. It will keep your home consistently cool. This attention to detail is truly worth the effort. Proper sealing also helps prevent your air conditioner coils from working too hard.
Securing the Portable AC Hose to Your New Panel
Once your custom window panel is securely in place, the next step is connecting the portable air conditioner’s exhaust hose. This connection needs to be airtight and stable. A loose connection will leak hot air back into your room. This defeats the purpose of the vent. I have seen many people overlook this crucial step.
Portable AC units come with a window vent kit adapter. This adapter usually fits onto the end of the exhaust hose. It then typically slides or screws into the standard window panel. For your custom panel, you will mount this adapter directly to the hole you cut.
Here is how to secure the hose:
- Attach the Adapter to the Panel:
- Direct Fit: If you cut the hole precisely, the adapter might fit snugly. You can press it into place.
- Screws: Some adapters have holes for screws. You can screw the adapter directly to your custom panel. This creates a very secure connection. Use short screws that do not go all the way through your panel.
- Adhesive: For foam board, you might use a strong, weather-resistant adhesive to bond the adapter. Let it cure fully before attaching the hose.
- Duct Tape or HVAC Tape: For a quick or temporary seal, use high-quality duct tape or HVAC foil tape. Wrap it tightly around the adapter’s connection point to the panel. Ensure there are no gaps. This tape is also excellent for reinforcing other connections.
- Connect the Exhaust Hose: Once the adapter is firmly attached to the panel, connect the exhaust hose from your portable AC unit to the adapter. Most hoses twist onto the adapter. Ensure it is twisted on tightly.
- Position the AC Unit: Place your portable AC unit as close to the window as possible. This minimizes the length of the exhaust hose. A shorter hose reduces friction and pressure. This helps the hot air exit more efficiently.
- Minimize Bends and Kinks: The exhaust hose should run as straight as possible from the AC unit to the window panel. Avoid sharp bends, twists, or kinks. These restrict airflow. Restricted airflow makes the AC work harder. It also reduces cooling power. If you have excess hose length, it is better to trim it if possible, rather than coiling it.
- Support the Hose (Optional): For very long or heavy hoses, you might need to provide some support. This prevents the hose from sagging or detaching. A simple hook or strap can help keep it straight.
A properly secured hose ensures all the hot air is expelled outside. This maximizes your portable AC’s cooling efficiency. It keeps your room comfortable. Always double-check the connection. A small leak here can negate all your careful sealing efforts elsewhere. This step truly completes your custom venting solution.
Maintaining Your Portable AC and Window Setup
Installation is only the first step. Regular maintenance ensures your portable air conditioner and its custom window setup continue to perform well. Neglecting maintenance can reduce cooling efficiency. It can also shorten the lifespan of your unit. I make it a habit to check my setup every few weeks during the cooling season.
Here are key maintenance practices:
- Clean Your Portable AC Filter Regularly: This is perhaps the most important maintenance task for any portable AC. Dirty filters restrict airflow. They make the unit work harder. This reduces cooling capacity and increases energy consumption. Most portable ACs have a washable filter. Remove it, rinse it under lukewarm water, and let it air dry completely before reinserting. I usually clean my filter every two weeks. You can learn more about this process by following guides on how to clean portable air conditioner filter.
- Drain the Water Tank/Pan: Portable ACs collect condensation. Many units have an internal water tank that needs draining. Some evaporate the water, but most still have a drain plug. Follow your unit’s instructions for draining. Some have continuous drain options. If the tank fills, the unit may shut off automatically. Draining prevents overflows and mold growth. You can find specific instructions on how to clean portable air conditioner water tank.
- Inspect and Clean the Exhaust Hose and Vent Panel: Check the exhaust hose for cracks or tears. Repair any damage with HVAC tape. Ensure the hose connection to the window panel is still tight. Dust can accumulate inside the exhaust hose. A vacuum cleaner attachment can help clear it out periodically. The vent hole in your custom panel can also attract dust or debris. Wipe it clean. This helps maintain optimal airflow. This is a good time to check your how to clean vent for clear instructions.
- Check All Seals and Weatherstripping: Over time, weatherstripping can degrade or lose adhesion. Caulk can crack. Inspect all sealed areas around your custom panel and window. Reapply weatherstripping or recaulk as needed. A tight seal is critical for preventing hot air intrusion.
- Clean the Unit’s Exterior: Wipe down the exterior of your portable AC unit. This prevents dust buildup. It keeps the unit looking good. A simple damp cloth is usually sufficient. For a more thorough cleaning of the entire unit, refer to guides on how to clean portable air conditioner. You might also look up how to clean air conditioner unit for general AC cleaning tips.
- Winter Storage: When the cooling season ends, prepare your portable AC for storage. Clean the unit thoroughly, drain all water, and clean filters. Disconnect the exhaust hose and custom panel. Store the unit upright in a dry, cool place. Store your custom panel flat to prevent warping. This prepares your AC for efficient operation next summer.
Regular maintenance extends the life of your portable AC. It also ensures you get the best cooling performance. A well-maintained setup provides consistent comfort. It saves you money on energy bills too.
FAQ Section
Q1: Can I use the standard AC kit with crank windows? No, you cannot use the standard AC kit with crank windows. Standard kits are designed for sliding windows. Crank windows open outwards. This requires a custom solution. You need to create a rigid panel to fill the unique opening. This panel will have a hole for the exhaust hose.
Q2: What is the best material for a custom panel? The best material depends on your needs. Plexiglass offers clarity and durability. Rigid foam board is lightweight, inexpensive, and easy to cut. Plywood or MDF provides the most robust and sturdy solution. Each material has different cutting requirements and aesthetic qualities.
Q3: How do I make sure the seal is airtight? To ensure an airtight seal, use weatherstripping or foam tape around all edges of your custom panel. Apply it where the panel meets the window frame. For any remaining gaps, use a caulk gun with silicone caulk. Check for drafts using an incense stick. Seal any detected leaks immediately.
Q4: Will this installation damage my window? No, this installation should not damage your window. You are not altering the window itself. You are fitting a custom panel into its open space. Use care when taking measurements and cutting materials. Choose attachment methods like compression, Velcro, or short screws. These methods are reversible.
Q5: Can I remove the setup easily? Yes, you can remove the setup easily. This depends on your chosen attachment method. Velcro or compression fits allow for quick removal. If you used caulk, it might require cutting the caulk bead first. Screws allow for removal with a screwdriver. The goal is a solution that can be temporary or semi-permanent.
- Portable Air Conditioner
- Crank Windows
- DIY AC Installation

Todd Martin
Senior Writer
With over 15 years of experience in home renovation and design, I started HEG to share what I’ve learned with homeowners who want to create spaces that are both beautiful and functional. I’ve always believed in a hands-on approach, and over the years, I’ve picked up practical solutions that actually work. Through HEG, I aim to make home improvement more approachable, sharing real tips that help you create a home you truly love.