· Todd Martin · Cooking & Kitchen · 19 min read
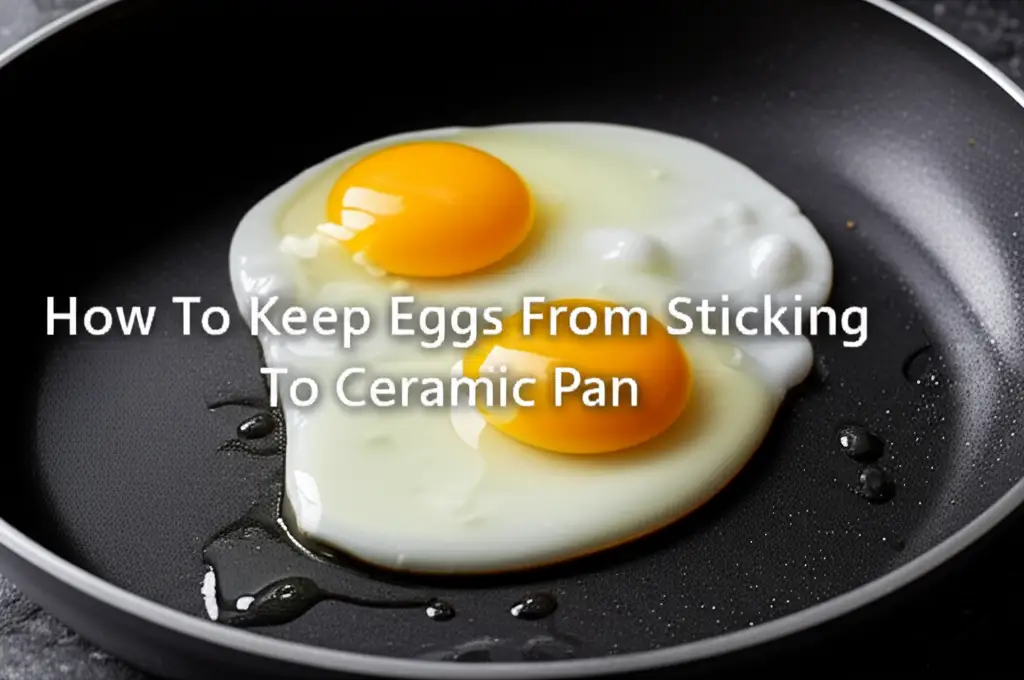
How To Keep Eggs From Sticking To Ceramic Pan

How To Keep Eggs From Sticking To Ceramic Pan
Have you ever looked forward to a perfect fried egg, only for it to stubbornly glue itself to your beautiful ceramic pan? It happens to many of us. That frustrating moment when your egg tears apart can ruin a simple breakfast. It often feels like the non-stick promise of ceramic cookware is short-lived.
But don’t worry, cooking eggs on a ceramic pan can be a smooth experience. You do not have to settle for stuck-on messes. This guide shows you how to keep eggs from sticking to your ceramic pan. We will cover everything from proper pan preparation to optimal cooking techniques. You will learn the secrets to perfectly slide-off eggs every single time. Get ready to enjoy stress-free cooking and easy cleanup.
Takeaway
- Proper Preheating is Key: Always preheat your ceramic pan gradually to the right temperature before adding oil or eggs.
- Use the Right Amount of Fat: A small, even layer of oil or butter creates a crucial non-stick barrier.
- Control Your Heat: Medium-low to medium heat settings are best for ceramic pans to prevent sticking and preserve the coating.
- Gentle Cleaning Preserves Coating: Avoid harsh abrasives or dishwashers to maintain the pan’s non-stick properties.
- Regular Maintenance Matters: Store your pan properly and avoid thermal shock to extend its lifespan and non-stick performance.
The Clear Answer
To keep eggs from sticking to a ceramic pan, always preheat the pan correctly over medium-low heat. Use a small amount of fat, like butter or oil, spread evenly. Avoid high heat and harsh cleaning methods to preserve the pan’s non-stick surface.
Understanding Ceramic Pan Non-Stick Properties
Ceramic pans are popular in kitchens today. Many home cooks choose them for their perceived non-stick qualities. Ceramic coatings offer a healthier alternative to traditional non-stick surfaces. They typically do not contain PFOA or PTFE chemicals. This makes them a safe choice for daily cooking.
These pans work by creating a smooth, non-porous layer. This layer prevents food from bonding with the pan’s surface. The coating is usually made from a silicon-based gel. This gel hardens into a slick, ceramic-like finish. This finish helps food, including eggs, release easily. However, this non-stick quality is not permanent. It needs proper care to last. Understanding how these pans work helps you maintain their performance. You can then avoid the frustration of stuck food.
The Science Behind Non-Stick Ceramic
The non-stick property of ceramic pans comes from their exceptionally smooth surface. This smoothness reduces the contact points between food and the pan. This creates less surface tension. When food has fewer points to adhere to, it slides more easily. Over time, tiny scratches or residue buildup can disrupt this smoothness. This can cause eggs to stick. Even invisible residues from previous cooking can affect performance. It is important to start with a clean, smooth surface every time you cook.
Why Ceramic Pans Lose Their Non-Stick Ability
Several factors can make your ceramic pan lose its non-stick effectiveness. High heat is a common culprit. Overheating a ceramic pan can damage its coating at a molecular level. This creates microscopic rough spots where food can grip. Using metal utensils can also scratch the surface. This directly compromises the smooth non-stick layer. Abrasive cleaners or sponges are another issue. They can wear down the delicate coating with each wash. Improper cleaning leaves behind sticky residues. These residues build up over time. This makes eggs stick more easily. Even cooking spray can leave a sticky film. This film bakes onto the surface. This can lead to a sticky mess.
Proper care and gentle handling are vital. They help maintain the pan’s initial non-stick promise. Always remember that ceramic coatings are not indestructible. They require a gentle touch and consistent care. Only then will they deliver consistent non-stick results for your eggs. This knowledge is your first step in mastering the art of cooking without sticking.
The Importance of Proper Preheating
Preheating your ceramic pan correctly is one of the most critical steps. Many people skip this step or do it wrong. They might put the pan on high heat. This can actually damage the ceramic coating over time. Proper preheating creates an even cooking surface. It also prepares the pan to receive the cooking fat and the egg. This even temperature prevents hot spots. Hot spots are areas where food is more likely to stick and burn.
Ceramic pans distribute heat efficiently. They do not need very high temperatures. A slow, gradual preheat is always best. This method protects the non-stick surface. It also ensures your eggs cook perfectly without sticking. You want the pan to be warm, not smoking hot. This gentle approach is key to success.
Gradually Warming Your Ceramic Pan
Start with your ceramic pan on a cold burner. Turn the heat to medium-low. Let the pan warm up slowly. This allows the heat to spread evenly across the entire surface. It prevents thermal shock to the coating. Thermal shock can happen when a cold pan hits high heat. This causes rapid expansion and contraction. This can damage the non-stick layer. Give your pan about 2-3 minutes to warm up. You can test the temperature with a few drops of water. If the water beads up and dances across the surface, the pan is ready. If it evaporates instantly, the pan is too hot. If it just sits there, the pan is not warm enough yet.
Achieving the Optimal Temperature for Eggs
The ideal temperature for cooking eggs in a ceramic pan is medium-low to medium. This range is gentle enough for the egg proteins. It also allows the egg to cook thoroughly. Avoid using high heat settings. High heat can cause proteins in the egg to bond too quickly with the pan surface. This results in sticking. High heat can also degrade the ceramic coating itself. This reduces its non-stick effectiveness over time. Once your pan is evenly preheated, you can add your chosen cooking fat. The fat will also heat up to the right temperature. This creates a perfect non-stick layer before your egg touches the surface. Remember, patience is a virtue in ceramic pan cooking.
Choosing the Right Cooking Fat
Even with a non-stick ceramic pan, cooking fat is essential. It acts as a crucial barrier. This barrier prevents eggs from sticking. It also adds flavor and helps with even cooking. The type of fat you choose matters. The amount you use also plays a big role. Some fats work better than others on ceramic surfaces. They can create a more effective non-stick layer. Using the right fat ensures your eggs will slide around freely. You will not have to scrape them off the pan.
Best Fats for Non-Stick Egg Cooking
For ceramic pans, certain fats perform exceptionally well.
- Butter: Unsalted butter is a classic choice. It adds rich flavor and browns beautifully. Make sure to use enough to coat the entire cooking surface.
- Olive Oil: Light olive oil or regular olive oil can work. Extra virgin olive oil has a lower smoke point. It might not be ideal for higher heat applications. However, for eggs on medium-low heat, it is fine.
- Avocado Oil: This oil has a high smoke point. It is great for higher heat cooking if needed. It is also a healthy choice.
- Grapeseed Oil: Another oil with a high smoke point. It is neutral in flavor. This makes it versatile.
- Clarified Butter (Ghee): This is butter with milk solids removed. It has a higher smoke point than regular butter. It is perfect for those who love butter’s flavor without the risk of burning.
Avoid low-quality cooking sprays. Many sprays contain propellants and additives. These can leave a sticky residue on ceramic surfaces. This residue can build up over time. It can actually make your pan less non-stick. If you prefer a spray, use a pump mister. Fill it with your own preferred cooking oil.
Applying Fat for Optimal Non-Stick Coverage
The way you apply the fat is just as important as the type of fat. Once your ceramic pan is properly preheated, add a small amount of your chosen fat. For an 8-inch pan, start with about half a teaspoon to a full teaspoon of oil or a small pat of butter. Gently swirl the pan. You want the fat to coat the entire cooking surface. Make sure the layer is thin and even. Use a paper towel to spread it if needed. This ensures every part of where the egg will sit has a protective layer. This prevents hot spots where the egg might stick. This thin, even coating is critical for getting that perfect non-stick release.
Mastering Egg Cooking Techniques
Even with the right pan and fat, your cooking technique makes a big difference. How you handle the eggs, when you add them, and how you monitor their progress are all crucial. Different egg preparations might require slight adjustments. But the core principles remain the same. The goal is to cook the egg thoroughly without letting it bond to the pan. You want your eggs to slide right off. This saves you from messy cleanups and broken yolks.
Gentle Handling for Perfect Release
Once you crack your egg into the preheated, greased ceramic pan, avoid immediate movement. Give the egg a few moments to set. As the egg cooks, the bottom surface will naturally firm up. This creates its own non-stick layer. If you try to move it too soon, the delicate raw parts might stick. Use a silicone or wooden spatula. These are gentle on the ceramic coating. Avoid metal utensils at all costs. Metal can scratch and damage the non-stick surface. Once the edges begin to set and lift slightly, you can gently slide the spatula underneath. For fried eggs, cook until the whites are set to your liking. For scrambled eggs, stir them gently and continuously. This keeps them from sticking to the bottom.
Specific Tips for Fried, Scrambled, and Omelets
Fried Eggs:
- Preheat your ceramic pan over medium-low heat.
- Add a small amount of butter or oil, ensuring an even coat.
- Crack the egg gently into the center of the pan.
- Cook undisturbed until the whites are set. The edges should lift easily.
- For over-easy or over-medium, carefully flip with a silicone spatula. Cook briefly on the second side.
- The egg should slide out effortlessly onto your plate.
Scrambled Eggs:
- Whisk your eggs in a separate bowl with a splash of milk or water. Add salt and pepper.
- Preheat the ceramic pan on medium-low heat. Add a generous pat of butter or a teaspoon of oil.
- Pour in the egg mixture.
- Let the edges set for a few seconds.
- Using a silicone spatula, gently push the cooked egg from the edges toward the center. This allows uncooked egg to flow underneath.
- Continue this gentle folding and stirring motion until the eggs are cooked to your desired consistency. They should remain moist and fluffy.
Omelets:
- Prepare your omelet mixture.
- Use a slightly larger ceramic pan for omelets, typically 8-10 inches.
- Preheat the pan on medium-low heat. Add butter or oil to coat the entire surface.
- Pour the egg mixture into the hot pan.
- As the edges set, use your silicone spatula to push the cooked egg from the sides to the center. Tilt the pan to let the uncooked egg flow beneath.
- Once most of the egg is set but still slightly moist on top, add your fillings.
- Fold the omelet in half or roll it. Gently slide it onto your plate. Mastering these techniques ensures your ceramic pan remains your go-to for perfect eggs.
Essential Cleaning and Maintenance for Ceramic Pans
Proper cleaning and ongoing maintenance are crucial. They help preserve the non-stick coating of your ceramic pan. Many people mistakenly believe that non-stick pans require no special cleaning. Or they clean them too aggressively. Both approaches can lead to a sticky situation with your eggs. A well-cared-for ceramic pan will continue to perform like new for a longer time. Neglecting its cleaning needs will quickly diminish its non-stick capabilities. Learn the best practices for cleaning to protect your investment.
Gentle Cleaning Practices to Preserve Non-Stick Coating
After cooking, let your ceramic pan cool down completely. Never plunge a hot pan into cold water. This can cause thermal shock. Thermal shock can warp the pan or damage the coating. Once cool, wash the pan by hand using warm water. Add a small amount of mild dish soap. Use a soft sponge or cloth. Avoid abrasive scrubbers like steel wool or rough sponges. These can scratch the delicate ceramic surface. Gently wipe away any food residue. For stubborn spots, soak the pan in warm, soapy water for a few minutes. This will loosen stuck food. Always rinse thoroughly. Make sure no soap residue remains. Soap residue can affect future non-stick performance. You can learn more about general ceramic cookware care by reading this article on how to clean ceramic cookware.
Avoiding Damage from Dishwashers and Harsh Cleaners
While some ceramic pans claim to be dishwasher safe, it is always best to hand wash them. Dishwasher detergents are often very harsh. They can contain strong chemicals and abrasive agents. These can strip away or degrade the non-stick coating over time. The high heat in a dishwasher can also damage the pan. If you put your ceramic pan in the dishwasher, you risk shortening its lifespan. Avoid using oven cleaner, bleach, or any other harsh chemical cleaners on your ceramic pan. These products are too aggressive. They will likely ruin the non-stick surface permanently. Stick to mild soap and soft tools. This gentle approach ensures your pan lasts for years.
Removing Stubborn Stains and Residue
Sometimes, despite best efforts, some residue might build up. If you notice a sticky film or discoloration, it is important to address it gently. For minor buildup, a paste of baking soda and a small amount of water can work. Apply the paste to the affected area. Let it sit for 10-15 minutes. Then gently rub with a soft sponge. Rinse well. For more severe cases, where food might have been burnt on, you might need a more focused approach. An article on how to clean a pan that is burnt can provide more detailed steps for such situations. Remember to always use gentle pressure. Never use sharp tools to scrape away stuck-on food. This includes metal spatulas or knives. Such tools will damage the coating beyond repair.
Addressing Common Ceramic Pan Problems
Even with the best intentions, you might encounter issues with your ceramic pan. Eggs can still stick. The non-stick coating might seem to degrade faster than expected. Understanding these common problems helps you troubleshoot. It allows you to take corrective action. Sometimes, a simple adjustment can revive your pan’s performance. Other times, it might indicate the pan has reached the end of its useful life. Do not give up on your pan too quickly. There are usually solutions for common sticking issues.
Why Eggs Still Stick: Troubleshooting Your Pan
If eggs continue to stick despite your efforts, consider these points:
- Heat Level: Are you consistently using too high heat? Overheating is the number one enemy of ceramic non-stick. Reduce your heat setting.
- Fat Application: Is there enough fat? Is it evenly distributed? A very thin or patchy layer might not be enough.
- Pan Cleanliness: Is there an invisible film or residue from previous cooking? Even seemingly clean pans can have buildup. Try a deeper clean using gentle methods.
- Utensil Use: Are you accidentally using metal utensils? Even one slip can cause damage.
- Pan Age: Ceramic coatings do not last forever. If your pan is old and heavily used, its coating may naturally be worn out.
By reviewing these points, you can often identify the root cause of the sticking. Adjust your technique accordingly.
What to Do When Non-Stick Performance Degrades
When your pan’s non-stick quality starts to fade, you can try some rejuvenation methods:
- Deep Cleaning: Perform a thorough cleaning to remove any unseen residue. Use warm water, mild soap, and a soft sponge. You can also try a baking soda paste. This helps remove polymerized oil or food particles that cause sticking.
- “Re-Seasoning” (Oil Rub): While ceramic pans are not truly “seasoned” like cast iron, a simple oil rub can sometimes help. After cleaning, dry the pan completely. Put a few drops of high-smoke-point oil (like grapeseed or avocado oil) on a paper towel. Rub it lightly over the entire cooking surface. Heat the pan on very low heat for 30 seconds. Turn off the heat and let it cool. Wipe away any excess oil. This creates a very thin, protective layer.
- Check for Scratches: Inspect the surface under good light. If you see numerous visible scratches, the coating is likely compromised. At this point, the non-stick is probably permanently damaged.
These steps can sometimes extend the life of a fading ceramic pan. However, be realistic about expectations.
When It’s Time to Replace Your Ceramic Pan
No non-stick pan lasts forever. Ceramic pans typically have a lifespan of 1 to 3 years with regular use. This can vary based on care and quality. Here are signs it might be time for a replacement:
- Extensive Scratches: If the non-stick surface is heavily scratched or flaking, it is compromised. It can no longer perform well.
- Consistent Sticking: Despite proper preheating, oil, and cleaning, if everything sticks consistently, the coating is worn out.
- Discoloration and Buildup That Won’t Come Off: Significant dark stains or sticky residue that gentle cleaning cannot remove. This indicates the coating has degraded.
- Warping: If the pan’s bottom is no longer flat, it will not heat evenly. This causes hot spots and sticking.
Replacing a worn-out pan is not wasteful. It is practical. It restores the joy of cooking. It also ensures safe and efficient food preparation.
Extending the Life of Your Ceramic Cookware
Buying quality ceramic cookware is an investment. Protecting that investment requires more than just careful cooking. It involves consistent care beyond the cooking process. Proper storage, avoiding extreme temperatures, and general gentle handling all contribute to the longevity of your ceramic pans. These habits help maintain the non-stick surface. They also prevent damage to the pan’s structure. By adopting these practices, you can enjoy your ceramic pans for many years. You will keep those eggs sliding effortlessly onto your plate.
Proper Storage for Ceramic Pans
How you store your ceramic pans significantly impacts their lifespan. Stacking pans directly on top of each other without protection is a common mistake. The metal rims or bases of other pans can scratch the delicate ceramic surface. This leads to non-stick degradation. To prevent this, always place a soft cloth, paper towel, or pan protector between stacked pans. These protectors are usually felt discs. They cushion the pans and prevent direct contact. Store pans in a cabinet where they are not constantly bumped or scratched by other kitchen items. Hanging pans on a rack is an excellent alternative. It avoids stacking entirely. This simple step can add years to your pan’s non-stick performance.
Avoiding Thermal Shock and Extreme Temperatures
Ceramic coatings are sensitive to rapid temperature changes. This is known as thermal shock. Never place a hot ceramic pan under cold water. Never put a cold pan directly on a very high heat burner. Always allow the pan to cool completely before washing. Always preheat the pan gradually over low to medium heat. High temperatures are also damaging. While ceramic pans can withstand moderate heat, prolonged exposure to very high heat (e.g., leaving an empty pan on high heat for a long time) can break down the coating. This creates microscopic imperfections that lead to sticking. Cooking eggs requires only medium-low to medium heat. This is ideal for ceramic pans. Stick to these lower temperatures for optimal results and pan longevity.
General Tips for Cookware Longevity
- Use the Right Utensils: Always use silicone, wood, or heat-resistant plastic utensils. Metal spatulas or spoons will scratch the ceramic surface. Even one slip can cause damage.
- Avoid Aerosol Cooking Sprays: As mentioned before, these sprays can leave a sticky residue. This residue bakes onto the pan. It forms a film that makes food stick. It is very hard to remove. Use regular oils applied manually or with a pump mister.
- Clean Promptly: Do not leave food sitting in the pan for extended periods. This can lead to stains or hardened residue that is difficult to remove. Clean the pan soon after it cools down.
- Don’t Overcrowd the Pan: When cooking multiple eggs, do not overcrowd the pan. Give each egg enough space. Overcrowding can lower the pan’s temperature. It can lead to uneven cooking. This also increases the chances of sticking.
- Inspect Regularly: Periodically check your pan’s surface for any signs of wear. Early detection of minor issues can help you adjust your care routine. This might prevent further damage. Maintaining the pan’s exterior also helps. Keeping the bottom of your pan clean can even help with more efficient heating. You can find tips on how to clean the bottom of a pan. This attention to detail ensures your ceramic cookware performs its best for years.
FAQ Section
Q1: Can I use metal utensils on my ceramic pan if I’m very careful?
No, it is highly recommended to avoid metal utensils on ceramic pans, even if you are careful. Metal can easily scratch the delicate non-stick coating. Even tiny scratches can lead to food sticking and shorten the pan’s lifespan significantly. Always use silicone, wooden, or heat-resistant plastic utensils instead.
Q2: Is it normal for ceramic pans to lose their non-stick properties over time?
Yes, it is normal for ceramic pans to gradually lose their non-stick properties over time. The ceramic coating is not permanent. It degrades with use, heat exposure, and cleaning. Proper care can extend its life. However, typically, ceramic pans last 1-3 years before noticeable sticking occurs.
Q3: How much oil should I use for eggs in a ceramic pan?
Use a small amount of oil, typically about half a teaspoon to one teaspoon for an 8-inch pan. The goal is to create a thin, even layer that covers the entire cooking surface. Too much oil can lead to greasy eggs, while too little can result in sticking.
Q4: Why do my eggs stick even if I use oil and preheat my ceramic pan?
Eggs might still stick if the pan is too hot or not hot enough, if the oil isn’t evenly distributed, or if there’s invisible residue on the pan. Consistent overheating degrades the coating. Also, using aerosol cooking sprays can leave sticky buildup, which compromises the non-stick surface over time.
Q5: Can a ceramic pan be “re-seasoned” like cast iron?
Ceramic pans cannot be truly “re-seasoned” in the same way as cast iron, as their non-stick property comes from the coating, not a polymerized oil layer. However, a light rub with high-smoke-point oil after cleaning can sometimes help improve release by filling in microscopic pores and creating a fresh, temporary barrier.
Q6: What’s the best way to clean a ceramic pan to prevent sticking?
The best way to clean a ceramic pan is by hand with warm water, mild dish soap, and a soft sponge. Let the pan cool completely first to avoid thermal shock. Avoid abrasive scrubbers, harsh detergents, and dishwashers, as these can damage the delicate non-stick coating and cause food to stick.
- ceramic pan
- non-stick eggs
- cooking tips
- ceramic cookware care
- egg cooking


