· Todd Martin · Baking Essentials · 15 min read
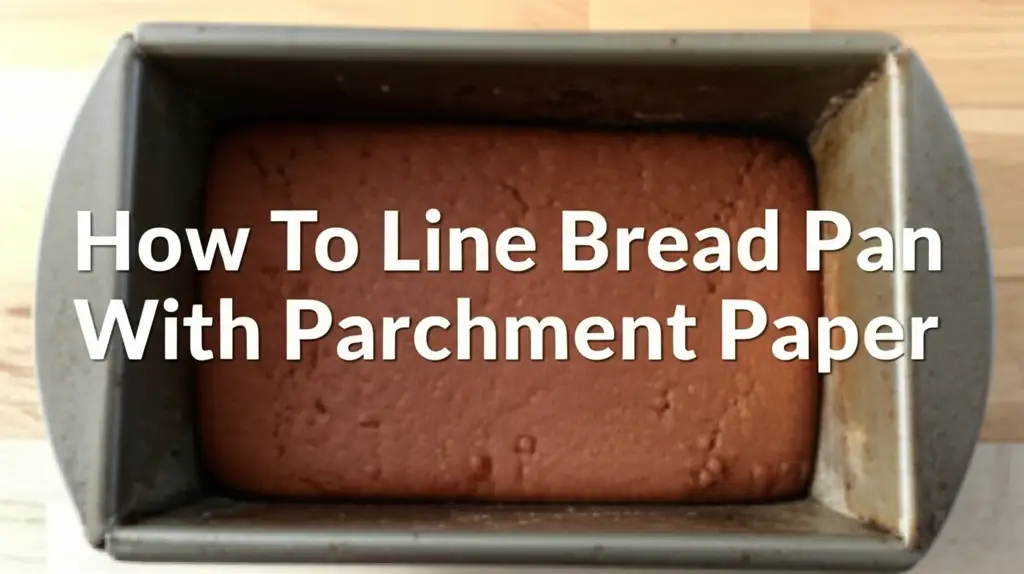
How To Line Bread Pan With Parchment Paper
Mastering Your Bread Pan: How to Line with Parchment Paper
Baking bread at home is a rewarding experience. There is nothing quite like the smell of a fresh loaf cooling on your counter. However, few things are as frustrating as a perfectly baked loaf sticking to the pan. This common problem often leads to a damaged crust or even a broken loaf. Learning how to line a bread pan with parchment paper can completely change your baking game.
Parchment paper acts as a reliable non-stick barrier. It ensures your bread releases cleanly every single time. This simple technique also makes cleanup incredibly easy. We will explore the many benefits of using parchment paper for bread baking. We will also provide step-by-step instructions for different lining methods. You will learn expert tips and troubleshoot common issues. By the end of this guide, you will feel confident baking beautiful, easily removable loaves.
Takeaway
Lining your bread pan with parchment paper ensures easy release and quick cleanup. It creates a non-stick surface for perfectly baked loaves. Use either a simple strip or a full pan coverage method, depending on your dough.
Clear Answer
To line a bread pan with parchment paper, cut a strip wide enough to cover the bottom and extend up the long sides, leaving overhang for handles. Alternatively, cut a larger rectangle and make corner cuts to fit the paper snugly into the pan for full coverage, then press it in.
Why Line Your Bread Pan with Parchment Paper?
Using parchment paper when baking bread is a small step with big benefits. It offers a simple solution to common baking frustrations. Many bakers find it improves their baking results significantly. I always reach for parchment paper when I bake bread.
The primary reason to line your bread pan is to prevent sticking. Bread dough, especially enriched doughs, can easily adhere to metal or glass pans. This sticking makes it very difficult to remove the baked loaf. Parchment paper forms a barrier. This barrier keeps your bread from bonding with the pan surface.
Parchment paper also ensures easy release. Once your bread is baked and cooled slightly, you can simply lift it out. The overhangs of the parchment paper act as convenient handles. This method protects the delicate crust of your fresh bread. It also prevents any damage that might occur from forcing the loaf out of the pan.
Cleanup becomes incredibly simple with parchment paper. Instead of scrubbing baked-on bits of dough, you just lift out the paper. The pan remains largely clean. This saves you valuable time and effort in the kitchen. It makes baking more enjoyable because there is less mess to deal with afterwards. Parchment paper is a key tool for any baker. It helps achieve consistently good results and streamlines the baking process.
Selecting the Best Parchment Paper for Baking Bread
Choosing the right parchment paper is important for good baking results. Not all papers are the same. Understanding the differences helps you pick the best one. This choice impacts how your bread bakes and how easy it is to remove.
Parchment paper comes in bleached and unbleached varieties. Bleached parchment is white. It undergoes a chlorine-free process. Unbleached parchment is brown. It is more natural. Both types work well for baking. The choice often comes down to personal preference or environmental concerns. Both versions offer excellent non-stick properties.
You can buy parchment paper in rolls or as pre-cut sheets. Rolls are economical. They allow you to cut custom sizes for different pans. Pre-cut sheets are convenient. They save time when you bake frequently. They are often sized for standard baking sheets, but you can trim them for bread pans. Consider your typical baking volume and pan sizes when deciding.
It is crucial to know the difference between parchment paper and wax paper. Wax paper has a thin layer of wax. It is not heat-resistant like parchment paper. Wax paper will melt and smoke in a hot oven. This can ruin your food and create a mess. Always use genuine parchment paper for baking. Check the label to be sure you have the correct product. Most parchment paper also has a temperature rating. Ensure your paper can withstand your oven’s baking temperature. Standard parchment paper usually tolerates temperatures up to 425-450°F (218-232°C). This is sufficient for most bread recipes. You can learn more about general parchment paper uses here: Can You Line an Aluminum Pan with Parchment Paper.
Basic Method: Simple Strip for Loaf Pans
This basic method is ideal for most standard loaf pans. It creates handles for easy lifting and prevents the bottom and long sides from sticking. I use this method frequently for my everyday sandwich loaves. It is quick, simple, and very effective.
H3: Step-by-Step Instructions
- Measure and Cut Your Paper: Take your roll of parchment paper. Place your bread pan on top of the paper. Unroll enough paper to cover the bottom of the pan and extend up both long sides. Leave an overhang of about 2-3 inches on each end. This overhang will serve as your handles.
- Fold the Strip: Remove the pan from the paper. Fold the cut strip of parchment paper lengthwise. Fold it in half. The fold should align with the width of your pan’s bottom. This helps you center the paper later.
- Crease the Edges: Unfold the paper. Place it inside the pan. The paper should run along the length of the pan. Press firmly along the bottom corners where the paper meets the pan’s sides. Create sharp creases. These creases help the paper sit snugly in the pan.
- Position in Pan: Adjust the paper so it lies flat on the bottom. The sides should extend up the long walls of the pan. The overhanging ends should stick out over the short ends of the pan. These overhangs are important for easy removal.
- Optional: Secure with Clips: Sometimes the paper might not stay put. You can use binder clips or small metal clips to hold the parchment paper in place. Clip them to the short ends of the pan. Remove these clips before placing the pan in the oven. They simply keep the paper from shifting while you add dough. This method works well for many types of bread. It ensures a clean release.
Advanced Method: Full Pan Coverage for Loaves
The advanced method provides complete coverage of your bread pan. This is especially useful for very sticky doughs or for bread types that expand significantly. It also works well if you want a perfect, clean shape on all sides of your loaf. This method provides extra protection against sticking. It ensures every part of your bread releases cleanly.
H3: Step-by-Step for Complete Coverage
- Prepare a Larger Rectangle: Unroll your parchment paper. Cut a rectangle that is significantly wider and longer than your bread pan. You need enough paper to cover the bottom and extend up all four sides. The paper should go over the top edges with a decent overhang. This ensures you have plenty of material to work with.
- Estimate Corner Cuts: Place your bread pan in the center of the parchment paper. Visually estimate where the corners of the pan meet the paper. You will make cuts at these points. These cuts allow the paper to fold neatly into the corners of the pan.
- Make Precise Corner Cuts: Lift the pan. Use scissors to cut from the edge of the paper inward. Cut towards the estimated corners of your pan. Cut along the lines that would extend from the pan’s corners. Make four cuts, one at each corner of the paper. These cuts should stop just short of where the pan’s corner would be. This creates four flaps.
- Fit the Paper into the Pan: Gently press the parchment paper into the bread pan. Start by pressing the bottom flat. Then, carefully fold the side flaps up against the pan walls. The cuts you made will allow the paper to overlap neatly at the corners.
- Ensure a Snug Fit: Press the paper firmly into all corners and along all sides. This ensures a tight fit. A snug fit prevents the paper from bunching up during baking. It also helps your bread maintain its shape. You want the paper to be as close to the pan’s contours as possible. The overhang should extend over the rim of the pan. These overhangs serve as excellent lifting handles. This method gives you total peace of mind for even the stickiest doughs. It ensures your bread releases perfectly every time. This technique is similar to how you might line a cake pan for better release. You can explore more about that here: How to Line Cake Pan with Baking Paper.
Smart Tips for Perfect Parchment Paper Lining
Even with the right method, small details can make a big difference. These tips help ensure your parchment paper lining works perfectly every time. I have learned these tricks through years of baking. They truly improve the results and simplify the process.
H3: Pre-Greasing and Adherence
Sometimes, parchment paper can slide around in the pan. A simple solution is to lightly grease the pan before adding the paper. Spray or wipe a small amount of cooking oil or butter on the bottom and sides of the pan. This thin layer of grease helps the parchment paper adhere. It holds the paper securely in place as you add the dough. This trick is especially useful for the full coverage method. It ensures the paper stays put while you press it into the corners.
H3: Dealing with Different Pan Sizes and Shapes
Most bread pans are rectangular, but some recipes call for round or square pans. The principles of lining remain the same. For round pans, cut a circle for the bottom and a strip for the sides. Overlap the strip slightly and secure it with a dab of oil. For square pans, the advanced full-coverage method works very well. You can also use two overlapping strips for square pans. This adaptability makes parchment paper a versatile tool in your kitchen.
H3: When Not to Use Parchment Paper
Parchment paper is generally safe for most baking temperatures. However, it has a maximum temperature limit, typically around 425-450°F (218-232°C). If your recipe requires higher temperatures, check the paper’s rating. For broiling or very high-heat roasting, parchment paper is not suitable. It can scorch or catch fire. Additionally, if a recipe relies on direct pan contact for a specific type of crust development, parchment paper might interfere. For example, some rustic loaves benefit from baking directly on a preheated Dutch oven surface. In such cases, skip the parchment. Knowing when to use it and when to omit it is part of mastering your baking skills. If you’re curious about using it in other contexts, like roasting, you can find more information here: Can I Line My Roasting Pan with Parchment Paper.
Common Issues and Solutions When Using Parchment Paper
While parchment paper is a fantastic baking aid, sometimes issues arise. Knowing how to troubleshoot these problems saves your bread and your sanity. I have encountered these problems myself, and finding solutions made my baking much smoother.
H3: Paper Sliding or Bunching
If your parchment paper refuses to stay flat, try the pre-greasing trick mentioned earlier. A light coating of oil or butter on the pan’s interior will help the paper grip. For the simple strip method, ensure you have enough overhang. This allows you to tuck the ends under the short sides of the pan. For the full coverage method, pressing firmly into the corners helps. You can also use metal binder clips on the pan’s rim. Remember to remove them before baking. These simple steps keep the paper from moving during dough transfer or baking.
H3: Uneven Browning or Crust Issues
Sometimes, parchment paper can prevent the bottom or sides of your bread from browning as much. This happens because the paper acts as an insulator. If you prefer a darker, crispier crust all around, you can remove the parchment paper for the last 10-15 minutes of baking. Carefully lift the bread out using the paper handles. Then, slide the loaf back into the pan without the paper. Continue baking directly in the pan. This allows the crust to crisp up and brown further. Monitor it closely to prevent burning. This technique gives you more control over the final texture of your bread.
H3: Paper Sticking to the Bread
Parchment paper is designed to be non-stick. If it sticks to your bread, a few factors might be at play. First, ensure you are using genuine parchment paper, not wax paper. Wax paper melts and sticks. Second, check the parchment paper’s temperature rating. If your oven is too hot for the paper, it can break down and adhere. Third, allow your bread to cool slightly in the pan before attempting to remove it. Hot bread is very delicate. A few minutes of cooling lets the crust set. This makes the paper easier to peel away. If a small piece does stick, it is usually harmless. You can gently scrape it off.
Expanding Your Skills: Beyond Bread Pans
Parchment paper is incredibly versatile. Its uses extend far beyond just lining bread pans. Understanding its broader applications helps maximize its value in your kitchen. I find myself reaching for it almost daily for various cooking tasks.
Parchment paper is a fantastic tool for baking cookies. You can line baking sheets with it. This prevents cookies from sticking and makes cleanup a breeze. It also promotes even baking. Many bakers prefer it over greasing pans directly for cookie sheets. The parchment paper can be reused for multiple batches of cookies.
It is also excellent for lining cake pans. Whether it is a round cake or a sheet cake, parchment paper ensures a clean release. For round cakes, you can cut a circle for the bottom. You can also cut a strip for the sides. This prevents crumbs from sticking to your pan. It makes frosting easier. This is a crucial step for beautiful cakes. This method is explored in detail in our guide: How to Line Cake Pan with Baking Paper.
Beyond baking, parchment paper excels in savory cooking. Use it to line roasting pans for vegetables or meats. It contains drips and makes cleanup almost effortless. You can even use it for “en papillote” cooking. This involves wrapping food in parchment paper and baking it. The paper traps steam and moisture. This method creates tender, flavorful dishes. It is a healthy way to cook fish or vegetables.
Parchment paper is also useful for creating piping bags for decorating. Just roll a cone shape from a square of paper. It is a quick and disposable option for small decorating jobs. This versatility makes parchment paper a true kitchen essential. Keep a roll handy for all your cooking and baking needs.
Frequently Asked Questions
Is it necessary to grease the bread pan even with parchment paper?
No, it is not strictly necessary. Parchment paper creates a non-stick surface. However, a very light greasing of the pan before adding the paper can help the paper stick to the pan. This prevents it from shifting while you add the dough. It can be useful for very wet doughs.
Can I reuse parchment paper for another loaf of bread?
Generally, no. For optimal results and food safety, it is best to use a new piece of parchment paper for each loaf. The paper absorbs moisture and oils during baking. Reusing it might reduce its non-stick properties. It could also become brittle. This might lead to sticking or tearing.
How do I store leftover parchment paper on the roll?
Most parchment paper rolls come with a box and a cutting edge. You can simply roll the excess back into the box. Secure the end with a small piece of tape or a rubber band. This keeps the paper neat and ready for your next baking project. Store it in a dry place.
Can I use aluminum foil instead of parchment paper to line a bread pan?
Aluminum foil can be used to line a pan. It can prevent sticking. However, foil does not have the same non-stick properties as parchment paper. Food can still stick to aluminum foil. Also, aluminum foil can sometimes react with acidic foods. This might affect the taste. Parchment paper is generally preferred for baking bread. You can compare more options here: Can I Line My Cake Pan with Aluminum Foil.
Does parchment paper affect the baking time or crust of my bread?
Parchment paper may slightly affect the baking time. It acts as a barrier and can insulate the crust. This might result in a slightly softer bottom crust or lighter browning. If you want a crispier, darker crust, you can remove the parchment paper for the last 10-15 minutes of baking. Adjust baking time as needed.
Is parchment paper safe for all oven types?
Yes, parchment paper is safe for most conventional and convection ovens. Always check the temperature rating on your specific parchment paper roll. Most are safe up to 425-450°F (218-232°C). Avoid using it under a broiler or in direct flame. It can ignite at very high temperatures.
Conclusion
Baking perfect bread does not need to be a struggle with sticky pans. Learning how to line a bread pan with parchment paper is a simple skill. It provides significant benefits for any home baker. This technique ensures your loaves release cleanly every time. It also simplifies the often dreaded cleanup process. You can now confidently tackle any bread recipe.
We have explored the clear advantages of using parchment paper. We discussed choosing the right type for your baking needs. You now have step-by-step instructions for both basic and advanced lining methods. We also covered essential tips and common troubleshooting solutions. These insights will help you bake consistently beautiful, well-shaped loaves. You can enjoy the baking process more. Your delicious bread will come out of the pan without a fuss. So, grab your parchment paper and start baking. Your next perfect loaf is waiting!
- how to line bread pan with parchment paper
- parchment paper bread pan
- non-stick baking
- easy bread release
- baking tips
- kitchen hacks

Todd Martin
Senior Writer
With over 15 years of experience in home renovation and design, I started HEG to share what I’ve learned with homeowners who want to create spaces that are both beautiful and functional. I’ve always believed in a hands-on approach, and over the years, I’ve picked up practical solutions that actually work. Through HEG, I aim to make home improvement more approachable, sharing real tips that help you create a home you truly love.