· Todd Martin · Baking Essentials · 16 min read
How To Line Cake Pan With Baking Paper
Mastering Cake Pan Lining: How to Use Baking Paper for Perfect Cakes
Baking a cake brings joy. However, getting the cake out of the pan can be a big challenge. Many bakers face cakes sticking to the pan. This causes cracks or broken pieces. Learning how to line cake pan with baking paper helps solve this problem. It makes sure your cake releases cleanly.
Baking paper, often called parchment paper, creates a non-stick barrier. It protects your cake from sticking to the metal. This article will show you simple methods to line various cake pans. We will cover round, square, and even special pans. You will learn the best ways to prepare your pan. This ensures a beautiful, intact cake every time. Prepare to bake with confidence.
Takeaway
- Ensure Easy Release: Lining cake pans with baking paper prevents cakes from sticking. This allows for a clean release.
- Protect Cake Texture: It helps maintain the cake’s delicate structure. This avoids tearing or breaking when removed.
- Simplify Cleanup: Baking paper acts as a barrier, keeping pans cleaner. This makes washing up much faster.
- Achieve Consistent Baking: The paper helps distribute heat more evenly. This promotes uniform baking.
- Master Different Pan Shapes: Learn specific techniques for round, square, and springform pans.
Quick Answer: How to Line Cake Pan with Baking Paper
To line a cake pan with baking paper, first cut the paper to fit the pan’s bottom. For round pans, trace the base and cut a circle. For square pans, cut strips for the sides and a rectangle for the bottom. Always grease the pan lightly before placing the paper. This helps the paper stay in place.
Understanding Baking Paper and Its Benefits
Baking paper is a common kitchen item. It has a silicone coating on both sides. This coating makes it non-stick and heat-resistant. It is safe to use in ovens at high temperatures. Many bakers use it for cookies, pastries, and cakes.
The main purpose of baking paper is to prevent food from sticking. When you line a cake pan, it creates a barrier. This barrier stops the cake batter from directly touching the pan’s surface. This is very important for delicate cakes. Without it, parts of the cake can stick. This leads to broken edges or a damaged shape.
Using baking paper also makes cleanup easier. Cake batter or crumbs often stick to unlined pans. This requires scrubbing to remove. With baking paper, most residue stays on the paper. You simply lift the paper and the cake out. The pan then needs minimal washing. This saves time and effort in the kitchen.
Another benefit is even heat distribution. Some cake pans conduct heat unevenly. This can lead to overcooked edges and undercooked centers. Baking paper can help create a more consistent baking surface. It protects the cake from direct intense heat on the sides and bottom. This results in a cake that bakes more uniformly. Knowing how to get cake out of cake pan without breaking becomes much simpler when you use this simple barrier. The paper acts as a release agent, making removal effortless.
Consider baking paper a small investment for big results. It saves your cakes from damage. It also makes your baking process smoother. You can achieve professional-looking results right at home. I always make sure I have a roll in my pantry.
Essential Tools for Lining Your Cake Pan
Lining a cake pan effectively requires a few basic tools. Having these items ready makes the process smooth. You do not need anything fancy. Simple kitchen supplies work best.
First, you need the baking paper itself. Make sure it is oven-safe. Most baking papers are, but it is always good to check the package. A standard roll of baking paper will work for most cake pans. Choose one that is wide enough for your largest pan.
Next, you will need a good pair of kitchen scissors. Sharp scissors help you cut clean lines. This ensures the paper fits snugly in your pan. Dull scissors can tear the paper. This makes it harder to get a precise fit. A craft knife can also work if you are careful.
A pencil is helpful for tracing. When lining round pans, you will trace the pan’s base. This helps you cut a perfect circle. A ruler is useful for straight cuts. It helps when lining square or rectangular pans. You can measure the pan’s dimensions accurately.
Lastly, have your cake pan ready. Knowing how to tell what size your cake pan is is crucial. Different pan sizes need different paper cuts. Use the correct pan for your recipe. A smaller pan might cause overflow. A larger one might make the cake too flat. Make sure your pan is clean and dry before you start lining. This helps the paper stick properly.
Sometimes, a little bit of butter or non-stick spray is useful. You will use this to “glue” the paper to the pan. It helps hold the paper in place while you pour the batter. This prevents the paper from shifting. These simple tools ensure your cake pan is ready for baking success.
How to Line a Round Cake Pan with Baking Paper
Lining a round cake pan is straightforward. This method ensures an easy release for your round cakes. It helps prevent any part of the cake from sticking. Follow these steps for perfect results.
First, take your roll of baking paper. Pull out enough paper to cover the bottom of your pan. Place your round cake pan on top of the baking paper. Use a pencil to trace around the base of the pan. Make sure the pencil line is clear. This line will be your cutting guide.
Now, cut out the traced circle. Use your kitchen scissors for a clean cut. Try to cut exactly on the line. A perfectly cut circle will fit snugly in the bottom of your pan. Set this circle aside for a moment.
Next, prepare the cake pan itself. Lightly grease the inside of the pan. You can use butter, shortening, or a non-stick spray. This thin layer of grease serves two purposes. It helps the baking paper stick to the pan. It also provides an extra layer of non-stick protection. This step is important for both the bottom and the sides.
Take your cut baking paper circle. Press it firmly into the bottom of the greased pan. Make sure it lies flat. There should be no wrinkles or air bubbles. Smooth it out with your fingers if needed. This forms the base barrier for your cake.
For the sides, cut a long strip of baking paper. The strip should be as tall as your cake pan’s sides. Its length should be enough to go around the entire inner circumference. You can measure this by wrapping the paper around the pan’s inside. Cut the strip cleanly. Press this strip against the greased inner sides of the pan. Overlap the ends slightly if needed. The paper will stand up, forming a collar. This method makes sure your cake slides out easily. Using baking paper is a reliable way to make cake not stick to aluminum pan, ensuring a smooth release every time.
Lining Square and Rectangular Cake Pans Made Easy
Lining square and rectangular cake pans uses a different approach. These pans have corners, which need specific attention. The goal is still to create a complete non-stick barrier. These methods help you achieve neat corners and straight sides.
Begin by greasing your square or rectangular pan. Just like with round pans, a thin layer of butter or non-stick spray helps. Apply it to the bottom and all sides. This grease helps the baking paper adhere properly. It prevents the paper from slipping around.
For the bottom, measure the exact dimensions of your pan’s base. Cut a rectangle of baking paper to match these measurements. Place this paper rectangle flat into the bottom of the greased pan. Press it down firmly. Ensure it lays flat without any creases. This creates your primary non-stick surface.
Now, prepare the side pieces. You will need two long strips and two shorter strips. Each strip should be as tall as your pan’s sides. For the length, measure the inside length of the pan for the long sides. Measure the inside width for the shorter sides. Cut the two longer strips first. Place one long strip along one inside wall of the pan. Press it firmly against the greased surface. It should extend slightly over the pan’s rim. Do the same for the opposite long side.
Next, cut the two shorter strips. These will fit between the two long strips you just placed. Press them against the remaining greased walls. Make sure they meet the long strips neatly at the corners. Some bakers prefer to cut one very long strip to line all four sides. They make vertical cuts at each corner to fold it around. This method can also work. However, using four separate pieces often gives a neater finish, especially in tight corners.
With all pieces in place, you have a fully lined pan. The baking paper covers all surfaces that will touch your cake. This technique guarantees your cake releases smoothly. It prevents bits from sticking to the pan’s edges or bottom. This is especially useful for dense cakes that tend to stick. You can line an aluminum pan with parchment paper using these methods without any issues, ensuring a smooth release for your cakes.
Special Considerations for Springform and Tube Pans
Springform pans and tube pans have unique designs. They require special lining techniques. These pans are often used for cheesecakes or delicate sponges. Proper lining ensures their unique features work as intended. It also prevents leaks and sticking.
A springform pan has a removable bottom. The sides latch together around it. This design makes releasing fragile cakes very easy. However, it also creates a seam where batter can leak. To line a springform pan, first, grease the bottom and sides lightly. Then, clamp the ring around the base with a piece of baking paper sandwiched in between. Trim the excess paper around the edges. This creates a leak-proof bottom. For extra security, you can wrap the outside bottom of the pan with aluminum foil. This is especially important if you are baking with a water bath.
For the sides of a springform pan, cut a long strip of baking paper. It should be as tall as the pan’s sides and long enough to encircle the interior. Press this strip against the greased inner walls of the pan. The paper will stand up, forming a collar. This protects the cake sides and helps it release cleanly. When the cake is done, unlatch the springform. The paper collar helps you slide the cake off the base easily.
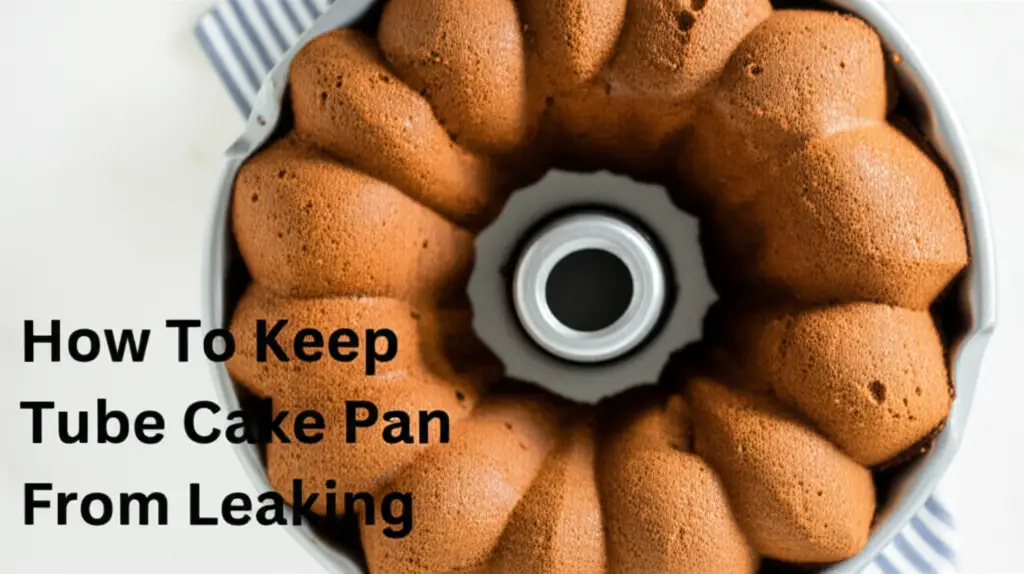
Tube pans, also known as Bundt pans, have a central cone. They are used for cakes like angel food cake or Bundt cakes. Lining a tube pan can be tricky due to its intricate designs. For some tube pans, especially those with non-stick coatings, you might only need to grease and flour them. However, for pans prone to sticking, baking paper can be used.
To line a tube pan, cut a circle for the bottom. Then, cut strips for the sides. You will need to make small snips in the paper to fit the curves. Press the paper into the fluted design as best as you can. For the central tube, cut a rectangle of baking paper and wrap it around the tube. This method is more challenging. Many bakers simply rely on thorough greasing and flouring for tube pans. However, for a super-sticky pan, paper can offer extra assurance. Remember, knowing how to keep tube cake pan from leaking is key for delicate batters. Proper lining, sometimes with paper, definitely helps.
Greasing and Flour Dusting: The Perfect Pairing with Baking Paper
While baking paper provides a non-stick surface, combining it with greasing and flour dusting offers extra security. This dual approach ensures your cake will never stick. It also helps achieve a beautiful, golden crust.
First, understand why greasing and flouring are still useful. Baking paper prevents the cake from sticking to the pan. But sometimes, the cake can stick to the paper itself. A thin layer of fat, like butter or cooking spray, on both the pan and the paper, acts as a release agent. It helps the cake separate cleanly from the paper after baking. The fat also helps the paper adhere to the pan, preventing it from slipping when you pour in the batter. This is a small step that makes a big difference.
After greasing, dusting the pan with flour adds another layer of protection. This is especially true for cakes that are prone to sticking, such as very moist or delicate batters. To flour the pan, add a tablespoon or two of all-purpose flour to the greased pan. Tilt and rotate the pan to coat all greased surfaces evenly. Gently tap out any excess flour. The flour creates a fine barrier between the batter and the pan (or paper). It helps the cake climb the sides of the pan more easily, which can lead to a lighter, airier texture for some cakes. This combination is particularly effective if you want to make cake not stick to aluminum pan.
You can also use cocoa powder instead of flour for chocolate cakes. This prevents white flour marks on your dark cake. Simply follow the same dusting process. The cocoa powder blends seamlessly with the chocolate batter.
Some recipes might specify using only grease and flour, or only baking paper. Always follow your recipe’s instructions first. However, for general baking, the combination of greasing the pan, lining with baking paper, and then greasing and flouring the paper can give you the ultimate non-stick assurance. This method is very useful for preventing delicate cakes from tearing when removed. It truly provides peace of mind when baking your favorite cakes.
Troubleshooting Common Cake Pan Lining Issues
Even with the right tools and techniques, you might face some challenges. Knowing how to troubleshoot common issues helps you fix them quickly. This ensures your cake turns out perfect every time.
One common issue is the baking paper slipping. You might pour the batter and the paper shifts. This creates uneven sides or lumps. The main cause is not enough grease to hold the paper. Make sure you lightly grease the pan before placing the paper. This helps the paper stick firmly to the pan’s surface. You can also press the paper down gently after placing it. This helps remove any air pockets.
Another problem is wrinkles or creases in the paper. These wrinkles can transfer to the cake’s surface. They make the cake look less smooth. To avoid this, cut the paper precisely. For round pans, ensure your circle is exactly the pan’s size. For square pans, press the paper into the corners firmly. Use your fingers to smooth out any wrinkles before pouring batter. Sometimes, a tiny bit of extra grease can help the paper conform better.
Tears in the baking paper can also happen. This exposes parts of the cake to the pan. It defeats the purpose of lining. Tears often occur if you use dull scissors or if the paper is old and brittle. Always use sharp scissors for clean cuts. Handle the paper gently when placing it. If a small tear happens, you can often patch it with another small piece of paper. Just make sure the patch lies flat.
Sometimes, the cake sticks to the baking paper itself, even after lining. This can happen if the cake is very moist or has a high sugar content. It also occurs if you skip greasing the paper. Always remember to lightly grease the baking paper after you place it in the pan. A light dusting of flour or cocoa powder on top of the greased paper can add another layer of non-stick protection. This extra step helps prevent the cake from adhering too strongly to the paper. If you frequently find cakes sticking, considering how to keep cake from sticking to aluminum pan and its solutions can offer useful insights, even when using parchment paper. These simple solutions make baking less stressful and more enjoyable.
FAQ Section
Can you reuse baking paper?
You can sometimes reuse baking paper, but it depends on what you baked. If the paper is clean and not overly greasy or discolored, you might get a second use. However, for cakes, it is best to use a fresh piece. Cake batter leaves more residue and moisture. Fresh paper ensures optimal non-stick performance every time.
Is parchment paper the same as baking paper?
Yes, “parchment paper” and “baking paper” are generally the same product. Both refer to paper treated with silicone. This treatment makes them non-stick and heat-resistant. They are interchangeable for most baking purposes. Different brands may use different names, but the function is identical.
What if I don’t have baking paper?
If you do not have baking paper, you can use aluminum foil as an alternative. Grease the foil thoroughly and dust it with flour. Aluminum foil is not non-stick on its own. Alternatively, you can rely on thorough greasing and flouring of the pan directly. This works well for many standard cake recipes. You can learn more about this by reading Can I Line My Cake Pan With Aluminum Foil?.
Do I need to grease baking paper?
Yes, it is often a good idea to lightly grease baking paper, especially for cakes. While baking paper is non-stick, a thin layer of butter or cooking spray on top of the paper provides an extra release layer. This ensures the cake separates perfectly from the paper. It also helps the paper stick to the pan.
How thick should baking paper be?
Baking paper comes in a standard thickness suitable for most baking. There is no need to look for a specific thickness. The key quality is its silicone coating, which provides the non-stick property. As long as it is labeled “baking paper” or “parchment paper,” it should work effectively for lining cake pans.
Conclusion
Lining your cake pan with baking paper is a simple yet powerful technique. It transforms your baking experience. You move from worrying about stuck cakes to celebrating perfect, easy releases. This essential step ensures your cakes come out beautifully intact. It makes presentation simple and cleanup quick.
We have explored the benefits of baking paper, from preventing sticking to aiding even baking. You now know the simple tools needed and the specific methods for lining various pan shapes. Mastering techniques for round, square, springform, and even tricky tube pans empowers you. Combining baking paper with traditional greasing and flouring creates the ultimate non-stick barrier. We also covered how to tackle common lining issues.
Embrace this easy method in your kitchen. It is a small effort with big rewards. No more broken cakes or frustrating scrubbing. You will achieve consistently excellent results. Enjoy the satisfaction of baking beautiful cakes every time. Start lining your cake pan with baking paper today, and elevate your baking game!
- Baking Paper
- Cake Baking
- Kitchen Tips
- Parchment Paper

Todd Martin
Senior Writer
With over 15 years of experience in home renovation and design, I started HEG to share what I’ve learned with homeowners who want to create spaces that are both beautiful and functional. I’ve always believed in a hands-on approach, and over the years, I’ve picked up practical solutions that actually work. Through HEG, I aim to make home improvement more approachable, sharing real tips that help you create a home you truly love.