· Todd Martin · DIY Projects · 20 min read
How To Make A Live Edge Table With Epoxy
Crafting Your Own Live Edge Epoxy Table
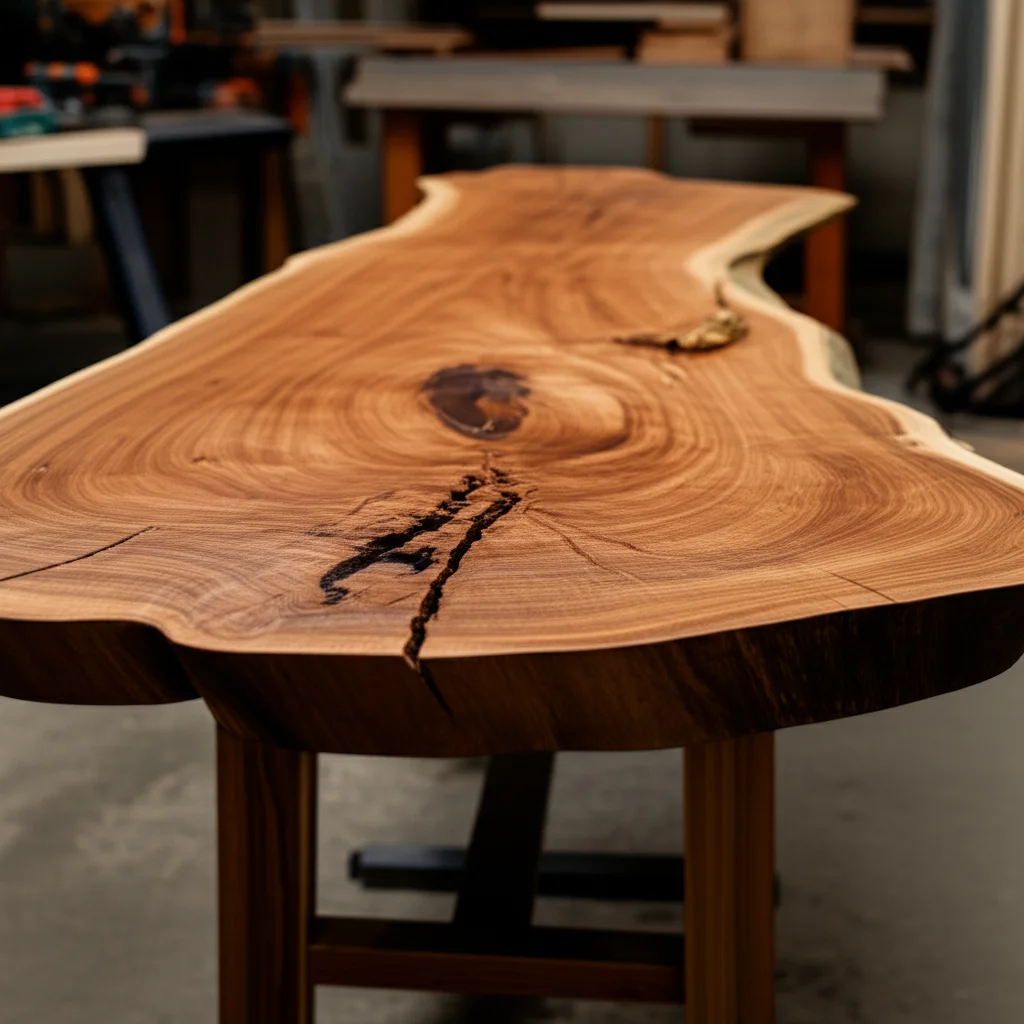
Creating furniture yourself brings a special kind of satisfaction. Imagine designing a piece that showcases nature’s raw beauty, enhanced by modern materials. A live edge table with epoxy does exactly this, merging rustic wood with a glassy, flowing river of resin. This type of table becomes a central focal point in any room. It offers both artistry and function. I am excited to share how you can bring this unique project to life.
This guide will walk you through every step of making your own live edge epoxy table. We will cover choosing the right wood, preparing your workspace, mixing and pouring epoxy, and finishing the surface to a high sheen. You will learn important safety tips and common pitfalls to avoid. By the end, you will feel confident to start your woodworking adventure. Get ready to build something truly spectacular and personal.
Takeaway
- Select the right live edge wood slab and type of epoxy resin.
- Prepare your wood thoroughly, including cleaning, flattening, and sealing.
- Build a sturdy, leak-proof mold for your epoxy pour.
- Carefully mix and pour epoxy, managing bubbles and curing times.
- Sand and finish the table surface for a durable, beautiful result.
- Attach a stable base to complete your custom live edge table.
Making a live edge table with epoxy involves selecting a beautiful wood slab, preparing it meticulously, building a form, pouring carefully mixed epoxy resin, allowing it to cure, then sanding and finishing the surface to create a unique and durable piece of furniture.
Understanding Live Edge and Epoxy Resin
Live edge furniture captures the natural edge of the wood slab. This means the wood’s original bark or organic shape remains. Each live edge piece is one-of-a-kind. It brings the outdoors inside your home.
Epoxy resin is a two-part liquid that cures into a hard, clear plastic. It fills voids, stabilizes wood, and creates a durable, glossy surface. When combined with live edge wood, epoxy can fill natural crevices or create “river” effects between two slabs. This blend highlights the wood’s character.
What Makes Them Popular?
People love live edge epoxy tables for their striking appearance. They offer a blend of rustic charm and modern elegance. The natural wood grain shows through, often enhanced by the clear or colored epoxy. These tables are durable and easy to maintain. I find them to be real conversation starters.
The unique look means no two tables are exactly alike. You get a custom piece of art. This personal touch appeals to many homeowners. It adds significant character to a living space.
Types of Epoxy for Table Making
Not all epoxy is suitable for large pours. You need specific types for different parts of your table. Understanding these differences helps prevent common issues. I learned this the hard way on my first large project.
- Deep Pour Epoxy (Casting Resin): This epoxy is designed for thick applications. It cures slowly, which prevents overheating and cracking in large volumes. Use this for “river” sections or filling large voids. It minimizes bubbles during curing.
- Table Top Epoxy (Finishing Resin): This epoxy cures quickly and forms a very hard, clear layer. It is for thin coatings. Use it as a final protective layer over the entire table surface. This type offers excellent scratch resistance and a high gloss finish.
Choosing the correct epoxy ensures your table stands up to daily use. It also helps achieve that desired smooth, glass-like finish. Always check the manufacturer’s specifications for maximum pour thickness.
Gathering Your Materials and Tools
Starting any project means having everything ready. For a live edge epoxy table, this is especially true. You will need both woodworking tools and specific supplies for the epoxy work. I like to lay everything out before I begin.
This preparation saves time and reduces frustration. It also ensures safety. Missing a key item can stop your progress mid-pour. Having the right tools makes the work easier and the results better.
Essential Materials for Your Table
The core materials are your wood and epoxy. But there are many other components needed. Each plays a vital role in the final product. I always create a checklist to ensure I do not forget anything important.
- Live Edge Wood Slab(s): Choose wood that is dry and free of rot. You might want one large slab or two smaller ones for a river table design. Look for interesting grain patterns.
- Deep Pour Epoxy Resin: As discussed, this is for the main pour. Calculate the volume needed carefully.
- Table Top Epoxy Resin: For the final clear coat.
- Color Pigments or Dyes (Optional): To add color to your epoxy. Mica powder or liquid pigments work well.
- Wood for Form/Mold: Melamine-faced particle board is ideal. Its smooth surface helps epoxy release easily.
- Sealant: Tyvek tape, silicone caulk, or hot glue for sealing the mold.
- Finishing Oil or Varnish: For parts of the wood not covered by epoxy.
- Table Legs/Base: Metal, wood, or custom-made.
Necessary Tools and Equipment
You will need a range of tools for woodworking and epoxy application. Some are common, others more specialized. Safety gear is paramount. I always put on my personal protective equipment first.
- Safety Gear: Nitrile gloves, safety glasses, respirator (for epoxy fumes), ear protection.
- Woodworking Tools:
- Circular Saw or Chainsaw: For rough cuts on the slab.
- Planer or Router Sled: To flatten the wood slab. You can learn more about how to plane a table top with an electric plane if you need to flatten large surfaces. Using a router sled is also an option for very wide slabs.
- Sander: Orbital sander, belt sander. For detailed instructions, check out articles on how to sand a table with an electric sander or how to use a belt sander on a table top.
- Clamps: Essential for holding down the wood and the mold.
- Drill: For attaching legs and other hardware.
- Measuring Tape, Straight Edge, Pencil.
- Epoxy Tools:
- Mixing Containers: Disposable plastic buckets.
- Mixing Sticks: Large wooden paint stirrers or power mixer attachment for a drill.
- Heat Gun or Propane Torch: For degassing epoxy bubbles.
- Spreader/Trowel: For applying top coat epoxy.
- Plastic Sheeting/Drop Cloths: To protect your workspace.
- Denatured Alcohol or Acetone: For cleaning spills and tools. For guidance on cleaning epoxy, including how to clean epoxy resin off tools, this type of solvent is key.
Remember to clean your tools promptly after use. Epoxy hardens quickly, making it difficult to remove later. Proper cleaning extends the life of your equipment.
Selecting and Preparing Your Wood Slab
Choosing the right wood slab is a critical first step. The wood is the heart of your live edge table. Its character will define the final look. I look for interesting grain, color, and shape.
Preparation ensures the wood is stable and ready for epoxy. This stage can take time, but rushing it causes problems later. A well-prepared slab leads to a long-lasting, beautiful table. This is where most of your initial effort should go.
Choosing the Perfect Slab
The best wood for a live edge table is fully dry. Wet wood will warp, crack, or cause issues with epoxy adhesion. Look for kiln-dried or air-dried slabs that have seasoned for several years. Moisture content should be below 10%. I use a moisture meter to check this.
Consider the species of wood. Each offers unique properties and aesthetics:
- Walnut: Rich, dark brown with beautiful grain. It is easy to work with.
- Maple: Light color, often with figuring like “curly” or “bird’s eye” patterns.
- Oak: Durable with prominent grain. It can be heavy.
- Cherry: Starts light and darkens to a reddish-brown over time.
- Elm: Unique grain with interlocked fibers.
Examine the slab for defects. Small cracks and voids are fine; the epoxy will fill them. Avoid large areas of rot or excessive checking that compromise structural integrity. Make sure the slab’s dimensions fit your planned table size.
Debarking and Cleaning the Wood
Most live edge slabs come with bark still attached. You need to remove this bark. It can harbor insects and will not adhere well to the epoxy. I use a chisel or a drawknife for this task. Carefully work along the live edge until all bark is gone.
After debarking, clean the wood thoroughly. Remove any loose debris, dirt, or dust. A wire brush works well for rough areas. You can also use compressed air. For overall wood cleanliness, think about how you might clean a wooden table or a wood table in general; you want it pristine before applying anything. This ensures good epoxy adhesion.
Flattening the Slab
A flat slab is essential for a stable table. Wood slabs are rarely perfectly flat. You will need to flatten one or both sides. This ensures your table top does not wobble and that epoxy pools evenly. I have found this step to be quite satisfying.
You have a few options for flattening:
- Planer: If your slab fits, a thickness planer works quickly. Feed the slab through to get parallel faces.
- Router Sled: For slabs too wide for a planer, a router sled is an excellent choice. Build a simple sled system. Then use a large-diameter router bit to mill the surface flat. This method requires patience.
- Hand Tools: For smaller or very irregular slabs, hand planes can work. This takes skill and more time.
Once flattened, sand the slab surfaces down to at least 120-grit. This provides a good surface for epoxy to bond to. Do not go too fine yet, as you will do more sanding later. Make sure all dust is removed after sanding.
Building the Epoxy Form and Sealing
The epoxy form, or mold, is crucial. It contains the liquid resin while it cures. A well-built form prevents leaks and ensures your table edges are straight and clean. I learned early on that a leaky form can ruin a project.
This step requires careful measurement and assembly. You want a form that is strong and watertight. I spend extra time here to avoid problems later. It pays off in the long run.
Choosing Mold Material
Melamine-faced particle board is the best material for your mold. Its smooth, slick surface prevents epoxy from sticking. This makes demolding easy. You can reuse the melamine for future projects if you are careful.
Cut the melamine to create the bottom and sides of your mold. The size should accommodate your wood slab(s) with enough space for the epoxy pour. Remember to account for the thickness of the mold sides. I always cut the base first, then the sides.
Assembling the Form
Assemble the mold with screws from the outside. Ensure all corners are perfectly square. This gives your table straight edges. I use plenty of screws to make it sturdy.
The height of the mold sides should be slightly higher than your desired finished table thickness. This allows for a slight overfill. You can then level it later. I aim for about 1/4 inch higher than my wood.
Sealing the Mold
This is where many projects go wrong if not done correctly. Epoxy will find any tiny gap. You must seal every seam where the melamine pieces meet. This includes the bottom edges and corners.
Here are reliable methods for sealing:
- Tyvek Tape: This strong, slick tape is excellent for covering seams. Apply it smoothly, pressing out all air bubbles. Overlap edges for full coverage. It provides a non-stick surface.
- Silicone Caulk: Run a bead of silicone along all interior seams. Smooth it with your finger or a wet tool. Let it cure completely before pouring epoxy. This creates a strong, flexible seal.
- Hot Glue: For quick, temporary seals on small gaps. Hot glue can be removed easily later. I use it for very minor imperfections or quick fixes.
Also, seal the wood slab itself if it has any natural voids or cracks that extend through. You do not want epoxy leaking into the wood pores where it is not intended. I use a thin coat of clear epoxy or a specialized wood sealer. Apply it to the undersides and any small holes. This creates a barrier against leaks from the wood itself. Ensuring a perfect seal is key for a clean epoxy pour.
Mixing and Pouring the Epoxy Resin
Pouring epoxy is the most exciting part for me. This is where the table starts to take shape. Accuracy in mixing and careful pouring techniques are vital for a successful outcome. Follow the manufacturer’s instructions precisely.
Working with epoxy requires patience and attention to detail. Rushing this stage can lead to bubbles, uneven curing, or a soft finish. I always double-check my measurements before I start mixing.
Calculating Epoxy Volume
First, determine how much epoxy you need. Measure the length, width, and depth of the area to be filled. For a river table, calculate the volume of the “river.” For filling voids in a single slab, estimate the volume of those voids.
- Formula: Length (inches) x Width (inches) x Depth (inches) / 231 = Gallons.
- Example: A river 48 inches long, 6 inches wide, and 1.5 inches deep needs (48 x 6 x 1.5) / 231 = 1.86 gallons. Always add 10-15% extra to account for waste.
It is better to have too much epoxy than too little. You cannot mix a second batch and expect it to blend perfectly with a partially cured one. Plan your pour thoroughly.
Mixing the Epoxy
Epoxy resin comes in two parts: resin (Part A) and hardener (Part B). The mixing ratio is critical. It is usually by volume or weight. Always follow the manufacturer’s instructions exactly. I use separate measuring containers for each part.
- Step 1: Measure Accurately. Pour Part A into a clean mixing container. Then add Part B according to the ratio.
- Step 2: Mix Thoroughly. Stir slowly and consistently for 3-5 minutes. Scrape the sides and bottom of the container. Unmixed epoxy will remain sticky and not cure properly. Do not whip the mixture, as this introduces bubbles.
- Step 3: Add Color (Optional). If you want to color your epoxy, add pigments or dyes during mixing. Start with a small amount and add more until you achieve the desired shade. Mix well to ensure even color distribution.
- Step 4: Pot Life. Be aware of the epoxy’s “pot life.” This is the time you have to work with the epoxy before it starts to harden. Deep pour epoxies have longer pot lives.
I like to use a paint mixer attachment on a drill for large batches. This ensures thorough mixing. Just make sure to keep the speed low to avoid creating bubbles.
Pouring the Epoxy
Once mixed, immediately pour the epoxy into your mold. Pour slowly and steadily into the deepest sections first. Let the epoxy flow naturally around the wood.
- Initial Pour: For river tables, pour directly into the gap between the slabs. For void fills, pour directly into the voids.
- Bubble Release: After pouring, bubbles will rise to the surface. Use a heat gun or small propane torch to gently pass over the surface. The heat pops the bubbles. Hold the heat source a few inches away and keep it moving. Do not overheat the epoxy. You may need to do this several times over the first hour as new bubbles appear.
- Multiple Pours (for deep pours): If your table is very thick (over 1.5-2 inches), you might need multiple pours. Consult your epoxy’s instructions for maximum pour depth per layer. Allow each layer to partially cure (reach a gel state) before pouring the next. This prevents overheating and cracking.
Protect your workspace with plastic sheeting. Epoxy spills are difficult to clean once cured. If you do get a spill, denatured alcohol can help clean it while wet. Once cured, epoxy is tough to remove. This is why it’s important to understand how to clean epoxy resin off tools promptly after use.
Curing, Demolding, and Initial Planing
Patience is key during the curing phase. The epoxy needs time to harden fully. Rushing this step can lead to a soft surface or permanent marks. Once cured, you can safely remove the form and begin refining your table.
Initial planing or flattening after demolding prepares the surface for final sanding. This ensures your table top is perfectly level. I always make sure the epoxy is fully cured before I move to this stage.
Curing Time
The epoxy will feel hard to the touch after 24-72 hours, depending on the type and temperature. However, it takes much longer to achieve full hardness.
- Deep Pour Epoxy: Can take 3-7 days for a full cure.
- Table Top Epoxy: Usually reaches full cure in 7-30 days.
During curing, keep the table in a dust-free environment with stable temperature. Avoid direct sunlight. High humidity or low temperatures can slow down the curing process. I often cover my curing tables lightly to protect from dust.
You will know the epoxy is fully cured when it is hard and not tacky at all. It should resonate with a solid sound when tapped. Do not rush to demold.
Demolding Your Table
Once the epoxy is fully cured, you can remove the mold.
- Step 1: Remove Screws. Unscrew the melamine sides from the base.
- Step 2: Gently Separate. Carefully pry the melamine sides away from the epoxy. If you used Tyvek tape, it should peel away easily. Silicone caulk might require a bit more effort. A thin plastic scraper can help.
- Step 3: Lift the Slab. Lift the entire table top from the melamine base. The epoxy should release cleanly. You may need to tap the underside lightly with a rubber mallet.
Inspect the edges of your table. There might be some small epoxy drips or sharp edges from the mold. These will be removed in the next step. I clean off any remaining tape residue immediately.
Initial Planing or Flattening
Even with a perfect pour, your table top might have small high spots. The epoxy might have slightly crowned, or the wood might have moved minimally. You need to flatten the entire surface. This ensures a perfectly flat and smooth table.
- Method 1: Router Sled: Use your router sled setup again. Mill down the top surface until it is perfectly flat. This method works well for both wood and epoxy.
- Method 2: Planer: If your table fits, run it through a large industrial planer. Be careful not to take off too much material at once.
- Method 3: Hand Planing/Sanding: For minor imperfections, a combination of hand planing and aggressive sanding can work.
After initial flattening, your table top will be rough. It will be ready for the detailed sanding process. This stage removes all major imperfections and prepares the surface for a refined finish.
Sanding and Finishing the Live Edge Table
Sanding is perhaps the most time-consuming part of making a live edge epoxy table. But it is also where the magic happens. Proper sanding reveals the true beauty of the wood and the clarity of the epoxy. A high-quality finish protects your work. I always allocate plenty of time for this stage.
Rushing sanding results in visible scratches under the final finish. A smooth, even finish requires dedication. It makes all the difference in the table’s appearance and durability.
Progressive Sanding
You will sand the entire table surface, both wood and epoxy. Start with a low grit sandpaper and work your way up to very fine grits. This process removes scratches from previous steps and creates a smooth surface.
- Step 1: Coarse Grit (80-120 grit): Begin with 80 or 120 grit sandpaper using an orbital sander. This removes major imperfections and marks from flattening. Sand the entire surface evenly.
- Step 2: Medium Grit (180-220 grit): Move to 180 or 220 grit. This removes the scratches left by the coarser grit. Always ensure you eliminate all scratches from the previous grit before moving to the next.
- Step 3: Fine Grit (320-400 grit): Progress to 320 or 400 grit. At this point, the surface should start to feel very smooth.
- Step 4: Very Fine Grit (600-800 grit and beyond): For a high-gloss epoxy finish, you may go up to 600, 800, 1000, or even 2000 grit. The finer you go, the clearer and shinier your epoxy will be. For wood areas, 220-320 grit is usually sufficient before applying oil or varnish.
Between each grit change, wipe down the entire surface thoroughly. Use a tack cloth or compressed air to remove all dust. Any dust left behind will create new scratches with the next sandpaper grit. This is a critical step for a flawless finish.
Applying the Final Finish
Once your sanding is complete and the surface is impeccably smooth, it is time for the final finish. This protects the wood and epoxy. It also enhances their appearance. You have several options depending on your desired look and durability.
Option 1: Top Coat Epoxy
For the most durable and high-gloss finish, apply a final flood coat of table top epoxy. This creates a hard, clear, seamless layer over the entire table. It protects both the wood and the deep-pour epoxy from scratches and spills.
- Preparation: Ensure the surface is perfectly clean and dust-free.
- Mixing: Mix table top epoxy according to the manufacturer’s instructions. Work quickly, as its pot life is shorter.
- Pouring: Pour the epoxy evenly over the center of the table. Use a spreader or squeegee to guide it to the edges. Let it self-level.
- Degassing: Use a heat gun or torch to pop any surface bubbles. Do this several times over the first 30-60 minutes.
- Curing: Allow the epoxy to cure fully, usually 24-72 hours to touch, and 7-30 days for full hardness. Protect it from dust during this time.
This finish offers excellent protection. It gives that signature “glassy” look. For cleaning an epoxy surface, remember that how to clean epoxy countertops can provide useful tips for everyday care.
Option 2: Oil or Varnish
If you prefer a more natural feel for the wood sections, or if you want a satin finish, you can use a high-quality oil or varnish. This is applied after the epoxy has fully cured and after all sanding is complete.
- Oil Finishes (e.g., Tung Oil, Linseed Oil): These penetrate the wood, enhancing its natural color and providing a matte or satin look. They are easy to repair but offer less protection than epoxy or varnish. Apply multiple coats, wiping off excess between coats.
- Varnish (e.g., Polyurethane, Lacquer): These form a protective film on the surface. They offer good durability and can be found in various sheens (matte, satin, gloss). Apply thin, even coats. Sand lightly between coats for better adhesion.
I often combine these: a flood coat of epoxy for the “river” and main wood surface, and then an oil or varnish for the live edges and underside to retain the wood feel. Whichever you choose, follow the product’s instructions for application and cure times.
Attaching the Base and Final Touches
With your live edge table top complete, the final step is to attach the legs or base. This transforms your beautiful slab into a functional piece of furniture. Choosing the right base adds to the table’s overall aesthetic. I always consider the style of the base carefully.
Ensuring a stable and level base is crucial. A wobbly table is frustrating. Take your time with this last step to ensure a perfect finish.
Choosing Your Table Legs
Table legs come in many styles and materials. Your choice should complement the live edge top. Consider the table’s intended use and your home’s decor.
- Metal Legs: Common choices include steel hairpin legs, U-shaped legs, or X-frame bases. They offer a modern, industrial look. Metal bases are very strong and stable.
- Wood Legs: Tapered legs, turned legs, or solid wood slabs can be used. They create a more traditional or rustic feel. Ensure the wood matches or contrasts nicely with your table top.
- live edge table
- epoxy resin
- DIY furniture
- woodworking
- river table
- home decor

Todd Martin
Senior Writer
With over 15 years of experience in home renovation and design, I started HEG to share what I’ve learned with homeowners who want to create spaces that are both beautiful and functional. I’ve always believed in a hands-on approach, and over the years, I’ve picked up practical solutions that actually work. Through HEG, I aim to make home improvement more approachable, sharing real tips that help you create a home you truly love.