· Todd Martin · DIY · 16 min read
How To Make An Outdoor Table Top

Craft Your Custom Outdoor Table Top for Lasting Beauty
Making your own outdoor table top brings a unique charm to any patio or deck. It is a rewarding DIY project. You get to choose the exact style, size, and material that fits your outdoor living space. This guide will walk you through every step of how to make an outdoor table top. We will cover selecting the best materials, designing your perfect surface, and building it from scratch. Get ready to create a durable and beautiful piece for your home.
Takeaway:
- Building your own outdoor table top saves money and allows for full customization.
- Choose materials like cedar, teak, or concrete for best outdoor durability.
- Always prioritize safety with proper tools and gear.
- Measure your space carefully for the right table top size and shape.
- Apply suitable weatherproofing to protect your finished table from the elements.
Making an outdoor table top involves selecting durable materials like weather-resistant wood, concrete, or tiling, then precisely cutting, assembling, and finishing the surface to withstand environmental conditions. You will choose a design, gather necessary tools, build the top, and apply protective sealants for longevity. This process allows for a custom piece that fits your outdoor space perfectly.
Why Create Your Own Outdoor Table Top?
Building your own outdoor table top offers many benefits over buying a ready-made one. I love the freedom it gives me to create something truly unique. You can customize the dimensions, the shape, and even the texture to match your existing outdoor decor. This level of personalization is hard to find in stores.
A custom table top also ensures it fits your specific needs. Maybe you have an odd-sized patio or a unique table base that needs a new surface. You can design the table top to fit perfectly. This avoids the frustration of trying to find a standard size that might not quite work. Plus, the satisfaction of using something you built yourself is immense. It adds a personal touch to your outdoor living area.
Cost savings are another big reason many people choose DIY. High-quality outdoor tables can be expensive. By sourcing materials yourself and putting in the labor, you can often build a superior table top for less money. This project lets you control the budget. You can choose affordable yet durable materials. It is a smart way to upgrade your outdoor space without breaking the bank. Creating your own table top is a practical and fulfilling project for any homeowner. If you are starting from scratch with a base, you might even consider options like learning how to make a table with folding legs for versatility. Or if you’re looking for a rustic vibe, you could explore how to make a picnic table out of pallets for a cost-effective, charming option.
Selecting the Right Materials for Outdoor Use
Choosing the correct material is crucial for an outdoor table top. It determines the table’s durability and its ability to withstand weather. Different materials offer various aesthetics and levels of maintenance. Consider your local climate and how much sun or rain your table will experience. I always recommend picking materials known for their outdoor resilience.
Wood Options for Outdoor Table Tops
Wood is a popular choice for its natural beauty and warmth. However, not all woods are suitable for outdoor exposure. Some woods naturally resist rot, decay, and insect damage.
- Cedar: This wood is lightweight and naturally resistant to moisture and insects. It has a beautiful reddish hue that ages to a soft gray. Cedar is easy to work with and widely available. It does require regular sealing to maintain its color and extend its life.
- Teak: Known for its exceptional durability and water resistance. Teak contains natural oils that make it highly resistant to rot and pests. It is expensive but requires very little maintenance. Teak weathers to a beautiful silvery-gray patina if left untreated.
- Redwood: Similar to cedar, redwood is naturally resistant to decay and insects. It is a good choice for outdoor projects. Redwood also has a rich color that can be preserved with proper sealing. It is often a more sustainable choice than some other hardwoods.
- Pressure-Treated Wood: This wood is chemically treated to resist rot, fungi, and insects. It is a very economical option and widely available. However, pressure-treated wood can be prone to warping or cracking if not properly dried and sealed. Make sure to use exterior-grade fasteners with it.
Alternative Materials for Durability
Beyond wood, other materials offer distinct advantages for outdoor table tops. Each presents a different look and level of required care.
- Concrete: A concrete table top offers a modern, industrial look. It is extremely durable and heavy, making it resistant to strong winds. Concrete can be poured into various shapes and colored. It requires sealing to prevent staining and moisture absorption. Concrete can develop hairline cracks over time, which often adds to its character. You can find specific tips on how to clean concrete table surfaces.
- Tile: You can create a tile table top using ceramic, porcelain, or natural stone tiles. This option allows for immense design flexibility with colors and patterns. Tile tops are durable and easy to clean. They need a waterproof substrate and proper grouting to prevent water damage. Grout lines may need occasional cleaning or re-sealing. For maintenance, check out guides on how to clean outdoor tiles.
- Metal (Sheet or Cladding): While less common for the entire top, metal can be incorporated. Aluminum or stainless steel can offer a sleek, modern look. They are durable and low maintenance. However, metal can get very hot in direct sunlight. It may require specialized fabrication.
- Composites and Recycled Plastics: These materials are engineered for outdoor use. They offer excellent resistance to weathering, rot, and insects. They often mimic the look of wood without the maintenance. Composite materials can be more expensive upfront but offer long-term durability with minimal care.
Regardless of your chosen material, weatherproofing is essential. Learning how to waterproof a table for outdoor use is key to ensuring your table top lasts for many years. Regular cleaning, like knowing how to clean outdoor wood furniture, also extends the life of your chosen material.
Essential Tools and Safety Gear for Building
Having the right tools makes any DIY project smoother and safer. Before you start to make an outdoor table top, gather all the necessary equipment. This ensures you can work efficiently and accurately. Always prioritize safety, no matter how simple the task seems. Protecting yourself is just as important as building a great table.
Hand Tools You Will Need
These basic tools are fundamental for most table top projects. They help with measuring, marking, and initial cuts. I keep these within easy reach in my workshop.
- Tape Measure: Essential for accurate measurements of wood or other materials.
- Pencil: For marking cut lines and drilling points.
- Speed Square or Combination Square: For marking straight lines and checking squareness.
- Clamps: To hold pieces securely in place while cutting, gluing, or drilling.
- Orbital Sander: For smoothing surfaces and preparing them for finishing.
- Wood Glue (Exterior Grade): For strong joints if you are making a wooden top.
- Utility Knife: Useful for scoring lines or trimming small pieces.
Power Tools for Efficiency
Power tools speed up the process and provide more precise results. They are especially helpful for larger or more complex table tops. If you are new to power tools, practice on scrap material first.
- Circular Saw or Miter Saw: For making straight, precise cuts on your material. A miter saw is great for repeatable cuts. A circular saw offers more versatility for larger sheets.
- Jig Saw: Useful for cutting curves or intricate shapes.
- Drill/Driver: For drilling pilot holes and driving screws. A cordless drill offers greater flexibility.
- Router (Optional but Recommended): For creating decorative edges or flush trimming. This tool can add a professional finish to your table top.
- Random Orbital Sander: Provides a smoother finish than other sanders. It makes preparing the surface much easier.
Crucial Safety Gear
Safety should never be overlooked when working with tools. I always put on my safety gear before starting any cutting or drilling. Accidents can happen quickly, so prepare properly.
- Safety Glasses: Protect your eyes from flying debris and sawdust. This is non-negotiable.
- Hearing Protection: Earplugs or earmuffs protect your ears from loud power tools. Prolonged noise exposure can damage hearing.
- Dust Mask or Respirator: Prevents you from inhaling sawdust or fumes from finishes. Especially important when sanding or cutting treated wood.
- Work Gloves: Protect your hands from splinters, cuts, and chemicals.
- Sturdy Footwear: Protect your feet from dropped tools or materials. Closed-toe shoes are a must.
Setting up a clean, well-lit workspace is also important for safety. Make sure cords are out of the way and that you have enough room to maneuver. Clear your workspace before and after each session.
Designing Your Outdoor Table Top: Size, Shape, and Aesthetics
The design phase is where your vision for the outdoor table top comes to life. Careful planning ensures the finished product meets your needs and looks great. Consider how the table will be used and where it will sit. This helps determine the ideal size, shape, and overall look. I spend a good amount of time sketching out ideas.
Determining the Right Size and Shape
Before cutting any material, measure your space. Consider the available area on your patio or deck. Also, think about how many people will typically use the table.
- Measure Your Space: Use a tape measure to determine the maximum length and width the table top can occupy. Remember to leave enough room for chairs to pull out comfortably. A good rule of thumb is at least 30-36 inches of clearance around the table.
- Consider Seating: For comfortable dining, allow about 24-30 inches of table edge per person. This helps you choose the appropriate length and width.
- Common Shapes:
- Rectangular: Best for larger gatherings and long, narrow spaces. They offer ample surface area.
- Square: Ideal for smaller groups or compact spaces. They create an intimate setting.
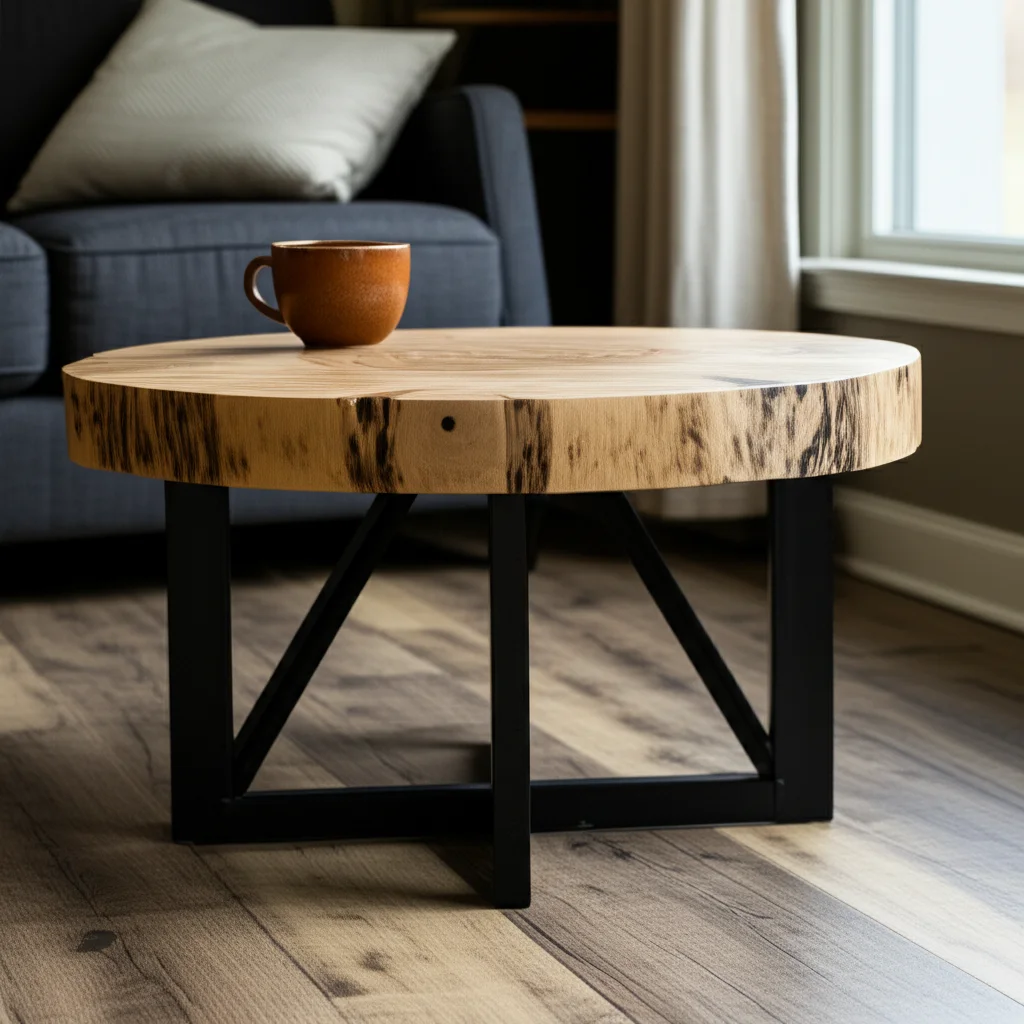
- Round or Oval: Promote conversation as everyone can see each other easily. They work well in smaller or irregular spaces. Round tables can feel less imposing.
- Thickness: The thickness of your table top affects its strength and appearance. For most outdoor tables, 1.5 to 2 inches of solid wood is suitable. Thinner materials may need additional support. If you are using a unique base, such as a large piece of wood, consider how to turn a tree stump into an outdoor table for a natural, robust look.
Aesthetic Considerations and Edge Profiles
The look of your table top contributes significantly to your outdoor area’s ambiance. Think about how the new table will integrate with your existing outdoor furniture and landscaping.
- Material Appearance: The choice of material impacts the aesthetic. Wood offers natural warmth. Concrete provides a minimalist, industrial feel. Tile allows for vibrant patterns. Consider the color and texture of the material.
- Edge Profiles: The edge of your table top can define its style.
- Square Edge: A simple, modern look. It is easy to achieve.
- Rounded Edge (Chamfer or Roundover): Softer look, safer for children. A router is usually needed for this.
- Beveled Edge: Creates a sleek, contemporary feel. It adds visual interest.
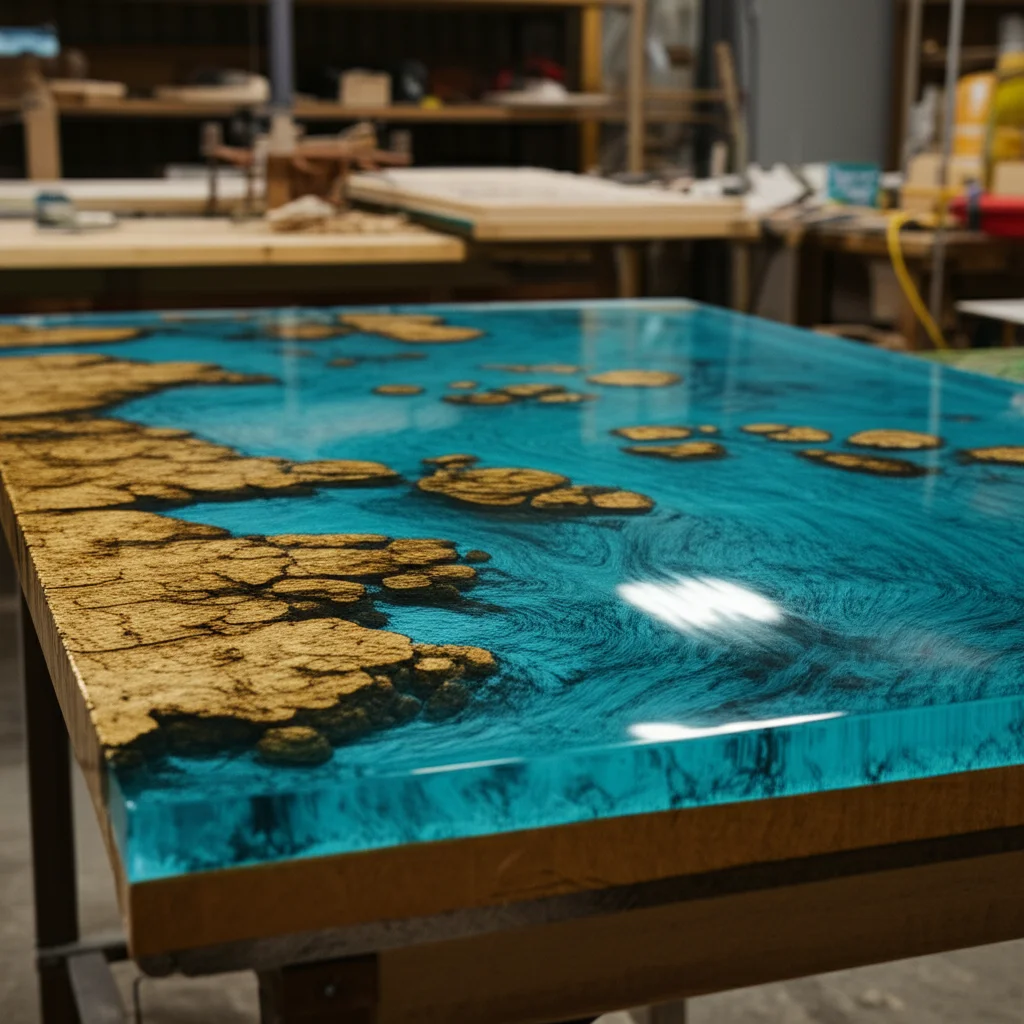
- Live Edge: For wood, leaving the natural edge of the slab creates a rustic, organic look. This makes a unique statement. If you’re interested in advanced techniques for these, learning how to make a live edge table with epoxy can create stunning results.
- Overall Style: Do you want rustic, modern, traditional, or eclectic? Your design choices should reflect this. For instance, a slatted wood top feels more casual than a solid, polished concrete slab.
- Integration with Base: If you are building a new table top for an existing base, ensure the design complements it. The top should be proportionate to the base’s size and style. A too-large or too-small top will look awkward.
Careful planning in this design stage will save you time and effort later on. It ensures you build an outdoor table top that you will love for years.
Step-by-Step Construction Guide for a Wooden Table Top
Building a wooden outdoor table top is a popular choice for DIYers. This section will guide you through the process for a sturdy and beautiful wooden surface. We will focus on joining multiple boards to create a wide, stable top. This method provides durability and allows for creative wood grain patterns.
Preparing the Wood
Proper wood preparation is crucial for a lasting table top. It affects both appearance and durability. Take your time with these initial steps.
- Select and Acclimate Your Boards: Choose exterior-grade wood like cedar, redwood, or teak. Ensure the boards are straight and free from major defects. Allow the wood to acclimate to your environment for a few days before cutting. This helps prevent warping later on.
- Cut Boards to Length: Measure and cut your chosen boards to the desired length of your table top. Use a circular saw or miter saw for precise, square cuts. Always double-check your measurements before cutting. I find it helpful to mark all cuts before making any.
- Joint and Plane (Optional but Recommended): For a professional finish, joint one edge of each board straight. Then, plane the boards to a consistent thickness. This step creates perfectly flat surfaces for strong, tight joints. If you do not have these tools, you can buy pre-milled lumber.
Assembling the Panels
Once your boards are ready, the next step is to join them together to form the table top surface. Strong joints are essential for an outdoor table.
- Choose Your Joinery Method:
- Pocket Holes: This is a popular and relatively easy method. Use a pocket hole jig to drill angled holes into the edges of your boards. Apply exterior wood glue along the mating edges. Then, screw the boards together using exterior-grade pocket hole screws.
- Biscuits or Dominos: These methods use small wooden connectors inserted into slots cut into the board edges. They help align the boards and add strength. Use with exterior wood glue.
- Tongue and Groove: If your boards have this profile, it creates a very strong and self-aligning joint. Glue along the tongue and groove before joining.
- Apply Glue and Clamp: Apply a generous but even layer of exterior-grade wood glue to the mating edges of your boards. Clamp the boards together tightly using bar clamps or pipe clamps. Ensure the surface remains flat as you tighten the clamps. Use cauls (straight pieces of wood clamped across the top and bottom) to keep the table top flat during drying.
- Allow to Dry: Let the glue cure completely according to the manufacturer’s instructions. This usually takes at least 24 hours. Do not rush this step.
Finishing Touches
After the glue dries, the final shaping and sanding prepare the table top for protection. These steps make the table top smooth and beautiful.
- Sand the Surface: Begin with a coarser grit sandpaper (e.g., 80-100 grit) to flatten any uneven spots. Progress to finer grits (e.g., 150-220 grit) for a smooth finish. Use an orbital sander for best results. Sanding with the grain produces the best finish. Dust thoroughly between grits.
- Route Edges (Optional): If you want a decorative edge profile (like a roundover or chamfer), use a router at this stage. Make sure the router bit is sharp. Practice on a scrap piece first.
- Attach to Base: Once the top is complete, attach it to your existing or newly built table base. Use appropriate fasteners that allow for wood movement. Z-clips, tabletop fasteners, or elongated screw holes are good options. This prevents the top from warping or cracking due to seasonal expansion and contraction. Remember, a clean surface is easier to work with, so knowing how to clean a wood table beforehand is helpful. For even more detailed cleaning, see how to clean a wood dining table.
With these steps, you will have a sturdy, attractive wooden outdoor table top ready for weatherproofing and enjoyment.
Alternative Table Top Construction: Concrete and Tile Overlays
While wood is popular, concrete and tile offer fantastic alternatives for an outdoor table top. These materials provide different aesthetics and durability profiles. Concrete gives a modern, minimalist look. Tile allows for incredible design flexibility. Both require specific techniques for successful outdoor application.
Building a Concrete Table Top
A concrete table top is heavy, strong, and can withstand harsh weather. It is a rewarding project that results in a unique, custom piece.
- Design and Form Building: First, decide on your table top dimensions. You will need to build a sturdy melamine or plywood form. This form acts as a mold for your concrete. Ensure the form is perfectly square and level. Line the inside with a release agent or plastic sheeting to prevent the concrete from sticking. For added strength, consider incorporating rebar or wire mesh reinforcement within the form.
- Mixing and Pouring Concrete: Use a high-strength concrete mix designed for countertops or outdoor use. Add water slowly until you reach a consistency similar to thick oatmeal. Mix thoroughly to avoid air bubbles. Carefully pour the concrete into your form, ensuring it fills all corners. Vibrate the form (e.g., by tapping with a rubber mallet) to release trapped air bubbles. This creates a smoother finish.
- Curing and Finishing: Once poured, smooth the top surface with a trowel. Cover the concrete with plastic sheeting and allow it to cure for several days, or as per the product instructions. Curing slowly helps the concrete gain maximum strength and reduces cracking. After curing, remove the form. Sand any rough edges. You can then stain the concrete for color or polish it for a smooth finish. Always apply a high-quality concrete sealer to protect it from stains and moisture. This step is critical for a long-lasting outdoor concrete table top. Knowing how to clean concrete table ensures its longevity.
Creating a Tile Overlay Table Top
Tiling an existing or newly built substrate creates a durable and highly customizable outdoor table top. This method is great for adding color and pattern.
- Prepare the Substrate: Your table base or existing table top needs a solid, stable, and flat substrate. Exterior-grade plywood or cement board are good choices. Ensure the substrate is clean, dry, and free of any loose debris. For wood substrates, apply a waterproof membrane or cement backer board. This prevents moisture from reaching the wood and causing rot.
- Lay the Tiles: Plan your tile layout before applying adhesive. Start from the center of the table top for a balanced look. Use thin-set mortar specifically rated for outdoor use. Apply the mortar with a notched trowel. Press each tile firmly into the mortar, using tile spacers to maintain consistent grout lines. Cut tiles as needed using a tile cutter or wet saw. Let the mortar cure completely, typically 24-48 hours.
- Grouting and Sealing: After the mortar has cured, mix exterior-grade grout according to the manufacturer’s instructions. Apply the grout to the tile lines using a rubber float, pushing it into all the gaps. Wipe away excess grout with a damp sponge. Let the grout haze dry, then buff the tiles clean. Once the grout is fully cured, apply a grout sealer. This protects the grout from stains and moisture. You can find detailed guides on how to clean outdoor tiles to keep your tiled surface looking new. Both concrete and tile options benefit greatly from knowing how to waterproof a table for outdoor use to ensure their longevity outdoors.
These alternative materials offer robust and beautiful options for your custom outdoor table top, expanding your design possibilities.
- DIY projects
- Outdoor furniture
- Woodworking

Todd Martin
Senior Writer
With over 15 years of experience in home renovation and design, I started HEG to share what I’ve learned with homeowners who want to create spaces that are both beautiful and functional. I’ve always believed in a hands-on approach, and over the years, I’ve picked up practical solutions that actually work. Through HEG, I aim to make home improvement more approachable, sharing real tips that help you create a home you truly love.