· Todd Martin · Baking Hacks · 18 min read
How To Make Cake Pan With Aluminium Foil
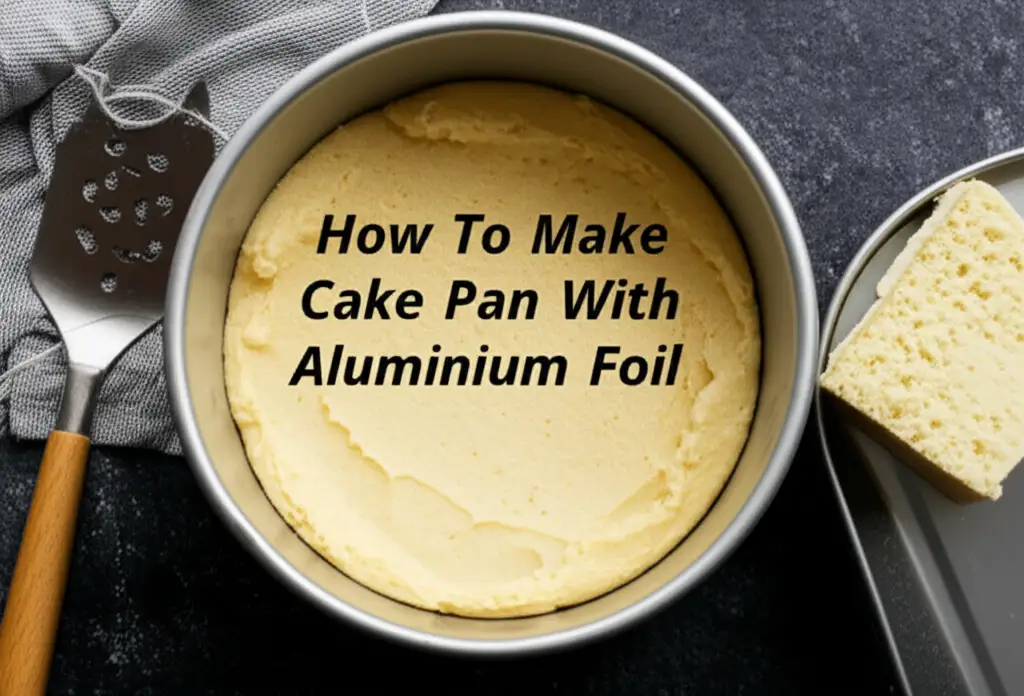
Mastering the Art of DIY: How to Make a Cake Pan with Aluminium Foil
Have you ever started baking a cake, only to discover you lack the correct size or shape of pan? It is a common problem for many home bakers. Do not let a missing pan stop your baking plans. You can easily make a functional cake pan with aluminium foil. This clever kitchen hack saves time and money.
This guide helps you understand how to make a cake pan with aluminium foil. We will cover essential materials and a detailed step-by-step process. You will also learn about crucial baking tips and safety considerations. Get ready to bake your favorite treats using this simple DIY solution.
Takeaway
- Layer multiple sheets of heavy-duty aluminum foil for strength.
- Use an existing pan or a sturdy object as a mold.
- Fold and crimp edges tightly for a stable structure.
- Always grease and flour your homemade foil pan before adding batter.
- Place the foil pan on a flat baking sheet for stable support in the oven.
How do you make a cake pan using aluminum foil?
You can easily make a functional cake pan using multiple layers of heavy-duty aluminum foil. Form the foil around a stable base like an existing pan or a sturdy box. Reinforce the edges for stability, ensuring it holds its shape during baking. Proper greasing and support are key for success.
Why Create a Cake Pan from Aluminium Foil?
Sometimes, you need a specific cake pan, but you do not have it. Perhaps your recipe calls for a unique size, or your regular pans are all in use. This is where learning how to make a cake pan with aluminium foil becomes a lifesafer. It offers a practical solution to common baking dilemmas.
Creating your own pan means you can bake without delay. It saves you a trip to the store for a specialized pan. This method is also very cost-effective. You likely already have aluminum foil in your kitchen. This DIY approach helps reduce kitchen waste too. You use simple materials to achieve great baking results.
This method gives you flexibility. You can shape the foil to fit almost any cake size or design. Need a smaller pan for a test batch? Want a pan for a specific cake shape? Foil makes it possible. It truly unlocks more creative freedom in your baking projects.
Emergency Baking Solution
An unexpected craving for cake can strike at any moment. You might realize too late that your usual cake pan is dirty or missing. Instead of delaying your baking, grab some aluminum foil. It acts as an excellent stand-in for traditional bakeware. This trick ensures your baking plans stay on track.
Cost-Effective Alternative
Buying many different cake pans can become expensive. Specialty pans, like those for specific shapes or sizes, often come with a high price tag. Using aluminum foil helps avoid these extra costs. It is a budget-friendly way to expand your baking options. You save money while still enjoying your favorite recipes.
Custom Sizes and Shapes
Standard cake pans come in fixed sizes. However, some recipes work better with slightly different dimensions. Aluminum foil allows you to create a pan that perfectly matches your needs. You can make a pan slightly larger or smaller. You can also form unique shapes, like hearts or stars, if you have a suitable mold. This offers unmatched versatility for your baking ideas.
Essential Materials for Your DIY Foil Cake Pan
Making a sturdy and reliable cake pan from aluminium foil starts with the right materials. You do not need many items, but the quality of each matters. Selecting heavy-duty foil is the most important step. Standard foil may tear or collapse under the weight of batter. This can lead to messy spills in your oven.
You will also need a stable object to use as a mold. An existing cake pan works best if you want a similar size. If you need a unique size, a sturdy cardboard box or even a block of wood can work. This mold ensures your foil pan holds its shape well. Gather these items before you start.
Heavy-Duty Aluminium Foil
Heavy-duty aluminium foil is crucial for this project. It is thicker and more durable than regular foil. This added strength prevents tears and provides better support for your cake batter. Regular foil is too thin and will likely fail during baking. I always recommend using the heavy-duty type for any baking application where strength matters. You want to make sure your pan can hold the batter without sagging.
Stable Mold or Base
A stable mold provides the structure for your foil pan. An existing metal or glass cake pan is ideal if you want a duplicate size. For custom sizes, a sturdy cardboard box or a thick book can work. Ensure your mold is clean and dry before use. The mold helps create crisp edges and a flat bottom. It gives your homemade pan the shape it needs to function correctly.
Scissors and Ruler (Optional)
Scissors help trim excess foil, giving your pan a neater finish. A ruler ensures precise measurements if you are aiming for a specific pan size. While not strictly necessary, these tools can improve the quality and appearance of your homemade pan. I find that a ruler is very helpful for getting straight edges. These tools help make the process smoother.
Non-Stick Spray or Grease
Even with foil, your cake can stick if you do not prepare the surface. Non-stick cooking spray or shortening works well. You can also use butter or oil. Ensure you coat every part of the pan that will touch the batter. This prevents your cake from sticking after it bakes. For more details on this, you might find information on how to make cake not stick to aluminum pan useful.
Step-by-Step Guide to Crafting a Basic Square or Rectangular Foil Pan
Creating a square or rectangular cake pan from aluminium foil is quite simple. This method uses layers of foil to build strength. You will use an existing object to help form the shape. This ensures your pan is sturdy enough for baking. Take your time with each fold to get the best results.
Prepare Your Work Surface and Materials
Start with a clean, flat work surface. Lay out all your materials: heavy-duty aluminum foil, your chosen mold (like an existing pan or cardboard box), and scissors. Make sure you have enough space to work comfortably. Having everything ready simplifies the process. This preparation step makes the following steps smoother.
Lay Out Multiple Foil Layers
Tear off several sheets of heavy-duty aluminum foil. For a standard 8x8 inch pan, I usually use three to four layers. Lay each sheet flat on your work surface. Stack them neatly on top of each other. Each layer adds to the pan’s strength. This layering is vital for preventing collapse during baking. Think of it as building a strong foundation.
Place Mold on Foil and Fold Sides
Center your mold (e.g., an existing cake pan) on top of the stacked foil layers. Ensure there is enough foil on all sides to extend up and over the mold’s height. Carefully bring the long sides of the foil up against the mold. Press the foil firmly around the sides and corners of your mold. This forms the basic wall structure.
Create and Secure the Corners
This is a critical step for pan integrity. At each corner, gather the excess foil. Fold it neatly, similar to wrapping a gift. Press the folds tightly against the mold’s corners. You want to create a sharp, defined corner. Crimp the top edges of the foil around the entire perimeter of the mold. This creates a rim and locks the layers together. This also adds crucial rigidity to the pan.
Remove Mold and Reinforce
Once the foil pan is shaped, carefully remove the mold. Your foil pan should now stand on its own. Gently press down on the bottom of the pan to flatten it further. Check all sides and corners for stability. If any part feels weak, you can add an extra strip of foil. Wrap this strip around the outside of the pan for added support. This final check ensures your pan will hold its shape.
Shaping Round or Specialty Cake Pans with Foil
Making round or specialty-shaped cake pans with aluminium foil requires a bit more care. The principle of layering foil remains the same. However, shaping curves and intricate designs needs a softer touch. You will still use a mold, but you will press the foil more gently. This helps prevent tears as you form the round edges.
Using a Round Bowl or Pan as a Mold
Find a sturdy round bowl or an existing round cake pan to use as your mold. Place multiple layers of heavy-duty aluminum foil over the inverted mold. Carefully press the foil down around the curves. Work slowly to smooth out any wrinkles. This gentle pressure helps form the foil to the round shape. You want a smooth, curved interior for your cake.
Forming the Side Walls and Rim
Once the bottom is shaped, lift the foil and gently push it inwards to form the side walls. For a round pan, you will gather the foil at the top edge. Fold it over to create a strong, upright rim. Crimp this rim tightly to lock the layers together and provide stability. This rim prevents the pan from collapsing outwards during baking. Ensure the walls are straight and uniform.
Addressing Specialty Shapes
For specialty shapes like hearts or stars, the process is similar. You need a solid mold of the desired shape. Lay your foil layers over the mold. Carefully press and fold the foil along the contours of the shape. Pay extra attention to sharp angles and intricate curves. You may need to snip the foil at tight corners to get it to lie flat, then fold the edges over. Always reinforce the entire rim by crimping it firmly. This detailed work makes the specialty pan possible.
Adding Stability for Odd Shapes
Odd shapes can sometimes lack structural integrity. Once you remove the foil from the mold, you might see weak points. Consider wrapping an extra strip of foil around the outside of the pan. This acts like a belt, adding support to the walls. You can also place the finished foil pan inside a slightly larger, sturdier pan for extra security during baking. This prevents any mishaps.
Critical Steps for Ensuring Your Foil Pan Bakes Evenly
Using a homemade aluminium foil cake pan means you must pay extra attention to baking evenly. Foil conducts heat differently than traditional metal pans. Proper preparation and support are key to avoiding raw centers or burnt edges. My experience shows these steps make a huge difference.
Proper Greasing and Flour Dusting
Even a foil pan needs to be greased. The smooth surface of foil can still cause cake to stick. Use butter, shortening, or cooking spray to coat the inside of your pan thoroughly. After greasing, dust the pan with flour. Tap out any excess flour. This creates a non-stick barrier. Some people also use parchment paper for an extra layer of protection. This can be helpful if you want to ensure your cake comes out easily. Learning how to line a cake pan with baking paper can offer additional insights for this step, even with foil.
Using a Baking Sheet for Support
A foil pan lacks the rigid structure of a metal pan. Placing it directly on the oven rack can lead to sagging or uneven baking. Always place your homemade foil pan on a flat, sturdy baking sheet. This provides essential support. It ensures the bottom of your cake bakes flat and evenly. This also makes transferring the pan in and out of the oven much safer. For general tips on using foil in the oven, you might want to review can you put foil in oven air fryer.
Monitoring Baking Time and Temperature
Foil pans can sometimes heat up faster or slower than metal pans. Keep a close eye on your cake as it bakes. You might need to adjust your oven temperature slightly. Or, you might need to bake for a shorter or longer time. Use a toothpick test to check for doneness. The toothpick should come out clean when inserted into the center of the cake. This vigilant monitoring helps prevent over-baking or under-baking.
Understanding Heat Distribution
Aluminum foil is a good conductor of heat. However, its thinness can sometimes lead to localized hot spots. If you notice edges browning too quickly, you can create a small “foil collar.” This involves wrapping a strip of foil around the outside edge of the pan. This collar reflects some heat, protecting the cake edges. This simple trick helps promote more uniform baking across the entire cake surface.
Troubleshooting Common Issues with Aluminium Foil Cake Pans
Baking with a homemade aluminium foil cake pan can be a rewarding experience. However, you might encounter a few common problems. Knowing how to fix these issues helps ensure your baking success. I have faced these challenges myself and learned solutions.
Cake Sticking to the Foil
The most frequent issue with foil pans is the cake sticking. This happens if the pan was not greased and floured enough. To prevent this, generously coat the inside of your foil pan with butter or cooking spray. Then, dust it with flour. For very sticky cakes, you can line the bottom with a small circle of parchment paper. If you have already baked and the cake is stuck, let it cool completely. Sometimes, chilling the cake can make it easier to release. Learning how to make cake not stick to aluminum pan offers great general advice that applies here.
Pan Collapsing or Losing Shape
A foil pan can collapse if it lacks sufficient layers or strong edges. Always use heavy-duty foil. Use at least three to four layers for a sturdy pan. Make sure to crimp the top edges firmly. This creates a strong rim. If you find your pan is still wobbly, place it inside a slightly larger, regular baking pan for support while it bakes. This external support prevents any sagging or deformation.
Uneven Baking
Uneven baking, where some parts are done and others are not, can occur. This often happens if the foil pan is not perfectly flat on the bottom. Always place your foil pan on a flat baking sheet when baking. This helps distribute heat evenly. If edges are browning too fast, you can cover them loosely with a small piece of foil during the last part of baking. This prevents burning while the center finishes cooking.
Leakage from the Bottom
Some batters are thin, and if the foil pan has any tiny gaps, it might leak. This is rare if you have made your pan correctly. However, a trick is to form the foil pan without cutting the bottom layer. Instead, fold the edges up. This creates a seamless bottom. Another solution is to place a double layer of foil under the pan on the baking sheet. This catches any drips. This ensures your oven stays clean and your cake batter stays in the pan.
Safety Precautions When Using Foil in the Oven
Using aluminium foil in your oven is generally safe, but some precautions are important. Knowing these rules ensures you bake safely and effectively. My main concern is always proper usage to avoid any kitchen accidents.
Avoid Overheating Foil
Aluminium foil is safe at typical baking temperatures. It has a high melting point. However, direct exposure to heating elements can cause it to darken or even melt slightly. Avoid placing foil directly on the bottom of your oven. This can block heat and damage your oven. Always place foil pans on a baking rack or a sturdy baking sheet. This ensures air circulation and prevents direct contact with the heating element. It is good practice to ensure air flow.
Do Not Use with Acidic or Salty Foods for Long Periods
While useful, foil can react with highly acidic or salty foods. Think of things like tomatoes, lemons, or very salty brines. This reaction can cause small holes in the foil. It might also leave a metallic taste in your food. For short baking times, this is usually not an issue. However, for extended baking or storage, consider using parchment paper as a barrier inside the foil pan. This protects your food and the pan. This also means you should be cautious when using foil for acidic recipes.
Ensure Proper Air Circulation
When you make a foil pan, remember that air needs to circulate around it. Do not crowd your oven with too many foil pans. Leave space between them. Good air circulation helps your cake bake evenly. Poor circulation can lead to burnt spots or uncooked areas. Make sure hot air can move freely. This is important for consistent baking results.
Handle Hot Foil with Care
Aluminium foil gets very hot in the oven. Always use oven mitts or heat-resistant gloves when handling a hot foil pan. The pan might also be flexible, so support it from the bottom with a baking sheet. Never touch hot foil with bare hands. This prevents burns and spills. Safety in the kitchen is always a top priority.
Elevate Your Foil Baking: Tips for Best Results
Making a cake pan with aluminium foil is a useful skill. To ensure your cakes turn out perfectly, a few extra tips help. These little adjustments make a big difference in the final product. I have found these techniques improve the baking experience significantly.
Use a Double Layer for Base Support
Even with heavy-duty foil, a thin base can sag. I always recommend using a double layer of foil for the bottom of your pan. Cut two pieces of foil that are larger than your pan’s intended base. Stack them before you begin shaping. This provides extra rigidity where it is most needed. It helps the cake bake with a flat bottom. This also reduces the chance of any leaks.
Smooth Out All Creases
When forming your foil pan, try to smooth out as many creases and wrinkles as possible. Deep creases can create weak points in the foil. They can also affect how your cake releases from the pan. Use your hands to gently press and smooth the foil as you shape it around the mold. A smoother surface means a better-looking cake. This also helps with even heat distribution.
Overlap and Crimp Edges Securely
The edges of your foil pan are its structural backbone. When you fold the foil to create the rim, overlap the layers generously. Then, crimp them tightly. You can even fold the crimped edge over again for extra strength. This prevents the pan walls from bowing outwards during baking. A strong rim keeps your cake in its intended shape. It is a vital step for pan stability.
Consider Cake Weight and Density
A foil pan works best for lighter cakes, like sponge cakes or chiffon cakes. Very dense or heavy cakes, such as fruitcakes, might put too much strain on the foil. If you must bake a heavy cake, use even more layers of foil. Or, consider placing the foil pan inside a slightly larger, sturdier pan for extra support. This prevents the pan from deforming under the weight. Always match the pan’s strength to the cake’s density.
FAQ Section
Can I reuse an aluminium foil cake pan?
Reusing a homemade aluminium foil cake pan is generally not recommended. After one use, the foil often becomes crinkled, weakened, or torn. This reduces its structural integrity and hygienic properties. For best baking results and food safety, it is always better to make a new pan for each use. Fresh foil ensures your cake bakes properly.
How do I prevent my cake from sticking to the foil pan?
To prevent sticking, generously grease the inside of your foil pan with butter, shortening, or non-stick spray. Then, dust it lightly with flour, tapping out any excess. For extra protection, you can line the bottom and sides with parchment paper before adding the batter. This creates a reliable non-stick barrier.
Can I make different shapes of cake pans with foil?
Yes, you can make various shapes with aluminium foil, like round, heart, or even star-shaped pans. You need a sturdy object of the desired shape to use as a mold. Carefully press multiple layers of heavy-duty foil around the mold, forming the exact contours. Ensure all edges are securely folded and crimped for stability.
Is it safe to bake with aluminium foil?
Baking with aluminium foil is generally safe at typical oven temperatures. Foil has a high melting point. Avoid placing foil directly on the oven bottom, as it can block heat or damage the appliance. Always use heavy-duty foil and ensure good air circulation around the pan.
What type of foil is best for making a cake pan?
Heavy-duty aluminium foil is the best type for making a cake pan. It is thicker and much more durable than regular foil. This extra strength is crucial for supporting the cake batter’s weight. It also helps the pan maintain its shape during baking, preventing collapses or tears.
Conclusion
Learning how to make a cake pan with aluminium foil is a valuable skill for any home baker. It provides a simple, effective solution when you lack a traditional pan. With just heavy-duty foil and a stable mold, you can create a sturdy pan in any shape or size. Remember to layer the foil properly and crimp the edges for maximum stability.
Always grease and flour your homemade pan thoroughly to prevent sticking. Place it on a baking sheet for essential support in the oven. By following these steps and tips, you ensure a successful bake every time. Do not let a missing pan stop your baking creativity. Get started on your next delicious cake today! Try this method and discover the convenience it offers.
- aluminium foil cake pan
- DIY baking
- emergency bakeware
- baking tips
- foil pan
- homemade cake pan

Todd Martin
Senior Writer
With over 15 years of experience in home renovation and design, I started HEG to share what I’ve learned with homeowners who want to create spaces that are both beautiful and functional. I’ve always believed in a hands-on approach, and over the years, I’ve picked up practical solutions that actually work. Through HEG, I aim to make home improvement more approachable, sharing real tips that help you create a home you truly love.