· Todd Martin · DIY Crafts · 23 min read
How To Make Dish Soap And Salt Slime
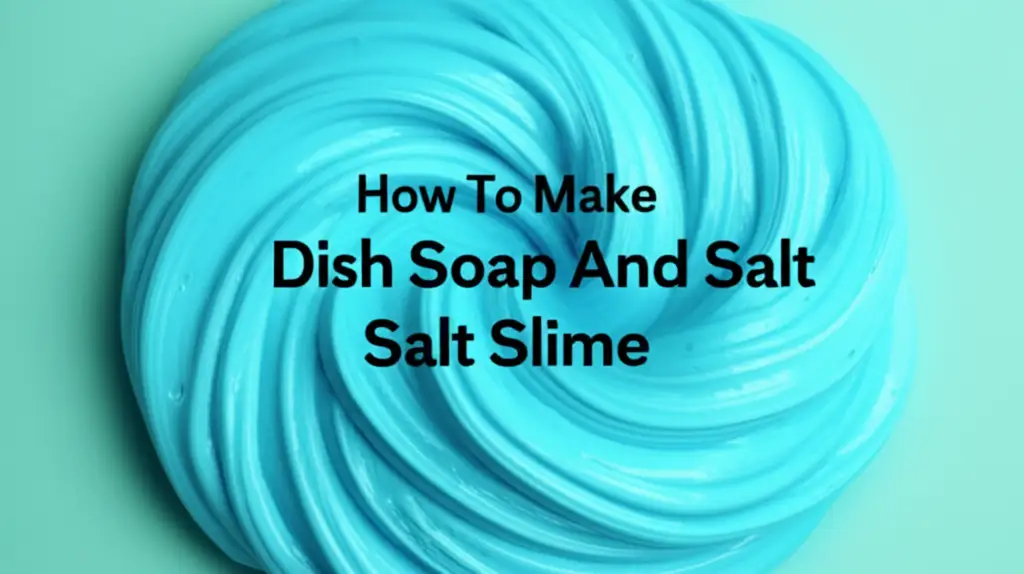
Crafting Dish Soap and Salt Slime at Home
Slime is a sensation. It offers a unique sensory experience for kids and adults alike. While many slime recipes involve glue and borax, you can make a fantastic version using everyday household items. Today, we explore how to make dish soap and salt slime, a simple, no-glue alternative. This homemade slime is perfect for a quick, fun activity without a trip to the craft store. We will cover the basic recipe, common challenges, and creative variations. Get ready to mix up some gooey fun with just two main ingredients.
Takeaway
Making dish soap and salt slime is easy. It uses common household items. You can create a fun, sensory toy quickly.
How to Make Dish Soap and Salt Slime
You make dish soap and salt slime by mixing liquid dish soap with salt. The salt reacts with the soap to thicken it, forming a slime-like consistency. Chilling the mixture can further improve its texture. This simple process creates a fun, tactile material without needing glue or borax.
Understanding Dish Soap and Salt Slime
Many people love slime for its unique texture. Traditional slime recipes often call for glue and an activator like borax. However, these ingredients are not always available. Sometimes, you want a quick, easy activity with items you already own. This is where dish soap and salt slime becomes a perfect choice. It offers a simple path to sensory play.
This type of slime is different from glue-based slimes. It has a jigglier, more gel-like texture. It is not as stretchy as traditional slime. Yet, it still provides hours of fun. The main appeal lies in its simplicity. You can whip it up in minutes. This makes it ideal for spontaneous play sessions. We focus on natural ingredients, making it a safer option for younger children. Always supervise children during play.
The science behind this slime is interesting. Dish soap is a surfactant. This means its molecules have both water-loving and water-hating parts. Salt, specifically sodium chloride, disrupts the structure of the soap micelles. This causes the soap to thicken. It creates a gooey substance. The amount of salt added is crucial. Too little, and the mixture remains liquid. Too much, and it becomes too stiff or watery again. Precision helps achieve the best slime.
Making this slime is a great way to introduce basic science concepts. Children observe a liquid transforming into a solid-like material. They see how different substances interact. It teaches patience and experimentation. This hands-on learning is valuable. It helps build a basic understanding of chemistry. Plus, it is incredibly satisfying to create something new.
Essential Ingredients and Tools for Dish Soap and Salt Slime
Gathering your materials is the first step. You only need a few basic items. These are likely already in your kitchen or laundry room. This makes the dish soap and salt slime recipe very accessible. You do not need to buy special craft supplies. This simplicity is a major benefit. It means you can start making slime right away.
The core ingredient is liquid dish soap. Most brands work well. Dawn, Palmolive, or Fairy are popular choices. Different brands may yield slightly different textures. Experiment to find your favorite. A thicker dish soap generally produces better results. Thicker soaps contain more polymers that react with salt. This helps create a more cohesive slime.
The second key ingredient is salt. Regular table salt works best. Fine-grained salt dissolves easily. This allows for a quicker reaction with the dish soap. Avoid coarse salts like kosher salt or sea salt for the initial mix. These might not dissolve fully. Undissolved salt can make the slime gritty. You want a smooth, consistent texture.
You also need a few simple tools. A mixing bowl is essential. Choose one that is easy to clean. A spoon or spatula is needed for stirring. A measuring spoon ensures accuracy with the salt. This helps achieve the right consistency. Lastly, a container with a lid is useful for storage. This keeps your slime fresh for longer.
Optional ingredients can enhance your slime. Food coloring adds vibrant hues. Glitter or small beads can make it sparkle. Essential oils can give it a pleasant scent. These additions are purely for fun. They do not affect the slime’s basic structure. Always add optional ingredients sparingly. Too much can alter the texture.
Make sure your work surface is clean. Cover it with a mat or old newspaper if you worry about mess. While dish soap slime is easier to clean than glue slime, spills can still happen. Preparation helps make the activity smooth and enjoyable. I find covering my table makes clean-up much faster.
- Liquid Dish Soap: Any brand works, thicker soaps are often better.
- Table Salt: Fine-grained salt is ideal for smooth texture.
- Mixing Bowl: A medium-sized, easy-to-clean bowl.
- Spoon/Spatula: For thorough mixing.
- Measuring Spoon: To add salt precisely.
- Storage Container: Airtight container for slime longevity.
Step-by-Step Guide to Making Dish Soap and Salt Slime
Making dish soap and salt slime is straightforward. Follow these steps for the best results. I find that precision with salt is key. Too much or too little can change everything. You will observe the transformation as you mix.
Step 1: Pour the Dish Soap
First, pour a generous amount of liquid dish soap into your mixing bowl. I usually start with about half a cup. The amount you use determines the final slime volume. If you want a small batch, use less soap. If you want more, use a full cup or more. Any brand of dish soap works. However, thicker dish soaps often yield a better, more cohesive slime. Some people find that certain brands produce a gooier texture. Experiment with what you have.
Step 2: Add Food Coloring (Optional)
If you want colorful slime, add a few drops of food coloring now. Stir it into the dish soap until the color is even. This is easier to do before adding salt. The salt will start to thicken the mixture. Once thickened, mixing in color becomes harder. I love adding bright colors like blue or green. They make the slime more visually appealing.
Step 3: Gradually Add Salt
This is the most critical step. Add a small pinch of salt to the dish soap. Start with about half a teaspoon for half a cup of soap. Stir constantly and observe the mixture. The soap will begin to thicken almost immediately. It will become clumpy or gel-like. Add salt slowly, a tiny bit at a time. Stir for at least 30 seconds after each addition. This allows the salt to dissolve and react properly.
If you add too much salt at once, the mixture can become watery again. This is called “over-salting.” It ruins the slime consistency. If this happens, you may need to add a bit more dish soap. Then, try to reactivate it with more salt, very slowly. Patience here pays off. I learned this the hard way many times.
Step 4: Mix Thoroughly
Continue mixing until the desired slime consistency forms. The mixture should pull away from the sides of the bowl. It should be thick and cohesive. It will feel less like liquid soap and more like a soft gel. It won’t be as firm as glue slime. But it should hold together. You may need to stir for several minutes. Do not rush this part.
The slime should be moldable but still a bit sticky. If it is too sticky, add another tiny pinch of salt. Mix again. If it is too watery, add a small amount more soap and then very gradually more salt. Aim for a balance that feels good to the touch.
Step 5: Chill the Slime (Crucial for Best Results)
Once you reach a good consistency, place the slime in an airtight container. Put the container in the refrigerator or freezer. Refrigerate for 30 minutes to an hour. For a firmer texture, freeze for 10-15 minutes. Chilling helps the slime firm up and become less sticky. It improves the overall texture significantly. Do not freeze for too long, or it will become too hard.
After chilling, take out the slime. It should be less sticky and more playable. If it is still too watery, you can try adding a bit more salt. Then chill it again. I always chill my slime. It makes a big difference.
Step 6: Play and Store
Your dish soap and salt slime is now ready for play! Enjoy its unique texture. When done playing, store the slime in its airtight container. Keep it in the refrigerator. This helps it last longer. It can usually last for a few days to a week. If it starts to break down or smell strange, it is time to discard it.
This method gives you a fun, simple, and safe homemade slime. It is perfect for a quick craft session. You can explore how to make various types of slime, including how to make slime out of dish soap no glue. My kids love the jiggly feel of this particular recipe.
Tips for Achieving the Perfect Dish Soap and Salt Slime Consistency
Creating the ideal dish soap and salt slime consistency requires a bit of finesse. It is not as forgiving as traditional glue slime. Slight variations in ingredients or environment can alter the outcome. My experience taught me a few tricks. These tips help you get the best possible texture every time.
The Role of Dish Soap Type
The brand and thickness of your dish soap truly matter. Thicker dish soaps, like Dawn Ultra, tend to produce a more cohesive slime. They have a higher concentration of polymers. These polymers react more effectively with salt. If your slime is too watery, even after adding salt, try a different dish soap brand. Some thinner soaps just do not have the right composition. I have noticed a big difference between generic and premium brands. For example, learning how to make slime with dish soap and no glue often highlights the importance of the soap itself.
Gradual Salt Addition
Adding salt slowly is perhaps the most important tip. Imagine you are seasoning a dish. You add a little, taste, and add more if needed. Do the same with salt for your slime. Add a tiny pinch, stir for a full minute, and observe. If it is still too liquid, add another tiny pinch. Over-salting is the most common mistake. It can make the slime go from perfectly thick to a watery mess in seconds. If this happens, try adding a bit more dish soap to dilute the salt, then slowly re-thicken.
Mixing Thoroughly
Once you add salt, stir vigorously and continuously. The salt needs to dissolve completely and distribute evenly throughout the soap. This ensures a consistent reaction. Inadequate mixing leads to lumpy or inconsistent slime. You might find some parts too thick and others too watery. Aim for a smooth, uniform texture. I often spend a few minutes just stirring.
The Power of Chilling
Refrigeration is not optional for this slime. It is crucial. The cold temperature helps the soap mixture firm up. It reduces stickiness significantly. Without chilling, your slime might remain too gooey and unmanageable. Chill for at least 30 minutes. If it is still too sticky, return it to the fridge for another 15-30 minutes. Some people even prefer a brief stint in the freezer (10-15 minutes) for a quicker firm-up. Just be careful not to freeze it solid.
Addressing Common Issues
- Too Sticky: Add a tiny pinch more salt. Mix well. Chill again.
- Too Watery: You likely added too much salt. Add a small amount of fresh dish soap. Mix well. Then, very slowly, add tiny pinches of salt, stirring after each addition. Chill.
- Too Stiff/Rubbery: This usually means too much salt or too long in the freezer. Try letting it warm up slightly at room temperature. Or add a tiny drop of dish soap and knead gently to reintroduce moisture.
By following these tips, you greatly increase your chances of making perfectly playable dish soap and salt slime. Every batch gets easier. This simple science experiment is quite rewarding.
Creative Variations and Additions for Your Slime
Once you master the basic dish soap and salt slime recipe, you can explore fun variations. These additions enhance the sensory experience. They make your slime unique. Remember, any addition can alter the texture slightly. Add them sparingly and observe the changes.
Color and Sparkle
Adding food coloring is the easiest way to personalize your slime. Choose vibrant colors like neon green, bright blue, or fiery red. Add a few drops at the very beginning, when you first pour the dish soap into the bowl. This ensures the color mixes evenly before the slime thickens. Mixing color into finished slime is harder. It can result in streaky colors.
Glitter adds a touch of magic. Fine glitter works best. Chunky glitter might make the slime feel bumpy. Stir glitter in after the initial thickening but before chilling. This helps distribute it without clumping. My kids love glitter slime. It makes the playing experience even more exciting.
Scented Slime
You can make your slime smell wonderful using essential oils. Add 1-2 drops of a child-safe essential oil to the dish soap at the start. Lavender, peppermint, or orange oils are popular choices. Ensure the oil is food-grade or skin-safe. Some oils can irritate skin. Always check the label. The scent adds another sensory dimension to play. It can be calming or invigorating.
Texture Boosters
While the main recipe is just dish soap and salt, other household items can subtly change the texture.
- Baking Soda: A tiny pinch of baking soda can sometimes help firm up slime that is a little too watery. It acts as a mild abrasive and can slightly alter the soap’s pH. However, too much baking soda can make the slime crumbly. This is similar to how to make slime with dish soap baking soda. Add it cautiously.
- Cornstarch/Cornflour: Adding a small amount of cornstarch can make the slime feel softer and less sticky. Start with a quarter teaspoon. Mix thoroughly. It can also make the slime opaque. This might change the translucent look of pure dish soap slime. This is a common ingredient in other no-glue slime recipes.
- Sugar: Counter-intuitively, a tiny pinch of sugar can sometimes help if the slime is too stiff. It draws moisture. However, it can also make the slime very sticky. Use this only as a last resort and with extreme caution.
These additions allow for endless experimentation. You can create different batches with various colors and scents. This keeps the activity fresh and engaging. Remember, the goal is fun and exploration. If a batch does not turn out perfectly, you learn from it.
Troubleshooting Common Issues with Dish Soap and Salt Slime
Even with a simple recipe, things can go wrong. Dish soap and salt slime can be finicky. I have had many batches go awry. Understanding common problems helps you fix them. Most issues stem from ingredient ratios or improper chilling. Do not get discouraged if your first batch is not perfect.
Problem: Slime is Too Watery
This is the most frequent complaint. It usually means one of two things:
- Not Enough Salt: You simply did not add enough salt to activate the thickening process. Add another small pinch of salt. Stir very well for at least a minute. Observe the consistency. Repeat until it thickens.
- Too Much Salt (Over-Salting): This is trickier. Adding too much salt can cause the soap molecules to “break down” or clump, releasing water. The mixture becomes a watery, separated mess. If this happens, try adding a small amount of fresh dish soap. Mix it in thoroughly. This dilutes the excess salt. Then, slowly add tiny pinches of salt again, stirring until it thickens. Chill the mixture afterward.
Remember, adding salt gradually is key to avoiding over-salting. It is better to add too little and then add more. Reversing over-salting is difficult.
Problem: Slime is Too Sticky
If your slime sticks to everything, it needs further treatment.
- Needs More Salt: Add another small pinch of salt. Stir well. The salt helps bind the soap molecules, reducing stickiness.
- Needs More Chilling: This is often the solution. Place the slime back in the refrigerator for an additional 30 minutes. The cold temperature significantly reduces stickiness. It allows the mixture to firm up. I always chill my slime for a noticeable difference.
- Dish Soap Type: Some dish soaps are naturally stickier. They might contain different polymers. If repeated attempts yield sticky slime, try a different brand of dish soap next time.
Problem: Slime is Too Stiff or Crumbly
This indicates too much salt or over-chilling.
- Too Much Salt: If you added too much salt, the soap matrix becomes overly rigid. It loses its elasticity. Try adding a tiny drop of plain water or dish soap. Knead it gently into the slime. This can help reintroduce some moisture and flexibility.
- Over-Chilled: If you left it in the freezer too long, it might be too hard. Let it sit at room temperature for 5-10 minutes. It should soften up. If it is still too stiff, try the water or soap trick mentioned above.
Problem: Slime is Breaking Apart
This often happens with overly stiff slime or if it has been played with too much.
- Aging Slime: Dish soap and salt slime does not last as long as glue slime. Over time, the ingredients degrade. It will naturally start to break apart. This is a sign it is time to make a fresh batch.
- Imbalance: If it breaks apart immediately, it is usually an ingredient imbalance. Try adding a tiny bit more dish soap and mixing gently. Then, chill it.
By understanding these common issues, you can troubleshoot your dish soap and salt slime. You can create a great batch every time. This empowers you to enjoy the fun of making homemade slime. Sometimes, you might want to try a completely different approach, like learning how to make slime with dish soap no glue or borax.
Storing and Maintaining Your Dish Soap and Salt Slime
Proper storage is essential for making your dish soap and salt slime last. While this type of slime doesn’t have the same longevity as traditional glue slime, you can extend its life. This ensures more play time from each batch. I always follow these simple storage rules.
Airtight Container is Key
Always store your slime in an airtight container. A plastic food container with a tight-fitting lid works perfectly. Ziploc bags are also an option, but a rigid container protects the slime better from squishing. Air exposure causes the slime to dry out. It becomes stiff and unusable. An airtight seal prevents evaporation of moisture. This keeps the slime soft and pliable.
Refrigeration for Longevity
Keeping your slime in the refrigerator is crucial. The cold temperature helps maintain its consistency. It prevents the dish soap from breaking down too quickly. It also helps inhibit mold growth. While mold is less common with soap-based slimes, cold temperatures reduce the risk. I always store my slime in the fridge. It truly makes a difference in how long it lasts. You can expect your slime to last anywhere from a few days to a week with proper refrigeration.
Handling and Play Tips
- Clean Hands: Always play with clean hands. Dirt, dust, and oils from your hands can degrade the slime over time. They introduce contaminants that break down the soap molecules.
- Clean Surface: Play on a clean, non-porous surface. A kitchen counter or a plastic placemat works well. Avoid playing on carpet or fabric, as the slime can be difficult to remove. If slime gets on fabric, quickly address it. Learning how to clean slime off couch might become necessary if accidents happen.
- Avoid Contamination: Keep the slime away from food particles or other debris. Any foreign material can ruin the texture and shorten its lifespan.
- Check for Deterioration: Over time, the slime will naturally start to break down. It might become more watery, develop an off-smell, or become very sticky and unmanageable. These are signs it is time to discard the old batch and make a fresh one. Do not try to revive slime that has clearly gone bad.
Troubleshooting Stored Slime
If your stored slime becomes slightly stiff:
- Let it sit at room temperature for a few minutes.
- Add a single tiny drop of dish soap and gently knead it in. Do not add too much.
If your stored slime becomes watery:
- It might need a tiny pinch more salt. Mix well.
- Return it to the refrigerator for another chill.
Remember, dish soap and salt slime is a temporary plaything. Its simple ingredients make it easy to whip up a new batch anytime. This makes it a sustainable and fun activity. Enjoy the process of creation as much as the play!
The Science Behind Dish Soap and Salt Slime
Understanding why dish soap and salt create slime adds another layer of fascination. This is not just a fun craft. It is a simple chemistry experiment. The interaction between these two common household items is quite interesting. I find this aspect particularly engaging.
The Role of Dish Soap
Dish soap is a surfactant. This means it reduces the surface tension of liquids. It does this because its molecules have a unique structure. Each soap molecule has two distinct parts:
- Hydrophilic Head: This part loves water. It dissolves in water.
- Hydrophobic Tail: This part hates water. It tries to avoid water.
In water, soap molecules arrange themselves into tiny spheres called micelles. The hydrophobic tails hide inside, away from water. The hydrophilic heads face outwards, interacting with the water. These micelles allow dish soap to trap grease and dirt, making cleaning effective. The soap solution feels slippery and viscous.
The Role of Salt
Salt, specifically sodium chloride (NaCl), is an ionic compound. When salt dissolves in water, it breaks apart into positive sodium ions (Na+) and negative chloride ions (Cl-). These ions are highly charged.
When you add salt to dish soap, these ions interact with the soap micelles. The salt ions disrupt the orderly structure of the micelles. They interfere with the repulsive forces between the hydrophilic heads of the soap molecules. The salt effectively “ties up” some of the water molecules. This reduces the amount of “free” water available to keep the micelles dispersed.
The Thickening Process
As salt ions interact with the soap, the micelles start to clump together. The solution becomes more concentrated with soap molecules. This increased concentration makes the overall mixture much thicker. It transforms from a liquid to a viscous, gel-like substance. This is your slime!
The amount of salt is crucial.
- Too Little Salt: Not enough ions are present to significantly disrupt the micelles. The mixture remains watery.
- Just Right Amount of Salt: Enough ions are present to cause optimal clumping. The mixture thickens into a cohesive slime.
- Too Much Salt: An excessive amount of salt can cause the soap molecules to “salt out.” This means they become insoluble and separate from the water. The mixture becomes a watery, clumpy mess. The water separates from the soap. This is why over-salting results in a runny slime.
The Effect of Chilling
Refrigeration further aids the slime formation. Lower temperatures reduce the kinetic energy of the molecules. This makes the soap molecules less mobile. It helps them maintain their clumped, thickened state. It also makes the entire structure more stable. This reduces stickiness and makes the slime more cohesive. The cold simply helps the structure “set.”
This simple reaction showcases how basic chemistry principles apply to everyday materials. It is a fantastic way to introduce concepts like solubility, ionic bonds, and molecular structure. All this happens while having fun with homemade slime.
Safety and Cleanup for Dish Soap and Salt Slime
While dish soap and salt slime is generally safe, proper handling and cleanup are important. This ensures a fun experience for everyone. I always emphasize safety, especially when kids are involved.
Safety First
- Not for Consumption: Dish soap is not food. This slime is for play only. Keep it out of mouths. Supervise young children to prevent ingestion. Even a small amount of soap can cause an upset stomach.
- Skin Sensitivity: While dish soap is made for washing, prolonged skin contact can sometimes cause mild dryness or irritation for very sensitive skin. If irritation occurs, wash hands thoroughly with plain water. You might use gloves for play if you have extremely sensitive skin.
- Supervision: Always supervise young children during slime play. This prevents accidental ingestion or misuse. It also helps manage potential messes.
- Avoid Eyes: If slime gets into eyes, rinse immediately and thoroughly with clean water. If irritation persists, seek medical advice.
Cleanup Made Easy
One of the great advantages of dish soap and salt slime is its relatively easy cleanup. It does not contain glue, which can be notoriously hard to remove.
- Surfaces: For most hard, non-porous surfaces (tables, counters, floors), simply wipe up spills with a damp cloth or paper towel. The soap content helps in its own cleanup.
- Hands: Wash hands with warm water and soap. The slime itself is made of soap, so it washes off easily.
- Clothes and Fabric: This is where you need to be careful. While easier than glue slime, dish soap slime can leave a mark on fabric.
- Act Quickly: If slime gets on clothes or upholstery, address it immediately. Do not let it dry.
- Scrape Off Excess: Gently scrape off as much slime as possible using a dull knife or spoon.
- Damp Cloth: Dab the stain with a damp cloth. You can use a bit of plain water.
- Wash as Usual: For clothing, pre-treat the stain with a laundry stain remover. Then, wash the item according to its care label instructions. For larger fabric items like couches, follow specific cleaning guidelines. Knowing how to clean slime off couch can save you a lot of worry.
- No Hot Water (Initially): Avoid hot water on fresh stains. Hot water can sometimes set certain types of stains.
Disposal
When your slime is no longer usable, simply throw it in the trash. It is best not to pour large amounts down the drain. While dish soap is drain-safe in small quantities, a large, thickened slime mass could potentially cause clogs, especially if it reacts further with other substances in the pipes. Dispose of it in a sealed bag in your regular household waste.
Following these safety and cleanup guidelines ensures that making and playing with dish soap and salt slime remains a fun and stress-free activity for everyone involved.
Frequently Asked Questions About Dish Soap And Salt Slime
Is dish soap and salt slime safe for young children?
Yes, dish soap and salt slime is generally considered safe for children to play with. It uses non-toxic household ingredients. However, it is not for consumption. Always supervise young children to prevent them from putting the slime in their mouths. If skin irritation occurs, wash hands thoroughly.
How long does dish soap and salt slime last?
This type of slime typically lasts for a few days to a week. Its longevity depends on proper storage and how much it is played with. Store it in an airtight container in the refrigerator. If it becomes watery, smells odd, or breaks apart easily, it is time to discard it.
Can I use any type of salt?
Regular fine-grained table salt works best for making dish soap and salt slime. Its small crystals dissolve quickly and react effectively with the dish soap. Coarse salts like kosher salt or sea salt might not dissolve completely. This can result in a gritty texture and less consistent slime.
What if my slime is too watery or too sticky?
If your slime is too watery, you likely added too much salt initially. Try adding a little more dish soap to dilute it, then very gradually add tiny pinches of salt, stirring well. If it’s too sticky, add another tiny pinch of salt and mix thoroughly, then chill it in the refrigerator.
- dish soap slime
- salt slime
- no glue slime
- DIY slime
- homemade slime
- kids crafts
- sensory play

Todd Martin
Senior Writer
With over 15 years of experience in home renovation and design, I started HEG to share what I’ve learned with homeowners who want to create spaces that are both beautiful and functional. I’ve always believed in a hands-on approach, and over the years, I’ve picked up practical solutions that actually work. Through HEG, I aim to make home improvement more approachable, sharing real tips that help you create a home you truly love.