· Todd Martin · DIY Crafts · 22 min read
How To Make Dish Soap Slime Without Glue

Create Amazing Dish Soap Slime: No Glue Needed!
Have you ever wanted to make slime but realized you ran out of glue? Or perhaps you seek a simpler, less messy option? Making dish soap slime without glue is a fantastic solution. This method uses common household items, making it accessible for everyone. It offers a unique sensory experience, different from traditional glue-based slimes. I find this a great project for a rainy afternoon.
This article shares how to make dish soap slime without glue. We will explore several popular methods. We cover techniques using salt, cornstarch, and baking soda. You will also find helpful tips for success and how to fix common problems. Get ready to create fun, stretchy slime with ease.
Takeaway
- Make slime using common kitchen ingredients like dish soap, salt, cornstarch, or baking soda.
- Adjust ingredient ratios to achieve different slime textures.
- Store slime in an airtight container to prolong its life.
- Always supervise children during slime-making activities.
Dish soap slime without glue is simple to make using a few household ingredients. You can mix dish soap with activators like salt, cornstarch, or baking soda. This combination creates a unique, non-sticky texture. The key is finding the right balance of ingredients for your desired consistency.
The Magic of No-Glue Slime: Understanding Dish Soap’s Role
Making slime without glue sounds like a magic trick. Yet, it uses basic chemistry. Dish soap is the hero in these recipes. It contains special molecules called surfactants. These molecules have a unique structure. They have one end that likes water and one end that dislikes water. This property makes dish soap excellent at cleaning. It also helps form the slime’s texture.
When you mix dish soap with certain ingredients, changes happen. Salt, for instance, affects the water in the dish soap. It causes the soap molecules to clump together. This clumping action creates the thick, gel-like slime. Cornstarch works differently. It absorbs water. This absorption helps thicken the dish soap mixture. The result is a soft, dough-like slime. Baking soda acts as a thickener and helps activate the soap. Each ingredient offers a unique path to slime creation.
I often marvel at how simple household items can transform. This process demonstrates basic scientific principles. It teaches about viscosity and molecular interaction. Plus, it is a lot of fun. Understanding how dish soap works helps in troubleshooting. If your slime is too runny, you might need more activator. If it is too stiff, you might need more soap or water. This knowledge gives you control over your slime’s texture.
This type of slime is often less messy than glue slimes. It also washes off hands and surfaces easily. This makes cleanup a breeze. I appreciate not having to worry about sticky residue. For more methods on creating slime with dish soap, explore how to make slime out of dish soap no glue.
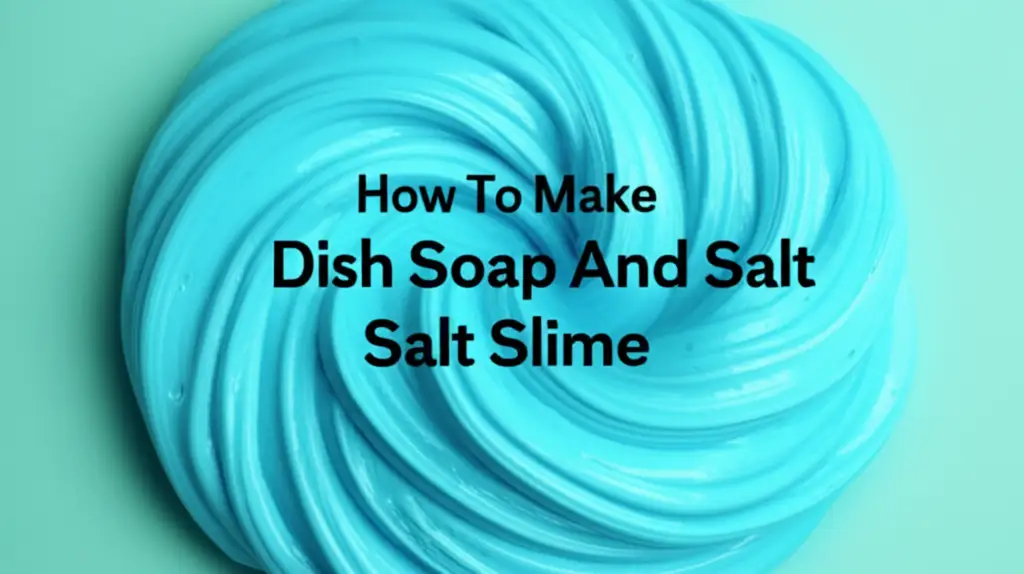
The Classic: Dish Soap and Salt Slime Method
The dish soap and salt method is one of the easiest ways to make no-glue slime. It requires only two ingredients. You likely have both in your kitchen right now. This makes it a perfect spontaneous activity. The salt acts as a gelling agent. It pulls water from the dish soap. This process causes the soap molecules to bind together. The result is a soft, sometimes jiggly slime.
To start, you need a bowl and a spoon. Choose a liquid dish soap. Thicker dish soaps often work best. Pour a generous amount of dish soap into your bowl. I usually start with about a quarter cup. Then, gradually add salt. Add a pinch at a time. Stir the mixture well after each addition. You will notice the soap start to thicken. It becomes less bubbly and more cohesive.
The key is adding salt slowly. Too much salt makes the slime watery. Too little salt leaves it too sticky. Keep stirring until the mixture pulls away from the sides of the bowl. Once it forms a ball, you can pick it up. Knead it gently with your hands. This helps improve its texture. If it feels too sticky, add a tiny bit more salt. If it becomes too liquid, you may need more dish soap and restart.
Remember, different brands of dish soap react differently. Some dish soaps contain more water. Others are thicker. Experiment with what you have. You can find another simple guide on how to make slime with dish soap and no glue. This method offers a satisfying, hands-on experience.
Step-by-Step Salt Slime Creation:
Gather Materials:
- Liquid dish soap (preferably thick)
- Table salt
- Mixing bowl
- Spoon
Measure Dish Soap: Pour 1/4 cup (or desired amount) of dish soap into the bowl.
Add Salt Gradually: Add 1/4 teaspoon of salt at a time. Stir thoroughly after each addition. You will see the soap thickening.
Observe Consistency: Continue adding salt and stirring until the mixture starts to pull away from the sides of the bowl. It should form a clumpy, gel-like substance.
Knead (Optional): Once it reaches a workable consistency, you can knead it gently with your hands for a few minutes. This improves its stretchiness.
Chill (Recommended): Place the slime in the freezer for 5-10 minutes, or the refrigerator for 15-30 minutes. This helps it firm up.
Test: Remove and test. If it is still too sticky, a tiny pinch more salt may help. Be careful not to add too much.
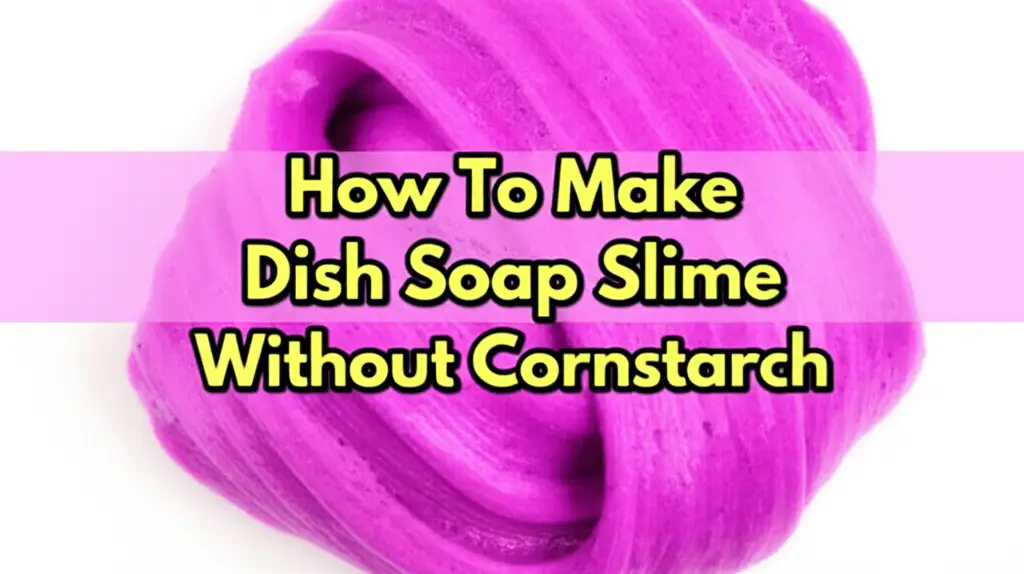
Alternative Method: Dish Soap and Cornstarch Slime
The dish soap and cornstarch method creates a different type of slime. This version is often thicker and more dough-like. It feels soft and squishy. This makes it perfect for shaping and molding. Cornstarch is a common kitchen ingredient. It acts as a primary thickener in this recipe. It absorbs the liquid from the dish soap. This absorption creates a non-Newtonian fluid. It behaves like a solid when you apply pressure. It flows like a liquid when you let it relax.
To begin, you will need a bowl, a spoon, dish soap, and cornstarch. I usually start with about half a cup of cornstarch. Then, I slowly add the dish soap. Pour a tablespoon of dish soap at a time. Mix it well with the cornstarch. The mixture will look crumbly at first. Keep mixing. The cornstarch will start absorbing the soap. It will form small clumps.
Continue adding dish soap, a little at a time. Mix until the mixture forms a soft, pliable dough. You may need more or less dish soap. It depends on your specific dish soap brand. It also depends on the humidity in your environment. Use your hands to knead the mixture. This helps combine the ingredients thoroughly. Kneading makes the slime smooth and uniform. If it is too crumbly, add more dish soap. If it is too sticky, add more cornstarch.
This slime has a unique texture. It is not as stretchy as glue-based slimes. However, its softness makes it very satisfying to play with. It is also less likely to stick to surfaces. This makes cleanup easier. This method is great for younger children. It provides a good sensory experience. For more insights on this specific type, check out how to make dish soap and salt slime. While that link specifically discusses salt, the general principles of working with dish soap apply.
Cornstarch Slime Instructions:
Gather Materials:
- Liquid dish soap
- Cornstarch
- Mixing bowl
- Spoon
Start with Cornstarch: Place 1/2 cup of cornstarch into your mixing bowl.
Add Dish Soap Slowly: Add 1 tablespoon of dish soap. Stir well. The mixture will be powdery and crumbly.
Mix and Observe: Continue adding dish soap, 1/2 tablespoon at a time. Stir after each addition. The mixture will gradually become more cohesive. It will start to form clumps.
Knead by Hand: Once it is too thick to stir, use your hands to knead the mixture. Work it until it forms a smooth, pliable dough-like slime.
Adjust Consistency:
- If too dry/crumbly: Add a few drops more dish soap.
- If too sticky: Add a small amount of cornstarch.
Play and Store: Enjoy your soft, moldable slime. Store it in an airtight container when not in use.
Exploring Another Method: Dish Soap and Baking Soda Slime
Making slime with dish soap and baking soda offers another exciting option. This method creates a slime with a different texture. It is often thicker and more robust than salt slime. Baking soda acts as a mild abrasive and also helps to absorb excess moisture. This creates a firmer, less sticky consistency. This slime can feel somewhat doughy, similar to the cornstarch version, but with a unique pliability.
To start, you will need your favorite liquid dish soap and baking soda. A mixing bowl and a spoon are also essential. Begin by pouring about a quarter cup of dish soap into your bowl. I usually use a thick, concentrated dish soap for best results. Next, slowly add the baking soda. Start with a teaspoon. Stir the mixture thoroughly after each addition. You will notice the soap thickening almost immediately.
Continue adding baking soda in small increments. Stir until the mixture pulls away from the sides of the bowl. It should form a cohesive mass. Be careful not to add too much baking soda. Too much can make the slime crumbly or too stiff. The goal is a soft, pliable consistency. Once it starts to form, you can gently knead it with your hands. This helps achieve a smooth texture. If it feels too sticky, add a tiny bit more baking soda. If it becomes too firm, you might need a drop more dish soap, but it’s harder to fix once too stiff.
This type of slime is great for stretching and squishing. It holds its shape better than salt slime. It also offers a distinct sensory experience. For more ideas on how to achieve different no-glue slimes, including baking soda, you can consult articles like how to make slime with dish soap baking soda. This method is satisfying to create.
Baking Soda Slime Recipe:
Materials Needed:
- Liquid dish soap (thick variety works best)
- Baking soda
- Mixing bowl
- Spoon
Dish Soap Base: Pour 1/4 cup of dish soap into your bowl.
Add Baking Soda: Add 1 teaspoon of baking soda to the dish soap. Stir well to combine.
Thicken Gradually: Continue adding baking soda, 1/2 teaspoon at a time. Stir after each addition. The mixture will begin to thicken and pull away from the bowl.
Knead for Consistency: Once it forms a shaggy ball, transfer it to your hands. Knead it gently for several minutes. This will make it smoother and more elastic.
Adjust:
- If still too sticky: Add a small pinch of baking soda.
- If too stiff/crumbly: A tiny drop of dish soap may help, but it’s tricky to correct.
Chill (Optional): Refrigerate the slime for 10-15 minutes to firm it up slightly.
Essential Tips for Perfecting Your No-Glue Slime
Making the perfect dish soap slime without glue requires a little patience and a few tricks. Different brands of dish soap behave differently. I have found that thicker, more concentrated dish soaps yield better results. Brands like Dawn or Palmolive often work well. They contain more gelling agents. Avoid very watery or diluted soaps. These tend to create a less cohesive slime.
Temperature also plays a crucial role. A cooler environment helps the slime firm up. After mixing, I often pop my slime into the freezer for 5-10 minutes. Alternatively, 15-30 minutes in the refrigerator can also work wonders. This chilling process helps the molecules settle. It creates a firmer, less sticky consistency. However, do not freeze it solid. This will ruin the texture.
Consistency is key. You are aiming for a substance that is pliable but not overly sticky. If your slime is too sticky, try adding a tiny bit more of your activator (salt, cornstarch, or baking soda). Add it very slowly. A pinch can make a big difference. If it is too stiff or crumbly, it might be over-activated. In this case, you might try adding a few more drops of dish soap. Sometimes, it is better to start over if it is too far gone.
Remember, no-glue slime is generally not as stretchy or durable as traditional borax or liquid starch slime. Its texture is unique. Embrace the differences. It might be jigglier or more dough-like. Manage your expectations. The fun lies in the process and the unique feel. My general experience shows that patience in adding ingredients makes the best slime.
- Choose the Right Dish Soap: Opt for thicker, concentrated liquid dish soaps. Brands with good gelling properties work best.
- Gradual Ingredient Addition: Always add your activator (salt, cornstarch, baking soda) slowly. Stir thoroughly after each small addition.
- Chill for Firmness: Refrigerate or briefly freeze your slime after mixing. This helps it firm up and reduces stickiness.
- Adjust Carefully: Fine-tune the consistency by adding very small amounts of activator for stickiness or dish soap for stiffness.
- Manage Expectations: No-glue slimes have unique textures. They may not be as stretchy as glue-based versions.
- Experimentation is Key: Don’t be afraid to try different ratios or dish soap brands. Every batch is a learning experience.
Troubleshooting Common No-Glue Slime Issues
Even with the best intentions, your no-glue slime might not turn out perfectly on the first try. This is normal. I have encountered many common issues, and most have simple fixes. Understanding why a problem occurs helps you solve it. Do not get discouraged. Slime making is a process of experimentation.
Problem 1: Slime is Too Sticky. This is the most frequent issue. It means your slime needs more activator. If you used salt, add a tiny pinch more. Stir it in thoroughly. For cornstarch or baking soda slime, add a small sprinkle. Mix it well. Repeat this process until the slime is less sticky. Be careful not to add too much at once. A little goes a long way. After adding more activator, chilling the slime for 10-15 minutes can also help.
Problem 2: Slime is Too Watery or Liquid. This often happens if you added too much dish soap or not enough activator. If it is just slightly too watery, try adding a bit more of your chosen activator. For salt slime, a few more pinches of salt might work. For cornstarch or baking soda slime, add more powder. If the mixture is very liquid, you might need to start over. It is difficult to recover from extreme wateriness. Sometimes, putting it in the freezer for 10-15 minutes can help thicken it temporarily.
Problem 3: Slime is Too Stiff or Crumbly. This means you added too much activator. The slime has over-solidified. For cornstarch or baking soda slime, you might be able to rescue it. Try adding a tiny drop or two of dish soap. Knead it in very well. This can sometimes re-introduce moisture and soften the slime. For salt slime, it is usually harder to fix if it becomes crumbly. Salt pulls too much water. You might need to start a fresh batch. Prevention is best here: add activator very slowly.
Problem 4: Slime is Not Stretchy. No-glue slimes, especially those made with cornstarch or baking soda, are often less stretchy. They are more moldable or squishy. If you want more stretch, you might have added too much activator. Try kneading it for longer. Sometimes, the warmth from your hands can make it more pliable. For salt slime, excessive salt can reduce stretchiness. If stretch is your primary goal, consider exploring alternatives like how to make slime with laundry detergent no glue for a different no-glue option that might offer more elasticity.
Remember, practice makes perfect. Keep experimenting with ratios. Each type of dish soap and even environmental humidity can affect the outcome. Take notes of what works for you.
Storing Your Homemade Dish Soap Slime
Once you have created your perfect batch of dish soap slime, you will want to keep it fresh. Proper storage helps prolong its lifespan. It also prevents it from drying out or becoming a sticky mess. Unlike some traditional slimes, dish soap slime does not last forever. However, good storage habits can extend your playtime. I always make sure to store my slime right after playing.
The best way to store dish soap slime is in an airtight container. Small plastic containers with snap-on lids work wonderfully. You can also use resealable plastic bags. Make sure to squeeze out as much air as possible if using a bag. Air exposure is the enemy of slime. It causes the slime to dry out. When it dries, it becomes stiff and loses its texture.
Store the container in a cool, dry place. A pantry or a drawer is ideal. Avoid direct sunlight or warm areas. Heat can make the slime more liquid and separate. Some people even store their dish soap slime in the refrigerator. This can help it maintain its firmness. If your slime feels a bit soft after storage, try chilling it again for a few minutes. This can often restore its consistency.
I have found that homemade dish soap slime typically lasts for a few days to a week. Its exact lifespan depends on the ingredients used and how well it is stored. If you notice mold growth or a foul smell, it is time to discard your slime. Always wash your hands before and after playing with homemade slime. This keeps your slime cleaner and your hands safe. Proper storage helps you enjoy your creation for as long as possible.
- Airtight Container: Always store your slime in a container with a tight-fitting lid or a resealable plastic bag.
- Remove Air: For bags, squeeze out excess air to prevent drying.
- Cool, Dry Place: Keep slime away from heat and direct sunlight. A pantry or drawer is suitable.
- Refrigeration: Storing it in the refrigerator can extend its life and maintain firmness, especially for softer slimes.
- Check for Spoilage: Discard slime if you see mold, notice an unusual smell, or if it significantly changes texture.
- Wash Hands: Ensure hands are clean before and after playing to keep the slime hygienic.
Safety and Cleanup for No-Glue Slime
Making and playing with no-glue dish soap slime is generally safe. However, common sense and supervision are always important. Especially when children are involved, ensure a responsible adult is present. While dish soap is a common household item, it is not meant for consumption. Remind children not to eat the slime. Small children might put things in their mouths, so this activity is best for older kids.
Some individuals might have sensitive skin. Dish soap can be an irritant for them. If anyone experiences skin irritation or redness, stop playing with the slime immediately. Wash hands thoroughly with water. Consider using gloves if you have sensitive skin but still wish to play. I always use a mild, gentle dish soap to minimize any potential issues.
Accidents happen, and slime can sometimes get on surfaces. The good news is that dish soap slime is typically easier to clean than glue-based slime. Because it is made mostly of soap, it dissolves in water. If slime gets on a hard surface, simply wipe it with a damp cloth. For fabrics, you can usually rinse the area with warm water. Gentle scrubbing with a sponge can help lift any residue. For more stubborn stains or if you used specific additives like food coloring, you might need a mild detergent. If your slime gets on furniture, you can learn more about how to clean slime off couch.
Always clean up your workspace after making slime. Wash all bowls, spoons, and surfaces with warm, soapy water. This removes any residue. Proper cleanup ensures your kitchen stays tidy. It also prevents any unintended stickiness later. Making slime is a fun activity. Following these simple safety and cleanup guidelines ensures everyone has a positive experience.
- Supervise Children: Always have an adult present, especially with younger children.
- No Ingestion: Emphasize that the slime is not edible.
- Skin Sensitivity: Be aware of potential skin irritation. Discontinue use if redness or itching occurs. Consider gloves if sensitive.
- Easy Cleanup: Most dish soap slime cleans up with warm water and a damp cloth on hard surfaces.
- Fabric Care: For fabric, rinse with warm water. Mild soap can help with tougher spots.
- Workspace Cleanup: Wash all tools and surfaces immediately after use with warm, soapy water.
Elevating Your Dish Soap Slime Experience
Making basic dish soap slime is just the beginning. You can personalize your creations. Adding colors and scents makes the experience even more engaging. These simple additions can transform a basic slime into something truly special. I love experimenting with different variations.
Adding Color: Food coloring is the easiest way to add vibrant color to your slime. Add a few drops of liquid food coloring to your dish soap before adding the activator. Stir it in completely. This ensures the color is evenly distributed. You can mix colors to create new shades. Gel food coloring also works well. It provides more intense hues. Remember that the color of your dish soap will affect the final shade. Clear or lightly colored dish soaps are best for bright, true colors.
Adding Scent: Essential oils can add a pleasant aroma to your slime. Add a few drops of your chosen essential oil to the dish soap. Mix it in well before adding your activator. Lavender oil can make the slime calming. Peppermint oil offers a refreshing scent. Vanilla extract can also provide a sweet aroma. Be mindful of essential oil concentration. Too much can be overpowering. Also, ensure the oils are skin-safe. Some oils can cause irritation.
Adding Texture: For an extra sensory dimension, you can mix in small, non-sharp items. Tiny foam beads or glitter can add visual appeal. Sand or very fine pebbles can give a unique tactile feel. Add these after your slime has formed its basic consistency. Knead them in gently. Start with a small amount. You can always add more if desired. Ensure any additions are safe and non-toxic. Avoid anything sharp or too small that could be a choking hazard.
Experiment with Dish Soap Types: Beyond color and scent, the type of dish soap itself can influence the outcome. Some dish soaps are naturally thicker. Others are more gel-like. Experiment with different brands you have. You might find a favorite. Remember that different soap consistencies may require slight adjustments to your activator ratios. This creative freedom makes no-glue slime making endlessly fun.
- Color with Food Coloring: Mix liquid or gel food coloring into the dish soap before adding the activator for even distribution.
- Scent with Essential Oils: Add a few drops of skin-safe essential oils (e.g., lavender, peppermint) for a pleasant aroma. Vanilla extract also works.
- Texture Add-ins: Incorporate glitter, small foam beads, or sand for enhanced visual and tactile appeal.
- Explore Dish Soap Varieties: Different dish soap brands and consistencies will yield unique results, encouraging experimentation with ratios.
Frequently Asked Questions About Dish Soap Slime
Is dish soap slime safe for young children?
Dish soap slime is generally safer than borax-based slimes because it avoids harsh chemicals. However, dish soap is not for consumption. Always supervise young children to ensure they do not put the slime in their mouths. This activity is best for children old enough to understand not to eat the slime.
How long does dish soap slime last?
Dish soap slime typically lasts for a few days to about a week. Its longevity depends on storage and environmental factors. Store it in an airtight container in a cool, dry place. Discard it if it becomes moldy, smells bad, or loses its desired texture.
Can I use any brand of dish soap?
While you can try any brand, thicker, more concentrated liquid dish soaps usually yield the best results. Brands like Dawn or Palmolive are often recommended due to their consistency. Very watery or diluted soaps may not produce a firm enough slime. Experiment with what you have.
Why is my dish soap slime too sticky or too watery?
If your slime is too sticky, it needs more of your activator (salt, cornstarch, or baking soda). Add it in tiny increments. If it is too watery, you likely added too much dish soap or not enough activator. It’s harder to fix very watery slime; sometimes starting over is best.
Does dish soap slime clean up easily?
Yes, dish soap slime is generally easy to clean. Since it is soap-based, it dissolves with water. For hard surfaces, a damp cloth usually suffices. For fabrics, rinse with warm water and gently scrub with a mild detergent if needed.
Can I add glitter or food coloring to my dish soap slime?
Absolutely! You can add food coloring to the dish soap before mixing in the activator for even color distribution. Glitter, small foam beads, or even essential oils for scent can be kneaded into the slime once it has formed, enhancing the sensory experience.
Conclusion
Creating dish soap slime without glue is an accessible and fun activity. It proves that you do not need fancy ingredients to make engaging playtime items. We explored several popular methods, including using salt, cornstarch, and baking soda. Each method offers a unique texture and sensory experience. The simple science behind how dish soap interacts with common household items is quite fascinating. I find it amazing how a few basic ingredients can transform into something so entertaining.
Remember the key tips for success: choose a good quality dish soap, add your activators slowly, and chill your slime for better consistency. Troubleshooting common issues like stickiness or crumbliness becomes easier with practice. Proper storage in an airtight container extends your slime’s life. Always prioritize safety, especially with children, and rest assured that cleanup is usually straightforward.
Embrace the joy of creation and experimentation. Try different colors, scents, or textures to personalize your slime. This hands-on activity provides hours of entertainment and a wonderful sensory experience for all ages. So, gather your simple ingredients and start making your own fantastic dish soap slime without glue today! Happy sliming!
- dish soap slime
- no glue slime
- homemade slime

Todd Martin
Senior Writer
With over 15 years of experience in home renovation and design, I started HEG to share what I’ve learned with homeowners who want to create spaces that are both beautiful and functional. I’ve always believed in a hands-on approach, and over the years, I’ve picked up practical solutions that actually work. Through HEG, I aim to make home improvement more approachable, sharing real tips that help you create a home you truly love.