· Todd Martin · DIY & Home Improvement · 19 min read
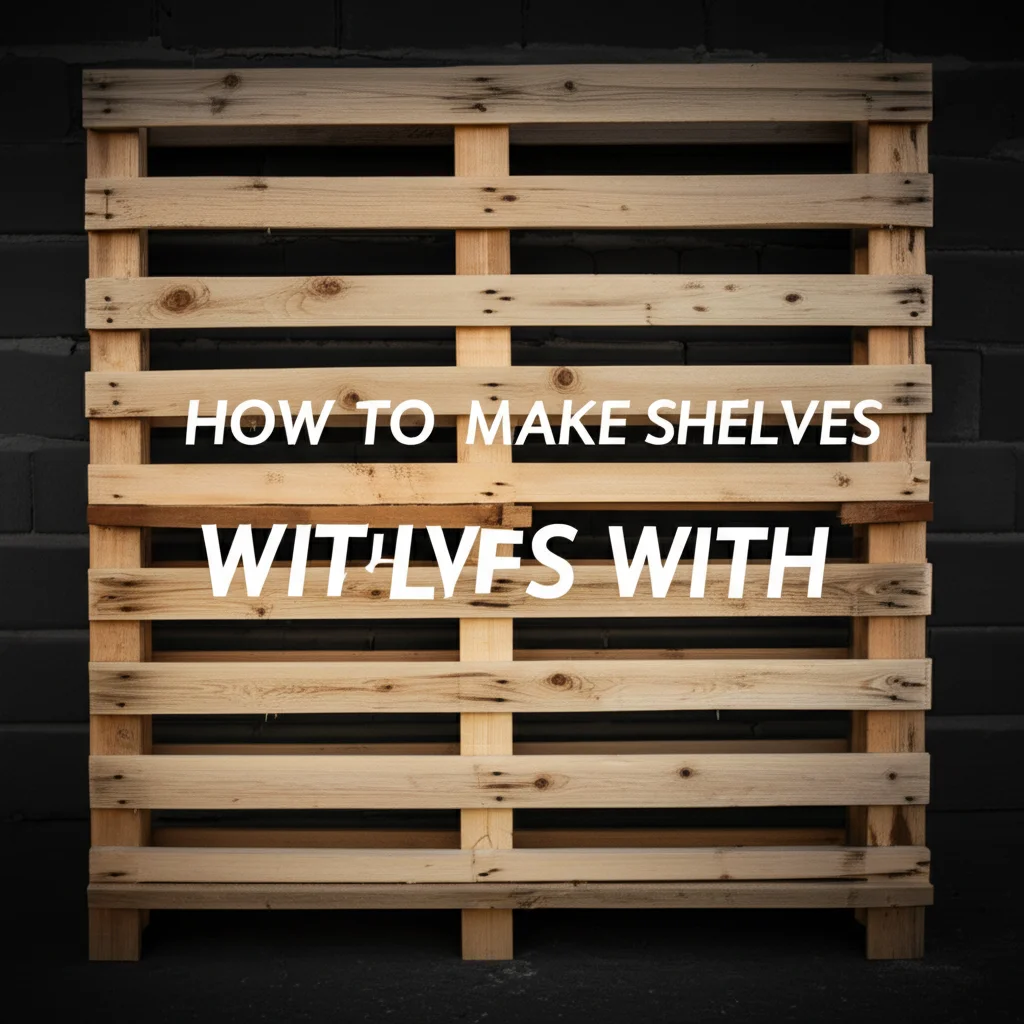
How To Make Shelves With Pallets
Make Pallet Shelves: Your DIY Guide to Rustic Storage
Are you looking for a creative, affordable way to add storage and character to your home? You can make shelves with pallets, transforming discarded wood into beautiful, functional pieces. This DIY approach not only saves you money but also contributes to a more sustainable lifestyle by repurposing materials. Pallet shelves offer a unique, rustic aesthetic that fits many home decor styles, from industrial chic to farmhouse charm.
In this comprehensive guide, I will show you how to make shelves with pallets from start to finish. We will cover everything from selecting the right pallets and gathering essential tools to designing, building, and finishing your custom shelving units. Get ready to unlock the potential of pallet wood and create stunning storage solutions for any room in your house. Let us build something amazing together!
Takeaway
- Pallets offer an eco-friendly and budget-friendly material for unique home shelving.
- Proper cleaning and preparation are crucial for safe and durable pallet shelf construction.
- Custom designs allow you to create shelves perfectly suited to your space and style.
- Finishing techniques protect the wood and enhance the aesthetic appeal of your shelves.
- This DIY project empowers you to create functional storage while reducing waste.
You can make shelves with pallets by carefully selecting and preparing the wood, then disassembling, cutting, and assembling the pieces into your desired shelf design. Finishing touches like sanding, staining, or painting enhance durability and appearance. This process offers a sustainable and cost-effective way to add custom storage to any home.
Why Choose Pallets for Shelving? Embrace Sustainable DIY
Using pallets to make shelves is more than just a passing trend; it is a smart choice for many reasons. Pallets are often discarded after a single use, making them a readily available and free resource for your DIY projects. This accessibility significantly cuts down on material costs, making custom shelving an incredibly budget-friendly endeavor. You get unique, sturdy shelves without breaking the bank.
Beyond the cost savings, repurposing pallets for shelving aligns perfectly with sustainable living principles. Every pallet you transform into a functional piece of furniture is one less item filling a landfill. This act of upcycling reduces waste and lessens the demand for new timber, which helps protect our forests. It is a win-win situation for both your wallet and the planet.
Pallet wood also brings a distinct, rustic charm to any space. Each pallet tells a story through its weathered texture, nail holes, and unique imperfections. This character cannot be replicated by new, store-bought wood. When you make shelves with pallets, you add warmth, personality, and a touch of industrial flair to your home decor. Your pallet shelves will be conversation starters, reflecting your creativity and commitment to eco-conscious living.
Environmental Benefits of Upcycling Pallets
Upcycling pallets is a fantastic way to support environmental sustainability. Millions of pallets are produced and discarded each year, contributing significantly to landfill waste. By giving these pallets a new life as shelves, you divert usable materials from ending up in dumps. This reduces the overall volume of waste and decreases the need for new wood production.
Choosing to use salvaged materials like pallets also lowers your carbon footprint. Manufacturing new wood products requires energy for harvesting, processing, and transportation. When you repurpose pallets, you are using materials that have already gone through this initial energy-intensive process. This saves resources and reduces greenhouse gas emissions. It is a simple yet impactful way to contribute to a greener planet through your DIY efforts.
Cost-Effective Storage Solutions
One of the most appealing aspects of using pallets for shelving is the remarkable cost savings. You can often acquire pallets for free from local businesses, industrial areas, or even through online marketplaces. This eliminates the primary material cost, which is typically the most expensive part of any woodworking project. Your investment will primarily be in tools, fasteners, and finishing supplies.
Even if you need to purchase a few pallets, their cost is minimal compared to buying new lumber or pre-built shelves. This allows you to create large, robust storage solutions without straining your budget. Imagine outfitting an entire garage, pantry, or living room with custom shelves for a fraction of the price of store-bought units. This cost-effectiveness makes pallet shelves an accessible DIY project for everyone, regardless of their financial resources.
Essential Tools and Materials for Your Pallet Project
Before you begin to make shelves with pallets, gathering the right tools and materials is crucial. Having everything on hand ensures a smooth and safe building process. You do not need a professional workshop to tackle this project, but some basic power tools will certainly make the job easier and more efficient. Safety should always be your top priority, so invest in proper protective gear.
For materials, the star of the show is, of course, the pallets themselves. Not all pallets are created equal, and choosing the right ones is important for safety and durability. You will also need fasteners to hold your shelves together, as well as finishing supplies to protect the wood and enhance its appearance. Taking the time to prepare your workspace and organize your supplies will set you up for success.
Here is a list of what you will likely need:
- Tools:
- Pry bar or pallet buster (for disassembling pallets)
- Hammer
- Drill/driver (with various bits)
- Saw (circular saw, jigsaw, or reciprocating saw are most helpful)
- Orbital sander (with various grits of sandpaper)
- Measuring tape
- Pencil
- Speed square or combination square
- Clamps (optional, but very helpful for assembly)
- Safety glasses
- Work gloves
- Dust mask
- Materials:
- Wood pallets (check for HT stamp)
- Wood screws (appropriate length for your wood thickness)
- Wood glue
- Wood filler (optional, for imperfections)
- Stain, paint, or clear sealer (polyurethane, tung oil, etc.)
- Brushes or rags for finishing
- Mounting hardware (if wall-mounting: screws, anchors, studs finder)
Gathering Your Pallets
The first step in your journey to make shelves with pallets is sourcing the pallets themselves. Look for pallets marked with an “HT” stamp, which indicates they have been heat-treated rather than chemically treated. Heat-treated pallets are safer for indoor use as they do not contain harmful chemicals. Avoid pallets that show signs of significant damage, rot, or chemical spills.
You can often find free pallets at local businesses such as hardware stores, nurseries, small manufacturing companies, or distribution centers. Always ask permission before taking any pallets. Explain your DIY project, and many businesses are happy to let you take them off their hands. You can also check online marketplaces for listings of free pallets. Aim to get a few extra pallets than you think you need, as some boards may be unusable.
Necessary Safety Gear
Safety is paramount when working with tools and wood. Before you even touch a pallet, make sure you have the right safety gear. Always wear safety glasses to protect your eyes from flying debris, splinters, and dust. A good pair of work gloves will protect your hands from splinters and rough edges, especially during pallet disassembly.
When cutting or sanding wood, a dust mask or respirator is essential to prevent inhaling fine wood dust, which can irritate your respiratory system. If you use power tools, consider wearing ear protection to guard against loud noises. Being properly geared up ensures your DIY project is not only productive but also safe.
Preparing Your Pallets for Shelf Construction
Once you have gathered your pallets, the real work begins. Proper preparation is the most critical step when you make shelves with pallets. This includes cleaning, inspecting, and carefully disassembling the pallets into usable wood planks. Skipping these steps can result in an unsafe, unsightly, or poorly constructed final product.
Pallets can be dirty, carrying grime, dust, and even mold from their journey through various warehouses and transportation routes. Thorough cleaning is essential for hygiene and for achieving a good finish. Disassembly can be challenging, as pallet nails are often tough and stubborn. Patience and the right tools make this process much easier, allowing you to salvage as many usable boards as possible for your shelving project.
Safe Pallet Disassembly Techniques
Disassembling pallets is often the most time-consuming part of the project. Pallets are built to be strong, meaning their nails are usually spiral-shanked and very secure. A pallet buster is the most efficient tool for this job, designed to leverage boards off without splitting them. If you do not have a pallet buster, a sturdy pry bar and hammer will also work.
Start by prying the deck boards off the stringers (the thicker support beams). Work slowly and carefully, trying to minimize splitting the wood. Once the boards are separated, you will need to remove all the nails. You can hammer them back out from the other side, or use pliers and a claw hammer to pull them completely out. Be sure to remove every single nail to prevent injury and ensure smooth surfaces for your shelves.
Cleaning and Sanding Pallet Wood
After disassembling your pallets and removing all nails, the next step is thorough cleaning. Use a stiff brush and soapy water to scrub down all the wood planks. For stubborn dirt or mold, a pressure washer can be very effective if you let the wood dry completely afterward. Make sure all dirt, grime, and potential contaminants are gone. Allow the wood to air dry completely for several days before proceeding. For more details on cleaning wood, you can explore guides on how to clean wooden pallets.
Once clean and dry, it is time for sanding. Pallet wood can be very rough, with splinters and uneven surfaces. Start with a coarse-grit sandpaper (around 60 or 80-grit) to smooth out major imperfections and remove any remaining surface grime. Then, progress to a medium-grit (120-grit) and finally a fine-grit (180 or 220-grit) for a smooth finish. Sanding not only makes the wood pleasant to touch but also prepares it for staining or painting, allowing finishes to absorb evenly.
Designing Your Pallet Shelves: Creative Concepts
Now that your pallet wood is clean and ready, it is time for the fun part: designing your shelves! When you make shelves with pallets, your design options are incredibly versatile. You can create simple, rustic wall shelves, robust freestanding units, or even integrated storage solutions. The key is to consider your space, your storage needs, and your personal style.
Think about where the shelves will go and what you plan to store on them. This will influence the size, depth, and overall structure of your design. Do you need a display shelf for decorative items, or a heavy-duty unit for books or tools? Pallet wood is strong, but proper design and reinforcement are essential for stability and safety.
Simple Wall-Mounted Pallet Shelves
For a quick and effective storage solution, consider simple wall-mounted pallet shelves. These are easy to build and add instant character to any wall. You can create individual floating shelves by cutting pallet boards to your desired length and attaching them to the wall with hidden brackets or L-brackets. For a more integrated look, use pallet stringers as vertical supports, then attach horizontal pallet boards to create a multi-tiered unit.
Measure your wall space carefully and decide on the height and spacing of your shelves. Ensure your mounting hardware is appropriate for the weight of the shelves and whatever you plan to put on them. These types of shelves are perfect for kitchens, living rooms, or hallways, providing both display and storage space.
Freestanding Pallet Bookshelves
If you need more substantial storage, a freestanding pallet bookshelf is a fantastic option. You can construct a sturdy frame using the thicker pallet stringers for the uprights and then create shelves from the wider deck boards. This design provides significant storage capacity and can be customized to any height or width. For outdoor use, consider designs similar to how to make outdoor furniture with pallets, applying weather-resistant finishes.
To build a freestanding unit, you will typically create two side frames with vertical supports and horizontal cross-braces, then connect them with your shelf boards. Make sure the base is wide enough for stability, or consider anchoring the unit to a wall for added safety, especially if it will hold heavy items. This type of shelf is perfect for living rooms, home offices, or even a child’s bedroom for toy storage. When thinking about robust shelving, you can draw principles from general wood shelf building, like those found in guides on how to build wood shelves in a closet.
Step-by-Step Guide to Building Pallet Shelves
With your design in mind and your pallet wood prepared, it is time to start building your shelves. This section outlines the general steps for assembling your pallet wood into functional shelves. Remember, specific dimensions and cuts will depend entirely on your chosen design, but the core principles remain the same. Take your time, measure twice, and cut once.
Building your shelves is a rewarding process. You will see your vision come to life as you join the individual pallet boards. Proper assembly techniques and reinforcement are key to ensuring your shelves are strong, stable, and durable. Do not rush through this stage; precision here pays off in the long run.
Cutting and Assembling Your Shelf Components
Begin by marking your pallet boards according to your design specifications. Use a measuring tape and a pencil to mark the exact lengths for your vertical supports, horizontal shelf planks, and any additional bracing. Use your saw to make clean, straight cuts. Always wear safety glasses and follow the safety guidelines for your power tools.
Once all your pieces are cut, lay them out according to your design to visualize the assembly. Apply wood glue to the joining surfaces before securing them with screws. Wood glue creates a stronger bond than screws alone and helps prevent the wood from shifting over time. Use a drill to pre-drill pilot holes for your screws, especially near the ends of boards, to prevent splitting the wood. Drive your wood screws until they are flush with the surface.
Reinforcing and Securing Your Shelves
To ensure your pallet shelves are sturdy and can hold the weight you intend, reinforcement is important. For wall-mounted shelves, locating wall studs is crucial for secure attachment. Use a stud finder to mark their locations. If studs are not available, use appropriate wall anchors that can support the weight of your shelves and their contents.
For freestanding units, consider adding diagonal braces to the back or sides to prevent racking (wobbling). You can also add additional supports directly under longer shelf spans to prevent sagging over time, especially if you plan to store heavy items like books. If the unit is tall, consider attaching it to the wall with safety straps to prevent tipping, a common practice for furniture stability. This reinforcement ensures your pallet shelves are not just beautiful but also safe and reliable.
Finishing Touches: Protecting and Beautifying Your Pallet Shelves
Once your pallet shelves are fully assembled, the finishing touches elevate them from raw wood to a polished, durable piece of furniture. Finishing protects the wood from moisture, wear, and tear, and enhances its natural beauty or transforms its appearance entirely. This stage allows you to personalize your shelves to perfectly match your home decor.
Choosing the right finish depends on where your shelves will be used and the look you want to achieve. Whether you prefer a natural wood look, a vibrant pop of color, or a distressed vintage feel, there is a finishing technique for you. Take your time with this step, as a good finish can significantly extend the life and appeal of your pallet shelves.
Choosing the Right Finish
Several finishing options are available for your pallet shelves:
- Clear Sealers: If you love the natural, rustic look of pallet wood, a clear polyurethane, tung oil, or Danish oil will protect the wood while allowing its unique grain and imperfections to show through. Polyurethane offers a durable, protective layer, while oils penetrate the wood for a more natural feel.
- Stain: Wood stain enhances the wood grain and allows you to achieve various wood tones, from light oak to dark walnut. Apply stain evenly with a brush or rag, wiping off excess after a few minutes. Always follow with a clear protective topcoat.
- Paint: For a clean, modern look, or to add a pop of color, painting your pallet shelves is a great option. Use a good primer, especially if the wood is very porous, then apply two coats of your chosen paint. Sand lightly between coats for a smooth finish. For a distressed look, paint, then lightly sand edges to reveal the wood beneath.
Consider the environment where the shelves will be placed. If they are in a high-moisture area like a bathroom or laundry room, or if they are outdoor shelves (which you could learn about from how-to guides like those for outdoor furniture), choose a finish with strong moisture resistance.
Installation Tips for Stability
Proper installation is critical for the safety and longevity of your pallet shelves. If your shelves are wall-mounted, always locate wall studs using a stud finder. Attaching shelves directly into studs provides the strongest and most secure hold. Use long wood screws that penetrate deep into the stud.
If you cannot find a stud where you need one, use heavy-duty wall anchors appropriate for your wall material (drywall, plaster, concrete). Make sure the anchors are rated to hold significantly more weight than you expect to put on the shelves. For floating shelf designs, ensure the brackets are securely fastened and level. Use a spirit level during installation to make sure your shelves are perfectly horizontal. For freestanding units, if they are tall or if children are in the home, it is a good idea to anchor them to the wall with anti-tip straps, even if they seem stable. This extra step ensures maximum safety.
Decorating and Styling Your New Pallet Shelves
Congratulations! You have successfully built and finished your pallet shelves. Now comes the exciting part: decorating and styling them to integrate seamlessly into your home. Pallet shelves, with their inherent rustic appeal, offer a wonderful backdrop for a variety of decor styles. This is where you infuse your personality into the functional storage you have created.
Think about the purpose of your shelves. Are they for practical storage, decorative display, or a mix of both? The way you arrange items can transform the entire look and feel of a room. This section will give you ideas on how to make your pallet shelves not just useful, but also visually appealing, turning them into a focal point in your space.
Maximizing Storage with Pallet Shelves
Pallet shelves are excellent for maximizing storage, especially in areas where space is a premium. In a kitchen, you can use them to store spices, cookbooks, or even small appliances. In a living room, they are perfect for books, media, or decorative boxes that hide clutter. For a home office, organize files, stationery, and small equipment.
Consider adding small baskets or containers to your pallet shelves to keep smaller items tidy and grouped. This helps maintain a clean look while still providing easy access to necessities. You can also use stackable items to utilize vertical space effectively. Think about items you use frequently versus those that are more for display. Place frequently accessed items at an easy reach.
Aesthetic Tips for Pallet Shelf Decor
Styling your pallet shelves is an art form. The goal is to create a balanced and inviting display. Start by incorporating a mix of textures and heights. Combine books with plants, ceramic vases, and metal accents. Do not overcrowd the shelves; leave some breathing room around items to prevent a cluttered look. You can get inspiration from how people decorate floating shelves in kitchen.
Here are some tips:
- Rule of Three: Arrange items in odd numbers, typically groups of three, for a visually pleasing effect.
- Vary Heights: Place taller items at the back or on one side, and shorter items in front or on the other side. This creates visual interest.
- Add Greenery: Plants, real or artificial, bring life and freshness to any shelf.
- Personal Touches: Include personal photos, souvenirs, or artwork that reflects your personality and tells a story.
- Color Palette: Stick to a consistent color palette or a few complementary colors to create a cohesive look.
- Lighting: Consider adding small LED strip lights or puck lights under the shelves to highlight your display, especially in darker corners.
Remember, your pallet shelves are an extension of your home’s character. Have fun experimenting with different arrangements until you find a look that you love and that serves your storage needs beautifully.
Frequently Asked Questions About Pallet Shelves
Are all pallets safe to use for DIY projects?
Not all pallets are safe for DIY. Always look for an “HT” stamp, which means the pallet was heat-treated to kill pests. Avoid pallets marked “MB” (methyl bromide), as these are chemically treated and can be harmful. Also, avoid pallets that look stained, moldy, or oily, as they may have carried hazardous materials.
How long do pallet shelves last?
With proper preparation and finishing, pallet shelves can last for many years. Cleaning, sanding, and applying a protective finish like polyurethane or paint helps preserve the wood. Indoor shelves, protected from the elements, will naturally have a longer lifespan than those exposed to outdoor conditions. Regular cleaning and maintenance also prolong their life.
Can I use pallet shelves outdoors?
Yes, you can use pallet shelves outdoors. However, they require extra protection. You need to use weather-resistant outdoor paint or a marine-grade sealant. These finishes protect the wood from moisture, UV rays, and temperature changes, preventing rot and decay. Ensure the pallets are fully clean and dry before applying any outdoor treatment.
What are the best types of pallets for shelving?
The best pallets for shelving are typically standard-sized, heat-treated (HT stamped) pallets made from hardwoods like oak or maple. These woods are denser and more durable. Look for pallets with minimal cracks, splits, or structural damage. Pallets from reputable sources are usually cleaner and in better condition.
How much does it cost to make pallet shelves?
The cost to make pallet shelves is very low, often free for the main material. Pallets themselves can be acquired for free from local businesses. Your main expenses will be for fasteners (screws, glue), sandpaper, and finishing supplies (stain, paint, sealer). Overall, you can create custom shelving for a fraction of the cost of buying new shelves.
Conclusion
You now know how to make shelves with pallets, transforming discarded wood into valuable, custom storage solutions for your home. This DIY project is a testament to the power of upcycling, offering a budget-friendly and sustainable way to enhance your living space. From sourcing and preparing the raw materials to designing, building, and styling your finished units, each step offers a chance to express your creativity.
Embrace the journey of making your own pallet shelves. They provide unique storage and add rustic charm and character that only repurposed wood can offer. So, gather your tools, find some pallets, and start building. Your home will thank you for the unique touch, and you will enjoy the satisfaction of creating something beautiful and functional with your own hands. Get started on your pallet shelving project today and enjoy the transformation!
- pallet shelves
- DIY storage
- upcycling pallets
- repurposed wood
- home decor
- sustainable living
- woodworking projects

Todd Martin
Senior Writer
With over 15 years of experience in home renovation and design, I started HEG to share what I’ve learned with homeowners who want to create spaces that are both beautiful and functional. I’ve always believed in a hands-on approach, and over the years, I’ve picked up practical solutions that actually work. Through HEG, I aim to make home improvement more approachable, sharing real tips that help you create a home you truly love.