· Katria Melrose · Home Improvement · 22 min read
How To Measure For Drawers
Get Perfect Fit: How To Measure For Drawers Accurately
Have you ever tried to replace a drawer only to find it does not fit? Perhaps you built a new cabinet and your new drawer feels too loose or too tight. These are common frustrations, but they are easy to avoid with correct measurements. Learning how to measure for drawers properly ensures a smooth installation and a functional storage solution.
This guide will walk you through every step. We will cover the tools you need, the parts of a drawer, and how to measure for both new and replacement drawers. You will also learn about measuring for drawer fronts and how to consider drawer slides. Get ready to achieve a perfect fit every time.
Takeaway:
- Measure the cabinet opening precisely for width, height, and depth.
- Account for drawer slide clearances on both sides.
- Measure existing drawers carefully for replacement projects.
- Consider overlay or inset types when measuring for drawer fronts.
- Always double-check all measurements before cutting or ordering.
Measuring for drawers involves precise measurements of the cabinet opening or existing drawer. You must account for clearances needed by drawer slides and the type of drawer face. Accurate measurements prevent fit issues and ensure smooth operation.
Why Accurate Drawer Measurement Matters for Your Home
Getting the right measurements for your drawers is crucial. It directly impacts how well your storage functions and looks. Incorrect measurements lead to many problems, from drawers that stick to those that do not close fully. A poorly fitting drawer can ruin the look of your entire cabinet or furniture piece.
Precision in measuring helps you save money and time. You avoid buying materials twice or spending hours on frustrating adjustments. Imagine ordering custom drawers, only to find them too large or too small. This mistake means wasted materials and delays in your project. Accurate measurements ensure your project finishes on time and on budget.
Correct drawer dimensions also ensure smooth operation. A drawer that glides easily adds to the comfort and efficiency of your home. Whether it is in the kitchen, bathroom, or bedroom, smooth drawers make daily tasks easier. Proper fit also protects your cabinet structure and drawer components from unnecessary wear and tear. You can avoid future repairs and enjoy your storage for years. This attention to detail reflects good craftsmanship and helps your home look its best.
Essential Tools for Measuring Drawers
Before you start measuring, gather the right tools. Having the correct equipment makes the job easier and ensures accuracy. The right tools help you get precise numbers, which is vital for any drawer project. Do not skip this step; good measurements start with good tools.
Here is what you will need:
- Tape Measure: Choose a sturdy tape measure with clear markings. A metal tape measure is generally better than a cloth one because it holds its shape. Make sure it is at least 12 feet long for most cabinet depths. Look for one with a locking mechanism to hold your measurements steady.
- Pencil: You will need a pencil to mark your measurements. Use a sharp pencil for clear, thin lines. This helps avoid errors when transferring numbers.
- Notepad: Always write down your measurements immediately. A small notepad is perfect for this. It helps keep your numbers organized and prevents you from forgetting important details. Create a simple sketch of the cabinet opening or drawer to label dimensions clearly.
- Calculator (Optional but Recommended): Sometimes you need to add or subtract small clearances. A calculator ensures these calculations are correct. It is especially useful when converting fractions to decimals or vice versa.
- Level (Optional): A level helps check if your cabinet opening is perfectly square. An opening that is not square can make measuring difficult and impact how a new drawer fits. This tool helps you identify any irregularities before you build or order.
- Flat Straight Edge (Optional): A straight edge, like a metal ruler or a framing square, can help you get more accurate readings when measuring diagonals or checking for squareness. This is useful for large openings where a tape measure might sag slightly.
Having these tools ready makes the measuring process efficient and precise. Double-check that your tape measure is not bent or damaged, as this can affect accuracy. Proper preparation leads to successful drawer projects.
Understanding Drawer Components and Terminology
To measure effectively, you need to understand the different parts of a drawer system. Each component plays a role in the overall fit and function. Knowing the correct terms helps you communicate accurately with suppliers or when following instructions. This understanding is key to avoiding common measuring mistakes.
Let us break down the main components:
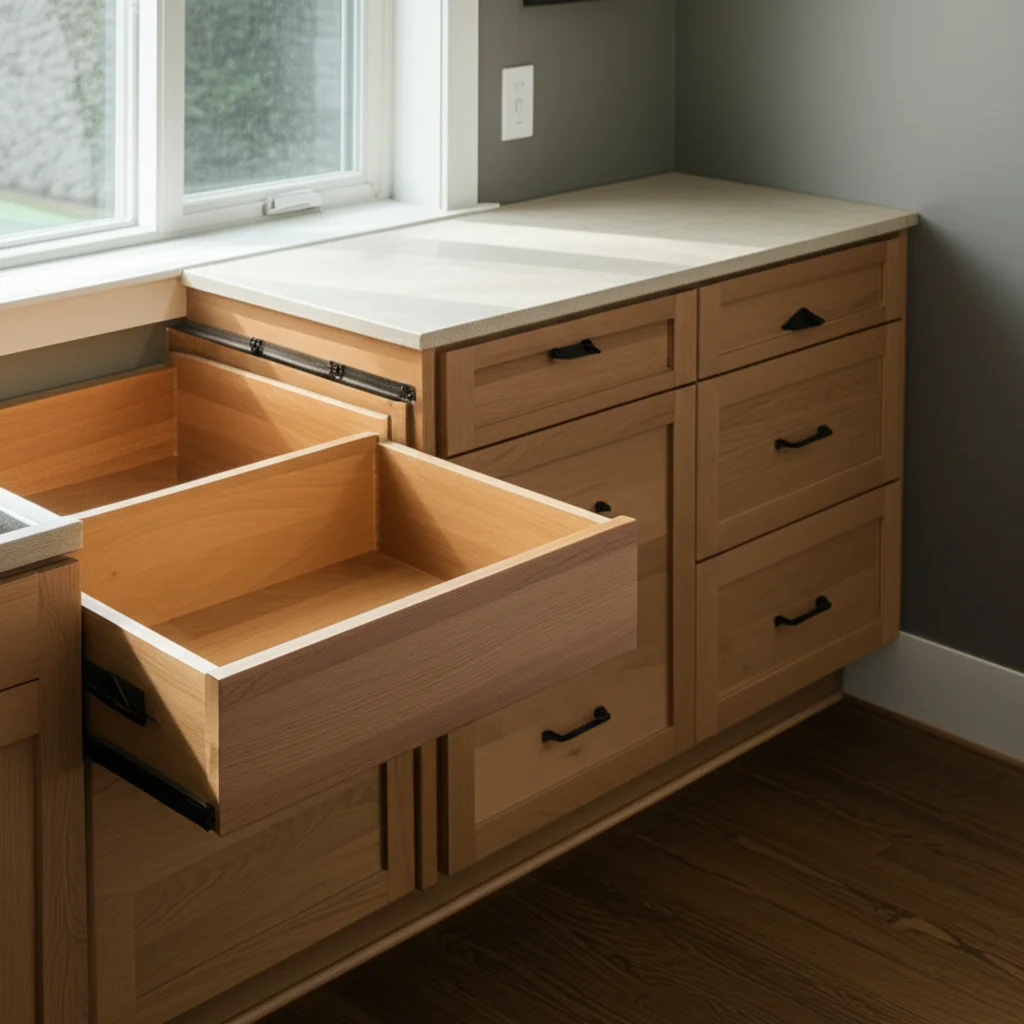
- Cabinet Opening: This is the space where the drawer will sit. It is the internal opening of your cabinet frame. You will measure the width, height, and depth of this opening. This measurement is crucial because it sets the limits for your drawer box.
- Drawer Box: This is the actual box that holds your items. It consists of four sides and a bottom. The drawer box slides in and out of the cabinet opening. Its dimensions must be smaller than the cabinet opening to allow for slides and clearances.
- Drawer Slides (or Runners): These are the hardware mechanisms that allow the drawer box to move smoothly. They attach to the sides of the drawer box and the inside of the cabinet opening. Different types of slides (side-mount, under-mount) require specific clearances. Most side-mount slides require 1/2 inch (12.7mm) clearance on each side of the drawer box. Under-mount slides typically require less side clearance but specific bottom clearance.
- Drawer Front (or Face): This is the decorative panel attached to the front of the drawer box. It is the part you see and grab. Drawer fronts can be either “overlay” or “inset.”
- Overlay Drawer Front: This type of front overlaps the cabinet frame. It sits on the outside of the cabinet opening. Full overlay fronts cover almost the entire cabinet frame. Partial overlay fronts cover only part of the frame.
- Inset Drawer Front: This type of front sits flush with the cabinet frame. It fits inside the cabinet opening. Inset fronts require very precise measurements and small clearances around all edges.
- Cleat (or Support Rail): Some cabinets have horizontal support pieces (cleats) that form the top and bottom of the drawer opening. These are important for depth measurements, especially if installing a new drawer box into an existing frame.
- Back Stop: This is a small piece of wood or plastic inside the cabinet. It stops the drawer from being pushed too far back. This affects the maximum depth of your drawer box.
Understanding these terms helps you measure accurately for all parts of your drawer project. When you measure for a new drawer, you are often figuring out the size of the drawer box that fits into a cabinet opening, and then the size of the drawer front that attaches to it.
Measuring for New Drawer Boxes: A Step-by-Step Guide
Measuring for a new drawer box requires precision. You are essentially defining the maximum size your drawer can be. This process starts by focusing on the cabinet opening where the drawer will reside. We will cover width, height, and depth measurements, accounting for necessary clearances.
Step 1: Measure the Width of the Cabinet Opening
First, measure the width. This is the horizontal distance inside the cabinet opening.
- Measure at Three Points: Use your tape measure to measure the width from left to right at the top, middle, and bottom of the opening. Cabinet openings are not always perfectly square.
- Record the Smallest Measurement: Use the smallest of these three measurements. This ensures your drawer box will fit even if the opening narrows slightly.
- Calculate Drawer Box Width: Subtract the total clearance needed for your drawer slides. Most standard side-mount slides require 1/2 inch (12.7mm) of clearance on each side of the drawer box. This means you subtract a total of 1 inch (25.4mm) from the smallest opening width.
- Example: If your smallest opening width is 15 inches, your drawer box width should be 14 inches (15 - 1 = 14).
- Confirm Slide Requirements: Always check the specifications for your specific drawer slides. Some heavy-duty slides or unique undermount slides may have different clearance requirements. This step prevents your drawer from being too wide and sticking.
Step 2: Measure the Height of the Cabinet Opening
Next, measure the height. This is the vertical distance inside the cabinet opening.
- Measure at Three Points: Measure the height from top to bottom at the left, center, and right sides of the opening. Again, openings can vary slightly.
- Record the Smallest Measurement: Use the smallest of these three measurements for your calculations. This ensures vertical clearance.
- Calculate Drawer Box Height: Subtract any necessary top and bottom clearances. If you are installing multiple drawers in one opening, you also need to consider the space between them. For single drawers, a small clearance of about 1/16 to 1/8 inch (1.5-3mm) at the top and bottom is often sufficient, especially if a drawer front will cover the opening. Under-mount slides also have specific height requirements.
- Example: If your smallest opening height is 8 inches, and you need 1/8 inch total clearance (1/16 top, 1/16 bottom), your drawer box height would be 7 7/8 inches.
Step 3: Measure the Depth of the Cabinet Opening
Finally, measure the depth. This is the distance from the front of the cabinet opening to the back wall.
- Measure from Front to Back: Measure from the very front edge of the cabinet opening to the back interior wall. Do this at a few points (top, middle, bottom) to check for consistency.
- Account for Obstructions: Check for any obstructions inside the cabinet, such as pipes, wiring, or uneven back walls. Your drawer box cannot be deeper than the shallowest point.
- Consider Drawer Slide Length: Drawer slides come in standard lengths (e.g., 14, 16, 18, 20, 22 inches). Your drawer box depth should match the slide length you plan to use. The slides usually need a small gap (about 1 inch or 25mm) between the back of the drawer box and the back of the cabinet when closed. This ensures the drawer front sits flush.
- Example: If your cabinet depth is 22 inches, you might choose 20-inch slides, making your drawer box depth 20 inches. This leaves 2 inches of space behind the drawer when closed. This extra space helps if you need to install rear mounting brackets for the slides.
Double-Check Everything: Write down all your final calculated drawer box dimensions: width, height, and depth. Remeasure the opening and re-calculate once more to confirm. Accuracy now prevents major headaches later. If you are building multiple drawers, measure each opening individually, as dimensions can vary even in the same cabinet unit. For more information on making drawers work smoothly, you can learn about how to make wooden drawers slide easy.
Measuring for Replacement Drawer Boxes
Replacing an existing drawer box can be simpler than building a new one from scratch. You often have the old drawer as a guide. However, you still need to be precise. The old drawer might be warped or damaged, so relying solely on its dimensions could lead to new problems. This section explains how to measure for replacement drawer boxes.
Option 1: Measuring the Existing Drawer Box (If It Fits Well)
If your old drawer fits perfectly and slides smoothly, you can use its dimensions as a primary guide.
- Remove the Old Drawer: Carefully remove the old drawer from its cabinet.
- Measure Width: Measure the width of the drawer box. Measure at the front, middle, and back. Note the smallest measurement.
- Measure Height: Measure the height of the drawer box at several points. Note the smallest measurement.
- Measure Depth: Measure the depth of the drawer box, from the back of the drawer front (if attached) to the back panel of the box. Or from the very front edge of the box to the back edge.
- Check for Squareness: Use a framing square to check if the old drawer box is still square. If it is significantly out of square, it might be part of the problem. If it is warped, rely more on cabinet opening measurements.
- Measure Drawer Front: If the drawer front is attached, measure its width and height. Note if it is an overlay or inset type.
Option 2: Measuring the Cabinet Opening (Recommended for Problematic Drawers)
If the old drawer does not fit well, or if you suspect the cabinet opening is the true guide, follow these steps. This is also the best approach if the old drawer is severely damaged or missing. This method is similar to measuring for new drawers but with the context of an existing setup.
- Measure Cabinet Opening Width:
- Measure the inside width of the cabinet opening at the top, middle, and bottom.
- Record the smallest width.
- Subtract the required side clearances for the drawer slides (usually 1 inch total for side-mount slides, or as per slide specifications). This is your new drawer box width.
- Measure Cabinet Opening Height:
- Measure the inside height of the cabinet opening at the left, center, and right.
- Record the smallest height.
- Subtract any top and bottom clearances needed. This gives you the new drawer box height.
- Measure Cabinet Opening Depth:
- Measure from the front edge of the cabinet frame to the back wall of the cabinet.
- Consider the length of your existing drawer slides. If you are reusing slides, measure their length. If replacing them, choose new slides that fit within your cabinet depth, leaving about 1 inch (25mm) clearance at the back. Your new drawer box depth will typically match the slide length.
- Inspect Existing Slides: If you plan to reuse the old slides, inspect them for wear or damage. Sometimes, a poorly fitting drawer is due to faulty slides, not the drawer itself. If the slides are worn, it is wise to replace them when replacing the drawer box. Understanding how to manage existing slides is key. You might find guidance on how to install sliding drawers in kitchen cabinets helpful if replacing slides.
Key Consideration: When replacing, always check if the original drawer was an overlay or inset type. This impacts how you measure and attach the new drawer front. If your existing setup uses pull-out pantry drawers, the same measurement principles apply for replacement, often with a focus on internal cabinet space. For insights into these specific types, consider resources on how to organize pull-out pantry drawers.
Measuring for Drawer Fronts and Faces
The drawer front is the visible part of your drawer. Its measurements depend on whether it is an overlay or inset style. Getting these dimensions right ensures your cabinet looks consistent and professional. Mistakes here will be visually apparent.
1. Overlay Drawer Fronts
Overlay fronts sit on the outside of the cabinet frame. They cover the drawer box and part of the cabinet face frame. This style offers more forgiveness in measurements compared to inset fronts.
- Full Overlay: These fronts cover almost the entire cabinet face frame, leaving minimal gaps between doors and drawers.
- Width: Measure the width of the cabinet opening. Add the desired overlay amount to each side. For example, if you want a 1/2-inch overlay on each side, add 1 inch to the opening width.
- Height: Measure the height of the cabinet opening. Add the desired overlay amount to the top and bottom. If this drawer is part of a stack, consider the reveal (gap) needed between drawers. A common reveal is 1/8 inch. If you have two drawers sharing a 1/8-inch gap, each drawer’s overlay will extend 1/16 inch into that gap.
- Example: For a single drawer opening 15” W x 8” H, and you want 1/2” overlay on all sides:
- Drawer Front Width = 15” (opening) + 1/2” (left overlay) + 1/2” (right overlay) = 16”
- Drawer Front Height = 8” (opening) + 1/2” (top overlay) + 1/2” (bottom overlay) = 9”
- Partial Overlay: These fronts cover only a portion of the cabinet frame, leaving more of the frame visible.
- Width & Height: Measure the width and height of the cabinet opening. Add the desired partial overlay amount to each side, top, and bottom. The amount depends on your desired exposed frame width.
- Example: If your cabinet frame is 1.5 inches wide and you want a 1/2 inch reveal on the frame, your overlay would be 1 inch on each side.
- Drawer Front Width = Opening Width + (1 inch overlay * 2)
Key Tip for Overlay: If you have multiple drawers or doors in a row, consider the desired gap (reveal) between them. Typically, this gap is 1/8 inch (3mm). For two adjacent drawer fronts sharing this gap, each front will extend 1/16 inch into the gap. Measure the overall opening for multiple drawers, divide by the number of drawers, and then subtract the total required reveal space. For example, for a single unit like a nightstand with drawers, you’d apply similar logic. You can see how this plays out in projects like how to build a nightstand with 2 drawers.
2. Inset Drawer Fronts
Inset fronts fit inside the cabinet opening, flush with the cabinet frame. They require very precise measurements and small, consistent gaps around all edges.
- Width: Measure the exact width of the cabinet opening (the smallest measurement from top, middle, bottom).
- Subtract the desired clearance from both sides. A common clearance is 1/16 inch (1.5mm) on each side, totaling 1/8 inch (3mm) for the entire width. This allows the drawer front to open and close without rubbing.
- Example: If your smallest opening width is 15 inches, your inset drawer front width would be 14 7/8 inches (15 - 1/8 = 14 7/8).
- Height: Measure the exact height of the cabinet opening (the smallest measurement from left, center, right).
- Subtract the desired clearance from both the top and bottom. Again, 1/16 inch on each side is common, totaling 1/8 inch for the entire height.
- Example: If your smallest opening height is 8 inches, your inset drawer front height would be 7 7/8 inches (8 - 1/8 = 7 7/8).
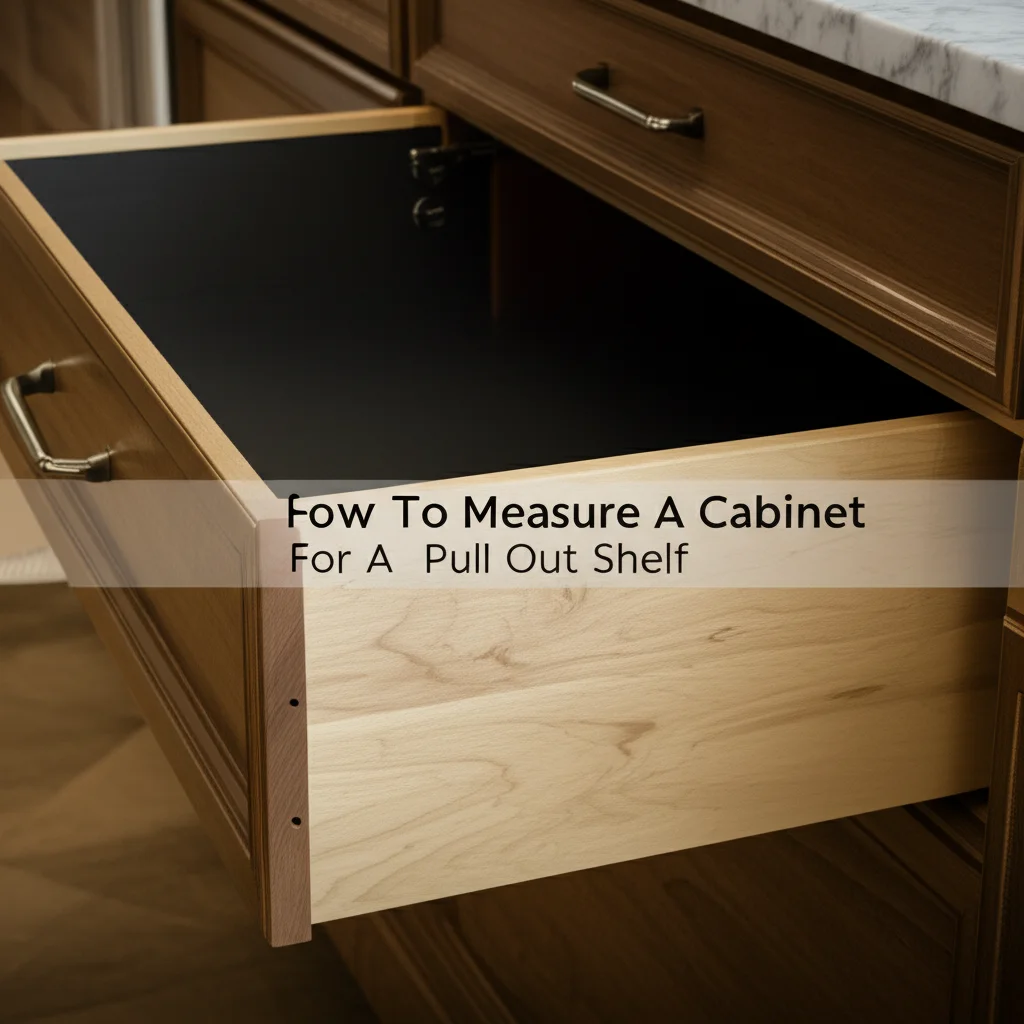
Critical Note for Inset: Inset fronts demand exact measurements. Any slight error will be noticeable. It is important to ensure your cabinet opening is perfectly square when planning for inset fronts. If the opening is not square, your drawer front will not sit flush. Always double-check your measurements, then check them again. This precision is also crucial when measuring for other cabinet components, such as when you might need to measure a cabinet for a pull-out shelf.
Accounting for Drawer Slides and Hardware
Drawer slides are essential for smooth drawer operation. They dictate the necessary clearances inside your cabinet. Ignoring slide specifications is a common mistake that leads to drawers that do not fit. There are a few main types, and each has its own requirements.
1. Side-Mount Drawer Slides
These are the most common type. They consist of two parts: one attaches to the side of the drawer box, and the other to the inside of the cabinet opening.
- Clearance: Most side-mount slides require 1/2 inch (12.7mm) of space on each side of the drawer box. This means your drawer box must be 1 inch (25.4mm) narrower than the smallest inside width of your cabinet opening.
- Calculation: Drawer Box Width = Cabinet Opening Width - 1 inch.
- Length: Slides come in standard lengths (e.g., 14, 16, 18, 20, 22 inches). Your drawer box depth should typically match the slide length. This ensures the drawer can extend fully. Ensure your cabinet depth allows for the chosen slide length, plus about 1 inch of clearance at the back when the drawer is closed. This extra space helps if you use rear mounting brackets for the slides.
- Weight Capacity: Consider the weight your drawer will hold. Choose slides with an appropriate weight capacity. Heavy-duty slides might have slightly different clearance requirements, so always check the manufacturer’s instructions.
2. Under-Mount Drawer Slides (Concealed Slides)
These slides mount underneath the drawer box, making them invisible when the drawer is open. They offer a cleaner look.
- Clearance: Under-mount slides require very specific clearances.
- Side Clearance: Often, only about 1/8 inch (3mm) total side clearance is needed between the drawer box and the cabinet opening. This means the drawer box width will be closer to the cabinet opening width than with side-mount slides.
- Bottom Clearance: These slides need specific space below the drawer box. They often require the drawer box bottom to be recessed or notched. Always refer to the manufacturer’s installation guide for precise requirements, as these can vary significantly between brands.
- Length: Similar to side-mount slides, under-mount slides come in standard lengths. Your drawer box depth should match the slide length.
- Drawer Box Construction: Under-mount slides often require a specific drawer box construction. The bottom of the drawer box might need to be set into a dado or groove, allowing the slides to engage properly.
3. Center-Mount Drawer Slides
These slides mount underneath the center of the drawer box and attach to a rail in the cabinet. They are less common for new installations but can be found in older furniture.
- Clearance: They require clearance on both sides of the drawer box for it to fit into the cabinet. The drawer box width needs to be slightly less than the opening.
- Weight Capacity: Generally, center-mount slides have a lower weight capacity compared to side or under-mount slides.
General Hardware Considerations:
- Knobs and Pulls: While not affecting the drawer box measurement directly, consider the placement of knobs or pulls on your drawer front. Ensure they do not interfere with adjacent doors or drawers when opening.
- Soft-Close Mechanisms: Many modern slides include a soft-close feature. This is integrated into the slide itself and does not usually affect measuring for the drawer box.
- Buy Slides First: It is often a good idea to purchase your drawer slides before building or ordering your drawer boxes. This way, you can consult the exact specifications for your chosen slides and ensure your measurements are perfect for them. Different brands and types can have slight variations in required clearances.
By carefully considering the type of drawer slides and their specific clearance requirements, you ensure your drawer boxes fit perfectly and operate smoothly. This attention to detail contributes to a professional and functional result for your home organization.
Planning for Multiple Drawers in a Single Opening
Sometimes, a single large cabinet opening needs to house multiple drawers, stacked vertically. This requires careful planning of both height and the gaps between drawer fronts. It’s not just about fitting each drawer; it is about making them work together visually and functionally.
1. Determine Overall Opening Height
First, measure the total clear height of the cabinet opening. Measure from the bottom interior of the cabinet up to the underside of the top frame or fixed shelf. Measure at several points and use the smallest dimension. This is your starting point for dividing the space.
2. Decide on Number of Drawers and Drawer Front Style
- Number of Drawers: How many drawers do you want? Two, three, or more? This will directly impact the height available for each drawer.
- Drawer Front Style:
- Overlay: Most common for stacked drawers. You will need to decide on the reveal (gap) between each drawer front. A standard reveal is 1/8 inch (3mm).
- Inset: Much harder for stacked drawers due to cumulative error and the need for very tight tolerances. Each gap must be perfect.
3. Calculate Individual Drawer Front Heights (Overlay Style)
This is a critical step.
- Total Reveal Space: Calculate the total reveal space needed. If you have N drawers, there will be (N-1) gaps between them. For example, 3 drawers will have 2 gaps.
- Calculation: Total Reveal = (Number of Drawers - 1) x Desired Gap (e.g., 1/8 inch).
- Available Front Height: Subtract the total reveal space from the overall cabinet opening height. This gives you the total height available for all drawer fronts combined.
- Calculation: Available Front Height = Overall Opening Height - Total Reveal.
- Individual Drawer Front Height: Divide the “Available Front Height” by the number of drawers.
- Calculation: Individual Front Height = Available Front Height / Number of Drawers.
- Example: Cabinet opening height is 24 inches. You want 3 drawers, with 1/8 inch gaps between them.
- Total Reveal = (3 - 1) x 1/8 inch = 2 x 1/8 inch = 1/4 inch.
- Available Front Height = 24 inches - 1/4 inch = 23 3/4 inches.
- Individual Front Height = 23 3/4 inches / 3 = 7 15/16 inches.
- Each drawer front would be 7 15/16 inches tall.
4. Calculate Individual Drawer Box Heights
Now that you have the drawer front height, you need to determine the drawer box height.
- The drawer box height needs to be shorter than the drawer front. This allows the drawer front to slightly overlap the cabinet frame or the drawer above/below it.
- Consider Slide Placement: The type of drawer slide (side-mount vs. under-mount) will influence how high the drawer box can be relative to the slide’s position.
- Typically, the drawer box height will be about 1/2 to 1 inch shorter than the drawer front height. This allows the drawer front to extend above and below the drawer box for aesthetic purposes and to hide the drawer box edges.
- Example: If your drawer front is 7 15/16 inches tall, your drawer box might be 7 inches or 7 1/2 inches tall, depending on your preference and slide type.
5. Verify Fit and Clearance
Before ordering or cutting, always draw a detailed sketch. Label all dimensions:
- Overall opening width and height.
- Individual drawer front widths and heights.
- The reveals (gaps) between fronts.
- Individual drawer box widths, heights, and depths.
- Drawer slide clearances.
This visual plan helps catch errors and ensures all components will fit together harmoniously. Remember that the sum of your drawer front heights plus the total reveal space should equal your overall cabinet opening height. This meticulous approach ensures that all your drawers not only fit but also look cohesive and function flawlessly, enhancing your home’s storage capabilities.
Common Drawer Measurement Mistakes to Avoid
Measuring for drawers seems simple, but small errors can lead to big problems. Many DIYers and even professionals make common mistakes that cause frustrating reworks or wasted materials. Knowing these pitfalls helps you avoid them.
Here are some common mistakes and how to prevent them:
- Measuring Only Once: This is perhaps the most frequent error. Always measure at least two or three times. Measure the width at the top, middle, and bottom. Measure the height on the left, center, and right. Measure the depth at various points. Use the smallest measurement obtained for each dimension. This ensures the drawer will fit even if the opening is not perfectly square.
- Not Accounting for Drawer Slide Clearances: Many people measure the cabinet opening and make the drawer box that exact size. This means the drawer will not fit, or it will bind when trying to install the slides. Remember, side-mount slides usually need 1/2 inch clearance on each side, totaling 1 inch less for the drawer box width. Always check the specific
- drawer measurement
- cabinet dimensions
- custom drawers
- DIY storage
- kitchen drawers
- drawer installation
- home organization

Katria Melrose
Cleaning Specialist
With over 12 years of experience in commercial cleaning and a certification in workplace ergonomics, I’ve developed a deep understanding of what makes a workspace truly productive. At HEG, I specialize in helping people transform their home offices into clean, efficient, and comfortable environments. Through smart cleaning routines and strategic organization solutions, I empower readers to create spaces that support focus, comfort, and success—one well-organized desk at a time.