· Todd Martin · Home Improvement · 21 min read
How To Paint A Metal Desk
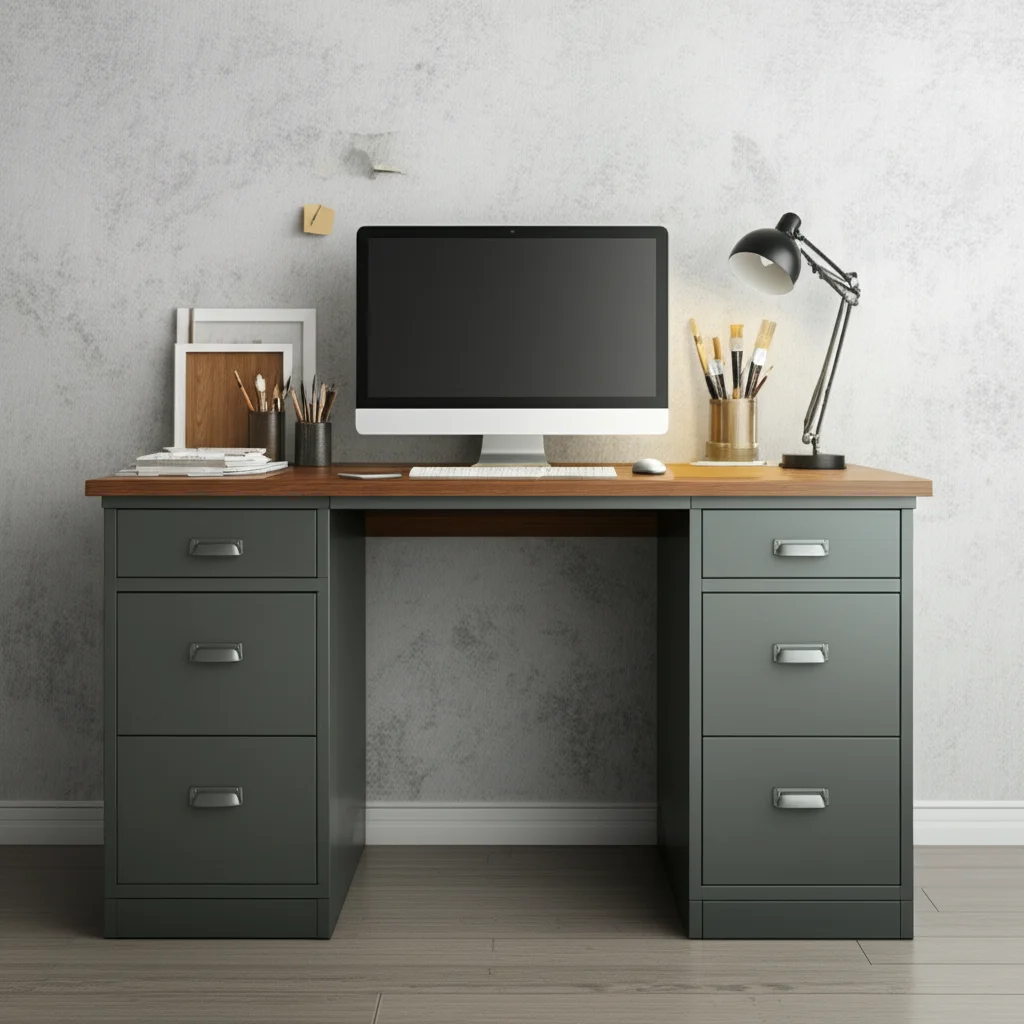
Revitalize Your Workspace: How to Paint a Metal Desk
Have you looked at your metal desk lately and thought it needed a change? A tired, scuffed, or simply outdated metal desk can make your entire workspace feel uninspired. Painting a metal desk is a simple, cost-effective way to give it a fresh look. You can transform it from drab to fab with just a few supplies and some effort. This guide helps you achieve a durable, beautiful finish.
In this article, I will walk you through every step of the process. We cover everything from proper preparation to choosing the right paint and applying it flawlessly. You will learn how to prepare the surface, select appropriate primers and paints, and apply them for a professional result. By the end, your metal desk will not only look new but also feel like a custom piece. Let us dive into making your desk a true centerpiece.
Takeaway:
- Proper surface preparation is crucial for paint adhesion and durability.
- Always use a primer specifically designed for metal to prevent rust and improve paint longevity.
- Select paints formulated for metal surfaces for the best results and wear resistance.
- Apply thin, even coats of paint, allowing ample drying time between each layer.
- A clear topcoat protects your painted desk from daily wear and tear.
To paint a metal desk, you must first clean and sand it thoroughly. Apply a rust-inhibiting metal primer. Then, apply two to three thin coats of metal-specific paint, allowing each coat to dry completely. Finish with a clear protective topcoat for added durability.
Why Paint Your Metal Desk? Benefits and Considerations
Painting your metal desk offers many practical and aesthetic benefits. It is a fantastic way to update an old piece of furniture without buying new. This project allows you to personalize your workspace. You can match your desk to your decor or express your unique style.
Beyond looks, painting adds a protective layer to the metal. This layer helps guard against scratches, dings, and rust. It extends the life of your desk significantly. Refinishing is also an eco-friendly choice, as it prevents perfectly good furniture from ending up in a landfill. My own metal filing cabinet looked terrible until a fresh coat of paint brought it back to life. It now serves its purpose better than ever.
Assessing Your Desk’s Current Condition
Before you start, take a good look at your metal desk. Check for any existing rust spots, deep scratches, or peeling paint. The current condition dictates how much prep work you need to do. A desk with significant rust requires more vigorous cleaning and rust removal. One with minor scuffs might only need a light sanding.
Understanding the desk’s material is also important. Most metal desks are steel or aluminum. Your choice of primer and paint depends on this. Ensure you buy products compatible with your desk’s specific metal type. This initial assessment saves you time and effort later.
Choosing the Right Time and Place
Selecting the correct environment for painting is essential for a good outcome. Work in a well-ventilated area, preferably outdoors or in a garage with open doors. Paint fumes can be strong and harmful. Ensure the temperature is moderate, typically between 60-80°F (15-27°C). Extreme temperatures can affect paint drying and curing.
Choose a day when humidity levels are low. High humidity can cause paint to dry slowly or unevenly. Lay down drop cloths or old newspapers to protect your surrounding surfaces from paint spills. I always check the weather forecast before starting any painting project outside. This simple step prevents many headaches.
Essential Tools and Materials for Painting a Metal Desk
Gathering all your tools and materials before you start saves time and frustration. Having everything on hand ensures a smooth process. You do not want to stop in the middle of a project to run to the store. This comprehensive list covers everything you will need. From protective gear to the right paint, we have you covered.
Investing in quality supplies often leads to better results. Cheap brushes or low-quality paint can make the job harder. They might also lead to a less durable finish. Think of this as an investment in your desk’s future. It makes the entire painting experience more enjoyable and successful.
Protective Gear for Safety
Safety always comes first when working with paints and chemicals. You need to protect your eyes, hands, and respiratory system. Proper ventilation is also a must, but personal protective equipment adds another layer of defense. Never skip this step. It is crucial for your health.
- Safety Glasses or Goggles: Protect your eyes from paint splatters and dust.
- Gloves: Chemical-resistant gloves prevent skin contact with primers, paints, and solvents.
- Respirator Mask: A proper mask (N95 or higher) filters out harmful fumes and dust particles.
- Old Clothes/Coveralls: Protect your clothing from paint stains.
Cleaning and Prep Supplies
Effective preparation is the secret to a lasting paint job. These supplies help you clean, degrease, and smooth the desk surface. Proper cleaning ensures that paint adheres well. Skipping this step often leads to peeling or bubbling paint down the line.
- Mild Detergent or Degreaser: To remove dirt, grease, and grime.
- Clean Rags or Sponges: For washing and wiping down the desk.
- Wire Brush or Steel Wool: For removing loose rust and paint flakes.
- Sandpaper: Various grits (80-120 grit for heavy rust/old paint, 180-220 grit for light scuffing, 320-400 grit for smoothing primer).
- Tack Cloths: To pick up fine dust particles after sanding.
- Painter’s Tape: To mask off areas you do not want to paint.
- Drop Cloths or Tarps: To protect your work area.
Primers, Paints, and Topcoats
Choosing the right primer and paint is essential for metal surfaces. They need to withstand wear and prevent rust. Different types of paint offer various finishes and levels of durability. Consider the look you want to achieve.
- Metal Primer: A rust-inhibiting or self-etching primer designed for metal. This is a crucial step for adhesion and preventing future rust.
- Metal Paint:
- Oil-Based Enamel: Very durable, good for high-traffic areas. Dries slower, strong fumes.
- Water-Based Acrylic Latex (with metal-specific properties): Easier cleanup, less odor, faster drying. Look for formulas designed for metal.
- Epoxy Paint: Extremely durable, often used for industrial applications, but some consumer versions exist.
- Spray Paint: Convenient for even coats, especially on intricate designs. Ensure it is rated for metal and offers rust protection.
- Clear Topcoat/Sealer: A clear protective layer (polyurethane or acrylic) to enhance durability and finish. Choose one compatible with your chosen paint.
Application Tools
The tools you use to apply paint affect the final finish. Brushes, rollers, or sprayers each offer different advantages. Your choice depends on the size and shape of your desk, and your preferred method. My preferred method for metal desks is often spray paint for a smooth finish.
- Paint Brushes: High-quality synthetic brushes for detailed areas or if using brush-on paint.
- Small Foam Rollers: For smooth, even coverage on flat surfaces.
- Spray Gun (Optional): For a professional, factory-like finish, but requires more setup and cleanup.
- Stir Sticks: To thoroughly mix your paint.
- Paint Tray (if using brush/roller): For easy paint loading.
With these supplies ready, you are well-prepared for a successful metal desk painting project.
Preparing Your Metal Desk for a Flawless Finish
The success of your painting project hinges on meticulous preparation. This step is more critical than the painting itself. Any shortcuts here will show in the final product. Paint will not adhere well to dirty, rusty, or uneven surfaces. Proper preparation creates a clean, smooth base for the paint.
My experience shows that 80% of a good paint job is in the prep work. Do not rush this phase. Taking your time here guarantees a durable and beautiful finish. This section details each necessary step.
Disassembly and Workspace Setup
First, clear everything off your desk. If possible, disassemble the desk into its main components. Remove any drawers, hardware, or decorative elements. This allows you to paint all surfaces evenly. It also protects parts you do not want painted.
Set up your workspace. Lay down drop cloths or plastic sheeting to protect the floor and surrounding areas. Ensure good ventilation. If working indoors, open windows or use fans. Proper lighting helps you see imperfections.
Thorough Cleaning and Degreasing
Next, clean the entire desk surface thoroughly. Use a mild detergent or a dedicated degreaser mixed with warm water. Wipe down every part of the desk. Pay special attention to areas with grime or sticky residue. Grease and dirt prevent paint from sticking.
Rinse the desk completely with clean water. Make sure no soap residue remains. Allow the desk to dry completely. Any moisture trapped under the paint can cause adhesion problems later. For more details on cleaning metal surfaces, you might find this guide helpful: how to clean metal before painting. This step creates a pristine surface for the next stages.
Removing Rust and Old Paint
Rust is an enemy of paint adhesion. You must remove all traces of it. Use a wire brush, steel wool, or sandpaper (80-120 grit) to scrape away rust. For stubborn rust, a rust converter product can chemically treat it. If your desk has old, peeling paint, remove that too. Scrape or sand away any loose flakes.
For smooth, intact old paint, you only need to scuff it. If the old paint is chipping, you need to remove it. You can use a paint stripper for extensive old paint removal. Always follow the product instructions for safe use. Learning how to remove rust from metal chairs offers similar techniques applicable here.
Light Sanding for Adhesion
After cleaning and rust removal, lightly sand the entire surface of the metal desk. Use 180-220 grit sandpaper. The goal is to scuff the surface, not to remove all the existing finish. This creates microscopic scratches. These scratches provide “tooth” for the primer to grip onto. This step is crucial even if your desk seems smooth.
After sanding, wipe down the desk with a tack cloth. This removes all sanding dust. Dust particles can cause bumps and an uneven finish. Run your hand over the surface to ensure it feels smooth and dust-free. If you want to learn more about cleaning older metal items, check out how to clean old metal.
Priming Your Metal Desk for Optimal Adhesion and Durability
Priming is a non-negotiable step when painting metal. It acts as a bridge between the bare metal and your topcoat. Primer serves several critical functions. It promotes adhesion, prevents rust, and provides a uniform base for the paint color. Skipping primer almost guarantees a less durable and aesthetically pleasing finish.
I once tried to skip primer on a small metal project, and the paint peeled within weeks. Never again. Take the time to prime properly. It saves you from future headaches and rework. This section explains why primer is vital and how to apply it correctly.
Why Primer is Non-Negotiable
Primer creates a surface for the paint to bond with. Metal surfaces are often too smooth for paint to adhere properly. Primer forms a strong, grippy layer. This prevents the paint from chipping, flaking, or scratching off easily. It also ensures color uniformity. It blocks any stains or existing colors from bleeding through your new paint.
For metal, primer is especially important for rust prevention. Many metal primers contain rust inhibitors. These chemicals actively prevent rust from forming, even if the metal gets scratched. This is vital for the longevity of your painted desk. A good primer acts as a foundational shield.
Selecting the Correct Metal Primer
Choosing the right primer is as important as choosing the right paint. You need a primer specifically designed for metal. There are two main types to consider:
- Rust-Inhibiting Primer: This is a general-purpose metal primer. It contains agents that prevent rust formation. It works well on both new and previously rusted (but cleaned) metal surfaces.
- Self-Etching Primer: This type chemically etches the metal surface. It creates an even stronger bond, especially useful for very smooth metals like aluminum or galvanized steel. It provides excellent adhesion.
Both spray-on and brush-on primers are available. Spray primers offer a smoother, more even coat, which is often preferred for desks. Always check the primer’s label for compatibility with your chosen topcoat paint. Compatibility ensures proper adhesion between layers.
Applying the Primer Evenly
Apply the primer in thin, even coats. Avoid applying a thick layer. Thick coats can lead to drips, uneven drying, and reduced adhesion. If using spray primer, hold the can about 8-12 inches from the surface. Use a steady, sweeping motion. Overlap each pass slightly to ensure full coverage.
For brush-on primer, use a good quality brush. Apply smooth, consistent strokes. Ensure there are no puddles or drips. Allow the first coat of primer to dry completely according to the manufacturer’s instructions. This usually takes a few hours. If the desk has significant rust or imperfections, a second thin coat of primer might be beneficial. Lightly scuff the first primer coat with 320-grit sandpaper before applying the second. Remember to wipe off any dust with a tack cloth.
Choosing and Applying the Best Paint for Your Metal Desk
Once your metal desk is primed and ready, the fun begins: choosing and applying the actual paint color. The type of paint you select significantly impacts the final look and durability. Applying it correctly ensures a professional, lasting finish. This is where your desk’s personality truly comes to life.
I love this part because it is where the transformation becomes visible. Seeing the color come alive on the desk is rewarding. Let us explore the best paint options and application methods to achieve stunning results.
Paint Type Considerations
For metal desks, you need a paint that offers both aesthetics and durability. Here are common choices:
- Oil-Based Enamel: This paint is very durable and provides a hard, protective finish. It resists chips and scratches well. It is an excellent choice for high-traffic desks. However, it dries slowly and has strong fumes, requiring good ventilation. Cleanup needs mineral spirits.
- Water-Based Acrylic Latex (for metal): Modern acrylic latex paints specifically formulated for metal offer good durability, faster drying times, and easier water cleanup. They have lower VOCs (volatile organic compounds) and less odor. Make sure the label states it is suitable for metal and offers rust resistance.
- Spray Paint for Metal: This is often the easiest way to achieve a smooth, factory-like finish. Many spray paints are designed for metal and include primer and rust inhibitors. They are great for intricate designs and getting into tight corners. They dry quickly. You can learn more about techniques by reading how to spray paint outdoor metal furniture.
- Epoxy Paint: While often used in industrial settings, some consumer-grade epoxy paints exist. These offer extreme durability and chemical resistance. They are very hard-wearing but can be more challenging to apply and may have strong fumes.
Consider your desired finish (gloss, semi-gloss, satin, matte) and how much wear and tear your desk will experience. High-gloss finishes are very durable but show imperfections more. Satin or matte finishes hide flaws better. When selecting your paint color, consider how it will fit with your room’s existing decor. Painting a large piece of furniture like a desk is a commitment, so choose wisely. If you are aiming for a classic look, how to paint a table black offers great insights into achieving a rich, dark finish.
Spray Painting Techniques
Spray painting is popular for metal desks due to its smooth finish. Here is how to get it right:
- Shake the Can: Shake the spray paint can vigorously for at least one minute before use and periodically during application. This mixes the pigment properly.
- Test Spray: Always do a test spray on a piece of cardboard. This helps you check the spray pattern and practice your technique.
- Light, Even Coats: Apply paint in thin, even coats. Hold the can 8-12 inches away from the surface. Use steady, sweeping motions. Overlap each pass by about one-third. Do not try to achieve full coverage in one coat. This prevents drips and runs.
- Multiple Coats: Apply two to three thin coats for best results. Allow each coat to dry completely before applying the next. Refer to the manufacturer’s drying times, usually 15-30 minutes for touch-dry. Full cure time is longer.
- Corners and Edges: When spraying, angle the can to cover edges and corners evenly. Avoid excessive buildup in these areas.
Brush-On Application Tips
If you prefer using a brush or roller, here are some tips:
- Choose the Right Tools: Use a high-quality synthetic brush for oil-based or acrylic paints. Small foam rollers work well for flat desk surfaces, providing a smoother finish than brushes.
- Load Evenly: Do not overload your brush or roller. Dip only a third of the brush bristles into the paint. Rollers should be evenly coated but not dripping.
- Smooth, Consistent Strokes: Apply paint in smooth, consistent strokes. For brushes, work in one direction following the metal grain if any, or in long, even passes. For rollers, use light, even pressure.
- Avoid Overworking: Do not brush or roll over partially dried paint. This can create streaks and an uneven texture. Apply the paint and move on.
- Multiple Thin Coats: Like spray painting, apply two to three thin coats. Allow each coat to dry fully before applying the next. This builds up a durable finish. How to paint furniture with latex paint provides useful information applicable to brush-on methods for metal.
By carefully applying your chosen paint, you will achieve a beautiful and lasting finish on your metal desk.
Sealing and Protecting Your Newly Painted Metal Desk
Congratulations! Your metal desk now boasts a fresh coat of paint. However, the job is not quite finished. To ensure your hard work lasts, you must seal and protect the painted surface. A clear topcoat adds durability and defends against daily wear, scratches, and moisture. This final layer locks in your beautiful new finish.
This step is critical for a long-lasting desk. Without a topcoat, your painted surface remains vulnerable. I always apply a topcoat to any painted furniture piece that will see regular use. It is the protective shield your desk needs.
The Importance of a Clear Topcoat
A clear topcoat serves as a transparent protective barrier over your paint. It shields the paint from:
- Scratches and Chips: Daily use can cause damage. A topcoat significantly increases the paint’s resistance to physical abrasion.
- Moisture and Spills: While your paint might be water-resistant, a topcoat adds an extra layer of defense against spills and humidity. This is especially important for a desk where drinks might sit.
- UV Damage: If your desk is near a window, UV rays can cause paint to fade over time. Many topcoats offer UV protection.
- Dirt and Grime: A smooth topcoat surface is easier to clean. Dirt and grime wipe off without damaging the paint underneath.
Think of it as the clear coat on a car. It protects the color layer underneath. It ensures your desk stays beautiful for years.
Applying Protective Layers
Just like with primer and paint, apply the clear topcoat in thin, even layers. This prevents drips and ensures a smooth, uniform finish.
- Ensure Paint is Fully Dry: Before applying the topcoat, make sure your paint is completely dry and cured. “Dry to the touch” is not enough. Read the paint manufacturer’s instructions for full cure time. This can range from 24 hours to several days. Applying a topcoat too soon can cause bubbling or adhesion issues.
- Select the Right Topcoat: Choose a clear topcoat compatible with your paint type.
- Polyurethane: Very durable, comes in oil-based (more durable, yellowing over time) and water-based (less yellowing, faster drying) formulas.
- Acrylic Sealer: Good for water-based paints, often non-yellowing.
- Spray Clear Coat: Convenient for even application, especially if you used spray paint.
- Choose your desired sheen: matte, satin, semi-gloss, or high-gloss.
- Apply Thin Coats: Whether spraying or brushing, apply thin, even coats.
- Spray: Hold the can 8-12 inches away, use steady sweeping motions.
- Brush/Roll: Use a clean, quality brush or foam roller, applying light, even pressure.
- Multiple Coats for Durability: Two to three thin coats are usually sufficient. Allow each coat to dry thoroughly between applications. Lightly scuffing with 400-grit sandpaper between coats can improve adhesion, but this is optional and depends on the product. Always wipe with a tack cloth after sanding.
Proper Curing and Drying Times
Drying time refers to how long it takes for paint or topcoat to feel dry to the touch. Curing time is how long it takes for the paint to reach its maximum hardness and durability. This can take much longer, sometimes days or even weeks.
- Follow Manufacturer Instructions: Always refer to the specific product’s label for drying and curing times. These times vary widely.
- Patience is Key: Do not use your desk or place heavy items on it until the topcoat has fully cured. Rushing this step can leave marks, dents, or permanently damage the finish.
- Environmental Factors: Humidity and temperature affect drying and curing times. Good ventilation helps speed up the process.
By diligently applying and allowing proper cure time for your topcoat, your newly painted metal desk will withstand the rigors of daily use beautifully.
Troubleshooting Common Painting Issues and Maintenance Tips
Even with careful preparation, painting projects can sometimes encounter small issues. Do not get discouraged if something does not go perfectly. Many common problems are easy to fix. Knowing how to address them helps you achieve a truly professional-looking finish. After the painting is complete, proper maintenance will keep your desk looking great for years.
I have faced many painting mishaps over the years. Experience taught me that patience and knowing a few simple fixes go a long way. This section guides you through troubleshooting and long-term care for your painted metal desk.
Addressing Paint Imperfections
- Drips or Runs: These happen when you apply paint too thickly.
- Fix: If the paint is still wet, you can sometimes brush or roll it out gently. If it is dry, carefully sand down the drip with fine-grit sandpaper (320-400 grit). Then, clean the area and reapply a thin coat of paint.
- Uneven Coverage or Streaks: This can result from insufficient paint, uneven application, or improper blending.
- Fix: Allow the paint to dry completely. Lightly sand the uneven areas to smooth them. Apply another thin, even coat of paint, ensuring consistent coverage.
- Bubbles or Blisters: Often caused by trapped air, moisture, or applying paint in direct sunlight.
- Fix: If the paint is wet, you can sometimes pop the bubbles and smooth them out. If dry, sand down the bubbles completely. Clean the area thoroughly and reapply paint in thinner coats, avoiding direct sunlight or high humidity.
- Poor Adhesion/Peeling: This usually points to inadequate surface preparation (e.g., not cleaning or sanding enough).
- Fix: You must address the root cause. Scrape off all peeling paint. Re-clean, re-sand, and re-prime the area. Then, repaint. This is why prep work is so important.
Maintaining Your Painted Metal Desk
Once your metal desk is beautifully painted and fully cured, regular maintenance will keep it looking its best.
- Regular Cleaning: Wipe down your desk regularly with a soft, damp cloth. Use mild soap and water for tougher grime. Avoid abrasive cleaners or scouring pads, as they can scratch the painted surface.
- Protect from Scratches: Use desk pads, coasters, or placemats under items that might scratch the surface, such as laptops, mugs, or sharp objects. Felt pads on the bottom of accessories also help.
- Avoid Harsh Chemicals: Do not use strong solvents, acetone, or harsh cleaning chemicals on your painted desk. These can damage the paint and topcoat. Stick to mild, pH-neutral cleaners.
- Address Dings Promptly: If your desk gets a small chip or scratch, touch it up quickly. Clean the area, apply a tiny bit of primer if the metal is exposed, then touch up with your paint and clear coat. Prompt repair prevents further damage or rust.
- Avoid Extreme Temperatures: While the paint is durable, extreme heat or cold can affect its longevity. Avoid placing very hot items directly on the desk surface without protection.
When to Consider Professional Help
Most metal desk painting projects are manageable DIY tasks. However, sometimes professional help is a good idea.
- Extensive Rust or Damage: If your desk has severe structural rust or significant damage, a professional might offer restoration services. They can handle specialized blasting or welding.
- Complex Designs or Finishes: For intricate designs or if you desire a very specific, high-end finish (like a powder coat), a professional painter or restorer is best. Powder coating offers extreme durability but requires specialized equipment.
- Time Constraints: If you do not have the time or patience for the multi-step process, a professional can complete the job efficiently.
By understanding how to troubleshoot and maintain your painted metal desk, you ensure it remains a beautiful and functional part of your workspace for many years.
FAQ Section
Q1: What kind of paint is best for painting a metal desk?
A1: The best paint for a metal desk is typically an oil-based enamel or a water-based acrylic latex specifically formulated for metal. Both offer good durability and adhesion. For a smooth finish, spray paint designed for metal with rust-inhibiting properties is also an excellent choice. Always ensure the paint is suitable for the type of metal your desk is made from.
Q2: Do I need to remove all rust before painting a metal desk?
A2: Yes, it is crucial to remove all loose and flaking rust. You can use a wire brush, sandpaper, or a rust converter. Painting over rust will lead to poor adhesion, bubbling, and the rust returning through the paint. A clean, rust-free surface is essential for a lasting finish.
Q3: How long does it take for painted metal desk to fully cure?
A3: While paint can be dry to the touch in a few hours, the full curing time for a painted metal desk varies. It
- metal desk painting
- desk makeover
- DIY desk paint
- metal furniture
- rust prevention
- desk restoration
- spray painting metal
- durable desk finish

Todd Martin
Senior Writer
With over 15 years of experience in home renovation and design, I started HEG to share what I’ve learned with homeowners who want to create spaces that are both beautiful and functional. I’ve always believed in a hands-on approach, and over the years, I’ve picked up practical solutions that actually work. Through HEG, I aim to make home improvement more approachable, sharing real tips that help you create a home you truly love.