· Todd Martin · Home Improvement · 16 min read
How To Paint A Vinyl Chair
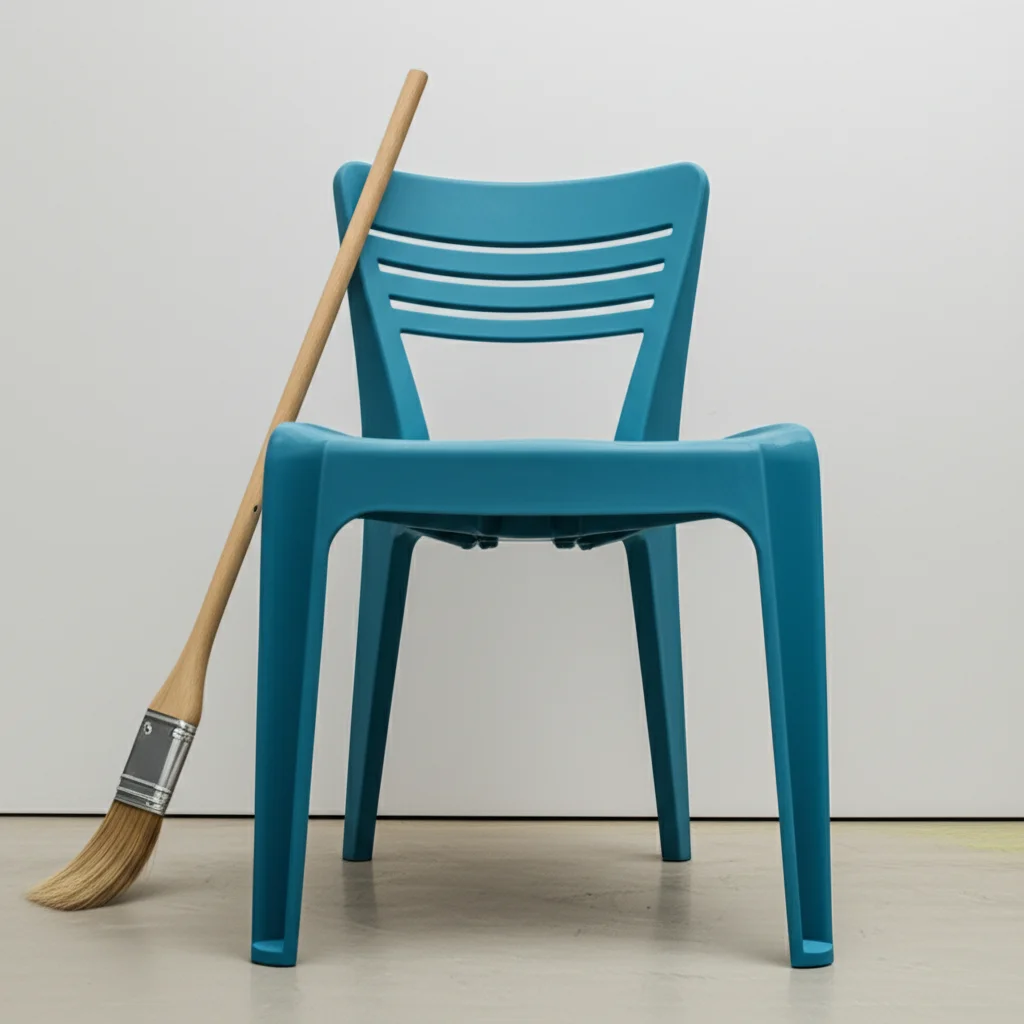
Painting a Vinyl Chair: Your Complete DIY Guide
Do you have a vinyl chair that looks worn? Perhaps its color no longer fits your decor. You might think buying a new chair is the only option. However, painting a vinyl chair offers a smart, budget-friendly solution. This project allows you to refresh old furniture and bring new life into your home. It provides a way to customize your space without breaking the bank.
This guide will show you exactly how to paint a vinyl chair. We will cover choosing the right materials and applying paint for a durable finish. You will learn about preparing the surface, selecting suitable paints, and proper application techniques. We also discuss important finishing steps to protect your work. By following these steps, you can achieve a professional-looking result. Get ready to transform your old vinyl chairs into stunning new pieces.
Takeaway:
- Prepare Thoroughly: Clean, degrease, and lightly sand the vinyl surface. This step ensures paint adhesion.
- Choose the Right Paint: Select flexible paints like vinyl dye, marine-grade paint, or acrylic-latex with an adhesion promoter.
- Prime Effectively: Use a flexible primer designed for plastics or vinyl. This creates a strong bond.
- Apply Thin Coats: Use multiple thin, even coats of paint. This prevents cracking and peeling.
- Seal for Durability: Apply a flexible topcoat or sealer to protect the painted surface.
How do you paint a vinyl chair?
You can paint a vinyl chair by first cleaning it thoroughly and degreasing the surface. Next, lightly sand the vinyl for better adhesion. Apply a flexible primer designed for plastics. Then, spray or brush several thin coats of a suitable, flexible paint. Finally, seal the painted surface with a clear, flexible topcoat for durability.
Why Paint Your Vinyl Chair? Discover the Benefits
Giving an old vinyl chair a fresh coat of paint offers many advantages. First, it saves you money. Buying new furniture can be expensive, but paint is a low-cost alternative. This project lets you update your space without a large investment. It also promotes sustainability by reusing what you already own.
Transforming your chair also allows for complete customization. You can choose any color to match your current room decor. This means your chair will perfectly complement your existing furniture. A new paint job also extends the life of your chair. It can cover minor imperfections and protect the vinyl from further wear. This makes your chair useful for many more years.
Painting is a fun and rewarding DIY project. You gain satisfaction from creating something new with your own hands. This process can be a relaxing and creative outlet. Plus, the end result is a unique piece of furniture. It reflects your personal style and creativity.
Think about the impact on your home. A dull, outdated chair can become a vibrant focal point. It lifts the mood of the room. Painting is a simple way to achieve a significant visual change. You can quickly achieve a fresh new look for your living space.
Choosing the Right Paint for Vinyl
Selecting the correct paint is vital when you paint a vinyl chair. Vinyl is a flexible material. Regular paints, like those for wood or metal, often crack or peel on vinyl. You need paint specifically designed to flex with the material. This ensures a lasting, smooth finish.
Several types of paint work well on vinyl. Vinyl dye is a popular choice. It penetrates the vinyl rather than sitting on top. This creates a very durable and flexible finish. Vinyl dye is less likely to chip or peel. It works best on light-colored vinyl you want to make darker.
Another option is marine-grade vinyl paint. This paint is designed for boat seats and outdoor furniture. It offers excellent flexibility, UV resistance, and water resistance. Marine paint withstands harsh conditions, making it a good choice for any vinyl chair. It comes in a wide range of colors.
Acrylic-latex paint can also work, but with a special preparation. You must mix an adhesion promoter with the paint. Alternatively, use a primer made for plastics. This primer creates a bonding layer. Without it, the acrylic-latex paint will not stick well. Look for paints labeled as “flexible” or suitable for “outdoor plastics.” For guidance on other furniture types, you might find useful information on how to paint furniture with latex paint.
Always check the paint label for specific instructions. Some paints require a specific primer or multiple thin coats. Using the right paint ensures your hard work lasts. It prevents common problems like cracking or peeling over time. Invest in quality products for the best outcome.
Essential Tools and Materials You Will Need
Before you start painting your vinyl chair, gather all necessary tools and materials. Having everything ready saves time and ensures a smooth process. You do not want to stop in the middle of a step. Preparing properly sets you up for success.
Here is a list of what you will need:
- Cleaning Supplies:
- Mild all-purpose cleaner or degreaser
- Clean rags or sponges
- Bucket of warm water
- Soft-bristle brush (optional, for stubborn dirt)
- Sanding Supplies:
- Fine-grit sandpaper (220-400 grit) or sanding sponge
- Protection:
- Drop cloths or old newspapers to protect your work area
- Painter’s tape to mask off any areas you do not want to paint (e.g., chair legs if they are not vinyl)
- Gloves (nitrile or latex)
- Safety glasses or goggles
- Respirator mask (especially for spray painting)
- Primer:
- Flexible adhesion primer for plastics or vinyl. This ensures your paint sticks.
- Paint:
- Your chosen vinyl-specific paint or vinyl dye. Ensure you buy enough for multiple coats.
- Applicators:
- High-quality synthetic brushes (for smooth finishes)
- Small foam rollers (for smooth, even coverage on flat areas)
- Spray paint cans (if using spray paint, ensure good ventilation)
- Paint sprayer (for professional, even coats, if you have one)
- Finishing Supplies:
- Flexible clear topcoat or sealer (optional, but recommended for durability)
- Other:
- Tack cloth to remove dust after sanding
- Screwdriver or wrench (if disassembling the chair)
Having these items ready prevents delays. It makes the entire painting project more enjoyable. Remember, safety first. Always wear your gloves and mask, especially when working with chemicals or spray paint.
Preparing Your Vinyl Chair for Painting
Proper preparation is the most critical step when you paint a vinyl chair. If you skip this stage, your paint might not stick or will peel quickly. Taking your time here guarantees a durable and professional finish. This is where most DIY painting projects fail if not done right.
First, disassemble the chair if possible. Remove any cushions, hardware, or legs that are not vinyl or you do not want to paint. This allows you to reach all surfaces easily. It also prevents accidental paint drips on other parts.
Next, clean the vinyl thoroughly. Use a mild all-purpose cleaner or a degreaser. Mix it with warm water according to the product instructions. Wipe down the entire chair surface. Pay close attention to crevices and seams. Dirt, grease, and grime will prevent paint from adhering. For specific methods, you can read more on how to clean vinyl furniture. If your chair is an outdoor type, like a boat seat, effective cleaning is even more crucial. Learn more about how to clean vinyl boat seats.
Rinse the chair well with clean water. Make sure no soap residue remains. Let the chair dry completely. Air drying is best, but you can gently wipe it with a clean, lint-free cloth. Ensure the surface is bone dry before moving on. Any moisture can affect paint adhesion.
Once dry, lightly sand the vinyl surface. Use fine-grit sandpaper (220 to 400 grit). This creates a slightly rough surface for the paint to grip. Do not sand too aggressively. You just need to dull the shine, not remove the vinyl. Pay attention to all areas, including edges and corners. After sanding, wipe the chair with a tack cloth to remove all dust. A clean, dust-free surface is ready for primer.
Priming for Superior Adhesion
Priming is a non-negotiable step for painting vinyl chairs. This layer acts as a bridge between the vinyl and your chosen paint. It ensures the paint sticks firmly and prevents peeling or cracking. Without proper priming, even the best vinyl paint might fail.
Choose a flexible adhesion primer specifically for plastics or vinyl. These primers contain special resins that bond well with synthetic materials. They create a “tooth” for the topcoat to grip onto. Regular primers might not offer this crucial flexibility and adhesion. Always read the primer label carefully for compatibility with vinyl.
Apply the primer in thin, even coats. If using spray primer, hold the can about 8-10 inches from the surface. Use a steady, sweeping motion. Overlapping each pass slightly ensures full coverage. If brushing, use a good quality synthetic brush. Apply thin, smooth strokes. Avoid thick coats, as they can crack.
Allow each primer coat to dry completely according to the manufacturer’s instructions. This usually takes 30 minutes to a few hours. Applying the next coat too soon can cause bubbling or poor adhesion. Most vinyl chair projects benefit from one or two thin primer coats. Two coats often provide better coverage and a more consistent base.
Inspect the primed surface. It should feel smooth and uniform. If there are any rough spots, lightly sand them with very fine-grit sandpaper (400 grit) after the primer dries. Then, wipe away any dust with a tack cloth. A well-primed surface is ready to accept your chosen paint. This step makes all the difference in the longevity of your painted chair.
Painting Techniques for a Smooth Finish
Now comes the exciting part: applying the color. Achieving a smooth, professional finish on your vinyl chair depends heavily on your painting technique. Remember, multiple thin coats are always better than one thick coat. Thick coats tend to crack, peel, and show brush marks.
You have two main options for applying paint: brushing/rolling or spraying.
Brushing and Rolling
- Brushing: Use high-quality synthetic brushes for detailed areas, edges, and corners. Apply paint in even strokes. Follow the contours of the chair. Do not overload your brush; a little paint goes a long way.
- Rolling: For larger, flatter areas, a small foam roller provides a very smooth finish. It minimizes brush marks. Roll with light, even pressure. Overlap your passes slightly to prevent lines.
No matter the tool, apply thin, even coats. Allow each coat to dry completely before applying the next. This drying time can range from 2-4 hours, depending on humidity and paint type. Applying a new coat too soon will lead to tacky paint or bubbling. Most vinyl chairs will need 2-4 coats of paint to achieve full, opaque coverage.
Spray Painting
- Spray Cans: If using spray paint, shake the can well before and during use. Hold the can 8-10 inches from the surface. Apply paint in steady, sweeping motions. Start spraying off the chair and end off the chair. This prevents uneven spots.
- Paint Sprayer: For large projects or a truly factory-smooth finish, a paint sprayer is ideal. Follow the manufacturer’s instructions for thinning the paint. Practice on a scrap piece first. Maintain a consistent distance and speed for even coverage.
Both methods require good ventilation. Work in a well-aired space. Protect your surroundings with drop cloths. This keeps stray paint from getting on floors or other furniture. For insights into painting other types of furniture, you might find useful tips on how to paint a metal chair or even how to paint a wooden rocking chair. Remember that vinyl is unique and needs flexible paint.
After your final paint coat, let the chair dry fully. This is crucial before moving to the next step. Resist the urge to touch the surface. Patience ensures a beautiful, long-lasting finish.
Sealing and Curing Your Painted Vinyl Chair
You have painted your vinyl chair, and it looks fantastic. But your work is not quite done. Sealing the painted surface is a critical step. It protects your new finish from wear, scratches, and everyday use. This final layer also helps prevent the paint from feeling sticky in warm weather.
Choose a clear, flexible topcoat or sealer designed for vinyl or flexible plastics. Some vinyl dyes do not require a separate sealer. However, if you used acrylic-latex paint or a marine-grade paint, a topcoat is highly recommended. Look for sealers that offer UV protection if the chair will be in sunlight. This prevents fading over time.
Apply the sealer in thin, even coats, just like the paint. Use a good quality brush or spray applicator. Two to three thin coats usually provide ample protection. Allow each coat to dry completely before applying the next. This typically takes a few hours per coat.
The most important part of this stage is curing. Curing is different from drying. Drying means the paint feels dry to the touch. Curing means the paint has fully hardened and achieved its maximum durability. This process can take much longer than drying, often 72 hours to several days, or even weeks for some paints. Always refer to the paint or sealer manufacturer’s instructions for specific curing times.
During the curing period, handle the chair gently. Avoid placing heavy objects on it or using it roughly. If you put the chair into heavy use too soon, the paint may scuff, scratch, or even peel. Give it enough time to fully cure for the best results.
Once cured, your painted vinyl chair is ready for use. Clean it with a mild soap and water solution. Avoid harsh chemicals or abrasive cleaners, as they can damage the finish. Proper care will help your newly painted vinyl chair last for many years. If you ever need to refresh the look again, remember that you can usually paint over painted furniture, often with just a light sanding and cleaning.
Common Challenges and Troubleshooting When Painting Vinyl
Even with careful planning, painting a vinyl chair can present some challenges. Knowing how to troubleshoot these common issues helps you achieve a successful outcome. Do not get discouraged if a problem arises; most issues have solutions.
Peeling or Cracking Paint
This is the most common problem. It usually happens because of poor surface preparation or using the wrong type of paint.
- Solution: Ensure the vinyl is perfectly clean and degreased before painting. Lightly sand the surface to create “tooth” for adhesion. Always use a flexible primer designed for plastics. Use paint specifically made for vinyl or flexible materials. If peeling occurs, sand down the affected area. Clean it thoroughly, re-prime, and repaint using correct materials and techniques.
Sticky or Tacky Finish
If your painted vinyl chair feels sticky, it might not be fully cured or the wrong paint was used.
- Solution: Allow the paint more time to cure. Some paints need weeks to fully harden. Ensure good ventilation. If the stickiness persists, you might need to apply a flexible clear topcoat or sealer. This creates a non-tacky barrier. In extreme cases, the paint might be incompatible with vinyl and require removal.
Uneven Coverage or Brush Marks
This issue often comes from applying too thick coats or using low-quality applicators.
- Solution: Always apply multiple thin coats of paint instead of one thick one. Use high-quality synthetic brushes or foam rollers for smooth application. If spraying, ensure consistent distance and sweeping motions. If you have existing brush marks, lightly sand them down once dry. Then, apply another thin coat of paint.
Fading or Discoloration
If your chair is exposed to sunlight, some paints might fade over time.
- Solution: Use paints and sealers with UV resistance. Marine-grade paints are excellent for this. If fading occurs, clean the chair, lightly sand, and apply fresh coats of UV-resistant paint.
Bubbling or Blistering
Bubbles can appear if the surface was not dry or clean, or if paint was applied in humid conditions.
- Solution: Ensure the chair is completely dry and clean before painting. Avoid painting in high humidity. Pop bubbles with a fine needle while wet and smooth out. If dry, sand down the bubbles, clean, and repaint.
Patience is your best friend when troubleshooting. Addressing problems as they arise saves you from having to redo the entire project. Each issue teaches you something new about the painting process.
Frequently Asked Questions About Painting Vinyl Chairs
Can you paint vinyl furniture permanently?
Yes, you can paint vinyl furniture permanently if you use the right materials and techniques. The key is proper preparation, including thorough cleaning and light sanding. You must also use flexible paints and primers designed for vinyl or plastics. A final clear, flexible topcoat will protect the finish and extend its life for many years.
What type of paint sticks to vinyl?
Paints specifically designed to stick to vinyl include vinyl dyes, marine-grade vinyl paints, and flexible acrylic-latex paints. If using acrylic-latex, always pair it with an adhesion promoter or a primer made for plastics. These paints are formulated to flex with the vinyl, preventing cracking and peeling that occurs with standard paints.
Do you need to sand vinyl before painting?
Yes, you should lightly sand vinyl before painting. Use fine-grit sandpaper (220 to 400 grit). Sanding creates a slightly rough surface, known as “tooth,” which helps the primer and paint adhere better. This dulls the smooth, slick finish of the vinyl. Do not sand too aggressively; simply scuff the surface.
How long does painted vinyl last?
The durability of painted vinyl depends on the paint quality, preparation, and how the chair is used. With proper surface preparation, flexible paint, and a protective topcoat, painted vinyl can last for several years. Chairs exposed to heavy use or direct sunlight may require touch-ups or repainting sooner than indoor, lightly used chairs.
Can I use fabric paint on vinyl?
Fabric paint is generally not ideal for vinyl. While vinyl is a “fabric” in a broad sense, fabric paints are made to soak into porous materials like cloth fibers. Vinyl is non-porous. Fabric paint might sit on the surface, making it prone to scratching or peeling. Stick to paints specifically formulated for vinyl or plastics for best results.
What if my vinyl chair is ripped?
If your vinyl chair has small rips or tears, you can often repair them before painting. Use a vinyl repair kit, which typically includes a patch and adhesive. Follow the kit’s instructions carefully. Ensure the repair is smooth and fully cured before cleaning and preparing the entire chair for paint. Painting will then help blend the repair.
Conclusion
Painting a vinyl chair is a fantastic way to refresh your furniture and personalize your living space. It is a rewarding DIY project that saves money and gives old pieces a new life. We covered every step, from selecting the perfect paint to ensuring a durable, lasting finish. Remember, the success of your project hinges on thorough preparation and choosing the right materials.
You learned about cleaning, light sanding, and the importance of a flexible primer. We also discussed applying thin coats of vinyl-specific paint and protecting your hard work with a sealer. By following these guidelines, you can avoid common pitfalls and achieve a professional-looking result. Your old vinyl chair can truly transform into a stylish, functional piece. So, gather your supplies, embrace the process, and enjoy the satisfaction of your DIY vinyl chair makeover. Get started today and bring your vision to life!
- vinyl chair painting
- DIY furniture
- repaint vinyl
- vinyl furniture makeover
- vinyl upholstery paint

Todd Martin
Senior Writer
With over 15 years of experience in home renovation and design, I started HEG to share what I’ve learned with homeowners who want to create spaces that are both beautiful and functional. I’ve always believed in a hands-on approach, and over the years, I’ve picked up practical solutions that actually work. Through HEG, I aim to make home improvement more approachable, sharing real tips that help you create a home you truly love.