· Todd Martin · Home Improvement · 15 min read
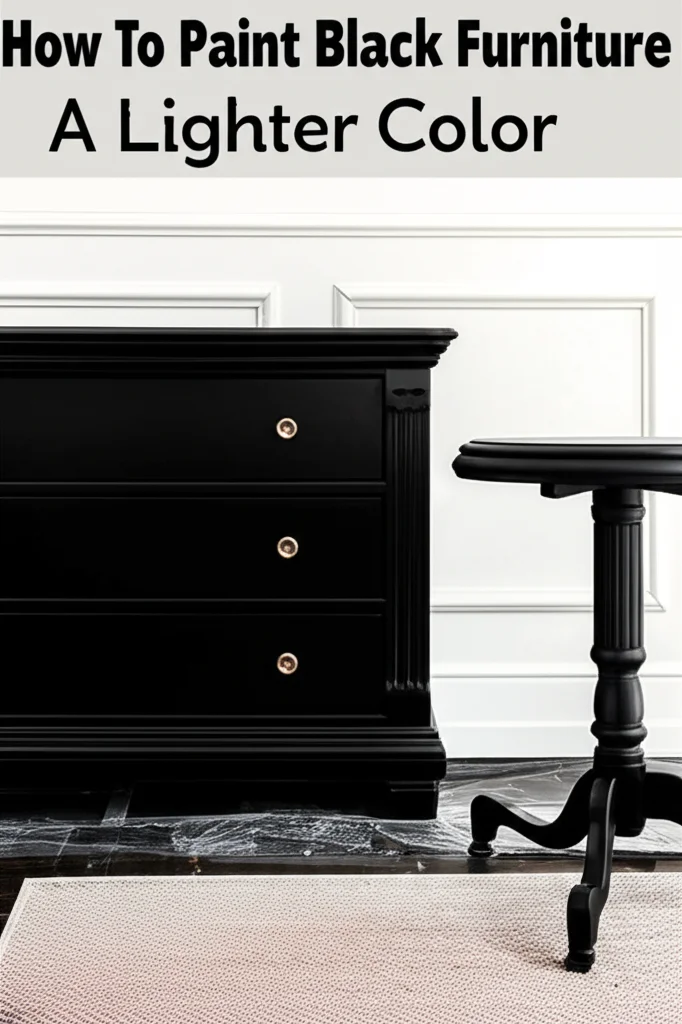
How To Paint Black Furniture A Lighter Color
Transform Black Furniture with Lighter Paint
Have you ever looked at a dark piece of furniture and wished it was brighter? Perhaps a black dresser feels too heavy in your room. Or maybe a dark coffee table makes your space feel small. You can easily update these items. Painting black furniture a lighter color is a great way to refresh your home. This process is simpler than you might think. We will walk through each step to ensure your project is a success.
Painting black furniture a lighter color gives old pieces a fresh start. It can lighten a room, making it feel more open. This project saves you money compared to buying new items. You also get to customize the look exactly how you want. This article will guide you through preparing the furniture, choosing the right products, and applying the paint. We will also cover important finishing steps. Get ready to transform your dark pieces into bright, inviting accents for your home.
Takeaway:
- Painting black furniture a lighter color can instantly brighten a room.
- Proper preparation, including cleaning and priming, is key for good results.
- Choosing the right high-quality primer and paint ensures durability and coverage.
- Multiple thin coats of paint give the best, smoothest finish.
- A protective topcoat is essential for the longevity of your painted furniture.
Painting black furniture a lighter color is possible with the right steps. You must clean, sand lightly, and apply a high-quality primer. Then, use multiple thin coats of your chosen light paint. Finally, seal it with a durable topcoat for a lasting finish.
Why Change Dark Furniture to a Lighter Shade?
You might wonder why someone would paint dark furniture. There are many good reasons to paint black furniture a lighter color. Dark pieces can make a room feel smaller and heavier. Lighter colors, on the other hand, open up a space. They make rooms feel airy and bright. This change can truly transform the feel of your home.
Changing the color of your furniture also updates its style. Black furniture might look dated or too traditional. A fresh coat of light paint, like white, cream, or a soft gray, brings a modern touch. It can fit with current design trends. This DIY project gives you a custom look without high costs. You get a unique piece that matches your decor perfectly. It is also a way to repurpose items you already own. This reduces waste and gives old furniture new life.
Consider the light in your room. Dark furniture absorbs light. Lighter furniture reflects it. This makes a room feel brighter and more inviting. If your room lacks natural light, painting dark pieces can make a big difference. It can visually expand the space. Lighter colors can also highlight interesting shapes or details on your furniture that were lost in the dark finish. This project is a rewarding way to personalize your living area. It creates a space that truly reflects your taste.
Gathering Essential Supplies for Your Project
Before you start painting, you need to gather all your materials. Having everything ready saves time and prevents interruptions. This step is important for a smooth painting process. You will need a variety of items for preparation, painting, and finishing. My checklist helps me stay organized.
First, you need cleaning supplies. You will need a good degreaser or mild soap. Buckets, sponges, and clean rags are also important. For sanding, get sandpaper in different grits. Start with medium-grit (120-150) and finish with fine-grit (220-320). A sanding block can make this job easier. Dust masks and safety glasses are essential for protection. Always put safety first.
Next, choose your primer and paint. A high-quality, stain-blocking primer is a must for dark furniture. It stops the black from showing through. For paint, select a light color in your preferred finish. Good quality brushes, rollers, and paint trays are also needed. For precise work, artist brushes might be helpful. A drop cloth or old sheets will protect your floors. Finally, a durable topcoat or sealant will protect your new paint job. This list ensures you have everything for a successful transformation.
Preparing Black Furniture for a Lighter Finish
Proper preparation is the most important step when painting black furniture a lighter color. Do not skip or rush this stage. A good prep job ensures your paint adheres well. It also prevents issues like chipping or peeling later on. I always tell people that prep work is 80% of the job.
Start by cleaning the furniture thoroughly. Remove all hardware like knobs or pulls. Use a mild soap and water solution or a degreaser. Wipe down every surface to remove dirt, grease, and grime. Black furniture often shows dust and oils more easily. Rinse well and let the piece dry completely. A clean surface helps the paint stick. You can learn more about how to clean furniture before painting for detailed guidance.
After cleaning, lightly sand the entire piece. This step creates a “tooth” for the primer and paint to grip. Use medium-grit sandpaper (120-150 grit) first. Then, follow up with fine-grit sandpaper (220-320 grit) for a smooth finish. Sand in the direction of the wood grain if it is wood. If the furniture is laminate or another material, just scuff the surface evenly. After sanding, wipe away all dust with a tack cloth or a damp, lint-free cloth. This removes tiny particles that could ruin your smooth finish.
Finally, apply a high-quality, stain-blocking primer. This is crucial when going from black to light. The primer prevents the dark color from bleeding through the new light paint. It also helps the light paint achieve full coverage in fewer coats. One to two coats of primer are usually enough. Allow each coat to dry fully according to the manufacturer’s instructions. A good primer creates a uniform base for your chosen light color.
Choosing the Best Paint and Primer for Light Colors
Selecting the right primer and paint is crucial for a successful furniture transformation. When you paint black furniture a lighter color, you need products that provide excellent coverage and adhesion. I have tried many types over the years. My experience shows that quality products make all the difference.
For primer, a shellac-based primer or a high-quality oil-based stain-blocking primer is your best friend. These primers are designed to block dark colors and stains from bleeding through. They create a solid, opaque base. This ensures your light paint will look true to color. Zinsser B-I-N Shellac-Based Primer is a popular choice for its excellent stain-blocking properties. Kilz Original is another reliable option. Apply at least one coat, sometimes two, for optimal coverage over black. Make sure to let each coat dry completely.
When it comes to paint, there are several good choices for furniture. Chalk paint is very popular for its matte finish and minimal prep needs. It often requires no sanding or priming, even over dark colors. However, it needs a wax or topcoat for durability. Mineral paint is similar to chalk paint but often has a built-in topcoat, offering a more durable finish without extra sealing. Latex (acrylic) paint is also a good option. Choose a high-quality interior latex paint designed for furniture or cabinets. It is water-based, easy to clean up, and comes in many colors. For durability, opt for an eggshell, satin, or semi-gloss finish. These sheens are easier to clean and more resistant to wear than matte finishes.
Consider the final look you want. A pure white will make a bold statement. A soft cream or light gray offers a more subtle change. Always choose a paint that is durable and easy to clean. This ensures your newly painted furniture lasts for years. You can find many choices at your local paint or hardware store.
Applying Lighter Paint: Techniques for a Smooth Finish
Once your black furniture is primed and dry, it’s time to apply the lighter paint. This is where your vision comes to life. Applying paint correctly ensures a beautiful, smooth finish. I always aim for thin, even coats. This prevents drips and brush marks.
Start with your first coat of light paint. Use a good quality synthetic brush for water-based paints. A foam roller can give a very smooth finish on flat surfaces. Dip your brush or roller only partially into the paint. Apply paint in long, even strokes. Do not overload your brush or roller. This helps avoid drips and streaks. Work in sections, making sure to cover all areas evenly. The first coat will likely look streaky. This is normal, especially when painting over black with a light color. Do not try to achieve full coverage in one coat.
Allow the first coat to dry completely. Drying times vary based on paint type and humidity. Read the manufacturer’s instructions for exact times. Once dry, apply a second thin coat. You may need three or even four thin coats to get full, opaque coverage over black. Each thin coat builds coverage without becoming too thick or uneven. Sand lightly with a fine-grit sandpaper (400 grit) between coats if there are any bumps or imperfections. This creates an even smoother surface for the next layer. Remember to wipe away all dust before applying the next coat.
Pay close attention to details and edges. Use a smaller brush for intricate areas. Keep your brushstrokes consistent. Overlapping wet edges can help blend the paint seamlessly. Do not overwork the paint. Once an area is covered, move on. Patience is key in this stage. A smooth, even finish will make all your preparation worthwhile.
Sealing and Protecting Your Newly Painted Furniture
After you have applied all coats of light paint and it is fully dry, the next vital step is to seal and protect your hard work. This topcoat provides durability. It protects your painted black furniture from scratches, chips, and daily wear. Without a sealant, your beautiful new finish will not last.
Choose a clear topcoat that is compatible with your paint type. For latex or acrylic paints, a water-based polyurethane or polycrylic is an excellent choice. Polycrylic is often preferred for light colors because it dries clear. Polyurethane can sometimes yellow over time, especially oil-based versions. For chalk paint, a furniture wax or a clear polycrylic is typically used. Waxes offer a softer, natural feel. Polycrylic provides a harder, more protective surface. Make sure the topcoat is designed for furniture use.
Apply the topcoat in thin, even layers. Just like with paint, multiple thin coats are better than one thick coat. Use a high-quality synthetic brush or a foam applicator. Apply in the direction of the paint strokes. Avoid drips and puddles. Allow each coat to dry completely before applying the next. This usually takes a few hours. Two to three coats of a clear topcoat are usually recommended for good protection. For high-traffic pieces like a coffee table, I often apply a fourth coat.
Remember that while the topcoat may feel dry to the touch in hours, it takes much longer to fully cure. Curing time can be anywhere from 7 to 30 days, depending on the product. During this curing period, be gentle with your furniture. Avoid placing heavy items on it or exposing it to moisture. Once fully cured, your painted black furniture will be much more durable. It will stand up to daily use.
Troubleshooting Common Furniture Painting Issues
Even with careful planning, sometimes things do not go perfectly when you paint black furniture a lighter color. Do not worry; many common problems have simple solutions. I have encountered most of them myself. Knowing how to fix them will save you frustration.
One common issue is bleed-through. This happens when the dark color of the original furniture shows through the light paint. It often looks like a yellowish or reddish stain. This means your primer did not block the color effectively. The solution is to apply another coat or two of a high-quality, shellac-based stain-blocking primer. Let it dry completely before reapplying your light paint. This stronger primer will create a barrier.
Another problem is brush marks or roller lines. This occurs if you apply paint too thickly or do not use the right tools. To fix this, lightly sand the affected area with fine-grit sandpaper (220-400 grit). Wipe away the dust. Then, apply thinner coats of paint. Use a high-quality brush with soft bristles or a good foam roller. Avoid overworking the paint. Let it self-level.
Drips and runs happen when too much paint is applied in one area. If the paint is still wet, you can carefully brush or roll it out. If it is dry, you will need to sand the drip flat. Then, reapply a thin coat of paint to that area. Uneven coverage is common with light colors over dark. This simply means you need more thin coats of paint. Do not try to fix it with one thick coat. Patience is your best tool here. Apply another thin coat and let it dry. Repeat until you have full, even coverage.
Finally, paint chipping or peeling usually points to poor preparation. The surface was not clean or sanded enough for the paint to adhere. If this happens, you will need to sand down the affected area completely. Then, re-clean, re-prime, and repaint that section. Proper cleaning and sanding is always worth the effort. Learn how to clean your paint brushes properly after use to prevent issues with future projects. You might also want to know how to clean paint off floor if you make a mess.
Final Touches and Styling Your Transformed Furniture
Once your painted black furniture is fully cured and ready, it is time for the exciting part: adding the final touches and styling. This step brings your vision to completion. It really makes your newly lightened piece shine in its space. I always enjoy this part of any furniture makeover.
Consider changing the hardware. New knobs, pulls, or hinges can dramatically change the look of your piece. If you painted a dresser, new gold, silver, or crystal knobs can add elegance. If it is a desk, modern pulls can give it a fresh feel. You can find hardware at home improvement stores or online. Sometimes, simply cleaning the old hardware and putting it back on can also work. Learn how to clean furniture hardware if you decide to keep the old pieces.
Next, think about styling the piece within your room. A lighter piece of furniture will instantly brighten the area. Add decorative items that complement the new color. For example, if you painted a console table white, add colorful vases or books. If it is a light gray dresser, place a mirror or framed art above it. Use textiles like throws or pillows on nearby seating to tie the colors together. The new light color will make these accents pop.
Accessorize with plants or lamps. A small plant can bring life to the surface of a light piece. A stylish lamp can add both light and design flair. Step back and look at the furniture in its new context. Does it flow with the rest of your room? Sometimes, subtle changes in surrounding decor make a big difference. Your transformed black furniture is now a focal point. It reflects your style and brightens your home. Enjoy the renewed feel it brings to your space.
Frequently Asked Questions
Do I need to sand black furniture before painting it a lighter color?
Yes, sanding is important even if you use chalk paint that claims “no sanding.” Lightly sanding creates a surface for the new paint to grip. This is called creating a “tooth.” It prevents the paint from chipping or peeling over time. Use fine-grit sandpaper for a smooth finish after initial cleaning.
What type of primer works best on dark furniture?
A high-quality, stain-blocking primer is essential for dark furniture. Shellac-based primers or oil-based primers are best. These types effectively block dark colors from bleeding through the new light paint. They ensure your lighter paint looks true to color and provides full coverage.
How many coats of light paint will I need?
You will likely need at least two to three coats of light paint. When painting over black furniture, sometimes even four thin coats are necessary for complete opacity. Apply thin, even coats and allow each layer to dry fully. This builds coverage gradually without creating thick, uneven spots.
Can I paint over high-gloss black furniture?
Yes, you can paint over high-gloss black furniture. However, proper preparation is even more critical. You must thoroughly scuff sand the glossy surface. This removes the shine and creates adhesion for the primer. Use a deglosser if needed. After sanding, apply a high-quality primer designed for glossy surfaces.
How long does painted furniture take to cure?
Painted furniture feels dry to the touch in a few hours, but it takes much longer to fully cure. Curing can take anywhere from 7 to 30 days, depending on the paint type and humidity. During this time, the paint hardens and reaches its full durability. Handle the furniture gently until it is fully cured.
What if my black furniture bleeds through the new paint?
If your black furniture bleeds through, it means the primer did not create a strong enough barrier. To fix this, you will need to re-prime the affected area. Apply one or two more coats of a shellac-based or oil-based stain-blocking primer. Let the primer dry completely before applying additional coats of your light paint.
Conclusion
Painting black furniture a lighter color is a rewarding project. It can totally change the feel of a room. This process allows you to give old pieces a fresh, modern look. We covered everything from choosing your supplies to the final styling. Remember that preparation is key to a lasting finish. Cleaning, sanding, and priming lay the groundwork for success.
Choosing the right primer and paint helps ensure bright, even coverage. Patience during application, with multiple thin coats, prevents common issues. Finally, sealing your work protects it for years of enjoyment. You now have the knowledge to transform your own dark furniture. Get ready to brighten your space and showcase your new, lighter pieces. Embrace the change and enjoy your refreshed home!
- furniture painting
- DIY furniture
- paint furniture lighter
- dark furniture makeover

Todd Martin
Senior Writer
With over 15 years of experience in home renovation and design, I started HEG to share what I’ve learned with homeowners who want to create spaces that are both beautiful and functional. I’ve always believed in a hands-on approach, and over the years, I’ve picked up practical solutions that actually work. Through HEG, I aim to make home improvement more approachable, sharing real tips that help you create a home you truly love.