· Todd Martin · Furniture Painting & Restoration · 20 min read
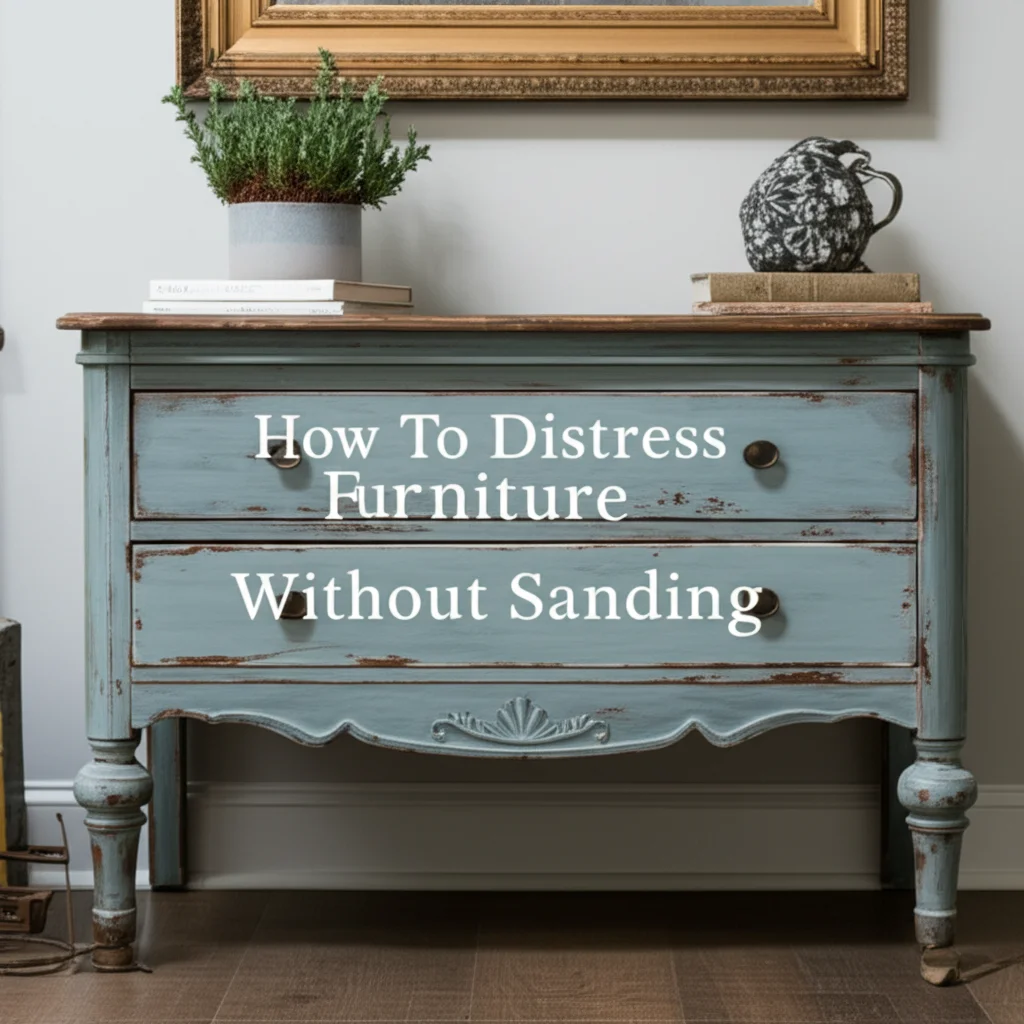
How To Paint Two Tone Distressed Furniture
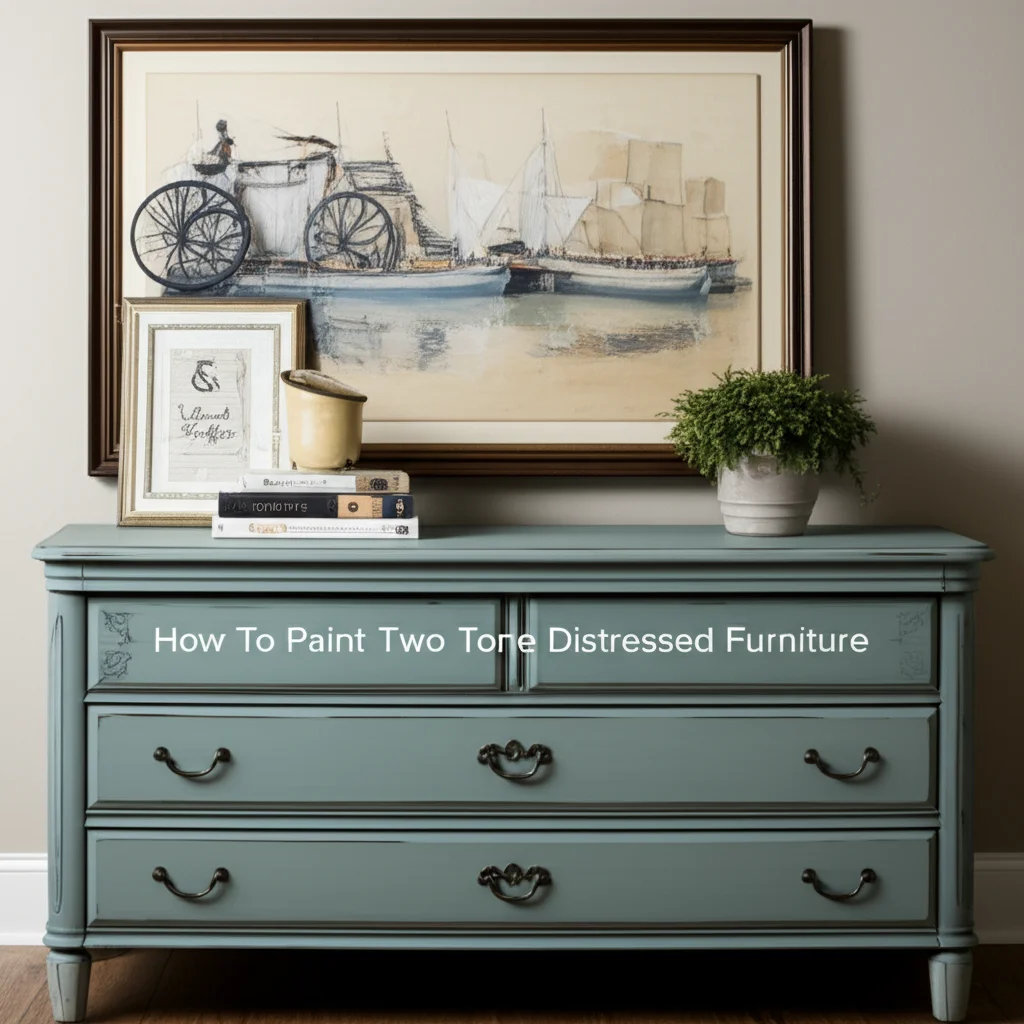
Paint Two-Tone Distressed Furniture Like a Pro
Do you own an old piece of furniture that needs new life? Perhaps you see potential in a forgotten thrift store find. Giving furniture a two-tone distressed finish is a popular way to create a charming, vintage look. This technique adds character and history to any item. It is perfect for transforming dressers, tables, or cabinets into unique statement pieces. Learning how to paint two tone distressed furniture will open up a world of creative possibilities for your home decor.
This guide will walk you through each step. We will cover choosing the right colors, preparing the surface, and applying multiple paint layers. You will learn the secrets to achieving an authentic distressed appearance. Finally, we will show you how to seal your work for lasting beauty. Get ready to turn ordinary furniture into extraordinary treasures with this simple yet impactful painting method.
Takeaway
To paint two-tone distressed furniture, remember these key steps:
- Prepare the surface: Clean, sand, and prime for best adhesion.
- Choose your colors: Select two complementary shades.
- Apply base coat: This will be your distressed color.
- Apply top coat: This is your main visible color.
- Distress strategically: Sand high-traffic areas for natural wear.
- Seal for durability: Protect your finish with wax or topcoat.
How do you paint two tone distressed furniture? To paint two-tone distressed furniture, first prepare the surface by cleaning and light sanding. Apply your chosen base color, allow it to dry, then apply the contrasting top color. Once dry, strategically sand areas to reveal the base color and original wood, creating a worn, vintage look. Finally, apply a protective sealant.
Preparing Your Furniture for a Flawless Finish
The success of your two-tone distressed furniture project begins with proper preparation. This step is important for getting a lasting and beautiful finish. Skipping preparation can lead to paint peeling or uneven distressing. Take your time with this part of the process.
Cleaning Your Furniture
First, you must clean your furniture thoroughly. Dust, dirt, and grime can prevent paint from sticking well. Use a mild cleaner and a damp cloth to wipe down all surfaces. For stubborn grime or sticky residue, a degreaser might be helpful. Make sure the furniture is completely dry before moving to the next step. Proper cleaning ensures your paint will adhere correctly. It also prevents dirt from showing through your new finish. For detailed guidance on cleaning furniture before painting, you can read our article on how to clean furniture before painting.
Light Sanding for Adhesion
After cleaning, lightly sand the entire surface. This creates a “tooth” for the paint to grip. Use 120-180 grit sandpaper. You do not need to remove all the old finish. Just scuff the surface to dull any sheen. If your furniture has a thick, glossy varnish, you might need a slightly coarser grit first. Wipe away all sanding dust with a tack cloth or damp rag afterward. This step is crucial for paint adhesion. It helps prevent chips and peeling later on.
Repairing Imperfections
Check your furniture for any cracks, dents, or loose parts. Fill small holes or cracks with wood filler. Let the filler dry completely, then sand it smooth. Tighten any wobbly legs or loose hardware. You want a stable and smooth canvas for your paint. Addressing these issues now saves frustration later. It ensures your finished piece looks professional and well-maintained.
Priming (Optional but Recommended)
Priming is not always necessary for a distressed look, but it is often beneficial. Primer helps paint stick better, especially on tricky surfaces like laminate or dark wood. It also blocks stains from bleeding through light paint colors. If you are painting a very dark piece of furniture with a light top coat, primer will save you many coats of paint. Choose a good quality primer that is compatible with your chosen paints. Apply one thin, even coat. Let it dry completely before painting. This step ensures an even color and a more durable finish.
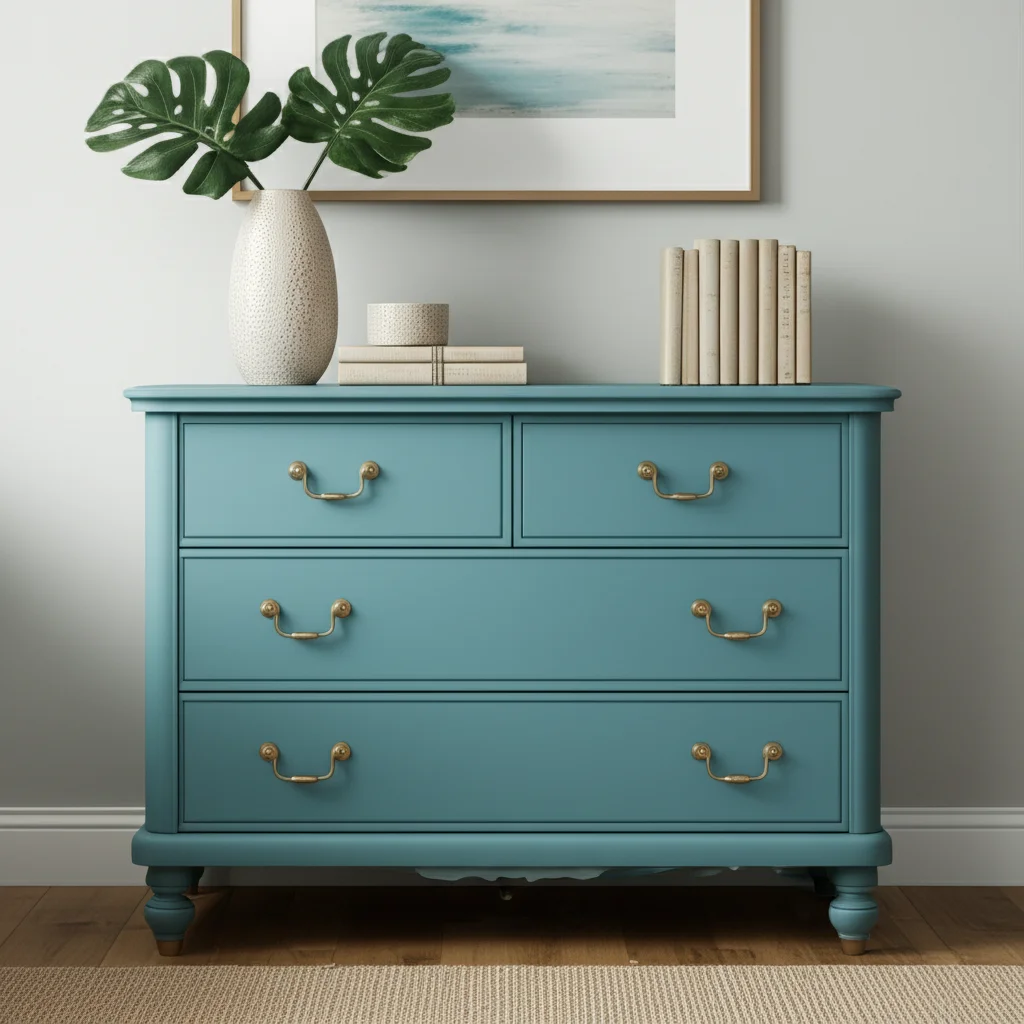
Choosing Your Colors and Paint Types
The right color combination is key to stunning two-tone distressed furniture. The type of paint you use also plays a big role in the final look and how easy it is to distress. Think about the style you want to achieve.
Selecting Your Paint Colors
For a two-tone distressed effect, you need two colors: a base color and a top color.
- Base Color: This color will show through the distressed areas. It often mimics the original wood or a darker, contrasting shade. Consider what would naturally appear underneath.
- Top Color: This is the main color of your furniture. It should complement your base color. Consider these combinations:
- Contrasting: A dark base (like navy or charcoal) with a light top (like cream or pale gray). This creates a dramatic, aged look.
- Subtle: A light base with a slightly darker, muted top. This gives a softer, more gently worn appearance.
- Similar Tones: Two shades of the same color family (e.g., light blue base, slightly darker blue top). This creates depth without high contrast. Think about your existing decor when choosing colors. You want the piece to fit well in your home.
Best Paint Types for Distressing
Certain paint types work better for distressing. They are easy to sand and create an authentic worn look.
- Chalk Paint: This is a very popular choice for distressing. It adheres well to many surfaces without much prep. It dries quickly and sands off easily to reveal the layer underneath. Many people find chalk paint gives the most natural distressed finish. If you plan to use chalk paint, you might find our article on how to clean chalk paint furniture helpful for future maintenance.
- Milk Paint: Authentic milk paint comes in powder form and is mixed with water. It creates a very natural, matte finish. It can also chip and flake naturally, which is great for a chippy distressed look.
- Latex or Acrylic Paint: These paints are durable but can be harder to distress evenly. You may need to sand more firmly. For a smoother finish, you might consider thinning certain paints like Valspar, as detailed in our guide on how to thin Valspar cabinet and furniture paint. If you use these paints, make sure they are flat or eggshell finishes, as satin or gloss finishes are harder to distress.
Complementary Materials
Beyond paint, gather your other materials:
- Paintbrushes and Rollers: High-quality brushes give a smoother finish. Small foam rollers work well for large, flat surfaces.
- Sandpaper: Various grits (120-220 for initial scuffing, 180-220 for distressing).
- Tack Cloths: For removing dust.
- Protective Sealant: Wax or a clear topcoat (polyurethane, polycrylic).
- Drop Cloths: To protect your work area.
- Painter’s Tape: For clean lines if you are painting different sections with different colors.
Choosing the right materials ensures a smoother process and a better outcome for your two-tone distressed furniture project.
Applying the Base Coat
The base coat is the foundation of your two-tone distressed furniture. This color will peek through the top coat, giving your piece its aged charm. Applying it correctly ensures a beautiful and lasting effect.
The Purpose of the Base Coat
The base coat serves two main purposes. First, it is the color that will be visible in your distressed areas. This means it must be a color you want to see. Second, it provides an even surface for your top coat. This helps you achieve a consistent finish across the entire piece. Think of it as the ‘underlayer’ that tells part of the story of your furniture’s imagined history.
Application Techniques
Before painting, stir your base coat paint well. This ensures the color is consistent. Apply the paint in thin, even coats. Avoid thick drips or brush marks. Use a good quality paintbrush for detailed areas and a foam roller for larger flat surfaces. Rollers help create a smooth finish quickly.
- Direction: For wood grain, paint in the direction of the grain. This helps reduce visible brush strokes.
- Coverage: Ensure you get good coverage. While this coat will be partially hidden, any missed spots might show through after distressing.
- Evenness: Aim for an even layer across the entire surface. This makes the top coat look better and more uniform.
Drying Time Between Coats
Allow the base coat to dry completely. Drying times vary based on paint type and humidity.
- Chalk Paint: Dries quickly, often within 30 minutes to an hour.
- Latex/Acrylic Paint: May take 2-4 hours to dry to the touch. Always check the manufacturer’s recommendations on the paint can. Applying the top coat too soon can cause the base coat to lift or smudge. It also affects the final durability. Patience is important here. You may need two thin coats of the base color for optimal coverage, especially if you are covering a dark piece with a light base. If you need tips on how to paint over varnished pine furniture, which often involves careful base coat application, you can consult our guide on how to paint over varnished pine furniture.
Once the base coat is fully dry, you are ready for the next exciting step: adding your top color.
Adding the Top Coat
With your base coat dry, it is time to apply the top coat. This color will be the primary shade of your two-tone distressed furniture. It is the color people will see most prominently. This step brings your vision to life.
Choosing Your Top Color
Remember, your top color should complement the base color you chose. If you went with a dark base, a light top color creates strong contrast. A light base with a slightly darker top offers a more subtle distress. Consider the overall aesthetic you want to achieve. Do you want bold and dramatic, or soft and rustic? Your top color defines the furniture’s new identity. For help deciding on color schemes, our guide on how to decide what color to paint furniture can provide inspiration.
Applying the Top Coat Evenly
Just like with the base coat, stir your top coat paint well. Apply it in thin, even layers.
- Brushes and Rollers: Use your chosen tools. For larger, flat surfaces, a foam roller often provides the smoothest finish. For edges and details, a high-quality brush is best.
- Consistent Strokes: Work in consistent, overlapping strokes. This prevents lines and uneven patches.
- Full Coverage: Aim for complete coverage of the base coat. You typically want the base coat to be fully hidden by the top coat before distressing. This creates a clean slate for the distressing process.
Multiple Coats and Drying Time
Most top coats will require two or three thin layers for full, opaque coverage.
- First Coat: Apply a thin first coat. This coat might look streaky, and that is okay. It provides a good foundation for the subsequent layers.
- Drying Time: Allow each coat to dry completely before applying the next. This prevents tackiness and ensures proper adhesion. Refer to your paint can for specific drying times. Rushing this step can lead to a less durable finish and problems during distressing. If you are painting a large item, like a dining room table, patience between coats is even more important. You can find more tips on furniture painting techniques, such as those for a dining room table, in guides like how to paint a dining room table without sanding.
Once your final top coat is dry to the touch, your furniture is ready for the exciting distressing stage. This is where the magic happens and your two-tone distressed furniture comes to life.
Achieving the Distressed Look
Now for the fun part: creating that perfectly aged and worn appearance. This is where the “distressed” aspect of your two-tone distressed furniture truly comes to life. The goal is to make it look like natural wear and tear.
Understanding Natural Wear Points
Before you start sanding, look at your furniture. Imagine how it would naturally age over time.
- Edges and Corners: These areas get bumped and rubbed the most.
- Raised Details: Ornate carvings, decorative trim, or raised panels naturally show wear.
- Handles and Knobs: Areas around hardware are frequently touched.
- Legs and Feet: The bottom of legs often show scuffs.
- Flat Surfaces: Minimal distressing on flat surfaces. Focus on the edges for a natural look. By focusing on these points, your distressed look will appear authentic, not forced.
Sanding Techniques for Distressing
Using sandpaper is the most common way to distress.
- Choose Your Grit: Start with a fine-to-medium grit sandpaper (180-220 grit is usually ideal). This gives you control. If you want more aggressive distressing, you can use a slightly coarser grit, but be careful not to remove too much paint.
- Gentle Pressure: Apply light pressure. You want to gently sand away the top coat to reveal the base coat or even the original wood underneath.
- Feathering: Use short, varied strokes rather than long, even ones. This mimics natural wear. Feather the edges of your sanded areas so they blend smoothly.
- Wipe Dust: As you sand, wipe away the dust frequently with a tack cloth. This helps you see your progress clearly.
- Less is More: You can always remove more paint, but you cannot easily put it back. Start small and add more distressing as needed. Step back frequently to assess your work from a distance.
Alternative Distressing Methods
While sanding is popular, other methods can create different distressed effects:
- Wet Distressing: If using chalk paint, you can distress with a damp cloth before the paint fully cures. This creates a softer, more subtle worn look. Simply rub the damp cloth over the areas you want to distress.
- Wax Resist: Before applying the top coat, rub a small amount of wax (like a candle or beeswax stick) on the areas where you want the base coat to show through. The top coat will not stick well to these waxed spots. When you go to distress, the paint will easily flake off these areas. This creates a more chipped or peeled look.
- Chipping: For a truly “chippy” look, especially with milk paint, you can add a bonding agent to the first coat of milk paint. The second coat applied without a bonding agent will naturally chip in places. This is a very rustic distressed finish.
Experiment on a scrap piece of wood first to find the method that gives you the look you want. This stage is about artistic expression. Your unique touch will make your two-tone distressed furniture truly special. For more ideas on achieving a vintage appearance, you might enjoy our article on how to paint a coffee table to look vintage.
Sealing and Protecting Your Masterpiece
After all your hard work, the final step is to protect your beautifully painted two-tone distressed furniture. Sealing prevents chips, scratches, and everyday wear. It also enhances the depth of your paint colors. Do not skip this crucial step.
Why Sealing is Essential
A proper sealant locks in your distressed finish. Without it, your paint, especially chalk or milk paint, can be susceptible to marks, water rings, or simply fading over time.
- Durability: It creates a protective layer against daily use.
- Cleanability: Sealed surfaces are easier to wipe clean without damaging the paint.
- Enhanced Look: Many sealants deepen the color and provide a subtle sheen.
Types of Sealants
There are several options for sealing your two-tone distressed furniture, each with its own finish and benefits.
- Wax (for Chalk Paint/Milk Paint): Furniture wax is a traditional choice for chalk and milk paint. It provides a soft, matte, or satin finish. Apply wax with a lint-free cloth or a wax brush in thin layers. Buff it gently to a subtle sheen. Wax needs time to cure (harden), which can take several weeks. Multiple thin coats of wax offer better protection than one thick coat. For specific maintenance tips, you can refer to our guide on how to clean chalk paint furniture.
- Polycrylic: This is a water-based polyurethane. It dries clear and does not yellow over time, making it excellent for light-colored furniture. Polycrylic offers more durability than wax. Apply with a foam brush or good quality synthetic brush in thin coats. Sand lightly with 220-grit sandpaper between coats for a super smooth finish. It is ideal for high-traffic pieces like dining tables or coffee tables.
- Oil-Based Polyurethane: This is very durable but can add an amber tint over light colors. It is better for darker furniture or if you want a warm, antique look. Apply with a good quality brush. It is very resistant to scratches and water.
- Clear Glaze/Topcoat: Some brands offer specific clear topcoats designed for their paints. Always use a product compatible with your paint type.
Application Tips for Sealant
- Clean Surface: Ensure your painted surface is completely free of dust and debris before sealing. A tack cloth works well here.
- Thin Coats: Apply thin, even coats. Thick coats can lead to drips, bubbles, or an uneven finish.
- Drying Time: Allow ample drying time between coats as recommended by the manufacturer.
- Light Sanding (Polycrylic/Polyurethane): For a smooth finish with polycrylic or polyurethane, lightly sand with 220-grit sandpaper between coats after the previous coat is fully dry. Wipe away dust before applying the next coat.
- Curing Time: Note the curing time, not just the drying time. Curing is when the sealant fully hardens. Avoid heavy use of the furniture during this period (often 7-30 days).
Sealing your two-tone distressed furniture ensures that your beautiful, aged look lasts for years to come. It protects your investment and maintains the charm of your handmade piece.
Troubleshooting and Tips for Success
Even experienced DIYers encounter challenges. Learning how to troubleshoot common issues and adopting smart tips will help you create beautiful two-tone distressed furniture every time.
Common Painting Problems and Solutions
- Uneven Coverage: If your paint looks streaky, you probably applied it too thinly or did not stir it enough. Apply another thin, even coat after the previous one dries.
- Brush Marks: Using a good quality brush, not overloading the brush, and painting with the grain can minimize brush marks. For a smoother finish, lightly sand with fine-grit sandpaper between coats.
- Drips and Runs: This happens when too much paint is applied. Smooth out drips immediately with your brush. If dry, sand them down and repaint.
- Paint Peeling/Chipping (Unintentionally): This usually points to inadequate surface preparation. Ensure you clean and scuff sand thoroughly. Primer can also prevent this. If you need to remove stubborn paint, especially chalk paint, our guide on how to remove chalk paint from furniture might be useful.
- Over-Distressing: If you removed too much paint, you can usually touch it up. Apply a small amount of the top coat to the area, let it dry, then re-distress lightly.
Tips for a Better Finish
- Work in a Well-Ventilated Area: This is important for your health and helps paint dry faster.
- Patience is Key: Allow adequate drying time between all steps. Rushing can ruin your finish.
- Test on an Inconspicuous Area: Before committing to a technique or color, test it on the back or underside of your furniture.
- Clean Your Brushes: Proper cleaning ensures your tools last longer and perform better. Our guide on how to clean your paint brushes offers great advice.
- Use Good Quality Products: High-quality paints and brushes make a big difference in the final look and ease of application. They also tend to be more durable.
- Practice Distressing: If you are new to distressing, practice on a scrap piece of wood or an old board. This helps you get a feel for how much pressure to apply.
Adding Decorative Touches
Once your two-tone distressed furniture is sealed, consider adding small touches to complete the look.
- New Hardware: Swapping out old knobs and pulls for vintage-style ones can dramatically change the piece’s character. You can learn about cleaning old hardware in our guide on how to clean hardware on old furniture.
- Lining Drawers: Use pretty paper or fabric to line the inside of drawers.
- Stenciling: Add a subtle stencil design on a drawer front or side panel.
- Dark Wax/Glaze: For an even more aged look, apply a thin layer of dark wax or glaze after your clear sealant has cured. Wipe most of it off, letting it settle into crevices.
By being mindful of common pitfalls and applying these tips, your two-tone distressed furniture project will be a rewarding experience with beautiful results.
Maintaining Your Two-Tone Distressed Furniture
You have put effort into creating a beautiful piece of two-tone distressed furniture. Now, proper maintenance ensures its unique charm lasts for many years. Regular care keeps your finish looking fresh and authentic.
Daily Cleaning and Care
For daily cleaning, less is more.
- Dust Regularly: Use a soft, lint-free cloth to gently dust your furniture. This prevents dust buildup that can scratch the surface over time.
- Wipe Spills Immediately: If spills occur, wipe them up quickly with a damp cloth. Do not let liquids sit on the surface, especially if your sealant is wax-based.
- Avoid Harsh Cleaners: Do not use abrasive cleaners, strong chemicals, or furniture polish that contains silicone. These can damage your painted and sealed finish. A mild soap solution and water are usually sufficient for cleaning.
Protecting Against Wear
While distressing gives an aged look, you still want to protect against new unwanted damage.
- Coasters and Trivets: Always use coasters under drinks and trivets under hot dishes, especially on tabletops. Heat and moisture are enemies of furniture finishes.
- Felt Pads: Place felt pads under lamps, decorative items, and anything else that sits on the surface. This prevents scratches.
- Avoid Direct Sunlight: Prolonged exposure to direct sunlight can fade paint colors over time. Position your furniture away from harsh, direct rays when possible.
- Lift, Don’t Drag: When moving items on your furniture, lift them rather than dragging them across the surface. This prevents scratches.
Re-Waxing or Re-Sealing
Depending on the sealant you used and how much wear the furniture gets, you might need to reapply protection.
- Waxed Furniture: If your furniture was sealed with wax, you might need to reapply a thin coat of wax every 6-12 months, especially on high-traffic areas like tabletops. You will notice the surface losing its sheen or feeling less smooth when it needs re-waxing.
- Polycrylic/Polyurethane Sealed Furniture: These sealants are more durable and usually do not require regular reapplication. If the finish gets scratched or worn down in specific spots, you can lightly sand the damaged area and apply another thin coat of the same sealant. For general furniture cleaning tips, our guide on how to clean wooden furniture can be helpful.
By following these simple maintenance tips, your two-tone distressed furniture will continue to be a beautiful and functional part of your home decor for years. Its unique character will only deepen with time, telling a story of thoughtful care and timeless style.
Expanding Your Two-Tone Distressed Skill Set
Once you master the basics of how to paint two tone distressed furniture, you might want to explore more advanced techniques. There are many ways to enhance your skills and create even more unique pieces. These ideas help you build confidence and try new creative avenues.
Experimenting with Different Paint Combinations
Do not limit yourself to just two colors.
- Three Tones: Add a third subtle color underneath the base coat. This adds more depth when distressed. Imagine a dark grey peeking through a robin’s egg blue, which then shows through a soft cream top coat.
- Metallic Accents: Incorporate a metallic paint as a base or an accent. A shimmering gold or silver peeking through a dark top coat creates a luxurious aged look. You can also dry brush metallic paint over existing distressed areas for highlights.
- Glazes and Washes: After distressing and before sealing, apply a thin, translucent glaze or a diluted paint wash. A dark glaze can settle into crevices, enhancing the aged look. A white wash can soften colors. Wipe off the excess for a subtle effect.
Advanced Distressing Methods
- Chipping with Heat Gun: For a truly authentic chippy paint look (especially with milk paint), a heat gun can be used carefully. Apply gentle heat to areas and scrape away the bubbling paint. Practice this technique on scrap wood first, as it requires careful control to avoid damaging the wood.
- Layered Sanding: Instead of just sanding to reveal the base coat, experiment with sanding through the base coat in some areas to reveal the original wood or previous finish. This adds another layer of history.
- Dry Brushing: After distressing, use a nearly
- furniture painting
- distressed furniture
- two-tone paint
- vintage look
- shabby chic
- DIY furniture
- furniture makeover
- chalk paint

Todd Martin
Senior Writer
With over 15 years of experience in home renovation and design, I started HEG to share what I’ve learned with homeowners who want to create spaces that are both beautiful and functional. I’ve always believed in a hands-on approach, and over the years, I’ve picked up practical solutions that actually work. Through HEG, I aim to make home improvement more approachable, sharing real tips that help you create a home you truly love.